
Subscribe to Our Youtube Channel
Related Manuals for ACME IM-5S-ELC


Summary of Contents for ACME IM-5S-ELC
- Page 1 IM-5S-ELC IM-5W-ELC IM-5S-HID IM-5W-HID User Guide Innovation , Quality , Performance Professional Entertainment Technology...
- Page 2 IM-5S-ELC IM-5W-ELC IM-5S-HID IM-5W-HID User Guide Innovation , Quality , Performance Professional Entertainment Technology...
-
Page 5: Table Of Contents
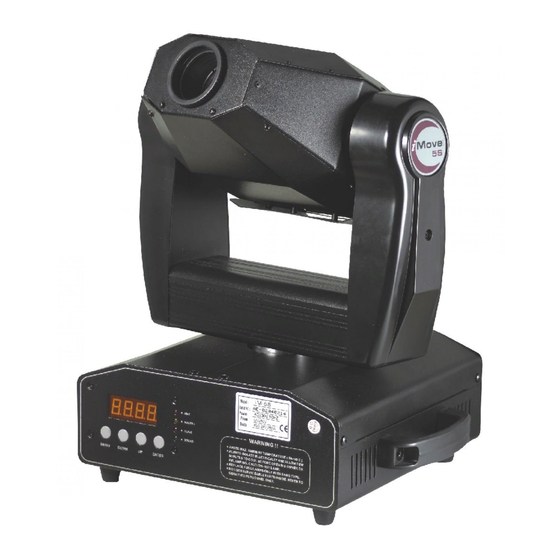
Technical Specifications TABLE OF CONTENTS Power AC 120V~60Hz AC 230/240/250V~50/60Hz 1. Safety Instruction Fuse 20mm Glass T6.3A 20mm Glass T5A HID 150W Lamp 2. Technical Specification ELC 24V 250W 2.1 Beam Angle Dimension 290 x 330 x 380 mm Weight 12 kg 3. - Page 6 Technical Specifications TABLE OF CONTENTS Power AC 120V~60Hz AC 230/240/250V~50/60Hz 1. Safety Instruction Fuse 20mm Glass T6.3A 20mm Glass T5A HID 150W Lamp 2. Technical Specification ELC 24V 250W 2.1 Beam Angle Dimension 290 x 330 x 380 mm Weight 12 kg 3.
-
Page 7: Safety Instruction
1.Safety Instruction Please read carefully the instruction, which includes important information about the installation, usage and maintenance. WARNING Please keep this User Guide for future consultation. If you sell the unit to another user, be sure that they also receive this instruction booklet. EC Declaration of Conformity Unpack and check carefully there is no transportation damage before using the unit. - Page 8 1.Safety Instruction Please read carefully the instruction, which includes important information about the installation, usage and maintenance. WARNING Please keep this User Guide for future consultation. If you sell the unit to another user, be sure that they also receive this instruction booklet. EC Declaration of Conformity Unpack and check carefully there is no transportation damage before using the unit.
- Page 9 7. Maintenance and Cleaning Warning Maintenance (for HID lamp only): To prevent or reduce the risk of electrical shock or fire, do not expose the unit to rain or moisture. Never touch bulb with bare fingers as it is very hot after using. Hot lamp explosion hazard.
- Page 10 7. Maintenance and Cleaning Warning Maintenance (for HID lamp only): To prevent or reduce the risk of electrical shock or fire, do not expose the unit to rain or moisture. Never touch bulb with bare fingers as it is very hot after using. Hot lamp explosion hazard.
-
Page 11: Technical Specification
2. Technical Specification G. If The pan belt is broken • Voltage:AC 120V~60Hz or 230V/240V/250V~50/60Hz Turn off the main power. • Bulb:HID 150W Unscrew all the screws (A) and open the base-housing cover (B). ELC 24V 250W Unplug all the connect wires (C) that from the arm to PC board and ignitor. also •... - Page 12 2. Technical Specification G. If The pan belt is broken • Voltage:AC 120V~60Hz or 230V/240V/250V~50/60Hz Turn off the main power. • Bulb:HID 150W Unscrew all the screws (A) and open the base-housing cover (B). ELC 24V 250W Unplug all the connect wires (C) that from the arm to PC board and ignitor. also •...
-
Page 13: Lamp
6. Troubleshooting 3. Lamp Following are a few common problems that may occur during operation. Here are In case of replacement of the lamp or maintenance, do not open the fixture some suggestions for easy troubleshooting: within 15 minutes until the unit cools down after switching off. A. - Page 14 6. Troubleshooting 3. Lamp Following are a few common problems that may occur during operation. Here are In case of replacement of the lamp or maintenance, do not open the fixture some suggestions for easy troubleshooting: within 15 minutes until the unit cools down after switching off. A.
- Page 15 HID 150W Lamp Installation Or Replacement 5.5 DMX512 Connection The DMX 512 is widely used in intelligent lighting control, with a maximum of 512 channels. • Always switch power off before installing or replacing the lamp. Never try to replace the lamp when it is hot.
- Page 16 HID 150W Lamp Installation Or Replacement 5.5 DMX512 Connection The DMX 512 is widely used in intelligent lighting control, with a maximum of 512 channels. • Always switch power off before installing or replacing the lamp. Never try to replace the lamp when it is hot.
-
Page 17: How To Set The Unit
5.4 DMX 512 Configuration 4. How To Set The Unit 4.1 Control Panel Item Ch 1 Ch 2 Ch 3 Ch 4 Ch 5 Ch 6 Ch 7 Move Spot Tilt Shutter/Sharking Gobo Color Move Wash Pan Tilt Shutter No function Color No function Dimmer Display To show the various menus and the selected functions. - Page 18 5.4 DMX 512 Configuration 4. How To Set The Unit 4.1 Control Panel Item Ch 1 Ch 2 Ch 3 Ch 4 Ch 5 Ch 6 Ch 7 Move Spot Tilt Shutter/Sharking Gobo Color Move Wash Pan Tilt Shutter No function Color No function Dimmer Display To show the various menus and the selected functions.
-
Page 19: Main Function
Stand by Blackout the unit 4.2 Main Function Strobe X/Y moving show Color/Gobo X/Y moving setting 1.Gobo / Color mode selection selection 1.Pan position To select any of the given functions, press the MENU button up to when the required one is sync. - Page 20 Stand by Blackout the unit 4.2 Main Function Strobe X/Y moving show Color/Gobo X/Y moving setting 1.Gobo / Color mode selection selection 1.Pan position To select any of the given functions, press the MENU button up to when the required one is sync.
-
Page 21: How To Control The Unit
5. How To Control The Unit Show Mode You can operate the unit in three ways: 1. By master/slave built-in preprogram function Press the MENU button up to when the is showing on the display. Pressing ENTER 2. By easy controller button and the display will blink. - Page 22 5. How To Control The Unit Show Mode You can operate the unit in three ways: 1. By master/slave built-in preprogram function Press the MENU button up to when the is showing on the display. Pressing ENTER 2. By easy controller button and the display will blink.
-
Page 23: Fixture Hours
ENTER button and the display will blink. Use DOWN and UP button to select the Color Mode (Led on) or (Led off) mode. Once the mode has been selected, press the ENTER button to setup or automatically return to the main functions without any change after 8 Press the MENU button up to when the is showing on the display. - Page 24 ENTER button and the display will blink. Use DOWN and UP button to select the Color Mode (Led on) or (Led off) mode. Once the mode has been selected, press the ENTER button to setup or automatically return to the main functions without any change after 8 Press the MENU button up to when the is showing on the display.
Need help?
Do you have a question about the IM-5S-ELC and is the answer not in the manual?
Questions and answers