Advertisement
Quick Links
Advertisement

Related Manuals for ACME LED-ST2000


Summary of Contents for ACME LED-ST2000
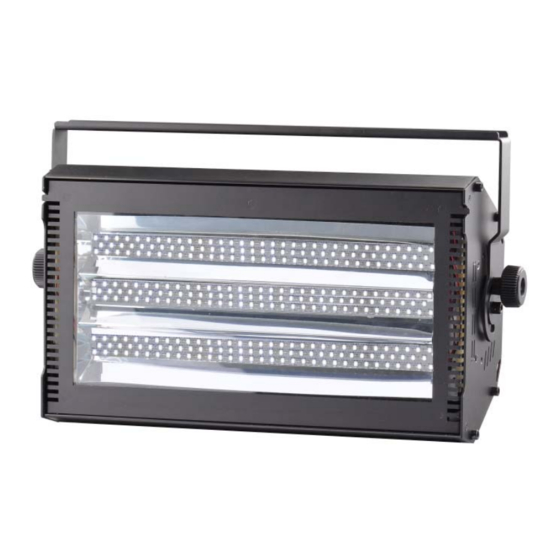
- Page 1 MEGA STROBE LED-ST2000 User Manual Please read the user manual before use...
-
Page 3: Table Of Contents
Table of Contents 1,Safety Information…………………………………………………. 3 2,Rear Panel…………………………………………………………. 5 3,Preparation for Use ………………………………………………...5 4,Main Function …………………………………………………….. 6 5, Remote Control…………………………………………………….10 6, Technical Specification…………………………………………….13... -
Page 4: Safety Information
Warning: This product is for professional use only! It is not for household use. The LED-ST2000 presents risks of lethal or severe injury due to fire and heat, electric shock, ultraviolet radiation, and falls. Flashing light is also known to trigger epileptic seizures in persons who are photosensitive. - Page 5 fixture to cool for at least 15 minutes before handling. Do not modify the fixture or install other than genuine parts. Do not operate the fixture if the ambient air temperature (Ta) exceeds 40° C (104° To guard against falls ...
-
Page 6: Rear Panel
3. Preparation for Use Table1: Cord cap wirings INSTALLATION The LED-ST2000 may be installed in any orientation. The mounting bracket provides five 12 mm holes for direct fastening or attachment of rigging clamps. To install the mounting bracket 1. Place the fixture face down on a table. -
Page 7: Main Function
that, tighten one hand knob to lock the mounting bracket in one end of bracket. 4. MAIN FUNCTION Press MENU button enter the function, then use UP/DOWN or MENU button to select the function you want, final press ENTER button to confirm the function you select. - Page 8 If you want back to main menu, please press MENU button. LED display setting Select the LED option, press ENTER button to confirm your selection. You can see the current ON/OFF status of LED display now. You can change its status by press UP/DOWN button.
- Page 9 Check the version number Select the VER, press ENTER button to confirm. You can see the current version number now (b 10/v 10) and check them by UP/DOWN. Wait for 30 seconds, it will return to main interface. If you want back to main menu, please hold MENU button for 1 second.
- Page 10 DMX CONTROL SUMMARY Intensity Flash intensity can be set from minimum (blackout) to maximum on 1-channel DMX modes, channel 2 in 2-channel DMX modes and channel 1 in the 3- and 4-channel DMX modes. The maximum intensity can be reduced by selecting low power mode as described Duration Flash duration can be set from 0 to 650 ms on 50 Hz power supplies, or 0 to 530 ms on 60 Hz power supplies, on channel 2 in the 3- and 4-channel DMX modes.
-
Page 11: Remote Control
1. When the value of channel 1 is changed, the light will flash once with the programmed intensity, duration, and effect. 5. Remote Controller BF-04D This section describes how to operate The LED-ST2000 with optional remote controls. Noted: the better is using BF-04D under the 2-channel DMX mode. - Page 12 DATA CONNECTION Important: Do not terminate the data link when using the BF-04D! The remote controller connects to The LED-ST2000 with a 3-pin XLR data cable. Additional LED-ST2000 may be connected in series, output to input. Note, however, that the data link must not be terminated as described DMX controllers and the LED-ST2000 should change to the remote control function.
- Page 13 Chase speed is controlled from slow to fast with the SPEED fader. The BLACK OUT button toggles chase run on and off. The indicator diode is on when chase stopped and off when chase running. Chase Number Toggle Chase number with Chase button and will be shown on the nixie tube. Chase Mode Toggle Chase running way with MODE button: AUTO/SOUND mode.
-
Page 14: Technical Specification
6. Technical Specifications Approved AC power ......100 - 240 V nominal, 50/60 Hz AC mains power cable . - Page 15 14 B...
- Page 16 Innovation, Quality, Performance 15 B...
Need help?
Do you have a question about the LED-ST2000 and is the answer not in the manual?
Questions and answers