
Summary of Contents for IK Multimedia ARC System 2
- Page 1 User Manual Correction Plug-In Measurement Measurement Microphone Software ARC System 2 is powered by...
- Page 3 Audyssey Laboratories™ Inc. used under license. All other product names and images, trademarks and artists names are the property of their respective owners, which are in no way associated or affiliated with IK Multimedia. Use of these names does not imply any cooperation or endorsement.
- Page 4 ARC System 2...
- Page 5 9 1.1 Introduction pag. 9 1.2 What is the ARC System 2? pag. 10 1.3 How does the ARC System 2 work? pag. 12 Chapter 2 The ARC System 2 components pag. 15 2.1 The ARC 2 Measurement Microphone pag.
- Page 6 5.4 Opening the ARC 2 Plug-In in your DAW pag. 51 5.5 Using the ARC 2 Plug-In pag. 52 5.6 Suggestions for the best ARC System 2 usage pag. 53 Chapter 6 Frequently Asked Questions pag. 55 Chapter 7 Troubleshooting pag.
- Page 7 ARC System 2...
- Page 8 Paragraph 4 (below) pertaining to “Software Transfer”. Storage/Network use. You may also store or install a copy of the “IK Multimedia Product” on a storage device, such as a network server, used only to install or run the “IK Multimedia Product”...
- Page 9 You agree that any and all claims, suits or other disputes arising from your use of the software shall be determined in accordance with the laws of Italy, in the event IK Multimedia, is made a party thereto. You agree to submit to the jurisdiction of the court in Modena, Italy for all actions, whether in contract or in tort, arising from your use or purchase of the software.
- Page 10 • Customizable EQ curves. • “Virtual Monitoring” feature. • MIDI remote controllable Monitoring section. • 64 bit native support. • Up to 192KHz sample rate support. • Legacy measurement files support (down to ARC 1.3). III - What's New in ARC System 2...
- Page 11 To offer the definitive solution for DAW-based studios, IK Multimedia has teamed up with Audyssey Laboratories™ Inc., the leading provider of sound equalization solutions, for the production of an innovative, low-cost, mobile solution to cor- rect the distortion problems caused by room acoustics: The ARC System.
- Page 12 2. ARC 2 Measurement Software 3. ARC 2 Plug-In The ARC System 2 is a combination of a professional calibrated measurement microphone (figure 1.1), measuring software (figure 1.2), and a multi-platform plug-in (figure 1.3) – that can be integrated with any DAW-based studio – capa- ble of correcting the distortion caused by room acoustics and able to improve how a studio will sound forever.
- Page 13 EQ on the market. The ARC System 2 represents one of the most advanced solutions to acous- tic problems for any DAW-based studio, and it dramatically improves the acoustics of home and project studios as well as correcting even the most thorough acoustically treated high-end studio.
- Page 14 ARC System 2 will analyze all your studio zones such as your center sweet spot, producer desk or client couch. Then it will provide a correction curve that effectively works for all of the zones at the same time.
- Page 15 ARC System 2 2) The second step is to apply the correction as a plug-in in your preferred DAW. Open your DAW (such as Pro Tools ® , Cubase ® , Logic ® , Sonar ® , Live™, Digital Performer™, etc.), and insert the ARC 2 Plug-In (figure 1.5) on the stereo master bus, load the measurement file you just saved from the measure- ment menu, turn the correction on, and voilà, the alterations introduced by...
- Page 16 ARC System 2 response applied by the ARC 2 system. As you can see, the low frequency extension of the speaker is not pushed beyond the physical limits of the speaker which is another advantage in comparison to all conventional room correction EQs (“auto”...
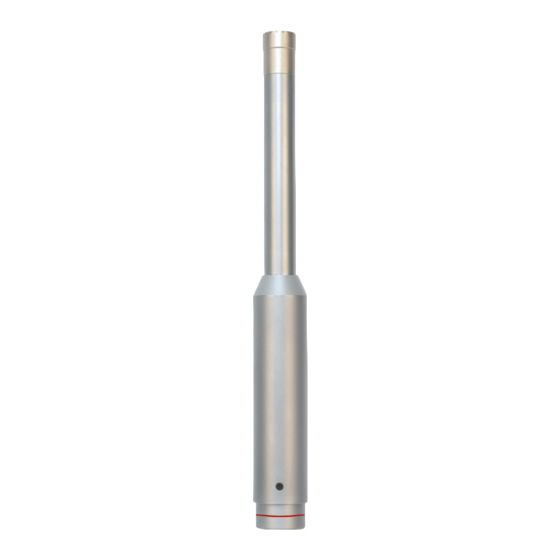
- Page 17 ARC System 2 Chapter 2 The ARC System 2 components 2.1 The ARC 2 Measurement Microphone The ARC 2 Measurement Microphone provides an overall higher qual- ity when compared to low or mid-priced measurement microphones. Measurement microphones usually exhibit a flat frequency response at the expense of poor sensitivity and a noise level that is too high for quality recording.
- Page 18 ARC System 2 2.3 The ARC 2 Correction Plug-In This multi-platform plug-in is the ARC System 2 component that will apply the ARC System 2 correction curve measured by the ARC 2 Measurement software to the monitoring system. The ARC 2 Plug-In should be inserted on your DAW’s stereo master bus or, when possible, on the monitoring bus.
- Page 19 To correctly measure your room, you need: • The ARC 2 Measurement software properly installed. This is included in the ARC System 2 installer and works as a standalone application. • A high-quality audio interface with at least one XLR microphone input with +48V phantom power.
- Page 20 ARC System 2 interface and your speakers (like a mixer, a monitor management system, etc), please check that their settings do not alter the audio signal in any way (e.g., no tone controls, no mono switch, phase reverse, etc). If you use a powered subwoofer that performs bass management, just connect your audio interface outputs to the subwoofer inputs, and your L and R satel- lites to the proper subwoofer outputs.
- Page 21 ARC System 2 3.2.3 Passive Speaker setup Figure 3.2 shows one possible way to connect your system components when passive speakers are used. figure 3.2 3 - Setup for measurements...
- Page 22 ARC System 2 3.2.4 Active Subwoofer and Powered Speakers setup Figure 3.3 shows one possible way to connect your system components when an active subwoofer is used together with powered speakers. figure 3.3 3 - Setup for measurements...
- Page 23 ARC System 2 3.2.5 How to connect the ARC 2 Measurement Microphone Please connect the ARC 2 Measurement Microphone to a high-quality micro- phone preamplifier, and enable the +48V phantom power supply. Please check these two options (both are okay): a.
- Page 24 ARC System 2 3 - Setup for measurements...
- Page 25 On Windows, go to your Start Menu \ Programsand launch ARC 2 Measurement. On Macintosh, go to your Applications folder, and launch ARC 2 Measurement. 4.2 Welcome to the ARC System 2 Upon launching the Measurement app, ARC 2 will display its welcome screen.
- Page 26 ARC System 2 4.3 STEP 1 - Microphone Selection The ARC 2 Measurement Microphone is available in two slightly different versions. It is important to keep in mind that neither microphone is inher- ently better or worse; It is simply that due to a small difference in frequency response the software must be told which microphone you are using to ensure the most accurate measurement possible.
- Page 27 ARC System 2 4.4 STEP 2 - Set up your Audio I/O Select your audio hardware here, and choose which channels to use for speaker outputs and the microphone input (figure 4.3). figure 4.3 Audio Hardware: click this menu to select the audio interface you are using for the measurement process.
- Page 28 ARC System 2 4.5 STEP 3 - Put the Measurement Microphone at the main position and adjust levels Step 3 will tell you to how to check levels and properly measure the room (figure 4.4). figure 4.4 The Levels adjustment must be done with the ARC 2 Measurement Microphone positioned at the main listening position.
- Page 29 ARC System 2 sider the main position as a point in the middle of the speakers at a distance where you usually sit when working on your mixes. 4.5.1 Microphone orientation The ARC 2 Measurement Microphone must be positioned VERTICALLY for all ARC 2 measurements (figure 4.6).
- Page 30 ARC System 2 4.5.2 Microphone height Set the microphone to the same height where your ears are when listening to the speakers (figure 4.7). figure 4.7 At this point, you should have your ARC 2 Measurement Microphone con- nected to the audio interface mic input (+48 V phantom power ON), pointed at the ceiling, and at the correct height.
- Page 31 ARC System 2 If you are using a mixer, you can use your “control room” level. 2. Click PLAY TEST (figure 4.9). This will generate a test sound (chirp), and it will be sent to the outputs specified in point 4.4.
- Page 32 ARC System 2 requires at least 7 measurements for two main reasons: 1. The ARC System 2 can fix the acoustics of a room from various listening areas at the same time. To do that, it needs to measure each listening area.
- Page 33 ARC System 2 4.6.1 Examples of measurement locations in various room types This section will visually describe a number of different audio production rooms with an indication of where the measurement microphone should be placed for each measurement. However, these diagrams should only be used as examples and not as specific positional instructions for your own room.
- Page 34 ARC System 2 Example 2 Studio, two chairs, wider listening position (figure 4.13). figure 4.13 Main position is marked as 1, and it is perfectly centered between the two speakers at the listening position. This is the position you should use to calibrate levels and for the first measurement.
- Page 35 ARC System 2 Example 3 Studio, one chair plus “client couch” listening area (figure 4.14). figure 4.14 Main position is marked as 1, and it is perfectly centered between the two speakers at the main listening position. This is the position you should use to calibrate levels and for the first measurement.
- Page 36 ARC System 2 Example 4 Movie mixing studio/theater (figure 4.15). figure 4.15 Main position is marked as 1, and it is perfectly centered between the two speakers at the main listening position. This is the position you should use to calibrate levels and for the first measurement.
- Page 37 Please note that these are just examples. Since all rooms are different, you should experiment with various measuring patterns and take several mea- surement sets to maximize the ARC System 2 capabilities and expand your monitoring options. Then you can store all measurement sets and recall them later in the ARC 2 Plug-In allowing for direct on-the-fly comparisons.
- Page 38 ARC System 2 4.6.2 Take Measurements figure 4.17 Follow these simple steps to properly measure the room. Preparing to measure: 1. DO NOT CHANGE ANY OF THE LEVELS THAT HAVE BEEN SET AT POINT 4.5. 2. Quiet the room as much as possible (e.g., if you are using a fan and/ or air conditioning, please turn it off while measuring your room).
- Page 39 ARC System 2 highlighted, and the arrow moves to the next one (figure 4.18). This picture shows measurement #1 successfully taken, and the ARC 2 Measurement System stands by to take measurement #2. figure 4.18 7. Repeat points 2, 3, 4, 5 and 6 for all measurements. (figure 4.19) figure 4.19...
- Page 40 ARC System 2 4.7 STEP 5 - Save your system correction Once all measurements have been taken, you will be presented with this screen. (figure 4.20). figure 4.20 Measurement name: click this field, and then name the recently taken measurement set. You can measure several speaker sets or various listening conditions (see paragraph 4.6.1 - Examples of measurement...
- Page 41 ARC System 2 Chapter 5 Using the ARC 2 Plug-In 5.1 ARC 2 Plug-In interface ARC 2 Plug-In is a multiplatform audio processor that applies the correction curve measured with the ARC 2 Measurement software to the incoming audio stereo signal in real-time. It is comprised of three operation windows each one dedicated to specific tasks.
- Page 42 ARC System 2 5.1.2 Measurement menu Click this menu (figure 5.2) to select the measurement set you saved from the ARC 2 measurement system. figure 5.2 ARC 2 is backward compatible with measurement files taken and used with previous ARC System versions (ARC 1.3 minimum) and they will be listed in the measurement menu below new ones;...
- Page 43 ARC System 2 The unavailable features are: • Correction Curevs are limited to the standard four Audyssey factory ® target. • Custom EQ drag functions will be disbled. • Legacy Measures won't be available when ARC 2 is used in sessions where sample rate is beyond 96KHz as previous versions of ARC System could not go past that sample rate.
- Page 44 ARC System 2 AUDYSSEY FLAT: the system will correct the frequency response so that the final response will be very close to flat. However, the system will not extend the low frequency response of the speakers beyond their limits to avoid possible damage and excessive distortion. In fact,...
- Page 45 ARC System 2 5.1.4 Virtual Monitoring Feature For a fast and convenient check of how your mix translates in various “real world” conditions, we've provided a set of alternative speaker responses which are listed under the Factory Target and Custom Curves in the Virtual Monitoring menu.
- Page 46 Note that the speaker icon selection is just a mnemonic aid and does not interact with the sound of the ARC System 2 in any way.
- Page 47 ARC System 2 uncorrected audio. Once the comparison has finished, please bring back the TRIM knob to its default position (0 dB) to avoid unwanted clipping of the signal. 5.1.9 Other controls LOCK: if you are running the software in demo mode and you click the LOCK button (figure 5.12), the Authorization Manager will appear.
- Page 48 ARC System 2 5.2 Edit Window Sometimes after ARC 2 has compensated for your speaker response by evening out the anomalies in the room's response, the resulting “tone” or “color” can be quite different from what you are used to. You can use the controls in the Edit window (figure 5.15) to adjust it to your personal taste...
- Page 49 ARC System 2 5.2.2 Custom 1-4 buttons These buttons (figure 5.17) select the user-defined Custom EQ Curves. figure 5.17 You can use these customizable EQ settings to adjust your personal listen- ing preference or to better suit different program material. These curves will retain the chosen settings after the “Apply”...
- Page 50 5.21 5.2.6 Full Range Bass Correction The ARC System 2 automatically detects the bass roll-off point of each speaker to ensure that no correction is applied below that point as it may potentially overload speakers. However, in some rooms with especially odd low frequency issues, the ARC’s measurement system can be misled and set...
- Page 51 Full Range Bass Correction is on, which you may find desirable. ARC System 2 goal is to achieve the most accurate room correction possible automatically, however we suggest checking both options after various lis- tening tests to match the preferred low frequency performance.
- Page 52 ARC System 2 5.3 Monitor Control Window To provide an easier, more “control room-style” monitoring system, you can use the “Monitor Window” (figure 5.25) which gives you a few key controls clearly arranged and instantly within reach. figure 5.25 5.3.1 Main volume knob This control acts as the master volume of your listening environment (figure 5.26).
- Page 53 ARC System 2 5.3.4 Mode selector This control lets you choose the mode in which ARC 2 will monitor your audio (figure 5.29). When set to “Stereo,” ARC 2 will reproduce the corrected L/R program on your DAW's master bus. Setting it to “Mono” or “Side” will allow you to monitor the program in Mono (channels sum) or in Side (chan- nels difference).
- Page 54 ARC System 2 Each DAW has its own criteria for how to use aux tracks, monitoring bus, master tracks/faders, etc. Therefore, these suggestions for how to start ARC 2 in several host applications are just a starting point, a guideline. For example, if your session already has a master track, you do not need to cre- ate another one.
- Page 55 5.6 Suggestions for the best ARC System 2 usage You are probably used to how your studio acoustics sound. For this reason – and considering that the ARC System 2 will improve the accuracy of your monitoring system and change the sound of your room –...
- Page 56 ARC System 2 5 - Using the ARC 2 Plug-In...
- Page 57 My studio already has some acoustical treatment. Will ARC 2 be useful for me? Yes. The ARC System 2 improves the clarity and focus of the perceived sound as well, and this will partially mask untreated rooms rever- beration and reflections considerably.
- Page 58 Can I use ARC System 2 if I have a subwoofer? Yes. Just connect your system so that ARC System 2 can measure and correct your Left and Right speakers, with the inclusion of the sub- woofer.
- Page 59 Does ARC 2 work with surround monitoring systems? Not at the moment. A multi-channel version of ARC System 2 is develop- ment and will be available in the future. 6 - Frequently Asked Questions...
- Page 60 ARC System 2 6 - Frequently Asked Questions...
- Page 61 ARC System 2 Chapter 7 Troubleshooting Where can I find my IK product Serial Number? The Serial Number is written on the Registration Card (included with your IK product inside the license envelope) or in the E-mail you received from DigitalDelivery@ikmultimedia.com (if you purchased the product as ‘Downloadable only version’).
- Page 62 Your login details will be sent to your email account. I just bought an IK Multimedia software product. What should I do to reg- ister and authorize my new product? Just run the Authorization Manager and follow the instructions.
- Page 63 Correction ON, the resulting sound is not optimal, and I don’t feel it is cor- rect for my monitors and for my room. Please read carefully the ARC System 2 User Manual (Chapters 3 & 4), and repeat the measurement process.
- Page 64 ARC System 2 When I open the measurements set on my ARC 2 Plug-In and turn the cor- rection ON, the resulting sound and the displayed response is strange and incorrect, making the monitors sound worse than when ARC 2 Plug-In is not enabled.
- Page 65 ARC System 2 Chapter 8 Support For any question you may have, please refer to the FAQ webpage at: www.ikmultimedia.com/faq Here you will find answers to the most common questions. To submit a Technical Support Form, go to: www.ikmultimedia.com/Support.php For other requests such as Product, Sales, or Web info, please go to: www.ikmultimedia.com/ContactIKForm.php...
- Page 66 ARC System 2 To access the User Area go to www.ikmultimedia.com/userarea To enter the User Area for the first time, you have to log in with the User Name and Password that you’ve received from us via e-mail after your first IK product registration.
- Page 67 IK Multimedia. Use of these names does not imply any cooperation or endorsement. Mac and the Mac logo are trademarks of Apple Computer, Inc., registered in the U.S.
Need help?
Do you have a question about the ARC System 2 and is the answer not in the manual?
Questions and answers