Winmate W07FA3S-PCM1AC-PoE Quick Start Manual
7” s-series hmi
Hide thumbs
Also See for W07FA3S-PCM1AC-PoE:
- User manual (77 pages) ,
- Quick start manual (30 pages) ,
- User manual (78 pages)
Table of Contents
Advertisement
Quick Links
Download this manual
See also:
User Manual
7" S-Series HMI
W07FA3S-PCM1AC-PoE
W07FA3S-PCM1-PoE
Quick Start Guide
V1.1
For more information on this and other Winmate
products, please visit our website at:
www.winmate.com
Document Part Number: 9152070I1001
Please read these instructions carefully before using this product, and save this manual for future use.
Advertisement
Table of Contents

Related Manuals for Winmate W07FA3S-PCM1AC-PoE


Summary of Contents for Winmate W07FA3S-PCM1AC-PoE
-
Page 1: Quick Start Guide
W07FA3S-PCM1AC-PoE W07FA3S-PCM1-PoE Quick Start Guide V1.1 For more information on this and other Winmate products, please visit our website at: www.winmate.com Document Part Number: 9152070I1001 Please read these instructions carefully before using this product, and save this manual for future use. -
Page 2: Fcc Statement
FCC Statement This device complies with part 15 FCC rules. Operation is subject to the following two conditions: This device may not cause harmful interference. This device must accept any interference received including interference that may cause undesired operation. This equipment has been tested and found to comply with the limits for a class "B"... - Page 3 Brand and product names are trademarks or registered trademarks of their respective owners. Disclaimer Winmate Inc. reserve the right to make changes, without notice, to any product, including circuits and/or software described or contained in this manual in order to improve design and/or performance. We assume no responsibility or liability...
- Page 4 Customer Service We provide a service guide for any problem by the following steps: First, visit the website of our distributor to find the update information about the product. Second, contact with your distributor, sales representative, or our customer service center for technical support if you need additional assistance. You may need the following information ready before you call: ...
-
Page 5: Table Of Contents
Configuring Ethernet Checking Ethernet Testing LED Status Light Bar Reading NFC Tag Using Front Camera The Camera Menu Winmate® Home Manager (WHM) How to Lock Application How to Unlock Application How to Change Password Turning Off Your Device INSTALLATION Wiring Requirements... - Page 6 VESA Mounting SPECIFICATIONS HMI Device Specifications Supported NFC Tag APPENDIX Appendix A: Cleaning the Monitor Appendix B: Winmate Software Development Kit Winmate Download Center Winmate File Share Android Debug Bridge (ADB)
-
Page 7: Introduction
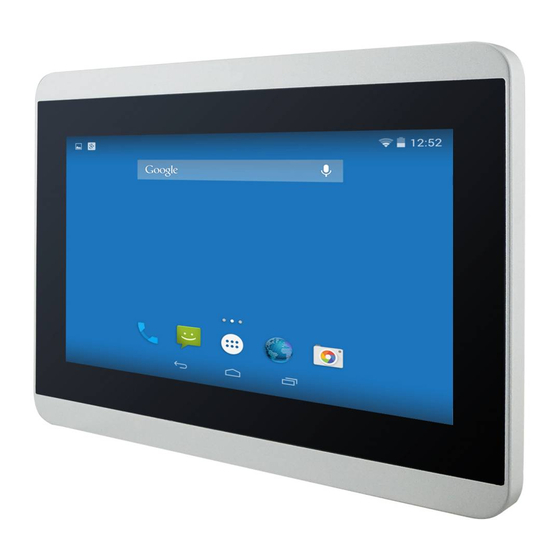
Congratulations on purchasing Winmate® 7” S-Series HMI. Interactive and smart automation systems of intelligent buildings are in a fast growing phase. Winmate® multi-touch S-Series HMI is suitable for home automation and room management systems. Flat surface is easy-to-clean and delivers aesthetically pleasing look for any interior. -
Page 8: Package Content
Package Content Carefully remove the box and unpack your device. Please check if all the items listed below are inside your package. If any of these items are missing or damaged contact us immediately. Standard factory shipment list: Quick Start Guide Driver CD &... - Page 9 Package may include optional accessories based on your order: VESA Wall Mount VESA Desk Stand VESA Desk Stand Bracket PCVS-V1 LA-100 LA-106 99KK00A0000E 9B0000000128 9B0000000412...
-
Page 10: Product Overview
2MP Front Camera (Optional) ④ ⑨ USB OTG 1W Speaker ⑤ ⑩ RS-232/422/485 LED Status Light Bar** *Power Device (PD): follows IEEE 802.3at (25 W), IEEE 802.3af (15 W) **RGB LED light bar only available for the model number W07FA3S-PCM1AC-PoE... -
Page 11: Getting Started
GETTING STARTED Turning On Your Device Follow the following steps to turn on your device: 1. Connect the HMI device to a thermal block (2-pin). 2. Connect the other side of the thermal block to the AC adapter. 3. Connect the AC adapter to the power cord. 4. -
Page 12: Configuring Serial Port Settings
Configuring Serial Port Settings Serial COM Port can be configured for RS-232, RS-422 or RS-485. Winmate provide COM port settings application for Android OS. To configure serial port settings: 1. Go to Settings > Accessibility 2. Go to Accessibility > Comport-Setting... - Page 13 3. Go to Comport-Setting > Comport 1/ Comport 2/ Comport 3 * Select Comport 1/ Comport 2/ Comport 3 that you want to configure. 4. In COM port settings select Comport 1 > RS232/RS422/RS485 *This example shows how to configure Comport 1 settings...
-
Page 14: Brightness Adjustment
Brightness Adjustment Use can adjust the screen brightness in Android settings. Pull down from the top of the screen to get the notifications area. You can also access display settings in the settings menu. To adjust the brightness of the screen: Go to Settings >... -
Page 15: Operating The Hmi Device
Operating the HMI Device Winmate® 7” S-Series HMI runs on Android 4.4 OS (Default). Setting up the Device When you first turn on your HMI device, you will see a Welcome screen. Choose the language you want and touch Start or the Start icon. When prompted, you can sign in with your Google Account to create one at that time. -
Page 16: Quick Settings
Quick Settings To open Settings, Swipe down from the top right of the screen and touch the Settings icon. You can open your device’s Settings app from the All Apps screen or from Quick Settings. For example, to change notification sounds, and volume go to Settings >... -
Page 17: Ethernet
Ethernet 1. Connect Ethernet Cable to the HMI device. 2. Go to APPS > Ethernet 3. Ethernet APP main menu appears Setting Description Check Ethernet Check Ethernet connection parameters: IP mode, IP address, DNS address and others Configure Ethernet Enable Ethernet connection and configure its such as connection type Advanced Settings Configure advanced parameters of the Ethernet... -
Page 18: Configuring Ethernet
Configuring Ethernet To configure Ethernet settings go to Apps > Ethernet > Configure Ethernet. Default settings: Ethernet OFF. Swipe Ethernet ON to activate Ethernet connection. Connection Type Setting Description DHCP The device automatically capture IP-address from the router Allows to manually set up IP-address, DNS, Network and Static IP Gateway Checking Ethernet... -
Page 19: Testing Led Status Light Bar
Testing LED Status Light Bar To test LED Light Bar go to APPS > Light BarDemo *This application is for demonstration purposes only Adjust the intensity of Red, Green and Blue light. -
Page 20: Reading Nfc Tag
Reading NFC Tag Notice that NFC Reader is an optional feature for 7” S-Series HMI and may not be present in your device. Refer to the Technical Specifications for more details of supported NFC card type. Follow instructions below to test NFC feature. Step 1 Go to all APPS menu, open NFC Tag Info application Step 2 User needs to turn the NFC on. - Page 21 Step 4 Go back to NFC Tag Info application. Now you can scan NFC tag. Locate the card to the NFC tag. Don’t remove tag, reading may take up to a minute. Step 5 The information written on the card displays on the screen.
-
Page 22: Using Front Camera
Using Front Camera Notice that 2MP Front Camera is an optional feature for 7” S-Series HMI and may not be present in your device. The Camera Menu To open the camera, open All APPS , and then tap on camera icon Item Icon Description Action... - Page 23 Shooting Photos 1 Open the Camera 2 Focus on the object 3 Tap to capture the object 4 By default, the photo preview is displayed briefly on the screen The preview screen automatically closes after 3 seconds. Alternatively, do one of the following: Icon Description...
- Page 24 Item Icon Description Action Location Tap to change location settings. Countdown Tap to set countdown timer. timer Picture size Tap to change picture size. Camera Settings to open camera settings. Item Icon Description Action Tap to zoom in or zoom out the Zoom in/ Zoom out picture.
- Page 25 Making Videos Short tap > Tap to make a video. Shooting Panoramic Images Short tap > Tap to make panoramic pictures.
-
Page 26: Winmate® Home Manager (Whm)
Winmate® Home Manager (WHM) Winmate® S-Series HMI running on Android OS comes with preinstalled APP named Winmate® Home Manager (WHM) which let the device manager to lock the launcher then the user can only use one application assigned by the device manager. - Page 27 Set which app you want to run up automatically after Home Manager booting. Set the WHM password. Password Manager (Default password is “0000”) Displays information about Winmate® Home About Manager. 2. Go to “Application Selector”, and choose the app which you want to run up automatically after booting.
- Page 28 3. Go back to “Home Selector” and press “Clear and Reset Default Home”. 4. Select “Restrict Home” and “Always”, and then restart the computer to enable these settings. The system will automatically start the application which you selected and lock it. ...
-
Page 29: How To Unlock Application
How to Unlock Application Follow the instruction below to reset WHM and unlock applications: 1. If you want to reset the home manager, pull down the left side to open the status bar and open HomeManager service. 2. System will request the password to login. Default password is “0000”. -
Page 30: How To Change Password
3. Restart the system and you will go back to the normal Launcher. How to Change Password To change the password: 1. Go to Password Manager and set your own password for this APP. 2. The default password is “0000”. Enter a new password in New Password field, and then tap Change Password. -
Page 31: Installation
INSTALLATION Wiring Requirements The following common safety precautions should be observed before installing any electronic device: Strive to use separate, non-intersecting paths to route power and networking wires. If power wiring and device wiring paths must cross make sure the wires are perpendicular at the intersection point. ... -
Page 32: Connecting To Other Devices
Connecting to Other Devices This section explains how to connect external interfaces to the HMI device. Power Input Connector The DC power source input of the 7” S-Series HMI is a 2 pin terminal block connector that supports 12V DC power input. Minimum Voltage 11.4V Maximum Voltage 12.6V Voltage... -
Page 33: Ethernet Connector
Ethernet Connector The 7” S-Series HMI supports one RJ45 10/100/1000 Mbps Ethernet interface for connecting to the internet. Pin № Pin № Signal Name Signal Name TX1+ TX1- TX2+ TX2- TX3+ TX3- TX4+ TX4- IMPORTANT: Power Device (PD): IEEE 802.3at (25 W), IEEE 802.3af (15 W) USB OTG Connector Use USB OTG connector to connect the HMI device to other USB On-The-Go compliant devices such as flash drives, digital cameras, mice or keyboards. -
Page 34: Mounting
Mounting S-series HMI devices come with different mounting options suitable for most of the industrial and commercial applications. Panel Mounting Panel / Flush Mounting solution allows installing the HMI device onto the wall. Wall Cutout Screw Hole Diameter 131.4 x 175.4 mm M3x4 mm Mounting Instruction 1. -
Page 35: Vesa Mounting
VESA Mounting VESA Desk Stand PCVS-V1 The HMI device can be installed on a desk with the stand. You can purchase desk stand as an optional accessory. Model Name: PCVS-V1 Part Number: 99KK00A0000E Mounting Instruction Use provided Philips M4x5 screws to fix the desk stand to VESA holes on the back cover of the device. - Page 36 VESA Desk Stand LA-100 The HMI device can be installed on a desk with the stand. You can purchase desk stand as an optional accessory. Model Name: LA-100 Part Number: 9B0000000128 Mounting Instruction Use provided Philips M4x5 screws to fix the desk stand to VESA holes on the back cover of the device.
- Page 37 VESA Wall Mount Bracket LA-106 The HMI device can be installed on a desk with the stand. You can purchase desk stand as an optional accessory. Model Name: LA-106 Part Number: 9B0000000412 Mounting Instruction...
- Page 38 Accessories Dimensions...
-
Page 39: Specifications
SPECIFICATIONS HMI Device Specifications Model Name W07FA3S-PCM1AC-PoE W07FA3S-PCM1-PoE 7” TFT (Widescreen) Size Resolution 1024 x 600 Brightness 500 (typ.) Contrast Display 700 : 1 (typ.) Ratio Specifications Viewing -75~75 (H);-70~75(V) Angle Max Colors 262K (6bit) Touch PCAP Multi-Touch support 5 points Freescale®... -
Page 40: Supported Nfc Tag
Camera 2 MP Front Camera (Optional) Peripheral Audio Output 1 Watt Speaker LED Light Bar Built-in RGB LED Status Light Bar (only for Indicator W07FA3S-PCM1AC-PoE) Power Input 12V DC Power Device (PD): Power over Power IEEE 802.3at (25 W) Ethernet Management IEEE 802.3af (15 W) -
Page 41: Appendix
ISO 14443-B Ifineon JTOP ISO 18092 SONY Felica Lite s (R/W) SONY Felica Lite APPENDIX Appendix A: Cleaning the Monitor Before cleaning: Make sure the device is turned off. Disconnect the power cable from any AC outlet. When cleaning: ... -
Page 42: Appendix B: Winmate Software Development Kit
Appendix B: Winmate Software Development Kit The table below lists SDK provided by Winmate for 7” S-Series HMI with Freescale® Cortex® A9 processor: Item Driver Description Android Driver USB Driver Android Driver USB OTG Driver Android SDK Linux SDK Guide... - Page 43 NOTES ________________________________________________________________ ________________________________________________________________ ________________________________________________________________ ________________________________________________________________ ________________________________________________________________ ________________________________________________________________ ________________________________________________________________ ________________________________________________________________ ________________________________________________________________ ________________________________________________________________ ________________________________________________________________ ________________________________________________________________ ________________________________________________________________ ________________________________________________________________ ________________________________________________________________ ________________________________________________________________...
- Page 44 Winmate Inc. 9F, No.111-6, Shing-De Rd., San-Chung District, New Taipei City 24158, Taiwan, R.O.C Tel: 886-2-8511-0288 Fax: 886-2-8511-0211 Email: sales@winmate.com.tw Official website: www.winmate.com...
Need help?
Do you have a question about the W07FA3S-PCM1AC-PoE and is the answer not in the manual?
Questions and answers