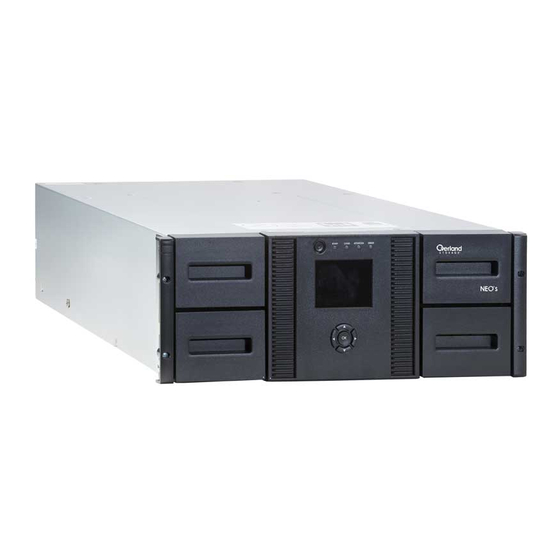
Overland Storage NEO 400S Getting Started
4u tape library
Hide thumbs
Also See for NEO 400S:
- User manual (170 pages) ,
- Replacement instructions (5 pages) ,
- Instructions (3 pages)
Table of Contents
Advertisement
Quick Links
Download this manual
See also:
User Manual
NEO 400
S
4U Tape Library
getting started
© Copyright 2009
First edition: July 2009
The information in this document is subject to change without
notice.
AL540-96015
IMPORTANT:
The shipping lock must be removed for the robotics to work
properly. A robot move error is displayed if the shipping lock is not
removed. See Step 1, Removing and storing the shipping lock.
WARNING!
The 4U Tape Library weighs 30.2 kg (66 lb) without media and 46
kg (101.4 lb) with media (48 cartridges). When moving the Library,
to reduce the risk of personal injury or damage to the device:
• Observe local health and safety requirements and guidelines for
manual material handling.
• Remove all tapes to reduce the overall weight of the device and
prevent cartridges from falling into the robotic path and dam-
aging the Library.
• Obtain adequate assistance to lift and stabilize the device during
installation or removal.
WARNING!
When placing the Library into a rack, to reduce the risk of personal
injury or damage to equipment:
• Extend the rack leveling jacks to the floor.
• Ensure that the full weight of the rack rests on the leveling jacks.
• Install stabilizing feet on the rack.
• Extend only one rack component at a time. Racks may become
unstable if more than one component is extended.
Front panel overview
1. Power button
3. LEDs
5. Control keys
7. Magazine
Page 1
2. Magazine and mailslot
4. LCD screen
6. Air vents
Advertisement
Table of Contents

Summary of Contents for Overland Storage NEO 400S
- Page 1 NEO 400 4U Tape Library IMPORTANT: getting started The shipping lock must be removed for the robotics to work properly. A robot move error is displayed if the shipping lock is not removed. See Step 1, Removing and storing the shipping lock. WARNING! The 4U Tape Library weighs 30.2 kg (66 lb) without media and 46 kg (101.4 lb) with media (48 cartridges).
-
Page 2: Back Panel Overview: Parallel Scsi
Back panel overview: parallel SCSI Back panel overview: Fibre Channel (FC) 1. 68-pin HD parallel SCSI 2. Fan connectors 1. Fibre Channel ports 2. Fan 3. Power connector 4. Tape drive assembly 3. Power connector 4. Tape drive assembly 5. Ethernet port 6. -
Page 3: Control Keys
To enable the Library RMI, follow the instructions in this installation process to: • Connect the Library to your local area network with an Ethernet cable.. • Configure the network settings of the . • If you intend to use the administrative functions of the RMI, set the Administrator password using the OCP. -
Page 4: Removing And Storing The Shipping Lock
1 Removing and storing the shipping lock The shipping lock protects the robotic transport mechanism from moving during shipment and must be removed and stored before powering on the Library. Locate the adhesive tape holding the storage lock at the top of the Library. -
Page 5: Planning The Sas Configuration
NOTE: See 12 Configuring the FC ports for additional FC configuration information. See the 2U Tape Library and 4U Tape Libraryuser and service guide for instructions on changing the FC configuration. 4b Planning the SAS configuration The server must have a SAS HBA with an external connector. 1. -
Page 6: Connecting The Library: Sas
Otherwise, attach a SCSI cable to the next device on the SCSI bus. Make sure that the last device on the SCSI bus is properly terminated. Connect the other tape drives, if applicable. 7b Connecting the Library: SAS Ensure that the SAS cable used has enough mini-SAS connectors for the number of drives installed in the Library. -
Page 7: Setting The Administrator Password
Press Next until the display shows Network Information. Press On the front panel, highlight Configuration > Set Date and Time. Press OK. Enter. The display shows IPv4 Network Enabled. Press Enter. Press OK to select the first block that can be edited. Use the Left and Right control keys to move between digits in the Date and Press Next until the display shows the IP address. -
Page 8: Labeling Tape Cartridges
To see the firmware revision of the Library on the front panel: Use the control keys to navigate to Info > Identity > Library. 13 Labeling tape cartridges The Library Controller FW Revision field shows the Library firmware revision. 16 Configuring additional features The Library has many features to customize for your organization. -
Page 9: Magazine Release
TIP: To see the slot numbering for your Library in its current configuration, see the RMI Status > Inventory screen. Magazine release When possible, release the magazines from the OCP or RMI. If you must remove the magazines when the Library is not powered on, 1) insert a straightened paperclip or small pin about 1.5 cm (0.6 inch) into the magazine release hole on the back panel, while 2) another person removes the magazines from that side. - Page 10 OCP menu Page 10...


Need help?
Do you have a question about the NEO 400S and is the answer not in the manual?
Questions and answers