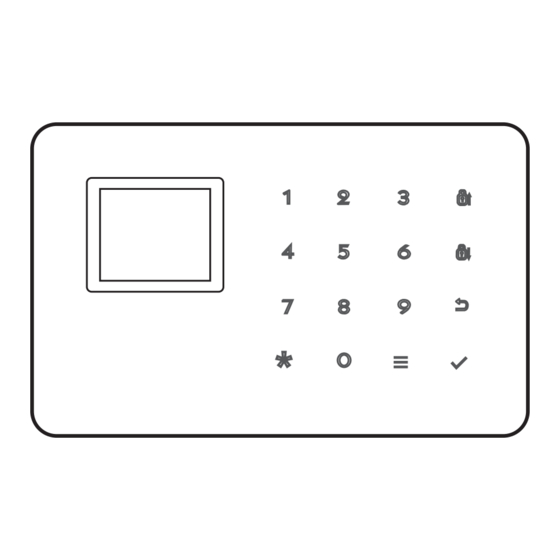
Summary of Contents for KERUI G18
- Page 1 Operation Instruction User Manual of G18 GSM Alarm System User Manual of G18 GSM Alarm System Version 1.0 2015.07 Reading carefully before handle Keeping the user manual reserved...
-
Page 2: Table Of Contents
Table of Contents 3.8.7 Scheduled Arm/Disarm .................13 3.8.8 Scheduled Arm/Disarm .................13 3.8.8.1 User Area Code.................13 Chapter One Introduction ...................03 1.1 System Introduction ..................03 3.8.8.2 Arm/Disarm Upload ................13 1.2 Function Introduction ..................03 3.8.8.3 Self Test Time ..................13 Chapter Two Host Installation ................04 3.8.8.4 Self Test Week ..................14 Chapter Three Operation&Setting..............05 3.8.9 Low Batter y and Anti-tamper Setting ...........14... -
Page 3: Chapter One Introduction
Chapter Two Host Installation Chapter One Introduction Host should be installed in the central position of the guard area to receive the 1.1 System Introduction signals from detectors best. Keep away from large mental objects or appliances This alarm system is a high-end GSM alarm with stable and reliable performance with high frequency interference, meanwhile, avoid the reinforced concrete and applies 1.7-inch TFT color screen and touch keyboard with built-in powerful walls and fire doors barriers etc. -
Page 4: Chapter Three Operation&Setting
■ Prompt detectors should be changed to be Home Arm zones in order to work properly. After Home Arm operation, it displays and locks “ Home Arm” icon. Display ”Disarm” Host is disarming Remote Control operation: press key [STAY]. Display ”Arm” Host is arming Keyboard operation: press key [ARM] twice Display ”Home Arm”... -
Page 5: Set Cid No
3.7 Accessories number like 13812345678. User can set 6 groups alarm phone numbers at most. Then press key 【BACK】to return to desk page. Add Accessories Add Remote Control Add Detector Delete Alarm Phone No. Enter Number(00-99): Enter Number(00-99): 1.Add Remote Control As shown in picture 3-1, after entering to the settings of alarm phone numbers, 2.Add Detector press key 【Menu】... -
Page 6: Delete Detectors
3.7.4 Delete Detectors 3.7.5.2 Code Match between Host and Smart Socket As shown in picture 3-2, press key【4. Delete Detectors】. With the voice prompt “ Code Match Method: In smart socket standby mode, long press key SET for 5s Please input numbers (01-99)”( e.g. delete Zone No. 1 remote control, then input until the socket indicator light turns out to enter learning state;... -
Page 7: Password Se
3.8.3.2 System Voice System Settings Delay Settings Password Settings On voice setting page, press key【DOWN】to move the cursor behind【System 1.Delay Settings Arming delay:00 Password:1234 Voice】 press key【MENU】 to switch it ON or OFF and press key 【OK】to save 2.Password Settings Alarm delay:00 Keypad Lock:OFF 3.Voice Settings... -
Page 8: Alarm Output
3.8.6 Alarm Output Test Time】 input self test time, press key【OK】to save setting. On system setting page, press key 【UP/DOWN】to move the cursor behind【 Remote Control Voice Setting】 then press key【OK】or number 6 to enter setting 3.8.8.4 Self Test Week page, as shown in picture 3-10. -
Page 9: Restore Factor Y Setting
3.8.10 Restore Factor y Setting type setting, dialing group when alarming and wired zones open/closed alarms, In the system setting page, press【up/down】key to move cursor to the【Restore etc as shown in Figure 3-23. The setting is as follows: Factor y Settings】. Then,press【OK】button or press key【0】directly to enter into Zone Settings Zone Settings Zone Settings... -
Page 10: Check Records
Chapter Four: SMS Setting and Command Chart Clock Settings Histor y List Alarm list 001 Histor y yy-MM-dd 1.Alarm list Alarm date: - 15-07-24 09:16:52 2.Arm&Disarm list In addition to set parameter through host menu, SMS or Fetion Message can also Alarm time:... -
Page 11: Chapter Five App
01~99; Feature 12346438151# 121—Robber y 01-99 Zone mobile phone users of iOS system should enter App Store, enter "G18" or sweep Code Set Zone 38 as Gas zone 122-Silence Rob 130-Burglar the next two-dimensional bar code in Figure 5-1, then the user can search APP 131-Surrounding of G18 alarm system. -
Page 12: Add Host Account
The setting is successful. This step can bind the control panels to APP. One G18 APP can add multiple control panel. You can operate several control panels through one APP. -
Page 13: Remote Control Operation Method
【 】 Note: both monitoring and speaking time are 20 seconds. Press 3 key to continue 7.3 System factor y default 【 】 monitoring. Press 5 to continue speaking within 20s. System Password SMS Message 1234 6.2 Remote control operation method Remote control Remote Alarm User can use any phone to call the phone number of the phone card on the host. -
Page 14: Installation And Use Of Pir Motion Detector
4.The indicator lighting for 1 second means alarm. The indicator in constant light Chapter Nine Troubleshooting is a suggestion of low power. 5.A, B can also be reinforced by screws, (A: remove the bottom cover, strengthen Troubleshooting the screw and then cover the bottom agian; B can be directly fixed by the screw.) Reasons Methods 1.


Need help?
Do you have a question about the G18 and is the answer not in the manual?
Questions and answers