Table of Contents
Advertisement
Available languages
Available languages
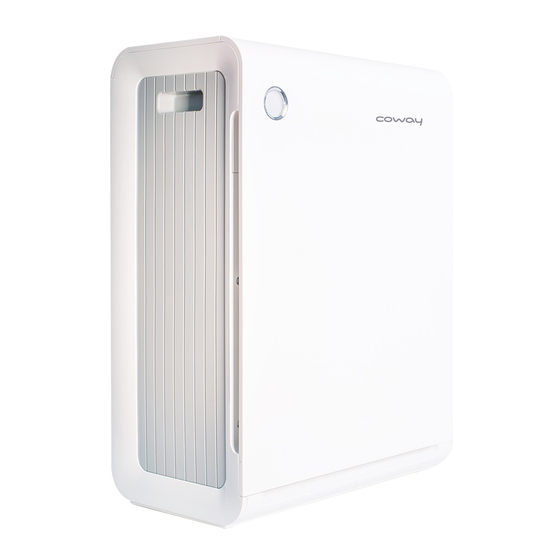
Coway Air Purifier APM-1010DH
• This product is for domestic use only. It cannot be used in an overseas country where the power
voltage is different.
• Warranty card is included in this user's manual.
• Read and save these instructions.
• English / Français / Español / Deutsch / Italiano / Nederlands / Русский
Advertisement
Chapters
Table of Contents

Subscribe to Our Youtube Channel
Related Manuals for Coway APM-1010DH


Summary of Contents for Coway APM-1010DH
- Page 1 Coway Air Purifier APM-1010DH • This product is for domestic use only. It cannot be used in an overseas country where the power voltage is different. • Warranty card is included in this user’s manual. • Read and save these instructions.
- Page 2 FEATURES An innovative ANTI-FLU HEPA™ filter system Coway’s innovative ANTI-FLU HEPA™ captures micro particles and inactivates viruses up to 99.9 %. The filter system has been optimized to quickly remove pollutants from the air. - This appliance is not a medical device.
-
Page 3: Table Of Contents
DEAR cUSTOmERS coway air purifier. Thank you for using the Please read the user’s manual to use and maintain the product correctly. If you encounter a problem while using the product, you may easily solve the problem by referring to the user’s manual. As this manual contains the product warranty card, please keep it in a safe place. -
Page 4: Safety Information
SAFETY INFORmATION The following information is for user safety that should be observed. It is to ensure user safety and prevent property damage. Please read the precautions carefully and use the for 220 V - 240 V use only for 120 V use only product correctly. - Page 5 • Do not use the product in areas where flammable gases or combustible materials are used or stored. • Do not insert sharp objects such as a gimlet into the pollution sensor. • If the product produces a strange noise, burning smell or smoke, unplug it from the electrical outlet immediately and call our service center.
-
Page 6: Warning | 14 | Adjust Particle Sensor
SAFETY INFORmATION warning : Failing to follow the precautions below may result in considerable physical injury or property damage. • Do not insert fingers or foreign objects into the air inlet or outlet. • Do not let children hang on to the product or climb on it. •... -
Page 7: Caution | 15 | Filling Up The Water Tank
caution : Failing to follow the precautions below may result in slight physical injury or property damage. • Do not install the product on a sloped surface. • Do not apply force or impact to the product. • When the product is in use, maintain a distance of at least 20 cm from the walls or adjacent objects and 30 to 60 cm above the product. -
Page 8: Parts Name
PARTS NAmE Front / Top view Handle Air quality indicator Particle sensor Front cover water tank water tray Front Rear humidification humidification filter filter Indicators / Air outlet buttons... - Page 9 Indication part / Operation part Indication Part Operation Part Air purification, mode indicator Airflow indicator humidification indicators Power Button mode button Airflow speed button current/Selected humidity indicator Off-timer indicator Humidity button Off-timer button Light sensor Air purification, humidification indicators Humidity button - When only the air purification indicator is Using the Humidity button, you can set the humidity level in the following order: 40% →...
-
Page 10: Air Purification Process
ANTI-FLU HEPA™ filter Coway’s innovative ANTI-FLU HEPA™ captures micro particles and inactivates viruses up to 99.9 %. Natural substances from Ginkgo and Japanese sumac trees destroy the protein on the surface of viruses. It also effectively removes fine dust and cigarette smoke while the antibacterial and anti-mold functions of... -
Page 11: Air Humidification Process
AIR HUmIDIFIcATION PROcESS Humidifying air purification process Water tank Contains 3 L of water, provides an anti-bacterial effect and promotes the ion-exchange of water. Water tray Supplies the appropriate amount of water from the water tank to the humidification filter and provides an anti-bacterial effect. - Page 12 PREPARATIONS Humidification filter Separate the water tank. Separate the water tray as shown by the figure. Install the humidification filter for which the plastic packaging has been removed. Front Rear Install the filter so that the thin filter faces the front and the thick filter faces the back.
- Page 13 HOw TO USE Connect the power plug to the electrical outlet before operating the product. When the air purifier is turned on, it automatically operates in Auto mode. Tips To Operate the Manual Mode Turn the product on by pressing the Power button and select an airflow speed by pressing the Airflow speed button.
- Page 14 HOw TO USE Off timer ON/OFF Using the off timer function, you can select 1, 4 or 8 hours before the unit is turned off. To cancel an off timer, press the off-timer button until the off-timer indicator is turned off. (1hr →...
- Page 15 ADJUST PARTIcLE SENSOR When the product is shipped, the pollution sensor is set to normal sensitivity. If the pollution level stays at the highest level after 2 hours of operating or stays at the lowest level for more than 1 hour when the air does not appear clean, users can adjust the sensitivity of the sensor.
- Page 16 FILLINg UP THE wATER TANk To fill the water tank with water Separate the water tank from the side of the product by pulling the separation catch. Separate the water tank cap by turning it counterclockwise. Fill the water tank with water and turn the water tank cap clockwise until you hear a popping sound.
-
Page 17: Cleaning Method
cLEANINg mETHOD Always unplug the unit before cleaning it. Do not use detergents that contain organic solvents (solvent, thinner, etc), bleach, Tips chlorine, or abrasives. Do not place the unit into water or spray water onto it. Cleaning Air Inlet and Outlet (every 2 months) Clean the air inlet and outlet with a soft brush. - Page 18 cLEANINg mETHOD Cleaning the water tank (daily) Separate the water tank from the side of the product and open the water tank cap at the bottom of the water tank by turning it counterclockwise. If there is any residual water in the water tank, empty the water tank before cleaning it.
- Page 19 Cleaning the water tank (daily) Dry the water tank completely in a shady location to remove all moisture before installing it. To operate in humidifying air purification mode: Remove any moisture from outside the water tank, fill up the water tank with water and install the water tank.
- Page 20 cLEANINg mETHOD Separate the humidification filter, the blocking film and the water tray cover from the water tray in this sequence, and then wash the water tray with a damp, soft cloth or cleaning brush using a neutral detergent under flowing water. Wipe away the moisture from the water tray with a soft, dry cloth and dry it in the shade.
- Page 21 Always unplug the unit before cleaning the filters. The Pre-filter is reusable by removing dust or cleaning it with water. If the Pre-filter is not cleaned for a long time, the product performance may deteriorate. Tips The Custom, Deodorization, and ANTI-FLU™ filters cannot be reused even when cleaned.
-
Page 22: Filter Replacement
FILTER REPLAcEmENT Check that the ‘front’ of each filter is facing in the correct direction. To maintain the optimal performance of the product, use the original Coway filters. Tips Always unplug the unit before replacing the filters. Replacing the air purification filter When replacing the HEPA filter, check that the front is facing the correct direction. - Page 23 Remove the anti-scale filter case from the water tank cap by turning it counterclockwise and then replace it. Replacing the anti-bacterial filter Separate the water tank from the product and separate the water tray from the side of the product by pulling it. Remove the anti-bacterial filter by pulling it upward and replace it.
-
Page 24: Natural Vaporization Humidification
NATURAL vAPORIzATION HUmIDIFIcATION Operating mechanism The humidification method adopted by this product is a natural vaporization humidification type. The Dry air Humid air humidification part consists of three parts, the water tank, the water tray and the humidification filter. The water tank supplies water to the water tray and the humidification filter installed in the water tray absorbs water. - Page 25 TROUBLESHOOTINg The air purifier may operate abnormally because of a minor issue or because the user is unfamiliar with the product and not because of a product malfunction. In such a case, problems can be solved easily without help from the Service Center by checking the following. If the problem remains unsolved, please call our Service Center.
-
Page 26: Specifications
SPEcIFIcATIONS Air Purifier Product Name Model APM-1010DH Power Supply 220 V - 240 V~ 50 Hz / 60 Hz Phase Single Phase 40 W (for the air purification function only) / Power Consumption 50 W (for the humidifying air purification function) - Page 27 mEmO...
- Page 28 FONcTIONNALITÉS Un système de filtre ANTI-gRIPPE HEPA™ innovant Le filtre novateur ANTI-GRIPPE HEPA™ de Coway permet de piéger les microparticules et d’éliminer jusqu’à 99,9 % des virus. Ce système de filtre a été optimisé pour retirer rapidement les polluants contenus dans l’air.
- Page 29 Merci d’avoir choisi le Veuillez lire attentivement le manuel d’utilisation afin d’utiliser et d’entretenir votre appareil de manière appropriée. En cas de problème d’utilisation, consultez la section Dépannage du présent manuel. La carte de garantie étant incluse dans ce manuel, conservez ce dernier dans un endroit sûr.
-
Page 30: Consignes De Sécurité
cONSIgNES DE SÉcURITÉ Les consignes suivantes concernent la sécurité de l’utilisateur et doivent être respectées. Ces consignes permettent d’assurer la sécurité de l’utilisateur et d’éviter d’endommager l’appareil. Veuillez lire attentivement ces consignes et respecter les instructions d’utilisation. Danger : Le non-respect des précautions ci-dessous peut entraîner un risque de blessures graves, voire mortelles. - Page 31 • Si le cordon d’alimentation est endommagé, ne tentez pas de le remplacer vous-même. Appelez un centre de réparation pour le faire remplacer. • N’installez pas l’appareil à proximité d’une source de chaleur. • N’installez pas l’appareil dans un endroit exposé à l’humidité ou à l’eau (ex. : eau de pluie).
-
Page 32: Avertissement
cONSIgNES DE SÉcURITÉ Avertissement : En cas de-non respect des consignes ci-dessous, il existe un risque de blessures graves ou de dommages matériels. • N’insérez pas le doigt ou tout corps étranger dans les entrées et sorties d’air. • Ne laissez pas les enfants se suspendre au produit ou grimper dessus. - Page 33 Attention : En cas de-non respect des consignes ci-dessous, il existe un risque de blessures légères ou de dommages matériels. • N’installez pas l’appareil sur une surface inclinée. • Évitez de soumettre l’appareil à un choc brutal. • Pendant l’utilisation, placez l’appareil à au moins 20 cm des murs ou des objets situés à...
-
Page 34: Nom Des Pièces
NOm DES PIÈcES vue de face / de dessus Poignée voyant capteur de indiquant la particules qualité de l’air capot avant Réservoir d’eau Plateau d’eau Filtre Filtre d’humidification d’humidification frontal arrière voyants/ Sortie d’air boutons... - Page 35 Composants d’affichage / Composants de commande composants d’affichage composants fonctionnels voyants de purification et voyants de mode voyant de débit d'air d'humidification de l'air Bouton de mise en marche Bouton de mode Bouton de débit d'air voyant d'humidité actuelle/sélectionnée voyant minuterie désactivée Bouton d'humidité...
-
Page 36: Processus De Purification De L'air
(ex. : odeurs de cuisine). Filtre ANTI-gRIPPE HEPA™ Le filtre novateur ANTI-GRIPPE HEPA™ de Coway permet de piéger les microparticules et d’éliminer jusqu’à 99,9 % des virus. Le ginkgo et le sumac détruisent les protéines situées à la surface des virus. -
Page 37: Processus D'humidification De L'air
PROcESSUS D’HUmIDIFIcATION DE L’AIR Processus de purification de l'air en l'humidifiant Réservoir d’eau Il contient 3 l d’eau, procure un effet anti-bactérien et facilite l’échange d’ion de l’eau. Plateau d’eau Il fournit la quantité d’eau appropriée à partir du réservoir vers le filtre d’humidification et procure un effet anti-bactérien. - Page 38 AvANT UTILISATION Filtre d'humidification Séparez le réservoir d’eau. Séparez le plateau d’eau comme indiqué sur la figure. Installez le filtre d’humidification pour lequel l’emballage plastique a été retiré. Vue avant Vue arrière Installez le filtre de sorte que le filtre mince soit orienté vers l’avant et le filtre épais vers l’arrière.
- Page 39 UTILISATION DE L’APPAREIL Brancher la fiche d’alimentation à la prise électrique avant de faire fonctionner le produit. Lorsque le purificateur d’air est allumé, il fonctionne automatiquement en mode Auto. Conseils Pour faire fonctionner en mode manuel Mettez l’appareil en marche en appuyant sur le bouton de mise sous tension et sélectionnez un débit d’air en appuyant sur le bouton de débit d’air.
- Page 40 UTILISATION DE L’APPAREIL Fonction Minuterie désactivée ACTIvEE/DESACTIvEE A l’aide de la fonction de minuterie désactivée, vous pouvez sélectionner 1, 4 ou 8 heures avant l’arrêt de l’appareil. Pour annuler la minuterie désactivée, appuyez sur le bouton de minuterie désactivée jusqu’à ce que le voyant correspondant s’éteigne.
- Page 41 RÉgLER LE cAPTEUR DE PARTIcULE L’appareil est réglé en usine sur le niveau Sensibilité normale. Si la qualité de l’air reste très mauvaise après deux heures de fonctionnement ou très bonne pendant plus d’une heure alors que l’air ne semble pas sain, l’utilisateur peut lui-même régler la sensibilité...
- Page 42 REmPLISSAgE DU RÉSERvOIR D’EAU Pour remplir le réservoir d'eau Séparez le réservoir d’eau du côté de l’appareil en tirant le loquet de séparation. Retirez le bouchon du réservoir en le tournant en sens antihoraire. Remplissez le réservoir avec de l’eau et tournez le bouchon en sens horaire jusqu’à...
-
Page 43: Nettoyage De L'appareil
NETTOYAgE DE L’APPAREIL Débranchez toujours l’appareil avant son nettoyage. N’utilisez pas de produits de nettoyage contenant des solvants organiques Conseils (ex. : solvants, diluants, etc.), de l’eau de Javel, du chlore ou des agents abrasifs. Ne mettez pas l’appareil dans l’eau ni ne vaporisez pas de l’eau dessus. Nettoyage de l'entrée et de la sortie d'air (tous les 2 mois) Nettoyez l’entrée et la sortie d’air à... - Page 44 NETTOYAgE DE L’APPAREIL Nettoyage du réservoir d'eau (quotidien) Séparez le réservoir d’eau du côté de l’appareil, ouvrez le bouchon du réservoir situé au bas du réservoir en le tournant en sens antihoraire. S’il subsiste de l’eau dans le réservoir, videz-la avant de le nettoyer. Séparez le filtre anti-tartre du bouchon du réservoir.
- Page 45 Nettoyage du réservoir d'eau (quotidien) Séchez complètement le réservoir dans un emplacement situé à l’abri du soleil pour retirer toute l’humidité avant de l’installer. Pour activer le mode de purification de l’air en l’humidifiant : Retirez toute humidité de l’extérieur du réservoir, remplissez le réservoir d’eau et installez-le.
- Page 46 NETTOYAgE DE L’APPAREIL Séparez le filtre d’humidification, le film de blocage et le capot du plateau selon cet ordre, lavez ensuite le plateau sous l’eau courante à l’aide d’un chiffon doux humide ou d’une brosse en utilisant un produit de nettoyage neutre.
- Page 47 Débranchez toujours l’appareil avant de nettoyer les filtres. Le pré-filtre est réutilisable (Retirez la poussière ou nettoyez-le à l’eau). Si le pré-filtre n’est pas nettoyé régulièrement, l’efficacité de l’appareil peut diminuer. Les filtres personnalisé, de désodorisation et ANTI-GRIPPE™ ne peuvent pas être Conseils réutilisés même après nettoyage.
-
Page 48: Remplacement Du Filtre
Vérifiez que les côtés « avant » de chaque filtre soient orientés dans le bon sens. Pour assurer le fonctionnement optimal du produit, utilisez toujours des filtres Conseils originaux Coway. Débranchez toujours l’appareil avant de remplacer les filtres. Remplacement du filtre de purification de l'air Lors du remplacement du filtre HEPA, veillez à... - Page 49 Retirez le boîtier du filtre anti-tartre du bouchon du réservoir en le tournant en sens antihoraire et remplacez-le. Remontage du filtre anti-tartre Séparez le réservoir de l’appareil et séparez le plateau du côté de l’appareil en le tirant. Retirez le filtre anti-bactérien en le tirant vers le haut et remplacez-le. Insérez le boîtier anti-bactérien dans le plateau afin que la flèche indique l’intérieur du filtre d’humidification.
- Page 50 HUmIDIFIcATION PAR vAPORISATION NATURELLE Mécanisme de fonctionnement La méthode d’humidification adoptée par cet appareil est de type à vaporisation naturelle. La partie humidification Air sec Air humide est composée de 3 pièces, le réservoir d’eau, le plateau et le filtre d’humidification. Le réservoir d’eau fournit l’eau au plateau et le filtre d’humidification installé...
- Page 51 DÉPANNAgE Il peut arriver que le purificateur d’air fonctionne de façon anormale, sans toutefois provoquer d’endommagement ; la raison la plus courante en est que l’utilisateur n’est pas habitué à utiliser l’appareil et non que l’appareil présente un dysfonctionnement réel. Dans ce cas-là, vous pouvez résoudre vous-même certains problèmes sans faire appel au centre de réparation en contrôlant les points suivants.
- Page 52 TEcHNIQUES Purificateur d’air Nom du produit Modèle APM-1010DH Alimentation 220 V - 240 V~ 50 Hz / 60 Hz Phase Monophasé 40 W (pour la seule fonction de purification de l'air) / Consommation électrique 50 W (pour la fonction de purification de l'air en l'humidifiant)
- Page 53 mEmO...
- Page 54 Un innovador sistema de filtro ANTI-FLU HEPA™ El innovador ANTI-FLU HEPA™ de Coway capta micropartículas e inactiva virus hasta un 99,9%. El sistema de filtro fue optimizado para eliminar rápidamente contaminantes del aire. - Este electrodoméstico no es un dispositivo médico.
- Page 55 ESTImADOS cLIENTES Purificador de aire coway. Gracias por utilizar el Lean el manual del usuario para un correcto uso y mantenimiento del producto. Si se encontrara un problema al utilizar el producto, puede ser posible resolverlo consultando el manual del usuario. Dado que este manual contiene la garantía del producto, debe guardarse en un lugar seguro.
- Page 56 INFORmAcIÓN DE SEgURIDAD La siguiente información es para la seguridad del usuario y debe leerse atentamente. Es para asegurar el bienestar del usuario e impedir daños. Lea las precauciones con cuidado y utilice el producto correctamente. Peligro: Si no se adoptan las siguientes precauciones se pueden producir lesiones físicas graves o incluso la muerte.
- Page 57 • No instale el producto en lugares con humedad o expuestos al agua (de lluvia). • No utilice el producto en lugares donde se utilicen o almacenen gases inflamables o materiales combustibles. • No introduzca objetos filosos, como una barrena, en el sensor de contaminación.
- Page 58 INFORmAcIÓN DE SEgURIDAD Advertencia: De no adoptar las precauciones siguientes se pueden producir lesiones de consideración o daños a la propiedad. • No introduzca los dedos ni objetos extraños en la entrada o salida de aire. • No permita que los niños se cuelguen del producto o se trepen a él.
- Page 59 Precaución: De no adoptar las precauciones siguientes se pueden producir lesiones leves o daños a la propiedad. • No instale el producto sobre una superficie inclinada. • No emplee la fuerza con la unidad ni la golpee. • Cuando se utilice el producto, mantenga una distancia de al menos 20 cm desde las paredes u objetos adyacentes y de 30 cm a 60 cm sobre el producto.
- Page 60 NOmBRES DE LAS PIEzAS Parte frontal / vista superior Indicador de la calidad del aire Sensor de partículas Depósito de Tapa frontal agua Bandeja de agua Filtro de Filtro de humidificación humidificación frontal posterior Indicadores / Salida de aire botones...
- Page 61 Indicadores de estado y funcionamiento Indicadores de estado Funcionamiento Purificación de aire, indicadores Indicador de modo Indicador de de humidificación flujo de aire Botón de encendido Botón de modo Botón de velocidad del flujo del aire Indicador de humedad actual/seleccionado Indicador de temporizador de apagado automático Sensor de Botón de humedad...
- Page 62 Filtro ANTI-FLU HEPA™ El innovador ANTI-FLU HEPA™ de Coway capta micropartículas e inactiva virus hasta un 99,9 %. Las sustancias naturales de los árboles de ginko y zumaque japoneses destruyen la proteína en la superficie de los virus.
- Page 63 PROcESO DE HUmIDIFIcAcIÓN DE AIRE Proceso de humidificación y purificación del aire Depósito de agua Contiene 3 litros de agua, brinda un efecto antibacterial y promueve el intercambio de iones en el agua. Bandeja de agua Suministra la cantidad adecuada de agua del depósito de agua al filtro de humidificación y ofrece un efecto antibacterial.
- Page 64 PREPARATIvOS Filtro de humidificación Separe el depósito de agua. Separe la bandeja de agua como se indica en la figura. Instale el filtro de humidificación para el cual se retiró el embalaje plástico. Parte frontal Parte Instale el filtro de modo que el filtro delgado esté orientado posterior hacia la parte frontal y el filtro grueso esté...
- Page 65 cÓmO UTILIzAR Conecte el enchufe al tomacorriente eléctrico antes de poner en funcionamiento el producto. Consejos Cuando el purificador de aire se enciende, funciona siempre en el modo automático. Para operación en modo manual Encienda el producto con el botón de encendido y seleccione la velocidad del flujo del aire presionando el botón de la velocidad del flujo del aire.
- Page 66 cÓmO UTILIzAR Temporizador de apagado ENCENDIDO/APAgADO Usando la función del temporizador de apagado, puede seleccionar 1, 4 u 8 horas antes de que se apague la unidad. Para cancelar el temporizador de apagado, presione el botón del temporizador de apagado hasta que se apague el indicador del temporizador de apagado.
- Page 67 AJUSTE DEL SENSOR DE PARTÍcULAS Cuando se envía el producto, el sensor de contaminación está configurado con la sensibilidad normal. Si el nivel de contaminación permanece en el nivel más alto después de 2 horas de funcionamiento o permanece en el nivel más bajo por más de 1 hora cuando el aire no parece limpio, los usuarios pueden ajustar la sensibilidad del sensor de contaminación.
- Page 68 LLENADO DEL DEPÓSITO DE AgUA Para llenar el depósito de agua con agua Separe el depósito de agua del lateral del producto tirando del pestillo de separación. Separe la tapa depósito de agua girándola en sentido contrario al de las agujas del reloj. Llene el depósito de agua con agua y gire la tapa del depósito de agua en el sentido de las agujas del reloj hasta que escuche un sonido.
- Page 69 mÉTODO DE LImPIEzA Desenchufe la unidad siempre antes de limpiarla. No utilice detergentes que contengan solventes orgánicos (solvente, diluyente, etc.), Consejos lavandina, cloro o productos abrasivos. No sumerja la unidad en agua ni rocíe agua sobre la unidad. Limpieza de la entrada y la salida de aire (cada 2 meses) Limpie la entrada y salida de aire con un cepillo blando.
- Page 70 mÉTODO DE LImPIEzA Limpieza del depósito de agua (diaria) Separe el depósito de agua del lateral del producto y abra la tapa del depósito de agua en la parte inferior del mismo girándola en el sentido contrario al de las agujas del reloj. Si hay agua residual en el depósito de agua, vacíelo antes de limpiarlo.
- Page 71 Limpieza del depósito de agua (diaria) Seque completamente el depósito de agua en un lugar a la sombra para eliminar toda la humedad antes de instalarlo. Para operar en un modo de humidificación y purificación de aire: Elimine la humedad del exterior de depósito de agua, llénelo con agua e instálelo.
- Page 72 mÉTODO DE LImPIEzA Separe el filtro de humidificación, la película de bloqueo y la tapa de la bandeja de agua de la bandeja de agua en esta secuencia y luego lave la bandeja de agua con un paño húmedo y suave o un cepillo limpio usando detergente neutro y agua corriente.
- Page 73 Desenchufe siempre la unidad antes de limpiar los filtros. El prefiltro puede reutilizarse eliminando el polvo o limpiándolo con agua. Si el prefiltro no se limpia por un largo tiempo, el desempeño del producto puede deteriorarse. Consejos Los filtros personalizados, de desodorización y ANTI-FLU™ no pueden reutilizarse incluso cuando están limpios.
-
Page 74: Reemplazo Del Filtro
REEmPLAzO DEL FILTRO Compruebe que la parte frontal de cada filtro esté orientada en la dirección correcta. Para mantener el óptimo desempeño del producto, utilice los filtros originales Coway. Consejos Desenchufe siempre la unidad antes de reemplazar los filtros. Reemplazo del filtro de purificación de aire Al reemplazar el filtro HEPA, verifique que la parte frontal esté... - Page 75 Retire el cartucho del filtro anti-sarro de la tapa del depósito de agua girándolo en el sentido contrario al de las agujas del reloj y reemplácelo. Reemplazo del filtro antibacterial Separe el depósito de agua del producto y la bandeja de agua del lateral del producto tirando de ella para retirarla.
- Page 76 HUmIDIFIcAcIÓN POR vAPORIzAcIÓN NATURAL Mecanismo de operación El método de humidificación adoptado por este producto es un tipo de humidificación por vaporización natural. La Aire seco Aire húmedo humidificación está compuesta por tres partes, el depósito de agua, la bandeja de agua y el filtro de humidificación. El depósito de agua suministra agua a la bandeja de agua y el filtro de humidificación instalado en la bandeja de agua absorbe agua.
- Page 77 SOLUcIÓN DE PROBLEmAS El purificador de aire puede que funcione anormalmente debido a problemas menores o porque el usuario no esté familiarizado con el producto, pero no por un defecto de éste. En tal caso, los problemas pueden resolverse fácilmente, sin la ayuda del centro de mantenimiento, con sólo verificar lo siguiente. Si el problema no se resuelve, llame a nuestro centro de mantenimiento.
- Page 78 ESPEcIFIcAcIONES Purificador de aire Nombre del producto Modelo APM-1010DH Suministro eléctrico 220 V - 240 V~ 50 Hz / 60 Hz Fase Monofásico 40 W (para la función de purificación de aire solamente) / Consumo de energía 50 W (para la función de humidificación y purificación de aire)
- Page 79 mEmO...
- Page 80 Innovativer HEPA-gRIPPEScHUTzFILTER™ Der innovative HEPA-GRIPPESCHUTZFILTER™ von Coway filtert Mikropartikel und beseitigt bis zu 99,9 % der Viren. Das Filtersystem wurde so optimiert, dass es Schadstoffe aus der Luft schnell beseitigen kann. - Dieses Produkt ist kein medizinisches Gerät. kombiniertes Luftreinigungs- und -befeuchtungssystem Dieses Gerät ist mit Hybridfunktionen ausgestattet, die während der Luftreinigung...
- Page 81 LIEBE kUNDEN coway-Luftwäscher Wir danken Ihnen, dass Sie sich für einen entschieden haben. Lesen Sie das Benutzerhandbuch, damit Sie das Gerät richtig einsetzen und pflegen können. Wenn Sie bei der Arbeit mit diesem Produkt auf ein Problem stoßen, werden Sie es mit Hilfe dieses Handbuchs lösen können.
- Page 82 SIcHERHEITSHINwEISE Die folgenden Informationen müssen beachtet werden, da sie der Sicherheit der Benutzer dienen. Sie sollen die Sicherheit der Benutzer gewährleisten und Sachschäden verhindern. Bitte lesen Sie die Sicherheitshinweise sorgfältig durch und verwenden Sie das Gerät entsprechend. gefahr: wenn Sie die unten aufgeführten Sicherheitshinweise nicht befolgen, können schwere verletzungen und sogar Tod die Folge sein.
- Page 83 • Wenn das Netzkabel beschädigt ist, ersetzen Sie das Kabel keinesfalls selbst. Wenden Sie sich an das Kundendienstcenter, um es ersetzen zu lassen. • Stellen Sie das Gerät nicht in der Nähe von Wärmequellen auf. • Stellen Sie das Gerät nicht an Orten auf, wo es Feuchtigkeit oder Wasser (Regenwasser) ausgesetzt ist.
- Page 84 SIcHERHEITSHINwEISE warnung: wenn Sie die unten aufgeführten Sicherheitshinweise nicht befolgen, können schwere Personen- und Sachschäden die Folge sein. • Stecken Sie niemals Ihre Finger oder andere Fremdkörper in den Lufteinlass oder -auslass. • Gestatten Sie nicht, dass sich Kinder an das Gerät hängen oder darauf klettern.
- Page 85 vorsicht: wenn Sie die unten aufgeführten Sicherheitshinweise nicht befolgen, können leichte Personen- und Sachschäden die Folge sein. • Stellen Sie das Gerät nicht auf geneigten Flächen auf. • Setzen Sie das Gerät keinen Stößen oder Schlägen aus. • Wenn das Gerät in Betrieb ist, halten Sie einen Abstand von mindestens 20 cm von Wänden oder benachbarten Objekten und einen Freiraum von 30 cm bis 60 cm über dem Produkt ein.
- Page 86 BEzEIcHNUNg DER TEILE vorderseite / Oberseite Handgriff Luftgüteanzeige Partikelfühler Frontabdeckung wassertank wasserschale vorderseite des Rückseite des Befeuchtungsfilters Befeuchtungsfilters Anzeigen / Luftauslass Bedientasten...
- Page 87 Anzeigeteil / bedienteil Anzeigeteil Bedienteil Anzeigen für Luftreinigung modusanzeige Luftgeschwindigkeitsanzeige und -befeuchtung Netztaste Betriebsartwahltaste Luftgeschwindigkeitstaste Aktuelle / gewählte Luftfeuchtigkeit Abchalttimeranzeige Luftfeuchtigkeitstaste Abchalttimertaste Lichtsensor Anzeigen für Luftreinigung und -befeuchtung Luftfeuchtigkeitstaste - Nur die Luftreinigungsanzeige ist eingeschaltet: Mit der Luftfeuchtigkeitstaste können Wenn der Wassertank leer ist, wird nur die Sie nacheinander eine der folgenden Luftfeuchtigkeiten einstellen: 40 % →...
- Page 88 Die Aktivkohlepartikel des Deo-Filters entfernen wirksam unangenehme Gerüche von Nahrungsmitteln und aus dem Haushalt. gRIPPEScHUTz-HEPAFILTER™ Der innovative HEPA-GRIPPESCHUTZFILTER™ von Coway filtert Mikropartikel und beseitigt bis zu 99,9 % der Viren. Natürliche Substanzen der Ginkgo-Pflanze und des japanischen Sumachbaums zerstören das Protein auf der Oberfläche der Viren.
- Page 89 LUFTBEFEUcHTUNgSPROzESS kombinierter Luftbefeuchtungs- und -reinigungsprozess Wassertank Der Wassertank hat ein Fassungsvermögen von 3 l, wirkt antibakteriell und unterstützt den Ionenaustausch im Wasser. Wasserschale Die Wasserschale gibt die benötigte Menge an Wasser aus dem Wassertank an den Befeuchtungsfilter ab und wirkt ebenfalls antibakteriell. Befeuchtungsfilter Der Befeuchtungsfilter absorbiert das Wasser.
- Page 90 vORBEREITUNg befeuchtungsfilter Nehmen Sie den Wassertank heraus. Entfernen Sie die Wasserschale wie in der Abbildung gezeigt. Entfernen Sie die Kunststoffverpackung des Befeuchtungsfilters, und setzen Sie ihn ein. Vorderseite Rückseite Setzen Sie den Filter so ein, dass die dünne Seite nach vorne und die dicke nach hinten zeigen.
- Page 91 vERwENDUNg Stöpseln Sie den Netzstecker in eine Steckdose ein, bevor Sie das Gerät in Betrieb nehmen. Wenn der Luftwäscher eingeschaltet wird, ist automatisch der automatische Modus Tipps eingestellt. Einsatz im manuellen Modus Schalten Sie das Gerät durch Drücken der Netztaste ein, und wählen Sie durch Drücken der Luftgeschwindigkeitstaste die gewünschten Luftgeschwindigkeit.
- Page 92 vERwENDUNg Aktivieren/Deaktivieren des Abchalttimers Mit der Timerfunktion können Sie auswählen, ob das Gerät nach 1, 4 oder 8 Stunden ausgeschaltet werden soll. Um den Abchalttimer zu deaktivieren, drücken Sie die Abchalttimertaste, bis die Abchalttimeranzeige erlischt. (1 Std. → 4 Std. → 8 Std. → abbrechen). verwendung der kombinierten Luftbefeuchtungs- und -reinigungsfunktion Um die kombinierte Luftbefeuchtungs- und -reinigungsfunktion zu nutzen, füllen Sie den Wassertank mit Wasser.
- Page 93 PARTIkELFÜHLER EINSTELLEN Beim Versand ist der Verschmutzungssensor des Geräts auf normale Empfindlichkeit eingestellt. Wenn der Verschmutzungsgrad nach zweistündigem Betrieb weiterhin als maximal oder länger als 1 Stunde als minimal angezeigt wird, obwohl die Luft unsauber erscheint, passen Sie die Empfindlichkeit des Verschmutzungssensors an: Halten Sie die Tasten für Luftgeschwindigkeit und Modus bei eingeschaltetem Luftwäscher gleichzeitig mindestens 3 Sekunden...
- Page 94 BEFÜLLEN DES wASSERTANkS gehen Sie folgendermaßen vor, um den wassertank mit wasser zu füllen: Entnehmen Sie den Wassertank an der Seite des Geräts, indem Sie am Verschluss ziehen. Entfernen Sie den Deckel des Wassertanks, indem Sie ihn gegen den Uhrzeigersinn drehen. Füllen Sie den Wassertank mit Wasser, und drehen Sie den Deckel des Wassertanks im Uhrzeigersinn, bis er hörbar einrastet.
- Page 95 REINIgUNg Ziehen Sie stets den Stecker aus der Steckdose, bevor Sie das Gerät reinigen. Verwenden Sie keine Reinigungsmittel, die organische Lösungsmittel (Fettlöser, Tipps Verdünner, usw.), Bleichmittel, Chlor oder Scheuermittel enthalten. Stellen Sie das Gerät nicht ins Wasser, und sprühen Sie kein Wasser darauf. Reinigen von Lufteinlass und Luftauslass (alle 2 Monate) Reinigen Sie den Lufteinlass und den Luftauslass mit einer weichen Bürste.
- Page 96 REINIgUNg Reinigen des wassertanks (täglich) Entnehmen Sie den Wassertank an der Seite des Geräts, und öffnen Sie den Wassertankdeckel an der Unterseite des Wassertanks, indem Sie ihn gegen den Uhrzeigersinn drehen. Entfernen Sie ggf. im Wassertank verbliebenes Wasser, bevor Sie den Tank reinigen. Entfernen Sie den Filter gegen Kesselsteine am Wassertankdeckel.
- Page 97 Reinigen des wassertanks (täglich) Lassen Sie den Wassertank an einem schattigen Ort vollständig trocknen, um vor dem Einsetzen alle Feuchtigkeit zu entfernen. Einsatz im kombinierten Luftbefeuchtungs- und -reinigungsmodus: Wischen Sie die Feuchtigkeit an den Außenflächen des Wassertanks ab, füllen Sie Wasser in den Tank, und setzen Sie diesen ein.
- Page 98 REINIgUNg Entfernen Sie nacheinander den Befeuchtungsfilter, den Sperrfilm und die Kappe von der Wasserschale, und waschen Sie die Wasserschale unter fließendem Wasser mit einem feuchten, weichen Tuch oder einer Reinigungsbürste und neutralem Reinigungsmittel. Wischen Sie die Feuchtigkeit an der Wasserschale mit einem weichen, trockenen Tuch ab, und lassen Sie sie an einem schattigen Ort trocknen.
- Page 99 Ziehen Sie stets den Stecker aus der Steckdose, bevor Sie die Filter reinigen. Der Vorfilter kann erneut verwendet werden, wenn Sie den Staub entfernen und ihn mit Wasser reinigen. Wenn der Vorfilter lange Zeit nicht gereinigt wird, kann sich die Geräteleistung verschlechtern.
- Page 100 FILTERTAUScH Überprüfen Sie, ob die „Vorderseite“ jedes Filters in die richtige Richtung zeigt. Verwenden Sie die Originalfilter von Coway, um die optimale Leistung des Geräts zu erhalten. Tipps Ziehen Sie stets den Stecker aus der Steckdose, bevor Sie die Filter austauschen.
- Page 101 Lösen Sie den Filter gegen Kesselsteine durch Drehen gegen den Uhrzeigersinn vom Wassertankdeckel, und tauschen Sie ihn aus. Austauschen des antibakteriellen Filters nehmen Sie den Wassertank aus dem Gerät, und ziehen Sie die Wasserschale seitlich aus dem Gerät heraus. Entfernen Sie den antibakteriellen Filter, indem Sie ihn nach oben ziehen, und tauschen Sie ihn aus.
- Page 102 NATÜRLIcHE LUFTBEFEUcHTUNg DURcH vERDUNSTUNg Funktionsmechanismus Dieses Gerät befeuchtet die Luft mit Hilfe von Verdunstung. Das Befeuchtungssystem besteht aus drei Teilen: dem Trockene Luft Feuchte Luft Wassertank, der Wasserschale und dem Befeuchtungsfilter. Der Wassertank stellt der Wasserschale das benötigte Wasser bereit, das anschließend von dem in die Wasserschale eingesetzten Befeuchtungsfilter absorbiert wird.
- Page 103 FEHLERBEHEBUNg Wenn der Benutzer nicht mit dem Produkt vertraut ist, kann der Luftwäscher bereits aufgrund geringfügiger Probleme gestört sein. Es liegt dann nicht unbedingt eine Gerätestörung vor. In solchen Fällen können Sie das Problem auch ohne Anruf beim Kundendienst einfach lösen, indem Sie die folgenden Punkte abprüfen.
-
Page 104: Technische Daten
TEcHNIScHE DATEN Luftwäscher Gerätebezeichnung Modell APM-1010DH Stromversorgung 220 V - 240 V~ 50 Hz / 60 Hz Phasen Einphasig 40 W (bei alleiniger Verwendung der Luftreinigungsfunktion) / Stromverbrauch 50 W (bei kombinierter Luftbefeuchtungs- und -reinigungsfunktion) Isolierungsgrad Gerät der Klasse 2... - Page 105 mEmO...
- Page 106 Innovativo sistema di filtraggio ANTI-FLU HEPA™ L’innovativo filtro ANTI-FLU HEPA™ di Coway cattura le microparticelle e inattiva i virus fino al 99,9%. Il sistema di filtraggio è stato ottimizzato in modo da rimuovere rapidamente i contaminanti dall’aria. - Questo apparecchio non è un dispositivo medicale.
- Page 107 Depuratore d’aria coway. Grazie per aver acquistato un Per utilizzare e mantenere il prodotto in modo ottimale, si prega di leggere il Manuale dell’utente. In caso di problemi durante l’uso del prodotto, è possibile risolverli consultando il Manuale dell’utente.
- Page 108 INFORmAzIONI SULLA SIcUREzzA L’utente è tenuto ad osservare le precauzioni per la sicurezza riportate di seguito. Tali precauzioni sono volte a garantire la sicurezza dell’utente e a impedire eventuali danni alla proprietà. Leggere attentamente le precauzioni indicate e utilizzare il prodotto di conseguenza. Pericolo: La mancata osservanza delle precauzioni riportate di seguito può...
- Page 109 • Se il cavo di alimentazione è danneggiato, non sostituire il cavo autonomamente. Per effettuare la sostituzione rivolgersi al Centro di assistenza. • Non installare il prodotto vicino a fonti di calore. • Non installare il prodotto in luoghi esposti a umidità o acqua (pioggia). •...
- Page 110 INFORmAzIONI SULLA SIcUREzzA Attenzione: La mancata osservanza delle precauzioni riportate di seguito può comportare lesioni personali gravi o danni alla proprietà. • Non inserire dita o corpi estranei nella presa d’ingresso o di uscita aria. • Non lasciare che i bambini si appendano o si arrampichino sul prodotto.
- Page 111 Avvertenza: La mancata osservanza delle precauzioni riportate di seguito può comportare lievi lesioni personali o danni alla proprietà. • Non installare il prodotto su una superficie inclinata. • Non applicare una forza eccessiva né urtare il prodotto. • Quando il prodotto è in uso, mantenere una distanza di almeno 20 cm dalle pareti o dagli oggetti adiacenti e di 30-60 cm al di sopra dell’unità.
- Page 112 NOmENcLATURA DELLE PARTI vista frontale / Superiore Indicatore di qualità dell'aria manico Sensore di particelle coperchio Serbatoio anteriore dell'acqua vassoio dell'acqua Filtro di Filtro di umidificazione umidificazione anteriore posteriore Spie / tasti Uscita aria...
- Page 113 Spia display / spia operativa Indicazione delle parti Tasti funzione Spie di depurazione e di Spia modalità Spia Flusso d'aria umidificazione dell'aria Tasto di alimentazione Tasto modalità Tasto velocità flusso d'aria Spia Umidità corrente/selezionata Spia Timer di spegnimento Tasto Umidità Tasto Timer di spegnimento Sensore luce ambiente flusso d’aria durante una modalità...
- Page 114 Il carbone attivo del filtro deodorante elimina in modo efficace gli odori di cucina e altri sgradevoli odori domestici. Filtro ANTI-FLU HEPA™ L’innovativo filtro ANTI-FLU HEPA™ di Coway cattura le microparticelle e inattiva i virus fino al 99,9 %. Sostanze naturali estratte dal Ginkgo e dal Sommacco giapponese distruggono le proteine sulla superficie dei virus.
- Page 115 PROcESSO DI UmIDIFIcAzIONE DELL’ARIA Processo di depurazione e umidificazione Serbatoio dell’acqua Ha una capienza di 3 litri, svolge un’azione antibatterica e stimola lo scambio di ioni dell’acqua. Vassoio dell’acqua Fornisce la giusta quantità d’acqua, proveniente dal serbatoio, al filtro di umidificazione e svolge un’azione antibatterica.
- Page 116 PREPARAzIONI Filtro di umidificazione Separare il serbatoio dell’acqua. Separare il vassoio dell’acqua come indicato in figura. Installare il filtro di umidificazione dopo aver rimosso l’involucro di plastica. Anteriore Posteriore Installare il filtro in modo che la parte sottile sia rivolta in avanti e la parte spessa sia rivolta indietro.
- Page 117 cOmE UTILIzzARLO Inserire la spina elettrica nella presa prima di accendere il prodotto. Una volta acceso il depuratore d’aria, il prodotto inizierà a funzionare in modalità Auto. Suggerimenti Funzionamento in modalità Manuale Accendere il prodotto premendo il tasto Power e selezionare la velocità desiderata premendo il tasto Velocità...
- Page 118 cOmE UTILIzzARLO Timer di spegnimento ON/OFF Mediante la funzione Timer di spegnimento, è possibile selezionare 1, 4 o 8 ore come periodo di tempo prima dello spegnimento automatico dell’unità. Per annullare il Timer di spegnimento, tenere premuto il tasto relativo fino a quando la spia si spegne. (1 ora →...
- Page 119 REgOLAzIONE DEL SENSORE DI PARTIcELLE Alla consegna del prodotto, il sensore di contaminazione è impostato su una sensibilità normale. Se il livello di contaminazione rimane sul livello massimo dopo 2 ore di funzionamento, o al livello minimo per oltre 1 ora con una contaminazione dell’aria elevata, l’utente è in grado di regolare la sensibilità del sensore.
- Page 120 RIEmPImENTO DEL SERBATOIO DELL’AcQUA Per riempire il serbatoio dell'acqua Estrarre il serbatoio dell’acqua lateralmente rispetto all’unità tirando il gancio di fissaggio. Rimuovere il coperchio dal serbatoio ruotandolo in senso antiorario. Riempire il serbatoio con acqua e rimontare il coperchio ruotandolo in senso orario fino ad avvertire uno scatto.
- Page 121 mETODO DI PULIzIA Prima di effettuare la pulizia, scollegare sempre l’unità dalla presa di corrente. Non utilizzare detergenti contenenti solventi organici (solventi, diluenti, ecc), Suggerimenti candeggina, cloro o abrasivi. Non immergere l’unità in acqua né spruzzarvi sopra acqua. Pulizia ingresso e uscita aria (ogni 2 mesi) Pulire le prese di ingresso e uscita aria con una spazzola morbida.
- Page 122 mETODO DI PULIzIA Pulizia del serbatoio dell'acqua (giornaliera) Estrarre il serbatoio dell’acqua dal lato del prodotto ed aprire il coperchio del serbatoio ruotandolo in senso antiorario. Se vi è dell’acqua residua, svuotarlo prima di procedere alla pulizia. Separare il filtro anticalcare dal coperchio del serbatoio dell’acqua. Aggiungere acqua e una piccola quantità...
- Page 123 Pulizia del serbatoio dell'acqua (giornaliera) Prima di rimontarlo, lasciare asciugare il serbatoio all’ombra per eliminare tutta l’umidità residua. Per utilizzare la modalità di depurazione e umidificazione dell’aria: Rimuovere eventuale umidità residua dal serbatoio dell’acqua, riempirlo d’acqua e montarlo all’interno del prodotto.
- Page 124 mETODO DI PULIzIA Estrarre il filtro di umidificazione, la pellicola di blocco e il coperchio del vassoio dell’acqua, in questa sequenza, quindi lavarli in acqua corrente utilizzando un panno morbido inumidito o una spazzola e detergente neutro. Asciugare l’umidità residua dal vassoio dell’acqua utilizzando un panno morbido e asciutto e lasciarlo asciugare all’ombra.
- Page 125 Prima di effettuare la pulizia dei filtri, scollegare sempre l’unità dalla presa di corrente. Il pre-filtro è riutilizzabile dopo aver rimosso la polvere o averlo lavato in acqua. Se il pre-filtro non è stato pulito per molto tempo, le prestazioni del prodotto potrebbero degradarsi.
- Page 126 SOSTITUzIONE DEL FILTRO Controllare che la parte ’anteriore’ di ogni filtro sia rivolta nella giusta direzione. Al fine di preservare le prestazioni ottimali del prodotto, usare filtri originali Coway. Prima di effettuare la sostituzione dei filtri, scollegare sempre l’unità dalla presa di Suggerimenti corrente.
- Page 127 Rimuovere il gruppo del filtro anticalcare dal coperchio del serbatoio dell’acqua ruotandolo in senso antiorario e sostituirlo. Sostituzione del filtro antibatterico Separare il serbatoio dell’acqua dal prodotto e rimuovere il vassoio dell’acqua estraendolo dalla parte laterale del prodotto. Rimuovere il filtro antibatterico tirandolo verso l’alto e sostituirlo. Inserire il gruppo antibatterico nel vassoio dell’acqua in modo che la freccia sia rivolta verso l’interno del filtro di umidificazione.
- Page 128 UmIDIFIcAzIONE NATURALE mEDIANTE vAPORIzzAzIONE Meccanismo di funzionamento Il metodo di umidificazione adottato in questo prodotto è di tipo naturale mediante vaporizzazione. La parte che Aria secca Aria umida provvede all’umidificazione è costituita da tre componenti: il serbatoio dell’acqua, il vassoio dell’acqua, e il filtro di umidificazione.
- Page 129 RISOLUzIONE DEI PROBLEmI Il depuratore d’aria potrebbe funzionare in modo anomalo a causa di piccoli problemi o di scarsa dimestichezza dell’utente con il prodotto, e non a causa di un malfunzionamento dell’unità. Controllando quanto descritto di seguito, è possibile risolvere tali problemi facilmente anche senza l’aiuto dell’assistenza tecnica.
- Page 130 SPEcIFIcHE Depuratore d’aria Nome del prodotto Modello APM-1010DH Alimentazione 220 V - 240 V~ 50 Hz / 60 Hz Fase 1 fase 40 W (solo per la funzione di depurazione) / Consumo 50 W (per la funzione di depurazione e umidificazione)
- Page 131 mEmO...
- Page 132 FUNcTIES Een innovatief ANTI-FLU HEPA™-filtersysteem Het innovatieve ANTI-FLU HEPA™-systeem van Coway vangt microdeeltjes en maakt virussen onschadelijk, tot 99.9 %. Het filtersysteem is geoptimaliseerd voor het snel verwijderen van verontreinigde stoffen uit de lucht. - Dit is geen medisch apparaat.
- Page 133 Hartelijk dank voor het gebruiken van de Lees de gebruikershandleiding door zodat u het product op de juiste wijze kunt gebruiken en onderhouden. Als u een probleem tegenkomt bij het gebruik van het product, kunt u dit op eenvoudige wijze oplossen met behulp van de gebruikershandleiding.
- Page 134 vEILIgHEIDSINFORmATIE De volgende informatie dient ten behoeve van de veiligheid van de gebruiker en moet in acht worden genomen. Hiermee beschermt u de veiligheid van gebruikers en voorkomt u materiële schade. Lees de voorzorgsmaatregelen zorgvuldig door en gebruik het product op correcte wijze. gevaar: indien de onderstaande veiligheidsvoorschriften niet in acht worden genomen, kan dit leiden tot ernstig letsel of zelfs de dood.
- Page 135 • Plaats het apparaat niet in de buurt van warmtebronnen. • Plaats het product niet op een plek waar het wordt blootgesteld aan vocht of water (regenwater). • Gebruik het product niet op plekken waar ontvlambare gassen of brandbare materialen worden gebruikt of opgeslagen. •...
- Page 136 vEILIgHEIDSINFORmATIE waarschuwing: indien de onderstaande veiligheidsvoorschriften niet in acht worden genomen, kan dit leiden tot ernstig fysiek letsel of materiële schade. • Steek geen vingers of vreemde voorwerpen in de luchtinlaat of -uitlaat. • Laat kinderen niet aan het product hangen of er bovenop klimmen.
- Page 137 Let op: indien de onderstaande veiligheidsvoorschriften niet in acht worden genomen, kan dit leiden tot licht fysiek letsel of materiële schade. • Installeer het product niet op een hellend oppervlak. • Oefen geen kracht uit op het product en stoot er niet tegenaan. •...
- Page 138 ONDERDEELNAmEN voor- / bovenaanzicht Luchtkwaliteitsindicator Handgreep Deeltjessensor watertank klep voorzijde waterbak voorste Achterste bevochtigingsfilter bevochtigingsfilter Indicatoren/ Luchtuitlaat toetsen...
- Page 139 Indicatiegedeelte / bedieningsgedeelte Indicatiegedeelte Bedieningsgedeelte Luchtzuiverings- en werkstandindicator Luchtstroomindicator luchtbevochtigingsindicatoren Aan/uit-toets modustoets Luchtstroomsnelheidstoets Huidige/geselecteerde vochtigheidsindicator Uitschakeltimerindicator Luchtvochtigheidstoets Uitschakeltimertoets Lichtsensor werkstand.) Luchtzuiverings- en luchtbevochtigingsindicatoren Luchtvochtigheidstoets - Alleen de luchtzuiveringsindicator brandt: Met de luchtvochtigheidstoets kunt u de aangezien de watertank leeg is, wordt alleen de vochtigheidsgraad instellen: 40% →...
- Page 140 De actieve koolfstofdeeltjes van het ontgeuringsfilter elimineren of effectieve wijze voedselgeuren en onaangename huishoudelijke geurtjes. ANTI-FLU HEPA™-filter Het innovatieve ANTI-FLU HEPA™-systeem van Coway vangt microdeeltjes en maakt virussen onschadelijk, tot 99.9 %. Natuurlijke stoffen die worden uitgescheiden door de Gingko en Japanse sumacbomen verwoesten de proteïne op het oppervlak van virussen.
- Page 141 LUcHTBEvOcHTIgINgSPROcES Luchtbevochtigings-luchtzuiveringsproces Watertank De watertank bevat 3 liter water, heeft een anitbacterieel effect en bevordert de ionenuitwisseling van water. Waterbak De waterbak voorziet het bevochtigingsfilter van de juiste hoeveelheid water uit de watertank en heeft een antibacterieel effect. Bevochtigingsfilter Het bevochtigingsfilter absorbeert water. Wanneer de gezuiverde lucht uit de luchtuitlaat het bevochtigingsfilter passeert, wordt er natuurlijk bevochtigd lucht gegenereerd.
- Page 142 vOORBEREIDINgEN bevochtigingsfilter Verwijder de watertank. Verwijder de waterbak zoals in de afbeelding wordt getoond. Installeer het bevochtigingsfilter waarvan de plastic verpakking is verwijderd. Voorzijde Achterzijde Installeer het filter zodanig dat het dunne zich aan de voorzijde en het dikke filter zich aan de achterzijde bevindt. Hoewel het bevochtigingsfilter een voor- en achterkant heeft, heeft het geen boven- en onderkant.
- Page 143 DE vERScHILLENDE FUNcTIES gEBRUIkEN Steek de stekker in het stopcontact voordat u het product in gebruik neemt. Wanneer de luchtzuiveraar wordt ingeschakeld, wordt automatisch de automatische Tips werkstand geactiveerd. De handmatige stand gebruiken Schakel het product in door op de aan/uit-toets te drukken en selecteer een luchtstroomsnelheid door op de luchtstroomsnelheidstoets te drukken.
- Page 144 DE vERScHILLENDE FUNcTIES gEBRUIkEN Uitschakeltimer AAN/UIT Met de uitschakeltimerfunctie kunt u een uitschakeltijd selecteren, zodat het apparaat na 1, 4 of 8 uur automatisch wordt uitgeschakeld. Om een uitschakeltimer te annuleren, drukt u op de uitschakeltimertoets totdat de uitschakeltimerindicator is uitgeschakeld.
- Page 145 DEELTJESSENSOR AANPASSEN Bij uitlevering van het product is de vervuilingssensor ingesteld op de normale gevoeligheid. Als het vervuilingsniveau na 2 uur werken nog steeds op het hoogste niveau verkeert of als dit gedurende langer dan 1 uur op het laagste niveau blijft staan terwijl de lucht niet schoon lijkt te zijn, kunnen gebruikers als volgt de gevoeligheid van de sensor aanpassen.
- Page 146 DE wATERTANk vULLEN De watertank met water vullen Verwijder de watertank door aan de zijkant van het product aan de ontgrendelingspal te trekken. Verwijder de deksel van de watertank door deze linksom te draaien. Vul de watertank met water en draai de deksel van de tank rechtsom totdat u een klikgeluid hoort.
- Page 147 REINIgINgSmETHODE Sluit de eenheid van het stopcontact af voordat u begint met schoonmaken. Gebruik geen reinigingsartikelen die organische oplosmiddelen (oplosmiddel, Tips verdunner, enz.), bleek, chloor of schuurmiddelen bevatten. Dompel het apparaat niet in water en spuit er geen water op. De luchtinlaat en -uitlaat reinigen (elke 2 maanden) Reinig de luchtinlaat en -uitlaat met een zachte borstel.
- Page 148 REINIgINgSmETHODE De watertank reinigen (dagelijks) Verwijder de watertank door aan de zijkant van het product aan de ontgrendelingspal te trekken en verwijder de deksel van de watertank door deze linksom te draaien. Als er water in de watertank is achtergebleven, leegt u de watertank voordat u deze reinigt.
- Page 149 De watertank reinigen (dagelijks) Laat de watertank volledig drogen in de schaduw, zodat alle vocht is verwijderd voordat u de tank terugplaatst. Als u de luchtzuiverings- en luchtbevochtigingsfunctie wilt gebruiken: verwijder al het vocht aan de buitenkant van de water tank, vul de watertank met water en installeer de watertank.
- Page 150 REINIgINgSmETHODE Verwijder achtereenvolgens het bevochtigingsfilter, de blokkerende folie en de klep van de waterbak en gebruik vervolgens een klein beetje neutraal reingingsmiddel en een vochtige, zachte doek of een schoonmaakborstel om de waterbak onder stromend water te reinigen. Droog de waterbak af met een zachte, droge doek en laat de bak inde schaduw drogen.
- Page 151 Trek altijd de stekker van het apparaat uit het stopcontact voordat u de filters reinigt. Het voorfilter is herbruikbaar nadat u alle stof hebt verwijderd of deze hebt gereinigd met water. Als het voorfilter gedurende lange tijd niet wordt gereinigd, kan de werking van het product nalaten.
- Page 152 Controleer of de ‘voorkant’ van de filters in de juiste richting wijst. Zorg voor een optimale werking van het product door gebruik te maken van originele Coway-filters. Tips Trek altijd de stekker van het apparaat uit het stopcontact voordat u de filters vervangt.
- Page 153 Verwijder de behuizing van het antikalkfilter uit de dop van de watertank door deze linksom te draaien en vervang het filter. Het antibacteriële filter vervangen Verwijder de watertank en verwijder vervolgens de waterbak aan de zijkant van het product door deze naar buiten te trekken. Verwijder het antibacteriële filter door deze omhoog te trekken en vervang het filter.
- Page 154 NATUURLIJk vERDAmPINgS-BEvOcHTIgINgSSYSTEEm werking De bevochtigingsmethode die door dit product wordt gebruikt, is een natuurlijke verdampings- Droge lucht Vochtige lucht bevochtigingsmethode. Het bevochtigingsgedeelte bestaat uit drie onderdelen: de watertank, de waterbak en het bevochtigingsfilter. De watertank voorziet de waterbak van water en het bevochtigingsfilter in de waterbak absorbeert het water.
- Page 155 PROBLEmEN OPLOSSEN Als de luchtzuiveraar niet naar behoren werkt, ligt dit mogelijk niet aan het product maar aan een klein probleem of aan het feit dat de gebruiker niet vertrouwd is met de werking van het product. In een dergelijk geval kunnen problemen op eenvoudige wijze worden opgelost zonder hulp van het servicecentrum door simpelweg het volgende te controleren.
- Page 156 SPEcIFIcATIES Luchtzuiveraar Productnaam Model APM-1010DH Voeding 220 V - 240 V~ 50 Hz / 60 Hz Fase Enkelfase 40 W (alleen voor de luchtzuiveringsfunctie)/ Stroomverbruik 50 W (voor de luchtzuiverings- en bevochtigingsfunctie) Isolatieklasse product Apparaat van klasse 2 Stofverzamelingsmethode Mechanische stofafvanging (HEPA-filter)
- Page 157 mEmO...
- Page 158 ОСОБЕННОСТИ Инновационная система фильтров ANTI-FLU HEPA™ Инновационная система фильтров ANTI-FLU HEPA™ производства Coway улавливает мельчайшие частицы, эффективность инактивации бактерий достигает 99,9 %. Система фильтрации была оптимизирована с целью быстрой очистки воздуха от загрязнений. - Данное устройство не является медицинским прибором.
- Page 159 УВАЖАЕМЫЙ ПОКУПАТЕЛЬ! СОДЕРЖАНИЕ ДЛЯ ИНФОРМАЦИИ ИСПОЛЬЗОВАНИЕ | 03 | | 10 | ИНФОРМАЦИЯ ПО ПОДГОТОВКА | 12 | ТЕХНИКЕ БЕЗОПАСНОСТИ ИСПОЛЬЗОВАНИЕ | 14 | РЕГУЛИРОВКА ДАТЧИКА Опасно ЗАГРЯЗНЕНИЯ ВОЗДУХА Предупреждение | 15 | ЗАЛИВКА ВОДы В РЕЗЕРВУАР Внимание | 07 | КОНСТРУКЦИЯ...
- Page 160 ИНФОРМАЦИЯ ПО ТЕХНИКЕ БЕЗОПАСНОСТИ Пожалуйста, внимательно ознакомьтесь с данным разделом руководства, во избежание причинения вреда здоровью или имуществу. Опасно: несоблюдение мер безопасности, представленных далее, может привести к серьезным травмам или смерти. • Не используйте поврежденную вилку или незакрепленную сетевую розетку. •...
- Page 161 • Не устанавливайте устройство вблизи нагревательных приборов. • Не устанавливайте устройство в местах повышенной влажности или там, где на него может попасть вода (дождь). • Не используйте устройство в местах использования и хранения горючих газов и легковоспламеняющихся материалов. • Не вставляйте острые предметы, например буравчик, в датчик загрязнения...
- Page 162 ИНФОРМАЦИЯ ПО ТЕХНИКЕ БЕЗОПАСНОСТИ Предупреждение: несоблюдение мер безопасности, представленных далее, может привести к значительным травмам или повреждению имущества. • Не вставляйте пальцы и посторонние предметы во впускное или выпускное отверстия устройства. • Не позволяйте детям висеть на устройстве или забираться на него.
- Page 163 Внимание: несоблюдение мер безопасности, представленных далее, может привести к легким травмам или повреждению имущества. • Не устанавливайте устройство на наклонную поверхность. • Не следует прилагать к устройству излишних усилий; старайтесь защитить его от ударов. • При эксплуатации устройства расстояние от стены и рядом стоящих...
- Page 164 КОНСТРУКЦИЯ Вид спереди / сверху Ручка Индикатор Датчик качества загрязнения воздуха воздуха Передняя Резервуар крышка для воды Поддон для воды Передний Задний увлажняющий увлажняющий фильтр фильтр Выпускное Индикаторы/ отверстие кнопки...
- Page 165 Индикаторы / кнопки управления Индикаторы Кнопки управления Индикаторы очистки и Индикатор режима Индикатор скорости увлажнения воздуха воздушного потока Кнопка питания Кнопка “Режим” Кнопка выбора скорости воздушного потока Индикатор текущего/выбранного уровня увлажнения Индикатор таймера отключения устройства Кнопка “Увлажнение” Кнопка таймера отключения устройства Световой...
- Page 166 Активные частицы углерода фильтра-дезодоранта эффективно устраняют запахи пищи и неприятные запахи в помещении. Фильтр ANTI-FLU HEPA™ Инновационная система фильтров ANTI-FLU HEPA™ производства Coway улавливает мельчайшие частицы, эффективность инактивации бактерий достигает 99,9 %. Натуральные вещества, выделяемые из деревьев гинкго и японского сумаха, разрушают белок на поверхности бактерий.
- Page 167 ПОЦЕСС УВЛАЖНЕНИЯ ВОЗДУХА Увлажнение очищенного воздуха Резервуар для воды Объем резервуара – 3 л. Обеспечивает антибактериальный эффект и способствует ионообмену воды. Поддон для воды Через него к увлажняющему фильтру подается необходимое количество воды из резервуара; обеспечивает антибактериальный эффект. Увлажняющий фильтр Увлажняющий...
- Page 168 ПОДГОТОВКА Увлажняющий фильтр Извлеките резервуар для воды. Извлеките поддон для воды, как показано на рисунке. Установите увлажняющий фильтр, предварительно сняв с него пластиковую упаковку. Передняя Установите фильтр, так, чтобы его тонкий элемент был Задняя обращен вперед, а толстый – назад. Увлажняющий...
- Page 169 ИСПОЛЬЗОВАНИЕ Перед использованием устройства подсоедините вилку кабеля питания к электророзетке. При включении питания воздухоочистителя он автоматически начинает Советы работать в режиме “Авто”. Работа в режиме “Ручной” Включите устройство, нажав кнопку питания. С помощью кнопки выбора скорости воздушного потока задайте нужную скорость. Уровень...
- Page 170 ИСПОЛЬЗОВАНИЕ Включение/выключение таймера отключения устройства С помощью таймера выключения можно выбрать период времени (1 час, 4 или 8 часов), по прошествии которого устройство выключится. Чтобы отключить таймер, нажимайте соответствующую кнопку, пока индикатор таймера отключения не погаснет. (1 ч → 4 ч → 8 ч → отмена) Использование...
- Page 171 РЕГУЛИРОВКА ДАТЧИКА ЗАГРЯЗНЕНИЯ ВОЗДУХА Во время доставки устройства для чувствительности датчика загрязнения воздуха установлено значение “Стандартная”. Если спустя 2 часа работы уровень загрязнения остается по-прежнему максимально высоким или в течение 1 часа остается максимально низким, а воздух при этом не очищается, установите...
- Page 172 ЗАЛИВКА ВОДЫ В РЕЗЕРВУАР Чтобы залить воду в резервуар, выполните следующие действия. Извлеките резервуар для воды, расположенный сбоку на устройстве, потянув за специальную выемку. Снимите крышку резервуара, поворачивая ее против часовой стрелки. Залейте воду в резервуар, а затем закрутите крышку, поворачивая...
- Page 173 СПОСОБ ОЧИСТКИ Перед проведением очистки устройства всегда отключайте его. Не используйте моющие средства, который содержат органические растворяющие вещества (растворители, разбавители и т.д.), отбеливающие Советы вещества, хлор или абразивы. Не помещайте устройство в воду и не брызгайте на него водой. Очистка впускного и выпускного отверстия (каждые 2 месяца) Очистка...
- Page 174 СПОСОБ ОЧИСТКИ Очистка резервуара для воды (ежедневно) Извлеките резервуар для воды, расположенный сбоку на устройстве, снимите крышку на дне резервуара, выкрутив ее против часовой стрелки. Если в резервуаре осталась вода, то, прежде чем приступить к очистке, вылейте ее. Снимите с крышки фильтр против накипи. Залейте...
- Page 175 Очистка резервуара для воды (ежедневно) Тщательно просушите резервуар для воды в затененном месте, прежде чем его устанавливать. Для работы устройства в режиме увлажнения и очистки воздуха: протрите влагу на внешней стороне резервуара для воды, залейте в него воду и установите в устройство. Для...
- Page 176 СПОСОБ ОЧИСТКИ Соблюдая последовательность, извлеките из поддона увлажняющий фильтр, защитную пленку и крышку поддона. Промойте поддон под проточной водой мягкой тканью или кисточкой, добавив нейтральное чистящее средство. Протрите мягкой сухой тканью оставшуюся в поддоне влагу и тщательно просушите его в тени. Извлеките...
- Page 177 Перед проведением очистки фильтров всегда отключайте устройство. Предварительный фильтр можно использовать многократно, если периодически извлекать его и удалять с него пыль или мыть водой. Если слишком длительный период не чистить предварительный фильтр, эффективность работы устройства может снизиться. Советы Специальный фильтр, фильтр-дезодорант и фильтр ANTI-FLU™ использовать повторно...
- Page 178 При установке фильтров всегда определяйте, где у них передняя сторона, и вставляйте фильтры в правильном направлении. Для поддержания оптимальной производительности устройства используйте Советы оригинальные фильтры Coway. Перед заменой фильтров всегда отключайте устройство. Замена фильтра очистки воздуха При замене фильтра HEPA всегда определяйте, где у него передняя...
- Page 179 Извлеките корпус фильтра против накипи из крышки на дне резервуара, повернув корпус в направлении против часовой стрелки, а затем замените фильтр. Замена антибактериального фильтра Извлеките из устройства резервуар для воды, затем извлеките поддон, расположенный сбоку, потянув за него. Извлеките антибактериальный фильтр, потянув вверх, а затем замените...
- Page 180 УВЛАЖНЕНИЕ С ЕСТЕСТВЕННЫМ ИСПАРЕНИЕМ Принцип работы Способ увлажнения, используемый в данном устройстве, представляет собой увлажнение с естественным испарением. Система увлажнения состоит из трех элементов: резервуара для воды, поддона для воды и увлажняющего фильтра. Из резервуара для воды вода поступает в поддон для воды, а увлажняющий фильтр, установленный...
- Page 181 ПОИСК И УСТРАНЕНИЕ НЕИСПРАВНОСТЕЙ Воздухоочиститель может работать неправильно из-за небольших проблем или недостаточного знакомства пользователя с принципами работы устройства, а не из-за неисправности устройства. Подобную проблему можно легко устранить, не обращаясь в сервисный центр. Для этого воспользуйтесь приведенной ниже таблицей. Если проблему устранить не удается, обратитесь в сервисный...
- Page 182 ТЕХНИЧЕСКИЕ ХАРАКТЕРИСТИКИ Воздухоочиститель Название устройства Модель APM-1010DH Источник питания 220 – 240 В~ 50/60 Гц Количество фаз Однофазный 40 В (только для очистки воздуха)/ Потребляемая мощность 50 В (для увлажнения и очистки воздуха) Степень изоляции устройства Устройство с изоляцией 2 степени...
- Page 183 mEmO...
- Page 184 mEmO...
- Page 185 mEmO...
- Page 186 INCLUDING ITS REPRESENTATIVES, TO MAKE ANY only to Product used for an application specified REPRESENTATION OR TO OFFER ANY WARRANTY, by COWAY for the Product and applied in strict CONDITION OR GUARANTY IN RESPECT OF THE accordance with COWAY published specifications PRODUCT OTHER THAN THIS WARRANTY.
- Page 187 COWAY no later than accident, alteration, improper installation or thirty (30) days after a defect is discovered or other acts that are not the fault of Coway or should by reasonable diligence have been the manufacturer of the product or that are discovered.
- Page 188 MADE IN KOREA 1216382 www.coway.com...
Need help?
Do you have a question about the APM-1010DH and is the answer not in the manual?
Questions and answers