Samsung MG402MADXBB User Manual
Hide thumbs
Also See for MG402MADXBB:
- Owner's instructions & cooking manual (28 pages) ,
- Owner's instructions & cooking manual (84 pages)
Table of Contents
Advertisement
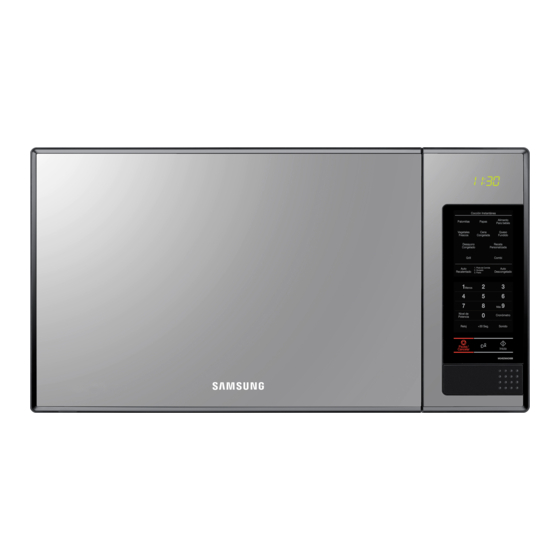
MG402MADXBB
فرن امليكروويف
دليل املستخدم
ال يغطي اتصاالت اخلدمة اخلاصةSamsung الرجاء العلم بأن ضمان
بشرح تشغيل املنتج أو تصحيح التركيب غير السليم أو تنفيذ عمليات
.الصيانة والتنظيف العادية
.% 100 مت إنتاج هذا الدليل باستخدام ورق م ُ عاد تدويره بنسبة
هائلة
إمكانيات
العربية
.Samsung نشكرك على شرائك هذا املنتج من
، ً للحصول على خدمة أكثر تكام ال
الرجاء تسجيل املنتج اخلاص بك على
www.samsung.com/register
MG402MADXBB_ZA_DE68-04160A-01_AR.indd 1
1/28/2013 6:40:24 PM
Advertisement
Chapters
Table of Contents

Related Manuals for Samsung MG402MADXBB


Summary of Contents for Samsung MG402MADXBB
- Page 1 MG402MADXBB فرن امليكروويف دليل املستخدم ال يغطي اتصاالت اخلدمة اخلاصةSamsung الرجاء العلم بأن ضمان بشرح تشغيل املنتج أو تصحيح التركيب غير السليم أو تنفيذ عمليات .الصيانة والتنظيف العادية .% 100 مت إنتاج هذا الدليل باستخدام ورق م ُ عاد تدويره بنسبة...
- Page 2 إرشادات السالمة استخدام كتيب اإلرلادا . تتضمن إرشادات املالك معلومات قيمة تتعلق بالطهي باستخدام فرنSAMSUNG لقد حصلت اآلن على فرن ميكروويف :امليكروويف احتياطات السالمة • • األدوات اإلضافية وأدوات الطهي املناسبة • تلميحات مفيدة للطهي • تلميحات للطهي معلوما مهمة تتعلق بالسشمة...
- Page 3 معاني األلكال والرموز .املمارسات العشوائية أو غير اآلمنة قد ينجم عنها حدوث إصابا جسدية خطيرة أو الوفاة حتذير املمارسات العشوائية أو غير اآلمنة قد ينجم عنها حدوث إصابا جسدية طفيفة أو إحلاق الضرر . باملمتلكا تنبيه حتذير؛ سطح ساخن حتذير؛ خطر حريق حتذير؛...
- Page 4 بفرض رسوم مقابل استبدال أ ي ّ أجزاء ملحقة أو إصالح أ ي ّ عيب جتميلي في حالة تلف الوحدة و/أو تلفSamsung ستقوم :األجزاء امللحقة أو فقدها بسبب العميل. العناصر التي يغطيها هذا الشرط .(أ) وجود نتوء أو كشط أو كسر في الباب أو املقبض أو اللوحة اخلارجية أو لوحة التحكم...
- Page 5 ال تضع اجلهاز فوق سطح قابل للكسر، مثل حوض املاء أو سطح زجاجي. (للطراز الذي ).يوضع فوق املنضدة فقط ال تستخدم البنزين أو ال ت ِ نر أو منظفات البخار أو املنظفات ذات الضغط العالي لتنظيف .اجلهاز تأكد من تطابق مستوى فولطية الكهرباء والتردد والتيار الكهربي لديك مع مواصفات .املنتج...
- Page 6 مي ُ كن استخدام هذا اجلهاز من ق ِ بل األطفال البالغني من العمر 8 سنوات أو أكثر أو األشخاص الذين لديهم قدرات عقلية أو حسية أو جسدية ضعيفة أو من لديهم نقص في اخلبرة أو املعرفة إذا مت إعطائهم إرشادات وتوصيات فيما يتعلق باستخدام اجلهاز بطريقة...
- Page 7 .يجب وضع امليكروويف بحيث يكون قري ب ً ا من مأخذ التيار الكهربي بحيث يسهل توصيله إذا أصدر الفرن ضجة غريبة أو رائحة حريق أو دخان، افصل مأخذ الكهرباء على الفور .واتصل بأقرب مركز خدمة قد تسخن األسطح أكثر من الالزم في حالة تنظيف الفرن، لذا يراعى إبعاد األطفال. (طراز ).التنظيف...
- Page 8 يحظر سلق البيض ويحظر كذلك تسخني البيض املسلوق جي د ً ا دون تقشيره ألنه قد يتفتق حتى بعد انتهاء عملية التسخني بامليكروويف؛ كذلك ال يجب تسخني الزجاجات والبرطمانات واألواني التي مت تفريغها من الهواء واملغلقة .بإحكام والبندق غير املقشر والطماطم، إلخ ال...
- Page 9 تركيب فرن امليكروويف تركيب فرا امليكروويف ضع الفرن على سطح أملس مسطح يرتفع عن األرض مبقدار 58 سم. يجب أن يكون السطح قوي ً ا بدرجة تكفي لتحمل وزن .الفرن بأمان 1. عند تركيب الفرن، تأكد من تهويته بشكل جيد بترك مسافة 02 سم...
- Page 10 تنظيف فرا امليكروويف :يجب تنظيف األجزاء التالية من فرن امليكروويف على فترات منتظمة ملنع تراكم الدهون وبقايا الطعام • األسطح الداخلية واخلارجية • الباب وقفلي الباب • القرص الدوار واحللقة الدوارة .تأكد "دوم ً ا" من نظافة قفلي الباب وإغالق الباب بإحكام قد...
-
Page 11: Table Of Contents
احملتويات تركيب فرا امليكروويف تركيب فرن امليكروويف تنظيف فرن امليكروويف كيفية عمل فرا امليكروويف كيفية عمل فرن امليكروويف فرا امليكروويف اجلديد التحقق من وجود كافة األجزاء معلومات حول الضمان والصيانة إعداد فرن امليكروويف أزرار لوحة التحكم التشغيل ضبط الساعة استخدام الزر توقف/إلغاء استخدام... - Page 12 إرلادا الطهي دليل التذويب التلقائي دليل الطهي وصفات الطهي أساليب الطهي تلميحات عامة دليل الطهي والشي دليل أواني الطهي دليل أواني الطهي ملحق دليل استكشاف األخطاء وإصالحها تخزين فرن امليكروويف وإصالحه املواصفات 21_ احملتويا MG402MADXBB_ZA_DE68-04160A-01_AR.indd 12 1/28/2013 6:43:16 PM...
- Page 13 كيفية عمل فرن امليكروويف كيفية عمل فرا امليكروويف أشعة امليكروويف عبارة عن موجات كهرومغناطيسية عالية التردد، تعمل الطاقة املنبعثة منها على طهي الطعام أو إعادة .تسخينه دون التأثير على شكله أو لونه :ميكنك استخدام فرن امليكروويف للقيام مبا يلي • فك...
-
Page 14: معلومات حول الضمان والصيانة
: 5. مركز الدعم عبر اإلنترنت ، فقط بأداء خدمة الضمان. عند احلاجة إلى خدمة الضمانSamsung ميكن أن تقوم مراكز اخلدمة املر خ َّ صة والتابعة لشركة ."Samsung قم بتقدمي املعلومات املوجودة أعاله مع نسخة من إيصال البيع إلى "مركز اخلدمة املرخص التابع لشركة... -
Page 15: إعداد فرن امليكروويف
إعداد فرا امليكروويف 1. ضع الفرن على سطح مستو ٍ وثابت، وقم بتوصيل السلك مبصدر تيار كهربي ذو طرف :أرضي. ومبجرد توصيل التيار الكهربي، تعرض شاشة الفرن ما يلي تأكد من وجود تهوية جيدة للفرن بترك مسافة أربع بوصات على األقل خلف الفرن .وفوقه... -
Page 16: أزرار لوحة التحكم
أزرار لوحة التحكم 61_ فرا امليكروويف اجلديد MG402MADXBB_ZA_DE68-04160A-01_AR.indd 16 1/28/2013 6:43:23 PM... - Page 17 ) (طهي فوريInstant Cook 19 الصفحة رقم .إعدادات فورية لطهي األطعمة الشائعة 24 الصفحة رقم ) (تسخني البيتزاGrill ) (تذويب تلقائيAuto Defrost 20 الصفحة رقم .تعيني وزن الطعام املراد فك جتميده 23 الصفحة رقم ) (أكثر/أقلMore/Less ) (مستوى الطاقةPower Level 21 الصفحة...
-
Page 18: استخدام الزر توقف/إلغاء
التشغيل ضبط الساعة .) (الس ّ اعةClock 1. اضغط على زر 2. استخدم أزرار األرقام إلدخال الوقت احلالي. يجب ضغط ثالثة أرقام على األقل لضبط .0 ،0 ،5 الساعة. إذا كان الوقت احلالي 00:5 أدخل األرقام . (الس ّ اعة) مرة أخرى. تومض عالمة ":" مشيرة إلى أنه قد مت ضبط الوقتClock 3. اضغط على الزر .في... -
Page 19: استخدام أزرار الطهي الفوري
استخدام أزرار الطهي الفوري (طهي فوري) املقابل للطعام الذي تقوم بطهيهInstant Cook 1. اضغط على الزر : (الفشار)). تعرض شاشة العرض حجم للتقدمي األولPopcorn ،(على سبيل املثال 2. كرر الضغط على الزر الختيار حجم الوجبة الذي تريده. تعرض الشاشة كافة أحجام .الوجبات... -
Page 20: فك التجميد التلقائي
فك التجميد التلقائي لفك جتميد األطعمة اجملمدة، اضبط وزن الطعام فيقوم امليكروويف تلقائي ً ا بضبط وقت فك التجميد ومستوى الطاقة ووقت .االنتظار . (تذويب تلقائي). يظهر «5.0» رطل أو «2.0» كجم على الشاشةAuto Defrost 1. اضغط على الزر (تذويب تلقائي) بشكل متكرر. يزيد ذلك الوزن مبقدار 5.0 رطل حتىAuto Defrost 2. لتحديد نوع الطعام، اضغط على الزر ).0.6 أرطال... -
Page 21: إعداد الزر طبخ عادي واستخدامه
إعداد الزر طبخ عادي واستخدامه . (طبخ عادي) على حفظ الوقت وإعداد الطاقة لطعام معنيCustom Cook يعمل الزر برمجة الزر طبخ عادي "CUS " (طبخ عادي). اضغط على الزر مرتني حلذف إعداد الطبخ العادي السابق. يظهرCustom Cook 1. اضغط على الزر .(عادي) على... -
Page 22: الطهي على مرحلة واحدة
الطهي على مرحلة واحدة لتنفيذ عملية طهي بسيطة من خطوة واحدة، حتتاج فقط إلى ضبط وقت للطهي. يتم ضبط مستوى الطاقة على Power Level (عالي) تلقائي ً ا. إذا كنت ترغب في تعيني الطاقة إلى أي مستوى آخر، يجب تعيينه باستخدام الزرHigh املستوى .)(مستوى... -
Page 23: استخدام الزرين أكثر/أقل
استخدام الزرين أكثر/أقل (أكثر/أقل) بضبط أوقات طهي معينة مسبقً ا، حيث يعمل هذان الزران في الوضعMore/Less يسمح لك الزران (طهي مؤقت) فقط. ي ُ ستخدم الزرانTime Cook (طهي فوري) وInstant Cook (تسخني تلقائي) وAuto Reheat . (أكثر/أقل) فقط بعد أن تكون قد بدأت الطهي بالفعل مستخدم ً ا إحدى هذه اخلطواتMore/Less .)... -
Page 24: استخدام زر الطهي في وضع امليكروويف
استخدام زر الطهي في وضع امليكروويف والشواية .ميكنك أيض ً ا الطهي باستخدام امليكروويف والشواية مع ً ا وذلك للطهي والشي في نفس الوقت بشكل سريع ،1. استخدم أزرار األرقام لضبط مدة الطهي في وضع امليكروويف والشواية. على سبيل املثال، لضبط املدة على 01 دقائق .)أدخل... -
Page 25: دليل التذويب التلقائي
إرشادات الطهي دليل التذويب التلقائي • .اتبع اإلرشادات املوجودة أدناه عند فك جتميد األنواع اخملتلفة من األطعمة مشحظا درجة احلرارة األولية الوزا نوع الطعام الرمز قم بتغطية احلواف الرفيعة بورق األملونيوم. قم بقلب 02 إلى 06 دقيقة 001 إلى 0002 جم اللحوم... -
Page 26: دليل الطهي
دليل الطهي دليل طهي اللحم في امليكروويف • .ضع اللحم على احلامل اخلاص بالشي املسموح باستخدامه مع امليكروويف، ثم ضع احلامل في طبق ضع اجلزء السمني من اللحم جهة أسفل. استخدم شرائح رفيعة من ورق األملونيوم حلماية أية أطراف أو قطع رفيعة من •... - Page 27 الطريقة مدة الطهي/مستوى الطاقة الطعام قطع الدجاج ،ضع عظم الدجاج ألسفل في الطبق :مدة الطهي مع وضع األجزاء السميكة على جوانب 7 إلى 01 دقائق/5.0 كجم حتى رطلني .الطبق. ثم قم بالتغطية بالورق الشمعي 08 درجة مئوية للحوم احلمراء .قم بالقلب عند مرور نصف وقت الطهي و57 درجة...
- Page 28 قلي البيض في امليكروويف • .يحظر طهي البيض دون تقشيره وال تقم أيض ً ا بتسخني البيض الناضج جي د ً ا دون تقشيره؛ ألنه قد يتفتت • .قم دوم ً ا بثقب البيض حتى ال يتفتق • .قم بطهي البيض للمدة احملددة له؛ حيث يصبح جا ف ًا إذا زاد نضجه دليل...
-
Page 29: وصفات الطهي
وصفا الطهي يخني اللحم البقري والشعير 576 جرام من اللحم البقري امل ُ قطع على شكل مكعبات، كل مكعب طوله 5.0 بوصة كوب من البصل امل ُ قطع ملعقتان كبيرتان من الدقيق ملعقة واحدة كبيرة من صلصة ورسترشاير علبة واحدة (083 إلى 504 جم) من مرق اللحم البقري )بوصة... - Page 30 سلطة البطاطس الدافئة بوصة 009 جم من البطاطس الصغيرة احلمراء املقطعة إلى قطع طولها 4 شرائح من اللحم (غير مطهي) مقطعة إلى قطع بحجم نصف بوصة كوب من البصل امل ُ قطع ملعقتان صغيرتان من السكر ملعقة صغيرة من امللح ملعقة...
-
Page 31: أساليب الطهي
أساليب الطهي التقليب .ق ل ّب األطعمة واخلضروات املوجودة في األطباق اخلزفية أثناء الطهي ليتم توزيع احلرارة بشكل منتظم ميتص الطعام املوجود في جانب الطبق قدر ً ا أكبر من الطاقة ويتم تسخينه بسرعة أكبر، لذلك قم بالتقليب من جوانب .الطبق... -
Page 32: تلميحات عامة
تلميحا عامة تأخذ األطعمة الكثيفة مثل، البطاطس، مدة أطول من األطعمة األقل كثافة ليتم تسخينها. يجب تسخني األطعمة • .ذات النسيج الضعيف على مستوى طاقة منخفض حتى ال تصبح جافة • قد يؤثر ارتفاع ونوعية أواني الطهي امل ُ ستخدمة في مدة الطهي. عند استخدام وصفة طهي جديدة، استخدم أقل مدة .للطهي... -
Page 33: دليل الطهي والشي
دليل الطهي والشي • .استخدم دوم ً ا امليكروويف وأواني الطهي التي حتتفظ بالسخونة • .قم بتغطية الطعام بورق شمعي أو أغلفة أو أغطية بالستيكية عند تشغيل امليكروويف وأزلها عند الشي • استخدم دوم ً ا احلامل املعدني الذي يأتي مع الفرن اخلاص بك عندما ترغب في احلصول على نتائج شي أفضل إال إذا كان .الطعام... - Page 34 الطريقة الشواية مدة الطهي/مستوى الطاقة الطعام 11 9 إلى :مدة الطهي اللحم الضاني دقيقة 4 إلى 6 دقائق قطع حلم الضأا بس ُ مك بوصة واحدة :مستوى الطاقة رطل إلى رطل ونصف )7( ) (متوسط إلى عاليMEDIUM-HIGH 11 9 إلى :مدة...
- Page 35 الطريقة الشواية مدة الطهي/مستوى الطاقة الطعام ق ل ّب شرائح السمك 5 إلى 9 دقائق :مدة الطهي السمك والسمك بكامله بعد نصف 3 إلى 4 دقائق لرائح السمك ،وقت الطهي بامليكروويف الفيليه بسمك :مستوى الطاقة وقم بتصفيتها بعد الطهي .بوصة )7( )...
-
Page 36: دليل أواني الطهي
دليل أواني الطهي للطهي باستخدام فرن امليكروويف، يجب أن تتمكن أشعة امليكروويف من اختراق الطعام دون أن تنعكس على .األطباق أو متتصها األطباق املستخدمة لذا يجب احلرص عند اختيار أدوات الطهي. إذا كانت أداة الطهي حتمل عالمة مسموح باستخدامها مع .امليكروويف،... - Page 37 تعليقا مسموح باستخدامها أدوا الطهي مع امليكروويف املعادا • .قد تتسبب في حدوث ماس كهربائي أو نشوب حريق األطباق • أربطة أكياس الفريزر الورق تستخدم في طهي الطعام الذي يستغرق فترات األطباق واألكواب ومناديل املائدة • قصيرة وفي تدفئة الطعام. وتستخدم أيض ً ا وورق...
-
Page 38: دليل استكشاف األخطاء وإصالحها
ملحق دليل استكشاف األخطاء وإصشحها .قبل االتصال مبسئول الصيانة للفرن، راجع هذه القائمة من املشكالت احملتملة وحلولها .ال تعمل لالة الفرا وال الفرا ذاته .صل القابس في مصدر للتيار الكهربي ذو طرف أرضي بشكل صحيح • • .إذا كان مقبس التيار الكهربي يعمل من خالل مفتاح، تأكد من تشغيل املفتاح .قم... -
Page 39: تخزين فرن امليكروويف وإصالحه
.إذا أردت تخزين الفرن اخلاص بك بشكل مؤقت، اختر مكان ا ً جاف ا ً وخالي من األتربة • .السبب:قد تؤثر األتربة والرطوبة بشكل سلبي على أجزاء الفرن ،إذا واجهتك مشكلة لم تتمكن من حلها SAMSUNG اتصل بالبائع احمللي أو بخدمة ما بعد البيع ملنتجا املواصفا MG402MADXBB رقم الطراز... - Page 40 800-SAMSUNG (726-7864) U.A.E 800-SAMSUNG(726-7864) OMAN www.samsung.com/ae (English) 183-2255 KUWAIT www.samsung.com/ae_ar (Arabic) 8000-4726 BAHRAIN 9200-21230 SAUDI ARABIA 08000-726786 EGYPT 800-22273 JORDAN 065777444 021-8255 IRAN 080 100 2255 MOROCCO 444 77 11 TURKEY 0800-726-7864 NIGERIA 0800-10077 GHANA 0302-200077 8000 0077 Cote D’ Ivoire www.samsung.com...
-
Page 41: Microwave Oven
MG402MADXBB Microwave Oven user manual Please be advised that the Samsung warranty does NOT cover service calls to explain product operation, correct improper installation, or perform normal cleaning or maintenance. This manual is made with 100 % recycled paper. imagine... -
Page 42: Safety Instructions
USING THIS INSTRUCTION BOOKLET You have just purchased a SAMSUNG microwave oven. Your Owner’s Instructions contain valuable information on cooking with your microwave oven: • Safety precautions • Suitable accessories and cookware • Useful cooking tips • Cooking tips IMPORTANT SAFETY INFORMATION IMPORTANT SAFETY INSTRUCTIONS. -
Page 43: Legend For Symbols And Icons
LEGEND FOR SYMBOLS AND ICONS Hazards or unsafe practices that may result in severe personal injury or death. WARNING Hazards or unsafe practices that may result in minor personal injury or property damage. CAUTION Warning; Fire hazard Warning; Hot surface Warning;... -
Page 44: Important Safety Instructions
Samsung will charge a repair fee for replacing an accessory or repairing a cosmetic defect if the damage to the unit and/or damage to or loss of the accessory was caused by the customer. Items this stipulation covers include: (a) A Dented, Scratched, or Broken Door, Handle, Out-Panel, or Control Panel. - Page 45 Do not place the oven over a fragile object such as a sink or glass object. (Counter top model only.) Do not use benzene, thinner, alcohol, steam cleaner or high pressure cleaner to clean the appliance. Ensure that the power voltage, frequency and current are the same as those of the product specifications.
- Page 46 This appliance can be used by children aged from 8 years and above and persons with reduced physical, sensory or mental capabilities or lack of experience and knowledge if they have been given supervision or instruction concerning use of the appliance in a safe way and understand the hazards involved.
- Page 47 This microwave oven has to be positioned so that plug is accessible. If the oven generates a strange noise, a burning smell, or smoke is emitted, unplug the power plug immediately and contact your nearest service center. During cleaning conditions the surfaces may get hotter than usual and children should be kept away.
- Page 48 Do not immerse the power cable or power plug in water and keep the power cable away from heat. Eggs in their shell and whole hard-boiled eggs should not be heated in microwave ovens since they may explode, even after microwave heating has ended;...
-
Page 49: Installing Your Microwave
installing your microwave oven INSTALLING YOUR MICROWAVE OVEN Place the oven on a flat level surface 85 cm above the floor. The surface should be strong enough to safely bear the weight of the oven. 1. When you install your oven, make sure there is 20 cm 10 cm behind adequate ventilation for your oven by leaving at least... -
Page 50: Cleaning Your Microwave Oven
CLEANING YOUR MICROWAVE OVEN The following parts of your microwave oven should be cleaned regularly to prevent grease and food particles from building up: • Inside and outside surfaces • Door and door seals • Turntable and Roller rings ALWAYS ensure that the door seals are clean and the door closes properly. Failure to maintain the oven in a clean condition could lead to deterioration of the surface that could adversely affect the life of the appliance and possibly result in a hazardous situation. - Page 51 contents INSTALLING YOUR MICROWAVE Installing your microwave oven OVEN Cleaning your microwave oven HOW A MICROWAVE OVEN How a microwave oven works WORKS YOUR NEW MICROWAVE OVEN Checking parts Warranty and service information Setting up your microwave oven Control panel buttons OPERATION Setting the clock Using the pause/cancel button...
- Page 52 COOKING INSTRUCTIONS Auto defrosting guide Cooking guide Recipes Cooking techniques General tips Guide for cooking & grilling COOKWARE GUIDE APPENDIX Troubleshooting guide Storing and repairing your microwave oven Specifications 12_ contents MG402MADXBB_ZA_DE68-04160A-01_EN.indd 12 2013-01-29 11:27:04...
-
Page 53: How A Microwave Oven Works
how a microwave oven works HOW A MICROWAVE OVEN WORKS Microwaves are high-frequency electromagnetic waves; the energy released enables food to be cooked or reheated without changing either the form or the colour. You can use your microwave oven to: •... -
Page 54: Your New Microwave Oven
4. CS e-mail: cs@tsm.com.sa 5. Online support Center : http://www.samsung-sa.com/ssc/ Warranty service can only be performed by a Samsung Authorized Service Center. If you should require warranty service, provide the above information with a copy of your sales receipt to the Samsung Authorized Service Center. -
Page 55: Setting Up Your Microwave Oven
SETTING UP YOUR MICROWAVE OVEN 1. Place the oven on a flat, sturdy surface and plug the cord into a grounded outlet. once plugged in, the display on your oven will show: Make sure there is adequate ventilation for your oven by leaving at least four inches of space behind, above, and to the side of the oven. -
Page 56: Control Panel Buttons
CONTROL PANEL BUTTONS 16_ your new microwave oven MG402MADXBB_ZA_DE68-04160A-01_EN.indd 16 2013-01-29 11:27:05... - Page 57 Instant Cook Buttons p.19 Instant settings to cook popular foods. Grill p.24 Auto Defrost p.20 Sets weight of food to be defrosted. More/Less p.23 Power Level p.21 Press this pad to set power level other than high. Clock p.18 Sets current time. Pause/Cancel p.18 Press to pause oven or correct a mistake.
-
Page 58: Operation
operation SETTING THE CLOCK 1. Press the Clock button. 2. Use the Number buttons to enter the current time. You must press at least three numbers to set the clock. If the current time is 5:00 enter, 5,0,0. 3. Press Clock again. A colon will blink, indicating that the time is set. If there is a power interruption, you will need to reset the clock. -
Page 59: Using The Instant Cook Buttons
USING THE INSTANT COOK BUTTONS 1. Press the Instant Cook button corresponding to the food you are cooking (Popcorn, for example). The display shows the first serving size: 2. Press the button repeatedly to select the serving size you want. The display will cycle through all available serving sizes. -
Page 60: Defrosting Automatically
DEFROSTING AUTOMATICALLY To thaw frozen food, set the weight of the food and the microwave automatically sets the defrosting time, power level and standing time. 1. Press the Auto Defrost button. The display shows “0.5 (lbs) or 0.2 (kg)”. 2. To set the type of your food, press the Auto Defrost button repeatedly. This increases the weight by 0.5 lbs increments, up to 6.0 lbs (The Auto Defrost button will increase the weight by 0.2 kg, up to 2.6 kg if you are using metric measurement). -
Page 61: Setting And Using The Custom Cook Button
SETTING AND USING THE CUSTOM COOK BUTTON The Custom Cook button memorizes the time and power setting for a particular food. PROGRAMMING THE CUSTOM COOK BUTTON 1. Press the Custom Cook button. Press the button twice to delete the previous Custom setting. -
Page 62: Demonstration Mode
ONE-STAGE COOKING For simple one-stage cooking, you only need to set a cooking time. The power level is automatically set to High. If you want to set the power to any other level, you must set it using the Power Level button. 1. -
Page 63: Setting The Child Protection Lock
USING THE MORE/LESS BUTTONS The More/Less button allows you to adjust pre-set cooking times. It only works with Auto Reheat, Instant Cook and Time Cook mode. Use the More/Less button only after you have already begun cooking with one of these procedures. The More/Less key cannot be used with the Baby food key. -
Page 64: Using The Combi Cook Button
USING THE COMBI COOK BUTTON You can also combine microwave cooking with the grill, to cook quickly and grill at the same time. 1. Use the Number buttons to set the combine time. For example, to set 10 minutes, enter 1,0,0,0(up to 60 minutes maximum). To enter 60 minutes, the display will show: Press the Pause / Cancel button, then re-enter the buttons to set a cooking time. -
Page 65: Cooking Instructions
cooking instructions AUTO DEFROSTING GUIDE • Follow the instructions below when defrosting different types of food. Initial Code Item Weight Remarks Temperature Meat 100-2000 g 20-60 mins Shield the sdges with aluminium foil. Turn the meat over, when the over beeps. -
Page 66: Cooking Guide
Check foods when the oven signals. After the final stage, small sections may still be icy; let them stand to continue thawing. Do not defrost until all ice crystals have thawed. Shielding roasts and steaks with small pieces of foil prevents the edges from cooking before the center of the food has defrosted. -
Page 67: Guide For Cooking Seafood In Your Microwave
Food Cook Time/Power Level Directions Chicken Cooking Time: Place chicken bone-side down on dish, Pieces with the thickest portions towards the 7-10 min. / 0.5 kg outside of the dish. Cover with wax Up to 2 lbs. 80 °C dark meat paper. -
Page 68: Cooking Eggs In Your Microwave
Cooking eggs in your microwave • Never cook eggs in the shell, and never warm hard-cooked eggs in the shell; they can explode. • Always pierce whole eggs to keep them from bursting. • Cook eggs just until set; they become tough if overcooked. Guide for cooking vegetables in your microwave •... -
Page 69: Recipes
RECIPES Beef and barley stew 675 g beef stew cubes, cut into ½-inch pieces ½ cup chopped onion 2 Tbs. all-purpose flour 1 Tbs Worcestershire sauce 1 can (380-405 g) beef broth 2 medium carrots, cut into ½-inch slices (about 1 cup) ½... -
Page 70: Warm Potato Salad
Warm potato salad 900 g small red potatoes, cut into ½-inch pieces 4 slices bacon (uncooked), cut into ½-inch pieces ¼ cup chopped onion 2 tsp. sugar 1 tsp. salt 1 tsp. flour ½ tsp. celery seed 1/8 tsp. pepper 2½... -
Page 71: Cooking Techniques
COOKING TECHNIQUES Stirring Stir foods such as casseroles and vegetables while cooking to distribute heat evenly. Food at the outside of the dish absorbs more energy and heats more quickly, so stir from the outside to the center. The oven will turn off when you open the door to stir your food. Arrangement Arrange unevenly shaped foods, such as chicken pieces or chops, with the thicker, meatier parts toward the outside of the turntable where they receive more microwave... -
Page 72: General Tips
GENERAL TIPS • Dense foods, such as potatoes, take longer to heat than lighter foods. Foods with a delicate texture should be heated at a low power level to avoid becoming tough. • Altitude and the type of cookware you are using can affect cooking time. When using a new recipe, use the minimum cooking time and check the food occasionally to prevent overcooking. -
Page 73: Guide For Cooking & Grilling
GUIDE FOR COOKING & GRILLING • Always use microwave and heat-safe cooking utensils: • Cover food with wax paper, plastic wrap or lids during microwave time; remove during grilling. • Always use the metal rack that comes with your oven when you want to get better grilling unless the food is very high, like whole chicken or meat loaf. - Page 74 Food CookTime/ Grill Directions Power Level Lamb Cooking Time: 9-11 min Lamb chops, 4- 6 min. 1-inch thick. Power Level: 1 to 1½ lbs MEDIUM-HIGH(7) Veal Cooking Time: 9-11 min Veal cutlets or 4-6 min loin chops, ½ to Same as above. Power Level: ¼-inch thick MEDIUM-HIGH(7)
- Page 75 Food CookTime/ Grill Directions Power Level Fish Cooking Time: 5-9 min Turn fish steaks and whole fish over after half the microwave Fish Fillets, 3-4 min. time, drain after microwaving, ½-inch thick. Power Level: brush with melted butter 1 lb MEDIUM-HIGH(7) before grilling.
-
Page 76: Cookware Guide
cookware guide To cook food in the microwave oven, the microwaves must be able to penetrate the food, without being reflected or absorbed by the dish used. Care must therefore be taken when choosing the cookware. If the cookware is marked microwave-safe, you do not need to worry. - Page 77 Cookware Microwave- Comments Safe Metal • Dishes May cause arcing or fire. • Freezer bag twist ties Paper • Plates, cups, napkins For short cooking times and warming. and Kitchen paper Also to absorb excess moisture. • Recycled paper May cause arcing. Plastic •...
-
Page 78: Troubleshooting Guide
appendix TROUBLESHOOTING GUIDE Before you call a repair person for your oven, check this list of possible problems and solutions. Neither the oven’s display nor the oven operate. • Properly insert the plug into a grounded outlet. • If the outlet is controlled by a wall switch, make sure the wall switch is turned on. •... -
Page 79: Storing And Repairing Your Microwave Oven
If you wish to store your oven away temporarily, choose a dry, dust-free place. • Reason : Dust and damp may adversely affect the working parts in the oven. If you have a problem you cannot solve, Contact your local dealer or SAMSUNG after - sales service SPECIFICATIONS Model Number... - Page 80 U.A.E 800-SAMSUNG (726-7864) OMAN 800-SAMSUNG(726-7864) www.samsung.com/ae (English) KUWAIT 183-2255 www.samsung.com/ae_ar (Arabic) BAHRAIN 8000-4726 SAUDI ARABIA 9200-21230 EGYPT 08000-726786 800-22273 JORDAN 065777444 IRAN 021-8255 MOROCCO 080 100 2255 TURKEY 444 77 11 NIGERIA 0800-726-7864 0800-10077 GHANA 0302-200077 Cote D’ Ivoire 8000 0077 www.samsung.com...
Need help?
Do you have a question about the MG402MADXBB and is the answer not in the manual?
Questions and answers