
Related Manuals for ACME Xperior 1500SZ


Summary of Contents for ACME Xperior 1500SZ
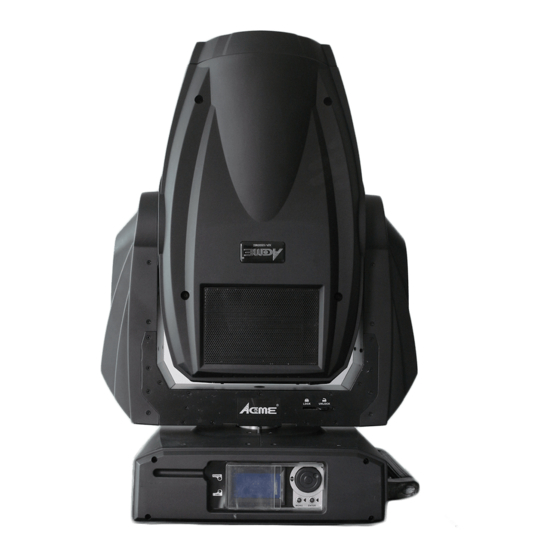
- Page 1 Xperior 1200/1500SZ Spot User Guide Please read these instructions carefully before use...
- Page 2 XP-1200/1500SZ...
-
Page 3: Table Of Contents
XP-1200/1500SZ CONTENTS 1. Safety Instruction................3 2. Installation ..................5 3. Technical Specification ..............6 4. Description ..................9 4.1 Description of the fixture....................9 4.2 Control Panel ........................10 5. Gobo and Lamp................11 5.1 Inserting/Exchanging rotating gobos ................11 5.2 Lamp .......................... -
Page 4: Safety Instruction
XP-1200/1500SZ 1. Safety Instruction Please read carefully the instruction manual, which includes important information about the installation, usage and maintenance. WARNING Please keep this User Guide for future consultation. If you sell the unit to another user, be sure that they also receive this instruction manual. Important: Damages caused by the disregard of this user manual are not subject to warranty. - Page 5 XP-1200/1500SZ during its operation, and allow about 15 minutes for cooling the unit down before replacing bulb or maintenance as it could be very hot. Avoid any inflammable liquids, water or metal objects entering the unit. Once it happens, cut off the mains power immediately. Do not operate in dirty or dusty environment;...
-
Page 6: Installation
XP-1200/1500SZ 2. Installation Unpacking the fixture (for flight case pack only) 1. Stop the flight case via the brake sheet above the wheels. 2. Unlock the lock modules (1) and (2), open the cover board. 3. Prop the cover board with lid bracket and open the side board. -
Page 7: Technical Specification
XP-1200/1500SZ occur during operation. The equipment must be installed beyond the areas where persons may walk by or be seated. The rigging has to be operated by or under the guide of a skilled person. This unit is fully operational in two different mounting positions, hanging upside-down from a ceiling, or set on a flat level surface. - Page 8 XP-1200/1500SZ Dimmer/Shutter - Blackout, 0~100% smooth dimming, independent shutter and various strobe effect. Color wheel - Color wheel: 7 dichroic colors + open . - Rainbow effect in both directions . - Easy calibration and maintenance by magnetic home positioning . Gobo wheel - Gobo Wheel1: 6 rotating, indexable, easily replaceable dichroic glass gobos + open.
- Page 9 XP-1200/1500SZ Weight: 40.5kgs Dimension: 557× 435×759 mm Photometric diagram XP-1500SZ XP-1200SZ DMX Channels Mode Mode 1 Mode 2 Mode 3 Channel 24-CH 24-CH 32-CH Shutter Pan Fine Dimmer Pan Fine Tilt Cyan Tilt Tilt Fine Magenta Tilt Fine P /T Speed Yellow P/T Speed Shutter...
-
Page 10: Description
XP-1200/1500SZ Prism Zoom R-Gobo 1 R-Prism R-Gobo 1 Fine Iris Pan Fine Gobo 2 Frost Tilt R-Gobo 2 Zoom Tilt Fine R-Gobo 2 Fine Focus P/T Speed Prism Special Function CMY Speed R-Prism R-Prism Fine Frost Iris Zoom Focus Shutter Dimmer Dimmer Fine 4. -
Page 11: Control Panel
XP-1200/1500SZ 4.2 Control Panel Front View Rear View ○ 1 Monitor ○ POWER Power on DMX input present ○ Button MENU To enter into, move backward or leave the menu ENTER To perform the desired functions JOG WHEEL To go to move up/down in the menu ○... -
Page 12: Gobo And Lamp
XP-1200/1500SZ 5. Gobo and Lamp 5.1 Inserting/Exchanging rotating gobos Rotation Gobo 1 Rotation Gobo 2 DANGER! Install the gobos with the device switched off only. Unplug from mains before changing gobos! CAUTION: Never unscrew the screws of the rotating gobo as the ball bearing will otherwise be opened! Please follow the steps below to insert/change rotating gobos 1. -
Page 13: Lamp
XP-1200/1500SZ 5.2 Lamp HTI 1500 W/60/P50 (OSRAM) Because of its high internal pressure, there might be a risk that the Discharge lamp would explode during operation. The lamp emits intense UV radiation which is harmful to the eyes and skin. The high luminance of the arc can cause severe damage to the retina if you take a close look at the lamp. -
Page 14: How To Set The Unit
XP-1200/1500SZ 6. Turn the screws (B) to adjust the lamp position. Be sure it is located in the center of the reflector for the best projection. 6. How To Set The Unit 6.1 Power On Display Every time you turn on the unit, it will run built-in program to reset all motors to their home position, the display will show as fig.4, you may hear some noises for about 20 seconds. -
Page 15: Main Function
XP-1200/1500SZ 6.2 Main Function Turn on the unit, press MENU button into menu mode, press UP and DOWN button until the required function is shown on the monitor. Select the function by ENTER button. Use UP and DOWN button to choose the submenu, press the ENTER button to store and automatically return to the last menu. - Page 16 XP-1200/1500SZ...
- Page 17 XP-1200/1500SZ DMX Functions Enter menu mode, select DMX Functions, press ENTER button to confirm, use jog wheel to select DMX Address, DMX Channel Mode or View DMX Value. DMX Address - DMX512 address setting Select DMX Address, press ENTER button to confirm, the present address will blink on the display, use jog wheel to adjust the address from 0 to 512, press ENTER button to store.
- Page 18 XP-1200/1500SZ mode. View DMX Value Select View DMX Value, press ENTER button to confirm. Channel function and its value will show on the display, use jog wheel to view other DMX value. Press MENU button back to the last menu or let the unit idle one minute to exit menu mode. WDMX Setting - wireless control setting (For the unit with wireless receiver built-in only) Select WDMX Setting, press ENTER button to confirm.
- Page 19 XP-1200/1500SZ Select Pan Inverse, press ENTER button to confirm, present mode will blink on the display, use jog wheel to select No (normal) or Yes (pan inverse), press ENTER button to store. Press MENU button back to the last menu or let the unit idle one minute to exit menu mode.
- Page 20 XP-1200/1500SZ Select Auto Focus, press ENTER button to confirm, present mode will blink on the display, use jog wheel to select No or Yes, press ENTER button to store. Press MENU button back to the last menu or let the unit idle one minute to exit menu mode. Lamp Setting °...
- Page 21 XP-1200/1500SZ lamp is off via DMX signal, you can reconnect the DMX controller to make the lamp on). Off If DMX Off - Lamp turns off when DMX signal is cut off Select Off If Dmx Off, press ENTER button to confirm, present mode will blink on the display, use UP and DOWN button to select Yes (Lamp turns off when DMX signal is cut off), press ENTER button to store.
- Page 22 XP-1200/1500SZ one minute to exit menu mode. Backlight Auto Off Select Backlight Auto Off, press ENTER button to confirm, present mode will blink on the display, use jog wheel to select No (display always on) or Yes (display goes off one minute after exiting menu mode), press ENTER button to store.
- Page 23 XP-1200/1500SZ Enter menu mode, select Fixture Information, press ENTER button to confirm, use jog wheel to select Fixture Use Time, Lamp On Time or Firmware Version. Fixture Use Time Select Fixture Use Time, press ENTER button to confirm, fixture use time will show on the display, press MENU button to exit.
- Page 24 XP-1200/1500SZ Shutter/Dimmer - Reset Shutter/Dimmer Select Shutter/Dimmer, press ENTER button to confirm, use jog wheel to select Yes (the unit will run built-in program to reset shutter and dimmer to their home positions) or No, press ENTER button to store. Press MENU button to exit. Focus/Zoom - Reset Focus/Zoom Select Focus/Zoom, press ENTER button to confirm, use jog wheel to select Yes (the unit will run built-in program to reset focus and zoom to their home positions) or No,...
-
Page 25: Home Position Adjustment
XP-1200/1500SZ settings and exit menu mode. 6.3. Home Position Adjustment Press MENU button into menu mode, then press ENTER button for about 3 seconds into offset mode to adjust the home position. Select the function by ENTER button. Use jog wheel to choose the submenu, press the ENTER button to store and automatically return to the last menu. - Page 26 XP-1200/1500SZ Enter offset mode, Select Shutter, press ENTER button to confirm, the present position will blink on the display, use jog wheel to offset the value from 0 to 255, press ENTER button to store. Press MENU button to exit. Color - Color home position adjust Enter offset mode, Select Color, press ENTER button to confirm, the present position will blink on the display, use jog wheel to offset the value from -128 to 127, press ENTER button...
- Page 27 XP-1200/1500SZ R-Prism - Prism rotation home position adjust Enter offset mode, Select R-Prism, press ENTER button to confirm, the present position will blink on the display, use jog wheel to offset the value from -128 to 127, press ENTER button to store. Press MENU button to exit. Cyan - Cyan home position adjust Enter offset mode, Select Cyan, press ENTER button to confirm, the present position will blink on the display, use jog wheel to offset the value from 0 to 255, press ENTER button to...
-
Page 28: Error Information
XP-1200/1500SZ blink on the display, use jog wheel to offset the value from 0 to 255, press ENTER button to store. Press MENU button to exit. 6.4. Error Information Lamp Startup Fail It appears when there is no lamp or some wires are damaged. Temperature Sense Error It appears when temperature check board is damaged. -
Page 29: Control By Universal Dmx Controller
XP-1200/1500SZ 7. Control By Universal DMX Controller 7.1 Connection ATTENTION Termination reduces signal errors and to avoid signal transmission problems and interference. It is always advisable to connect a DMX terminal (Resistance 120 ohm 1/4W between pin2 (DMX-) and pin3 (DMX+) of the last fixture). 1. -
Page 30: Channel Mode Setting
XP-1200/1500SZ 5. The end of the DMX 512 system should be terminated to reduce signal errors. 6. 3 pin XLR connectors are more popular than 5 pins XLR. 3 pin XLR: Pin 1: GND, Pin 2: Negative signal (-), Pin 3: Positive signal (+) 5 pin XLR: Pin 1: GND, Pin 2: Negative signal (-), Pin 3: Positive signal (+), Pin4, Pin5 not used. - Page 31 XP-1200/1500SZ 24 Channels (Mode 1):...
- Page 32 XP-1200/1500SZ...
- Page 33 XP-1200/1500SZ 24 Channels (Mode 2):...
- Page 34 XP-1200/1500SZ...
- Page 35 XP-1200/1500SZ 32 Channels (Mode 3):...
- Page 36 XP-1200/1500SZ...
- Page 37 XP-1200/1500SZ...
-
Page 38: Lighting Library Download
The whole series of Xperior fixtures’ personalities have been built into the most widely used consoles from Avolites, Compulite, Daslight, MA Lighting, Wholehog and Zero 88. Please visit their websites or ours: http://www.acme.com.cn/ to download the latest Fixture Personality Library. - Page 39 XP-1200/1500SZ 2. If the DMX LED is on and no response to the channel, check the address settings and DMX polarity. 3. If you have intermittent DMX signal problems, check the pins on connectors or on PCB of the unit or the previous one. 4.
-
Page 40: Maintenance And Cleaning
XP-1200/1500SZ F. If The tilt belt is broken 1. Turn off the mains power. 2. Loosen all the screws (A) and open the right arm cover (B). 3. Loosen the screws (C) that fix the bridge. 4. Loosen the screws (D). 5. - Page 41 XP-1200/1500SZ Cleaning: The cleaning of internal and external optical lenses and/or mirrors must be carried out periodically to optimize light output. Cleaning frequency depends on the environment in which the fixture operates: damp, smoky or particularly dirty surrounding can cause greater accumulation of dirt on the unit’s optics.
- Page 43 Declaration of Conformity We declare that our products (lighting equipments) comply with the following specification and bears CE mark in accordance with the provision of the Electromagnetic Compatibility (EMC) Directive 2004/108/EC. EN55103-1: 2009 ; EN55103-2: 2009; EN61000-3-2: 2006 + A1:2009 + A2:2009; EN61000-3-3: 2008. &...
- Page 44 Innovation, Quality, Performance...
Need help?
Do you have a question about the Xperior 1500SZ and is the answer not in the manual?
Questions and answers