
Subscribe to Our Youtube Channel
Related Manuals for Braun Omnitest 3


Summary of Contents for Braun Omnitest 3
- Page 1 Omnitest ® B. Braun Melsungen AG, OPM Carl-Braun-Straße 1 34212 Melsungen Germany...
-
Page 2: Important Information
Important Information The Omnitest® 3 system provides a quick and easy way to measure the blood glucose level. Omnitest® 3 can be used for self-monitoring of blood glucose level by diabetes patients. It should be used only for testing blood glucose (sugar) and only with fresh capillary whole blood samples. -
Page 3: Table Of Contents
Content Omnitest® 3 Blood Glucose Monitoring System The Meter, Display Segments Quick Reference Omnitest® 3 Blood Glucose Test Strip Automatic Coding of the Meter Battery Checking the Meter Display Check Strip Using Control Solution Set the Meter Reviewing Your Results Deleting Test Results Collecting a Drop of Blood Sample Testing Your Blood Glucose... -
Page 4: Omnitest® 3 Blood Glucose Monitoring System
Omnitest ® 3 Blood Glucose Monitoring System Omnitest® 3 meter Two 3V lithium-batteries (CR2032) Check strip Omnitest® 3 test strips (may be sold separately) Omnitest® 3 Control solution (sold separately) Omnitest ® - 4 -... -
Page 5: Test Control H
Check that your Omnitest® 3 system contains all parts shown on the outer packaging. If anything is missing, please return your system to the place of purchase or contact your nearest B. Braun representative. Lancets and lancing device are only parts of the Omnitest® 3 Set. -
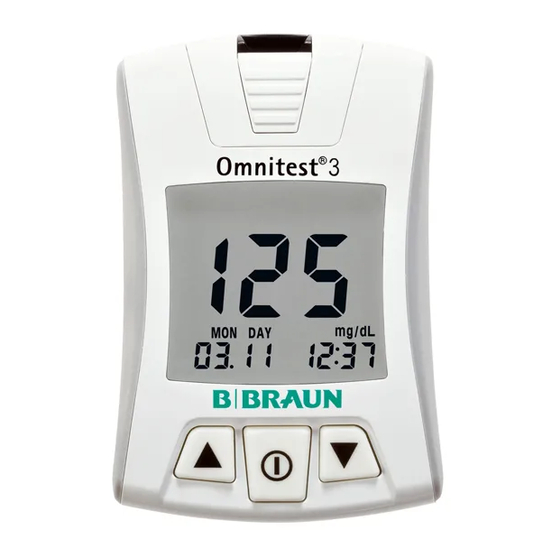
Page 6: The Meter, Display Segments
Battery cover LCD display Strap holder Up button Data transfer port Power + Select button Down button ® Omnitest 3 mmol/L Omnitest ® GKGBGBS00266 B. Braun Melsungen AG · OPM · Germany · www.bbraun.com ® Omnitest www.omnitest.bbraun.com - 6 -... - Page 7 Display Segments Segment Meaning Segment Meaning The battery symbol “AVG” is displayed means the battery is when average results low and has to be are shown. changed. The “CODE” mark is The “DEL” mark will displayed when the display when you can recognized test strip delete results from the code is shown.
-
Page 8: Quick Reference
® 3 mmol/L Omnitest ® 3 mmol/L GKGBGBS00266 GKGBGBS00266 B. Braun Melsungen AG · OPM · Germany · www.bbraun.com B. Braun Melsungen AG · OPM · Germany · www.bbraun.com ® Omnitest www.omnitest.bbraun.com Insert test strip Close test strip vial Code 06/2019 ®... - Page 9 Code is automatically recognized and displayed Omnitest ® CODE? Code 06/2019 2019 trips Control M Mean test Control H Mean B. Braun Melsungen AG · O 34209 Melsungen · Germa Ready for measurement Omnitest ® - 9 -...
- Page 10 Quick Reference Get blood sample with lancing device - 10 -...
- Page 11 Apply blood Wait 3 sec for result sample Omnitest ® Omnitest ® Eject test strip - 11 -...
-
Page 12: Omnitest® 3 Blood Glucose Test Strip
Omnitest ® 3 Blood Glucose Test Strip Omnitest® 3 meter is only to be used with Omnitest® 3 test strips for accurate analysis of your blood glucose level. Use the test strip exactly as described in the user’s manual for Omnitest® 3 test strips. Opening of the measurement chamber Confirmation window Meter contacting leads... - Page 13 Storage and Handling: Prior to first use, check that the vial is undamaged and closed. Store the Omnitest® 3 test strip vials in a cool, dry place between 2 – 30 °C (36 – 86 °F). Do not refrigerate or freeze. Keep out of direct sunlight.
- Page 14 Omnitest ® 3 Blood Glucose Test Strip Be careful not to modify the auto-coding label on the back side of the test strip. Do not perform blood glucose tests at temperature below +10 °C (50 °F) or above +40 °C (104 °F) and above 90 % relati- ve humidity.
-
Page 15: Automatic Coding Of The Meter
If these two code numbers match, you can start testing. Omnitest ® CODE? Code 06/2019 trips /2019 Control M Mean test Control H Mean B. Braun Melsungen AG · O 34209 Melsungen · Germa - 15 -... - Page 16 Automatic Coding of the Meter If the code on the vial and the meter do not match, you will not get accurate test results of your blood glucose level. Make sure that you are checking the code against the right vial.
-
Page 17: Battery
Battery Change batteries when the battery icon appears on the display or when the meter does not power on by any means. The meter needs two 3V lithium-batteries (CR2032). Batteries are provided with the Omnitest® 3 meter system. The Omnitest® 3 system could also operate with a single 3V lithium-battery (CR2032) which will reduce the operating time. - Page 18 Correct the date and time setting after the battery change. ® Omnitest 3 mmol/L Omnitest ® 3 mmol/L GKGBGBS00266 GKGBGBS00266 B. Braun Melsungen AG · OPM · Germany · www.bbraun.com B. Braun Melsungen AG · OPM · Germany · www.bbraun.com ® Omnitest www.omnitest.bbraun.com - 18 -...
-
Page 19: Checking The Meter Display
Checking the Meter Display Each time you insert a new battery, all segments of the display will appear for 3 seconds. The numbers displayed are only meant for internal tests of the electronics. Also, after inserting a test strip, all segments will be displayed. The following picture shows all possible display segments, so that you could check that the display is working properly. -
Page 20: Check Strip
Check Strip The check strip is used to test that the Omnitest® 3 meter is working properly. Insert check strip into meter. Meter will be automatically turned on. Meter is ok ® Omnitest Omnitest ® - 20 -... - Page 21 If an error message is displayed, repeat 2 or 3 times. If it is still Er 1, do not use the meter for blood glucose monito- ring. Please contact your local distributor for warranty services. It is recommended to do this test before first use and always if you suspect the meter is not properly working.
-
Page 22: Using Control Solution
Using Control Solution The Omnitest® 3 Control solution is used to check that the blood glucose monitoring system consisting of the meter and the test strips is working correctly. The control solution should be used: Whenever you suspect the meter or test strip is not functioning properly. - Page 23 Insert Test Strip If the control solution is cold, do not use until the solution has warmed up to room temperature. Control solution tests have to be done in a temperature range 20 – 25 °C (68–77 °F). Insert a test strip.
- Page 24 Using Control Solution Apply Control Solution Shake the control solution vial gently. Remove the cap. Squeeze the vial, discard the first drop, and wipe off the dispenser tip with a clean tissue to ensure an accurate result. Squeeze the vial again to get a drop. Apply a drop of control solution on a clean and none absorbing base.
- Page 25 Once you hear the “beep”, it means the test strip is completely filled. The meter begins to count down 3 to 1 and then the result is displayed. - 25 -...
- Page 26 The result should fall within the range. ® Omnitest Code 06/2019 trips mmol/L Control M Mean 4.5 - 6.3 test Control H Mean B. Braun Melsungen AG · O 34209 Melsungen · Germa 12 6 17 4 - 26 -...
- Page 27 Comparing Control Solution Results If test results fall outside the range, repeat the test. Out-of- range results may be caused by one or more of the following causes: Error in performing the test. Failure to shake the control solution vial gently. Expired or contaminated control solution.
- Page 28 Using Control Solution Marking Function Press button after the measurement to choose the control solution symbol among the available symbols. NOTE Mark all control solu- tion tests with sym- ® Omnitest bol to distinguish from blood glucose tests in the meter memory. Marked control solu- tion test results will not be included in...
-
Page 29: Set The Meter
Set the Meter If you intend to change any of the settings, you need to enter the setting mode. Turn on the meter by pressing button and hold for 3 seconds. This will initiate the “Set the Meter” mode. SET icon will appear on the display during the setting. - 29 -... - Page 30 Set the Meter To go to the next step of the setting mode, press the button. To leave the “Set the Meter” mode at any time, press the button for 3 seconds. If you have missed out a setting, start the “Set the Meter” procedure again.
- Page 31 Set the 12 Hour or 24 Hour Mode If you are in the "Set the Meter" mode, at first you can change the hour mode. Press button to select the proper time system. - 31 -...
- Page 32 Set the Meter Set the Date and Time After setting the hour mode press button to set the date and time. Press button to select the year. NOTE Without setting the date properly, the average glucose level and the results in memory will not show proper value.
- Page 33 With the correct year on display, press the button and the month setting will start flashing. Press button to select the month and then press button to set the day. After that press button to set time. Press button to select the appropriate hour, press button to set minutes.
- Page 34 Set the Meter Set the Alarm Omnitest® 3 has 5 different alarm settings. The bell icon will be displayed during the alarm setting. Alarm setting order is AL1 « AL2 « AL3 « AL4 « AL5. If the AL2 is OFF the rest of AL3 - AL5 are all OFF.
- Page 35 NOTE Press either button to stop the alarm. The alarm will not work during the testing of blood glucose. The loudness of the alarm is intended to remind you of a glucose measurement but not to wake you up from deep sleep. The alarm buzzer is always turned on, even when the buzzer is set to OFF.
- Page 36 Set the Meter Set the Buzzer Press button to set the buzzer. Buzzer character “bEEP” will appear on the display. Press to select ON/OFF the buzzer sound. NOTE There is no beep sound during buzzer is OFF when test strip inserted, sufficient blood sample applied and when test result is displayed.
- Page 37 Set the Temperature Unit Press button to set the temperature unit. Press button to select the proper temperature unit. - 37 -...
- Page 38 Set the Meter Set the Average Day Press button to proceed to set the average day. Omnitest® 3 will show 3 different average results and the number of days can range from 1 to 99 days. The setting mode begins with setting the number of days of which you would like to receive an average calculation of your glucose level.
- Page 39 To increase or decrease the number of days, press the button button; holding the button the value will be increased or decreased at a quicker rate. With the correct number of days displayed, press button to set next average day. AVG character will display during the average day setting.
-
Page 40: Reviewing Your Results
Reviewing Your Results Omnitest® 3 saves up to 365 test results with date and time in built-in memory and 3 different average glucose levels are calculated and saved. These values will appear on the display by recalling anytime you like to see them. The latest result will replace the oldest beyond 365 data. -
Page 41: Deleting Test Results
Deleting Test Results To delete any individual test result in the memory press button for 3 seconds. Small DEL icon will be shown on the upper right of the display. Press button until 3 beeping sounds will be heard and the test result disappears from the display. -
Page 42: Collecting A Drop Of Blood Sample
Collecting a Drop of Blood Sample Unscrew the tip of the Omnilance lancing device. Insert a new Omnican® lancet to the end of the carrier. Twist off the protective cover of the lancet. Replace the threaded tip of the Omnilance device. The comfort tip offers 5 different levels of skin penetration. - Page 43 Next hold the tip in one hand and pull on the sliding barrel with the other hand. As the ends are pulled apart, the spring tension increases. When a click is felt, the spring tension is locked and the device is ready for use. Release the sliding barrel.
- Page 44 Collecting a Drop of Blood Sample Place Omnilance against the tip of the finger. Next press the trigger and lift up the device. It is less painful to prick the side of the finger tip. Set aside Omnilance and wait a few seconds for a blood drop to form.
- Page 45 Omnican® Lancet Removal Unscrew the Omnilance tip. Push ahead the lancet ejector with thumb and simultaneously pull out the sliding barrel to dispose the lancet. For safety reasons, and to prevent cross-contamination, discard the used lancet into an appropriate sharps or biohazard container. Taking Care of Your Omnilance Use mild soap and water to wipe the outside of the lancing device.
-
Page 46: Testing Your Blood Glucose
Testing Your Blood Glucose Cleanliness: Wash your hands with warm soapy water. Rinse and dry hands thoroughly. You may also use an alcohol wipe to clean the puncture area. Make sure it is completely dry before you obtain the blood sample. Alcohol, dirt or perspiration may affect the test result. - Page 47 First all display segments and then the code number is shown. ® Omnitest Code 06/2019 trips Control M Mean test Control H Mean B. Braun Melsungen AG · O 34209 Melsungen · Germa - 47 -...
- Page 48 Make sure the code number on the display matches the code number on the test strip vial. ® Omnitest CODE? Code 06/2019 /2019 trips Control M Mean test Control H Mean B. Braun Melsungen AG · O 34209 Melsungen · Germa - 48 -...
- Page 49 CAUTION If the code number on the display and on the test strip vial do not match, please try it again by using a new test strip (see also page 15 “Automatic Coding of the Meter”). If any different message appears on the display due to several causes and conditions please refer to “Trouble shooting”...
- Page 50 Testing Your Blood Glucose Ready for the Measurement 2 seconds after code display, blood icon will be displayed on the screen. Date and time information are shown at the bottom. Omnitest® 3 is now ready for the measurement. ® Omnitest - 50 -...
- Page 51 Applying Blood Sample Prick the area where you have decided to obtain the blood. Touch your finger to the tip of Omnitest® 3 test strip to apply the blood sample. ® Omnitest - 51 -...
- Page 52 Testing Your Blood Glucose The measurement chamber of the test strip will draw automati- cally the blood of your finger. Your finger should remain still, until the confirmation window is completely filled and you hear the “beep” sound. The minimal sample volume is 0.3 µL. Do not allow blood to flow aside the test strip into the meter.
- Page 53 Accurate Results in Seconds The test will begin automatically, counting down the numbers from 3 to 1 on the display. Then the test result will be shown in mmol/L (millimoles of glucose per litre of blood). Date and time information are displayed under the test result.
-
Page 54: Marking Function
Testing Your Blood Glucose Marking Function If required, you can press the button to choose one of the following marks: Before having a meal After having a meal After taking medication Control solution or no marker The result is stored automatically with the shown mark. IMPORTANT NOTE Your meter has been preset and locked to display results in mmol/L. - Page 55 Remove used Test Strip by Ejector Slide the ejector button forward to remove the test strip from the meter while it is directed downwards. The meter is turned off with the removal of the test strip. Discard the used test strip and the lancet according to the local regulations.
-
Page 56: Maintain Your Blood Glucose Monitor System
Maintain Your Blood Glucose Monitor System For safe, accurate, and long-term use of Omnitest® 3, be sure that the meter is maintained with proper care. Clean and dry your hands before use to prevent any damage of the meter and the test strips. - Page 57 Furthermore immunity of Omnitest® 3 against electrostatic discharge (according to IEC 61000-4-2) and high frequent electromagnetic fields (according to IEC 61000-4-3) was tested. A disturbance of other electronic equipment is not likely. After test, put the parts of Omnitest® 3 in the pouch together, and keep it at a cool and dry place out of the reach of children.
-
Page 58: Troubleshooting
2 or 3 times. meter. There is an abnormal Do not use the meter. Contact Check Strip signal. B. Braun representative. Error message could be Repeat the test with a new caused by a used or wet test strip. Apply a sufficient test strip. - Page 59 Please insert a new test strip and perform your test again. There is a problem with the If the problem persists, auto-code detection. please contact B. Braun representative. If the LCD screen shows “Sun” There is a problem with the message alternately with Er 6, auto-code detection.
- Page 60 Troubleshooting message caused by what to do? Place the meter at the oper- ating temperature range 10 - The ambient temperature 40 °C (50 - 104 °F) for more is too high. than 10 minutes and re-test. In case of doubt of blood test result, check the meter with control solution.
- Page 61 Change batteries and if the The meter Battery is flat or there is a problem persists, contact your does not problem with the meter. distributor or nearest B. Braun power on. representative. Apply sufficient amount of a Test does not Insufficient sample or there...
-
Page 62: Specifications
Specifications Test Range 0.6 – 33.3 mmol/L Reading Time 3 seconds Memory Capacity 365 test results with date and time Operating Temperature 10 °C – 40 °C (50 °F – 104 °F ) Operating Humidity 10 – 90 % Sample Type Fresh capillary whole blood Sample Volume 0.3 µL... - Page 63 Symbol Description Consult operating instructions Use by This product fulfills the requirements of Directive 98/79/EC on in vitro diagnostic medical devices In vitro diagnostic medical device Batch code Catalogue number Temperature limitation Do not re-use Use within 3 or 6 months after first opening Caution, consult accompanying documents Direct current...
- Page 64 Specifications Limitations of the System: For any additional information concerning limitations of the system or interferences that may affect test results, please refer to the user’s manual for Omnitest® 3 blood glucose test strip. Omnitest® 3 complies with the requirements of EN ISO 15197.
-
Page 65: Transfer Test Results To A Computer
Transfer Test Results to a Computer You can transfer test results from the Omnitest® 3 meter to a computer, where the data can be further analyzed. To make use of this feature, you need the Omnitest® 3 PC interface cable REF 9152856G, as well as a link to the Online Diary Omnitest®... -
Page 66: Blood Glucose Conversion Table
Blood Glucose Conversion Table Blood Glucose Conversion Table (mmol/L to mg/dL) mmol/L 0.55 mg/dL mmol/L mg/dL mmol/L 14.4 15.0 16.0 16.6 17.0 18.0 19.0 20.0 mg/dL - 66 -... - Page 67 10.0 10.5 11.0 11.1 12.0 12.5 13.9 20.8 22.2 23.0 24.0 25.0 26.4 27.7 30.0 33.3 - 67 -...
- Page 68 If you have any questions about the use of the Omnitest® 3 system, please contact your nearest B. Braun representative or go to www.omnitest.bbraun.com Distributed by: B. Braun Australia Pty Ltd 17 Lexington Drive Bella Vista NSW 2153 B. Braun Melsungen AG Carl-Braun-Straße 1...
Need help?
Do you have a question about the Omnitest 3 and is the answer not in the manual?
Questions and answers