Sign In
Upload
Download
Table of Contents
Contents
Add to my manuals
Delete from my manuals
Share
URL of this page:
HTML Link:
Bookmark this page
Add
Manual will be automatically added to "My Manuals"
Print this page
×
Bookmark added
×
Added to my manuals
Manuals
Brands
Ricoh Manuals
Printer
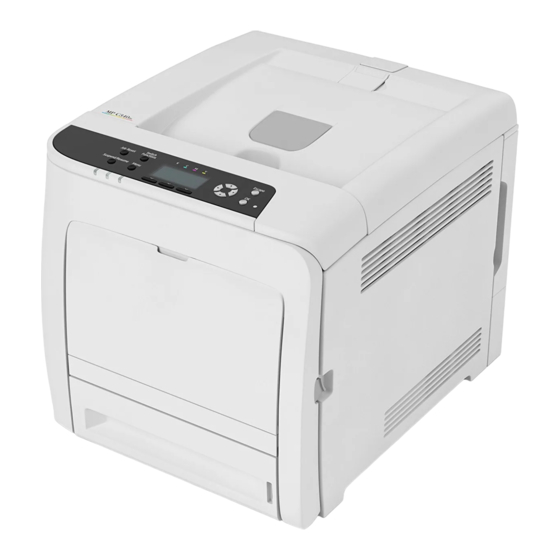
SP C340DN
User manual
Ricoh SP C340DN User Manual
Hide thumbs
1
2
Table Of Contents
3
4
5
6
7
8
9
10
11
12
13
14
15
16
17
18
19
20
21
22
23
24
25
26
27
28
29
30
31
32
33
34
35
36
37
38
39
40
41
42
43
44
45
46
47
48
49
50
51
52
53
54
55
56
57
58
59
60
61
62
63
64
65
66
67
68
69
70
71
72
73
74
75
76
77
78
79
80
81
82
83
84
85
86
87
88
89
90
91
92
93
94
95
96
97
98
99
100
101
102
103
104
105
106
107
108
109
110
111
112
113
114
115
116
117
118
119
120
121
122
123
124
125
126
127
128
page
of
128
Go
/
128
Contents
Table of Contents
Troubleshooting
Bookmarks
Table of Contents
User Guide
Table of Contents
Manuals for this Machine
List of Manuals
1 Getting Started
Before You Start
How to Read the Manuals
Model-Specific Information
List of Options
Guide to Names and Functions of Components
Guide to Components
Guide to the Names and Functions of the Control Panel
Guide to the Names and Functions of the Control Panel Screen
Turning On/Off the Power
Turning on the Power
Turning off the Power
Saving Energy
Displaying the Printer Configuration Screens Using the Control Panel
Configuring Printer Settings from the [Menu] Key
Configuring Printer Settings from the [User Tools] Key
Monitoring and Configuring the Printer
Using Web Image Monitor
Displaying the Top Page
2 Loading Paper
Paper Loading Procedure
Paper Size Specifications
Paper Type Specifications
Paper Precautions
Loading Paper into Paper Trays
When Loading Paper Larger than A4 or 8
Loading Paper into the Bypass Tray
Loading Orientation-Fixed Paper or Two-Sided Paper
Loading Envelopes
Printing on Envelopes with Windows (PCL 6/Postscript 3)
Printing on Envelopes with Windows (PCL 5C)
Printing on Envelopes with Mac os X
Paper Settings
Specifying a Paper Size
Specifying a Paper Type
Configuring Envelope Settings Using the Control Panel
3 Troubleshooting
When a Panel Tone Beeps
When Checking the Indicator Lamps, Status Icons, and Messages on the Control Panel
Indicators
Checking Printer Status and Settings
When the Indicator Lamp for the [Check Status] Key Is Lit or Flashing
If USB Connection Fails
When Messages Are Displayed
Status Messages
Alert Messages (Displayed on the Control Panel)
Alert Messages (Printed on Error Logs and Reports)
When You Cannot Print
When the Data in Indicator Does Not Light up or Flash
Other Printing Problems
When You Cannot Print Properly
Paper Misfeeds Occur Frequently
Additional Troubleshooting
The Printed Image Is Different from the Image on the Computer
When Printer Is Not Functioning Properly
When Pictbridge Printing Does Not Work
Removing Jammed Paper
Paper Misfeed Message (A)
Misfeed Bypass Tray
Paper Misfeed Message (B)
Paper Misfeed Message (Y)
Paper Misfeed Message (Z)
Trademarks
Advertisement
Quick Links
1
User Guide
2
Configuring Printer Settings from the [Menu] Key
Download this manual
User Guide
Getting Started
Loading Paper
Troubleshooting
For safe and correct use, be sure to read the Safety Information in
Read This First before using the machine.
Table of
Contents
Previous
Page
Next
Page
1
2
3
4
5
Advertisement
Table of Contents
Troubleshooting
Troubleshooting
63
Additional Troubleshooting
106
Need help?
Do you have a question about the SP C340DN and is the answer not in the manual?
Ask a question
Questions and answers
Related Manuals for Ricoh SP C340DN
Printer Ricoh Aficio SP C320DN Brochure & Specs
Ricoh aficio sp c320dn: product brochure (4 pages)
Printer Ricoh Aficio SP C320DN Hardware Manual
Ricoh aficio sp c320dn: hardware guide (260 pages)
Printer Ricoh Aficio SP C320DN Software Manual
Software guide (248 pages)
Printer Ricoh Aficio SP C311N Information
User guide (306 pages)
Printer Ricoh SP C311N Manual
(17 pages)
Printer Ricoh Aficio SP C311N Brochure & Specs
Color laser printer (4 pages)
Printer Ricoh Aficio SP C312DN Manual
(17 pages)
Printer Ricoh SP C342DN User Manual
(128 pages)
Printer Ricoh SP C352dn User Manual
(124 pages)
Printer Ricoh AP410i - Aficio B/W Laser Printer Manual
Sap printing (12 pages)
Printer Ricoh Aficio SP C811DN Hardware Manual
Ricoh aficio sp c811dn: user guide (252 pages)
Printer Ricoh SP C210 Operating Instructions Manual
(92 pages)
Printer Ricoh SP C240 Series Firmware Update Manual
(14 pages)
Printer Ricoh SP C250DN Getting Started Manual
Color laser printers (42 pages)
Printer Ricoh Aficio SP C440DN Field Service Manual
(654 pages)
Printer Ricoh Aficio SP C840DN Operating Instructions Manual
(328 pages)
This manual is also suitable for:
Sp c342dn
Table of Contents
Print
Rename the bookmark
Delete bookmark?
Delete from my manuals?
Login
Sign In
OR
Sign in with Facebook
Sign in with Google
Upload manual
Upload from disk
Upload from URL


Need help?
Do you have a question about the SP C340DN and is the answer not in the manual?
Questions and answers