Table of Contents
Advertisement
Quick Links
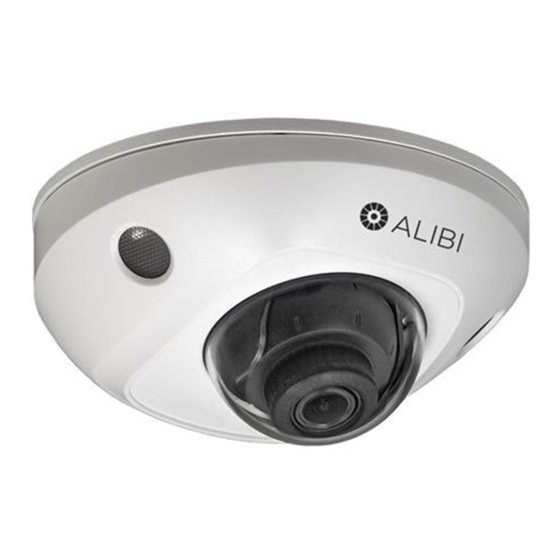
The ALIBI ALI-NS1025VR dome camera includes 6 megapixel video performance in a small form factor
network camera. The camera can be mounted directly onto a ceiling. This camera includes the following
features:
3072 × 2048 (6 MP) @ 20 fps video
•
Up to 33 ft (10 m) IR
•
120 dB WDR
•
Built-in microSD / SDHC / SDXC card storage up to 128 GB
•
Built-in microphone, supports audio in and out (1 channel each way)
•
12 Vdc or Power over Ethernet (PoE)
•
Internal 3-axis adjustment
•
IP66 weather rated, IK08 impact resistant, TVS 2000 Lightning, Surge and Transient protection
•
This device complies with Part 15 of the FCC Rules. Operation is subject to the following two
conditions:
(1) This device may not cause harmful interference, and
(2) This device must accept any interference received, including interference that may cause
undesired operation.
This equipment complies with FCC radiation exposure limits set forth for an uncontrolled
CAUTION
environment. This equipment should be installed and operated with minimum distance
8 inches (20 cm) between the radiator & your body.
Changes or modification not expressly approved by the party responsible for
compliance could void the user's authority to operate the equipment.
Camera assembly base
IR Lens
Dome cover
Dome cover
screw (3)
Camera drop cable connectors
www.observint.com
1
ALI-NS1025VR 6 Megapixel IR Mini Dome IP + WiFi Camera Quick
Outer cover
Lens
Drop cable
Ethernet connector
supports PoE
12 Vdc Power
Connector
Audio IN / OUT out terminals
Alarm IN / OUT terminals
Screw
holes (3)
for base to
mounting
plate
IR LED (2)
Built-in
microphone
For factory
use only
*Reset restores factory settings. Press the reset button for 10 seconds while the camera is powering on or rebooting.
Camera base assembly
Ground
terminal
Holes (3) for base to
mounting plate screws
Underside of camera base assembly
Holes (3)
for base to
mounting
Locator
plate screws
pins
What's in the box
Camera assembly
•
Dome cleaning cloth
•
Machine screws (3)
•
Installation Guide
microSD card slot
Camera
module
Reset button*
Camera
drop cable
Holes for
locator pins (3)
Built-in
microphone
access cover
Holes (3) for
mounting
screws
Orient
toward FOV
Knockout for
cable routing
Adapter plate
ALI-NS1025VR_CQ
Camera
gimbal
hold
screw
200911
Advertisement
Table of Contents

Related Manuals for ALIBI ALI-NS1025VR


Summary of Contents for ALIBI ALI-NS1025VR
- Page 1 Installation Guide ALI-NS1025VR 6 Megapixel IR Mini Dome IP + WiFi Camera Quick The ALIBI ALI-NS1025VR dome camera includes 6 megapixel video performance in a small form factor Screw microSD card slot holes (3) network camera. The camera can be mounted directly onto a ceiling. This camera includes the following...
- Page 2 Weatherproof Ethernet fitting 3. Install an alarm input and an alarm output devices as needed, and then route wires from them to • Mounting hardware - screws and wall inserts (3 each) where the camera will be installed. Alarm terminations for one input (NO or NC) and one output alarm •...
- Page 3 Refer to the documentation available for your NVR firmware for the procedure to activate the camera, if necessary. When an Alibi device is first installed, or reset to its factory configuration, it must be “Activated” before it Ethernet connector can be used. In the Alibi Configuration Tool, “Inactive” devices have a Security status of Inactive, and an IPv4 address of 192.168.1.64.
- Page 4 Step 4. Modify Network Parameters Setting MS Internet Explorer to run as an Administrator NOTE: If the camera LAN extension cable is attached to a Network Video Recorder (NVR), skip this step. Window 10: To run IE as an Administrator: The camera will receive network configuration settings from the NVR.
- Page 5 Cover (captive) b. In the message bar at the bottom of the screen, click Run. Follow the on-screen instructions to screw (3) install WebComponents. When the following screen opens, click Finish. 3. Insert a microSD card into the card slot as shown in the photo below. The label on the card should face away from the mounting surface.
- Page 6 Gimbal assembly Gimbal lock screw Pan range: -30° ~ +30° 3. Adjust the Brightness Contrast, Saturation and Sharpness of the image. Each parameter can be set to a level of 0 ~ 100 either by moving the slider or entering the value in the box on the right. The effect of the adjustment will appear in the Live View image in the menu.
- Page 7 User / Host 3 levels: Administrator, Operator, User 32 (9) 51 (15) 78 (22) 206 (59) Client Alibi CMS (ACMS) 24 (7) 38 (11) 59 (17) 154 (44) Web Browser Microsoft® Internet Explorer® 8 or later, Apple® Safari ® 8.0 or later...
- Page 8 Using the Waterproof Ethernet Fitting Install the Waterproof Ethernet Fitting on the Ethernet cable end at the camera when moisture or contamination exists in the area near the camera. The fitting includes several parts that must be installed in a specific order. To install the fitting: 1.
Need help?
Do you have a question about the ALI-NS1025VR and is the answer not in the manual?
Questions and answers