HP proliant ML110 Operation And Maintenance Manual
Hide thumbs
Also See for proliant ML110:
- User manual (120 pages) ,
- Operating system installation manual (49 pages) ,
- Quickspecs (27 pages)

Subscribe to Our Youtube Channel
Related Manuals for HP proliant ML110


Summary of Contents for HP proliant ML110
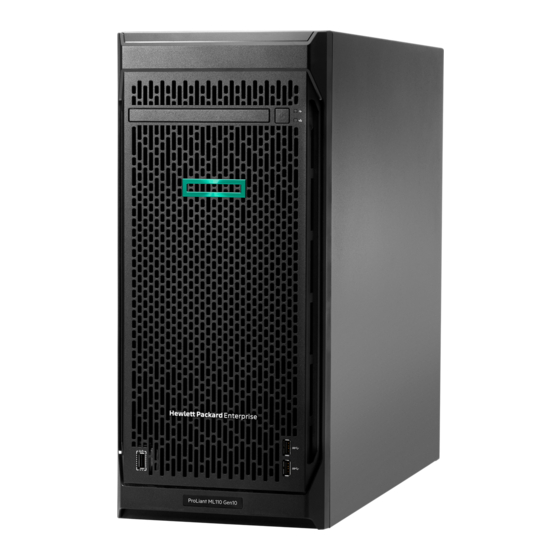
- Page 1 HP ProLiant ML110 Server Operations and Maintenance Guide June 2004 (Third Edition) Part Number 347748-003 Regulatory Model Number HSTNS-3100...
- Page 2 “as is” without warranty of any kind and is subject to change without notice. The warranties for HP products are set forth in the express limited warranty statements accompanying such products. Nothing herein should be construed as constituting an additional warranty.
-
Page 3: Table Of Contents
Mainboard Components........................2-5 Chapter 3 System Setup Setup Reminders............................3-1 Checking the Contents ........................3-1 Selecting a Site............................ 3-1 System Setup ............................. 3-2 Connecting Peripherals ........................3-2 Powering On/Off the Server ....................... 3-6 HP ProLiant ML110 Server Operations and Maintenance Guide... - Page 4 Determining the Cause of a Problem Condition..................6-4 Specific Troubleshooting Procedures....................6-5 Chapter 7 System Diagnostics System Diagnostics Overview ........................7-1 Power-On Self-Test (POST) ........................7-1 POST Error Indicators.........................7-1 POST-related Troubleshooting......................7-9 Hardware Diagnostic Software ........................7-10 Diagnostics for Windows ........................7-11 HP ProLiant ML110 Server Operations and Maintenance Guide...
- Page 5 Non-Nuclear Usage ..........................A-6 Appendix B Electrostatic Discharge Preventing Electrostatic Damage ......................B-1 Grounding Methods To Prevent Electrostatic Damage ................B-1 Appendix C Power Cord Set Requirements General Requirements ..........................C-1 Country-Specific Requirements ........................C-2 Index HP ProLiant ML110 Server Operations and Maintenance Guide...
-
Page 6: About This Guide
Improper repairs can create conditions that are hazardous. Audience Assumptions This guide is for service technicians. HP assumes you are qualified in the servicing of computer equipment and trained in recognizing hazard in products with hazardous energy levels and are familiar with weight and stability precautions for rack installations. -
Page 7: Where To Go For Additional Help
Service training guides • Service advisories and bulletins • QuickFind information services Telephone Numbers For the name of your nearest HP authorized reseller: • In the United States, call 1-800-345-1518. • In Canada, call 1-800-263-5868. For HP technical support: •... -
Page 8: System Features
Five PCI bus slots with two separate bus channels — Two 32-bit/33 MHz 5V PCI bus slots — Three 64-bit/66 MHz 3.3V PCI-X bus slots • Media storage — 3.5-inch, 1.44 MB floppy disk drive — IDE CD-ROM drive HP ProLiant ML110 Server Operations and Maintenance Guide... -
Page 9: Software
— Microsoft Windows Server 2003 and Small Business Server 2003 • Diagnostic tools include: — BIOS Setup Utility — Diagnostics for Windows • ACPI (Advanced Configuration and Power Interface)-compliant power management scheme HP ProLiant ML110 Server Operations and Maintenance Guide... -
Page 10: System Specifications
Input type: AC • Input maximum range: 100 to 127 VAC@45/66Hz / 200 to 240 VAC@45/66Hz • Maximum current: 115VAC @8.0A • Inrush current: 80A@115AVC • Operating power: 350W @25°C; 320W @50°C HP ProLiant ML110 Server Operations and Maintenance Guide... -
Page 11: System Structure
In the illustration below, the server is shown with both the front bezel attached (items labeled 1 through 8), and removed (items labeled 9 through 13). Figure 2-1: Front panel components Refer to Table 2-1 on the next page for a list of front panel components. HP ProLiant ML110 Server Operations and Maintenance Guide... - Page 12 Off when there is no IDE or SCSI device activity. Floppy disk drive (FDD) FDD activity indicator FDD eject button ® Torx screws for the hard disk drive (HDD) cage HDD cage HP ProLiant ML110 Server Operations and Maintenance Guide...
-
Page 13: Rear Panel
USB ports (black) LAN port (RJ-45) PCI slot covers PSU fan Power supply cable socket Thumbscrews for the detachable left-side cover System fan Retention clips for the PCI slot covers ® Kensington lock HP ProLiant ML110 Server Operations and Maintenance Guide... -
Page 14: Internal Structure
Figure 2-3: Internal components Table 2-3: Internal Components Item Description Standard autoranging 350-watts PSU System fan Expansion board Mainboard HDD cage Retaining lever for the FDD Retaining levers for 5 ¼” devices HP ProLiant ML110 Server Operations and Maintenance Guide... -
Page 15: Mainboard Components
System Structure Mainboard Components Figure 2-4: Mainboard components Refer to Table 2-4 on the next page for a list of mainboard components and their corresponding codes. HP ProLiant ML110 Server Operations and Maintenance Guide... - Page 16 Dip switch Internal buzzer PCI2 to PCI4 64-bit/66 MHz PCI bus slots PCI1 and PCI5 32-bit/33 MHz PCI bus slots Video frame buffer ATI Rage XL VGA chipset Broadcom 5705 LAN chipset continued HP ProLiant ML110 Server Operations and Maintenance Guide...
- Page 17 Note: Set SW1-5 and SW1-6 to the combinations shown above to select the operation mode for the PCI2 through PCI4 slots. Both switches, by default, are set to the Off position, and are dependent on the card installed into each slot. HP ProLiant ML110 Server Operations and Maintenance Guide...
-
Page 18: System Setup
• HP ProLiant ML110 Server Startup CD-ROM This Startup CD contains on-line HP documentation as well as drivers and utilities for configuring the server. If any of the above items are damaged or missing, contact your dealer immediately. Save the packaging container and packing materials in the event you need to package the server for reshipment. -
Page 19: System Setup
Generally, the server can handle the normal transient effect caused by an inrush current when it is first connected to an AC power source. However, if you install several HP servers on one circuit, precautions are necessary. If there is a power failure and power restored afterwards, all the servers immediately begin to draw inrush current at the same time. - Page 20 Plug the keyboard cable into the PS/2 keyboard port (purple). Figure 3-1: Connecting a PS/2 keyboard • Plug the mouse cable into the PS/2 mouse port (green). Figure 3-2: Connecting a PS/2 mouse HP ProLiant ML110 Server Operations and Maintenance Guide...
- Page 21 If you are going to use a flat-panel monitor, refer to its accompanying documentation for connection instructions. • To connect a VGA monitor, simply plug the monitor cable into the monitor port (blue). HP ProLiant ML110 Server Operations and Maintenance Guide...
- Page 22 If you are going to use a USB printer, connect the printer cable into either USB port (black). • To connect a parallel printer, plug the printer cable into the parallel port (burgundy). Figure 3-5: Connecting a parallel printer HP ProLiant ML110 Server Operations and Maintenance Guide...
-
Page 23: Powering On/Off The Server
Then plug the other end of the power cable into a properly grounded, wall power outlet. Figure 3-6: Connecting the server’s power cable 3. Press the power button on the front panel and then turn on the monitor. Figure 3-7: Turning on the server HP ProLiant ML110 Server Operations and Maintenance Guide... - Page 24 (on or off) and returns to this state when AC power is reconnected. Sleep Modes The HP ProLiant ML110 server supports the ACPI (Advanced Configuration and Power Interface) standard, which is a key component of a NOS’ directed power management. The supported features are available when an ACPI-compliant NOS is installed on the server.
- Page 25 Wake-up Events The HP ProLiant ML110 server supports certain types of system activity, which are used as wake-up events from sleep states. Refer to the Power menu of the BIOS Setup Utility for a description of these wake-up events.
-
Page 26: System Configuration
Review the specifications of a new component before installing it to make sure it is compatible with the HP ProLiant ML110 server. When you integrate new components into the system, record its model and serial number, and any other pertinent information for future reference. -
Page 27: System Covers
2…). When these figures are used in substep items, the alphabetically labeled instructions correspond to the numbered labels on the related figure (i.e., Label 1 correspond to step a, label 2 correspond to step b, etc.). HP ProLiant ML110 Server Operations and Maintenance Guide... - Page 28 To Reinstall the Left-Side Cover 1. If you have been installing accessories or servicing the server, return the server to its normal upright position. 2. Perform steps 1 through 3 of the post-installation instructions. HP ProLiant ML110 Server Operations and Maintenance Guide...
- Page 29 Press the two plastic retention clips on the bottom of the bezel upward to release them from their tabs on the inside of the front chassis. b. Tilt the bottom edge of the bezel away from the front panel to disengage it from the chassis. HP ProLiant ML110 Server Operations and Maintenance Guide...
- Page 30 3. Place the front bezel in a safe place for reinstallation later. To Reinstall the Front Bezel 1. Position the bezel so the two mounting tabs are aligned with their notch on the front panel, then insert the tabs into their notch. HP ProLiant ML110 Server Operations and Maintenance Guide...
-
Page 31: Hardware Configuration Procedures
Disconnect the IDE data cable from the rear of the CD-ROM drive. c. Press the drive-retaining lever. d. Move the lever downward to release the bar from its retaining hook. e. Gently pull out the CD-ROM drive from the chassis. HP ProLiant ML110 Server Operations and Maintenance Guide... - Page 32 Make sure the IDE jumper on the rear section of the CD-ROM drive is set to CS (Cable Select). d. Connect the IDE power cable to its connector on the rear of the CD-ROM drive. HP ProLiant ML110 Server Operations and Maintenance Guide...
- Page 33 Disconnect the FDD power cable from the rear of the drive. b. Disconnect the FDD data cable from the rear of the drive. c. Press the FDD retaining lever. d. Move the lever downward to release the bar from its retaining hook. HP ProLiant ML110 Server Operations and Maintenance Guide...
- Page 34 Press the FDD retaining lever downward. c. Move the lever into its retaining hook to secure the new drive in place. d. Connect the FDD power cable to its connector on the rear of the drive. HP ProLiant ML110 Server Operations and Maintenance Guide...
- Page 35 4. Select the common bay where you plan to install the optional drive. 5. Prepare the selected common bay for drive installation: a. Pull out the bay cover. Keep it for later use. b. Press the retaining lever of the selected bay. 4-10 HP ProLiant ML110 Server Operations and Maintenance Guide...
- Page 36 Press the retaining lever downward. c. Move the lever into its retaining hook to secure the new drive in place. d. Connect the drive power cable to its connector on the rear of the drive. HP ProLiant ML110 Server Operations and Maintenance Guide 4-11...
- Page 37 (c). a. Disconnect the power cable from the rear of the drive. b. Disconnect the data cable from the rear of the drive. 4-12 HP ProLiant ML110 Server Operations and Maintenance Guide...
- Page 38 If you are installing the new hard disk in a drive bay where there was a previously installed drive, use the screws you removed from that old drive to secure the new drive. HP ProLiant ML110 Server Operations and Maintenance Guide 4-13...
- Page 39 If there is any previously installed drive that is still in the cage, reconnect the data cable of that drive. Figure 4-13: Installing the HDD cage 8. Observe the post-installation procedures. 4-14 HP ProLiant ML110 Server Operations and Maintenance Guide...
- Page 40 6. Remove the processor from its socket: a. Depress then lift up the socket retention bar up to a 90° angle. b. Grasp the processor by its edges and lift it out of its socket. HP ProLiant ML110 Server Operations and Maintenance Guide 4-15...
- Page 41 Make sure that pin-1 marker (indicated by the notched corner) of the processor is align to hole 1 of the socket (on the bottom right corner). c. Insert the processor into the socket. 4-16 HP ProLiant ML110 Server Operations and Maintenance Guide...
- Page 42 CAUTION: To prevent overheating or a possible system crash, use only a heat sink-cooling fan assembly specified for the HP ProLiant ML110 server model. 4. Reinstall the heat sink-cooling fan assembly: a. Align then insert the heat sink-cooling fan assembly on top of the processor.
- Page 43 System Configuration Figure 4-17: Installing the heat sink-cooling fan assembly 5. Observe the post-installation procedures. Memory Your HP ProLiant server has four DIMM slots that support: • DDR 400 unbuffered ECC DIMMs in 256 MB, 512 MB, or 1GB configuration •...
- Page 44 Yes * Both channel A and B Yes * DS mode Yes * Note: (*) special cases – need to meet the requirements discussed in the “Dynamic addressing mode” item above. HP ProLiant ML110 Server Operations and Maintenance Guide 4-19...
- Page 45 Figure 4-18: Single-channel mode operation Figure 4-19: Dual-channel mode operation NOTE: While the four DIMM slots can accept different size DIMMs in any configuration, HP recommends installing the smallest capacity module in slot 4 and progressively larger capacity modules in slots 3, 2 and 1.
- Page 46 Firmly press the holding clips inward to secure the DIMM in place. If the holding clips do not close, the DIMM is not inserted correctly. Figure 4-21: Installing a DIMM 4. Observe the post-installation procedures. HP ProLiant ML110 Server Operations and Maintenance Guide 4-21...
- Page 47 System Configuration PCI Cards The HP ProLiant ML110 server supports five PCI bus slots with two separate bus channels: • Two 32-bit/33 MHz 5V PCI bus slots (PCI1 and PCI5) • Three 64-bit/66 MHz 3.3V PCI-X bus slots (PCI2 to PCI4) To Install a PCI Card 1.
- Page 48 Figure 4-23: Installing a PCI card 7. Observe the post-installation procedures. Battery Your HP ProLiant server is equipped with a 3V 200 mAh internal lithium battery. To Replace the Battery WARNING: Note the following reminders when replacing the battery. •...
- Page 49 WARNING: Be sure to support the PSU with your hands when removing the screws securing it to the chassis. The PSU is heavy and could hurt you or damage components on the mainboard. 4-24 HP ProLiant ML110 Server Operations and Maintenance Guide...
- Page 50 Connect the PSU cables to their mainboard connectors (CN1 and CN2). Connect the power cables of all installed drives to the PSU. Figure 4-26: Installing a PSU 6. Observe the post-installation procedures. HP ProLiant ML110 Server Operations and Maintenance Guide 4-25...
- Page 51 Slide the system fan upward to disengage the frame tabs from the chassis. d. Pull the system fan away from the chassis. Figure 4-27: Removing a system fan from the server 4-26 HP ProLiant ML110 Server Operations and Maintenance Guide...
- Page 52 6. Install a new system fan: a. Align the tabs on the system fan frame to their chassis notch. b. Slide the system fan downward to secure the tabs to the chassis. HP ProLiant ML110 Server Operations and Maintenance Guide 4-27...
-
Page 53: Server Configuration
Connect the system fan cable to its power connector (SYSFAN1) on the mainboard. Figure 4-30: Installing a system fan on the server 7. Observe the post-installation procedures. Server Configuration The following sections describe how to configure the HP ProLiant ML110 server using the following resources: • HP ProLiant ML110 Server Startup CD-ROM This CD-ROM allows you to access and copy the needed utilities and drivers to flexible diskettes, which can be used to configure the server. - Page 54 — Set and clear the system passwords — Set device boot priority The Setup Utility used by the HP ProLiant ML110 server is Phoenix BIOS v4.06. For more information on this utility, refer to Chapter 5. NOTE: The Setup Utility automatically detects most of the hardware devices you install, but you should verify that the server has properly recognized the options after you have installed all of the optional accessories.
- Page 55 Initialization parameter. By default, this parameter is enabled. Press Y to disable the parameter. d. Press x to save the configuration settings and close the utility. The system will automatically reboot. 4-30 HP ProLiant ML110 Server Operations and Maintenance Guide...
-
Page 56: Bios Setup Utility
POST uses these values to configure the hardware. If the values and the actual hardware do not agree, POST generates an error message. You must run this utility to change the BIOS settings from the default or current configuration. HP ProLiant ML110 Server Operations and Maintenance Guide... -
Page 57: Accessing The Setup Utility
The Setup Utility’s menu bar has six menu selections. The table on the next page lists these menus and their corresponding functions. Refer to the online help displayed on the left side of the Setup screen for an explanation of the currently displayed setting. HP ProLiant ML110 Server Operations and Maintenance Guide... -
Page 58: To Move Around The Setup Screen
Grayed-out parameters are not user-configurable for one of the following reasons: — The parameter is auto-configured or auto-detected. — The parameter is informational only. — The parameter is password-protected and is accessible only by the User or Administrator. HP ProLiant ML110 Server Operations and Maintenance Guide... -
Page 59: Recording Bios Settings
• PCI slots available • Wake On LAN (WOL) status It is recommended that you check this screen during the initial system setup and each time you install, remove, or upgrade accessories. HP ProLiant ML110 Server Operations and Maintenance Guide... -
Page 60: To View The System Summary Screen
There are three types of passwords that you can set: • Supervisor password Entering this password will allow the user to access and change all settings in the Setup Utility. HP ProLiant ML110 Server Operations and Maintenance Guide... -
Page 61: To Set A System Password
1. In the Security menu screen, select a set password parameter—Set User Password or Set Supervisor Password, then press Enter. A password box will display. 2. Type the original password then press Enter. 3. Type a new password then press Enter. HP ProLiant ML110 Server Operations and Maintenance Guide... -
Page 62: To Remove A System Password
SW1-3 to its default position. 8. Power down the server and disconnect the power cable. 9. Remove the left-side cover as described in Chapter 4. 10. Repeat steps 2 through 3. HP ProLiant ML110 Server Operations and Maintenance Guide... -
Page 63: Closing The Setup Utility
NOTE: If you do not have convenient access to the Internet, you can create the BIOS Update/Recovery diskette by using the HP ProLiant ML110 Server Startup CD-ROM. Please note that the Startup CD may not provide the most recent BIOS. To create the BIOS Update/Recovery diskette, run the Startup CD on any Windows PC with an HTML browser and follow the menu instructions. -
Page 64: To Update Bios
BIOS Setup Utility To Update BIOS HP regularly posts a new version of the HP ProLiant ML110 server BIOS on their website at www.hp.com to improve the server’s performance. To update the server’s BIOS Setup Utility with the latest version: 1. -
Page 65: Clearing Cmos
2. Locate the dip switch (SW1) on the mainboard. Refer to Chapter 2 for a view of the mainboard layout. 3. Identify SW1-1 of the dip switch. By default, SW1-1 is set to the Off position. 5-10 HP ProLiant ML110 Server Operations and Maintenance Guide... -
Page 66: Setting Hardware Protection
2. Select the hardware item you want to lock. 3. Press the plus (+) or minus (-) key to set the selected hardware to Lock. 4. Press F10 to save the changes you made and close the Setup Utility. HP ProLiant ML110 Server Operations and Maintenance Guide 5-11... -
Page 67: System Maintenance
NOTE: HP recommends the periodic cleaning of tape heads, capstans, and guides on HP tape drive units and those products using high-density data cartridges and mini-data cartridges. These maintenance procedures prolong tape and head life and helps reduce read/write errors due to dust and oxide. -
Page 68: Troubleshooting Procedures
Refer to the following sections for the information you need to deal with possible system problems. Troubleshooting Tools If you are having problems operating your HP ProLiant ML110 server, refer to the table below for a list of resources you can use. Table 6-2: Troubleshooting Tools... -
Page 69: Troubleshooting Procedures
If you need any technical support on operating your server, do any of the following: • Contact an HP authorized service provider in your area. For information on how and where to contact these service centers in your area, refer to http://e-support.hp.com.cn/Support/product-item.asp. -
Page 70: Determining The Cause Of A Problem Condition
5. Make sure all firmware/BIOS revisions on any controllers are kept current. 6. Make sure that only HP-provided drivers are used for all HP devices used in the server. This includes HP drivers for the initial installation of any NOS that is supported by the server. -
Page 71: Specific Troubleshooting Procedures
If after performing the steps above, the cause of the problem condition remains unknown, seek HP technical support. Refer to the “Technical Support” section earlier in this chapter. Specific Troubleshooting Procedures Refer to the instructions below for troubleshooting a particular server problem. - Page 72 Make sure all disk drive power and data cables are securely and properly connected. Check that all the mass storage devices meet the specification of your HP server. g. Verify that all installed memory modules are HP-approved modules and they are properly seated.
- Page 73 DC power supply cables to all mass storage devices, including the flexible disk drive • DC power supply cable to all fans If the server fans still failed to function, call your HP Customer Support provider. The power indicator does not light green after the power button is pressed. •...
- Page 74 6. Press the power button again. 7. Check the status of the power indicator. If it remains off, call your HP Customer Support provider for assistance. If it lights up: a. Reconnect the power connectors one by one to the internal devices to determine which device or connection is defective.
- Page 75 Refer to the manual provided with the screen saver utility. 9. If the monitor displays a badly scrambled image that looks to be a current screen image, the monitor is not synchronizing correctly. Call your HP Customer Support provider. HP ProLiant ML110 Server Operations and Maintenance Guide...
- Page 76 13. Verify that fans and hard drives are spinning up. If there is still no video: 14. Repeat steps 4 through 5. 15. Remove and reseat the memory and take down to base memory. 16. Remove all PCI controller cards. 6-10 HP ProLiant ML110 Server Operations and Maintenance Guide...
- Page 77 Keyboard Problems The following conditions are indicative of a keyboard problem: • The keyboard does not work. • A character is not displayed when a key is pressed. HP ProLiant ML110 Server Operations and Maintenance Guide 6-11...
- Page 78 6. Verify that you are using the latest BIOS for your HP ProLiant ML110 server. Mouse Problems The HP server automatically detects a mouse when one is installed. If it is not detected or if any of the following conditions are present, there is a mouse problem: •...
- Page 79 1. Review the items under the “Troubleshooting Checklist” section earlier in this chapter. 2. Check the battery socket terminals for corrosion or loose connections. If this does not correct the problem, call your HP Customer Support Center before replacing any more parts. Flexible Disk and FDD Problems...
- Page 80 The server will not boot from the CD-ROM drive. 1. Review the items under the “Troubleshooting Checklist” section earlier in this chapter. 2. Place a known, bootable CD-ROM in the drive. 6-14 HP ProLiant ML110 Server Operations and Maintenance Guide...
- Page 81 2. Remove the board and restart the server. Ιf this corrects the problem, the new board is either defective or it is trying to use a system resource used by another SCSI controller board. HP ProLiant ML110 Server Operations and Maintenance Guide 6-15...
- Page 82 Ensure that no SCSI device is set to SCSI ID 7. This SCSI address is generally used by the SCSI controller. • Check that all installed SCSI controllers are configured correctly. 6-16 HP ProLiant ML110 Server Operations and Maintenance Guide...
- Page 83 5. If you suspect hardware failure and there are no system error messages or beep codes, check each component associated with the failure. Equipment failure is probably the most unlikely reason for an IDE devices failure. HP ProLiant ML110 Server Operations and Maintenance Guide 6-17...
- Page 84 2. Try turning the server off and on. This performs a cold restart rather than a warm restart (Ctrl-Alt-Del). 3. Make sure that the installed modules are of the type approved by HP to be used on this server. The HP ProLiant ML110 server supports PC3200 unbuffered ECC memory modules.
- Page 85 3. Try the faulty module in another memory slot to confirm that the slot is not defective. 4. Replace the defective module. For detailed procedures on how to remove and install memory modules, go to the “Memory” section in Chapter 4. HP ProLiant ML110 Server Operations and Maintenance Guide 6-19...
-
Page 86: System Diagnostics
System Diagnostics Overview The HP ProLiant ML110 server’s diagnostic function monitors system activity and performs constant hardware testing to ensure proper system operation. The diagnostic results are displayed during POST (which in itself is a diagnostic process). - Page 87 Keyboard error Verify that the keyboard cable is securely connected to the keyboard port (not the mouse port) on the rear panel of the server. If the problem persists, replace the keyboard or contact your HP Customer Support provider. Mouse error Verify the mouse cable is securely connected to the mouse port (not the keyboard port) on the rear panel of the server.
- Page 88 Press F10 to save the new settings and close the utility. If you feel that your computing needs require BIOS settings that are geared for optimum system performance, contact the HP technical support for assistance. When no POST message is displayed but the server stops during POST, listen for beep codes.
- Page 89 Restore CPU control word during warm boot Initialize PCI bus mastering devices Initialize keyboard controller 1-2-2-3 BIOS ROM checksum Initialize cache before memory auto size 8254 timer initialization 8237 DMA controller initialization Reset Programmable Interrupt Controller continued HP ProLiant ML110 Server Operations and Maintenance Guide...
- Page 90 QuietBoot start (optional) Shadow video BIOS ROM Display BIOS copyright notice Initialize MultiBoot Display CPU type and speed Initialize EISA board Test keyboard Set key click if enabled Enable USB devices continued HP ProLiant ML110 Server Operations and Maintenance Guide...
- Page 91 Detect and install external parallel ports Initialize PC-compatible PnP ISA devices Re-initialize onboard I/O ports Configure motherboard configurable devices (optional) Initialize BIOS data area Enable Non-Maskable Interrupts Initialize extended BIOS data area continued HP ProLiant ML110 Server Operations and Maintenance Guide...
- Page 92 Inform ROM Pilot about the end of POST POST done - prepare to boot operating system One short beep before boot Terminate QuietBoot (optional) Check password (optional) Initialize ACPI BIOS Prepare boot continued HP ProLiant ML110 Server Operations and Maintenance Guide...
- Page 93 The following are for boot block in flash ROM: Initialize the chipset Initialize the bridge Initialize the CPU Initialize system timer Initialize system I/O Check force recovery boot Checksum BIOS ROM Go to BIOS Set huge segment Initialize Multi-Processor continued HP ProLiant ML110 Server Operations and Maintenance Guide...
-
Page 94: Post-Related Troubleshooting
The processor is fully seated in its socket on the mainboard. • The heat sink-CPU fan assembly is properly installed on top of the processor. • Verify that the all memory modules are properly installed. HP ProLiant ML110 Server Operations and Maintenance Guide... -
Page 95: Hardware Diagnostic Software
In order to be effective, diagnostic software tools must be used in the context of a wider troubleshooting procedure. 7-10 HP ProLiant ML110 Server Operations and Maintenance Guide... -
Page 96: Diagnostics For Windows
Diagnostics for Windows Diagnostics for Windows provides an easy-to-use hardware diagnostic for server verification and rapid troubleshooting. This utility is installed from the HP ProLiant ML110 Server Startup CD-ROM, and run under Microsoft Windows. For instructions on installation and use, refer to the README file located inside the Diagnostics for Windows folder in the Startup CD. -
Page 97: Addendum - Sata Configuration
Array Management (PAM). For information on installing the FastTrak S150 SX4 RAID Controller card and configuring an array on your HP server, refer to Chapter 2 of the Promise FastTrak S150 SX4/SX4000 /SX4000 Lite User Manual that comes with your system. -
Page 98: Sata Drive Installation
4. Remove all hot-plug hard drives from the cage: This step assumes that there is a drive currently installed in the cage. If the cage is empty, go directly to step 5. HP ProLiant ML110 Server Operations and Maintenance Guide... - Page 99 5. Remove the HDD cage from the server a. Remove the six Torx screws that secure the cage to the chassis. Keep the screws for reinstalling the cage later. b. Gently slide out the cage from the chassis. HP ProLiant ML110 Server Operations and Maintenance Guide...
- Page 100 Remove the four Torx screws that secure the backplane to the cage. Keep the screws for reinstalling the new backplane. b. Gently slide out the backplane from the cage. Figure 8-4: Removing the backplane HP ProLiant ML110 Server Operations and Maintenance Guide...
-
Page 101: Creating The Fasttrak S150 Sx4 Raid Controller Driver Diskette
Windows OS installation. Please follow the steps below: 1. Insert a blank, formatted 3.5" diskette into the floppy drive. 2. Insert the HP ProLiant ML110 Server Startup CD into the CD-ROM drive. 3. On the Startup CD’s Welcome page, click drivers on item number 3. -
Page 102: Sata Led Indicator Status
Ongoing drive activity, predictive failure blinking (S.M.A.R.T status) Single Offline, no activity, critical fault condition blink SATA drive selected Slow SATA drive rebuilding blinking Note: Fast blinking – 8 Hz Slow blinking – 4 Hz HP ProLiant ML110 Server Operations and Maintenance Guide... -
Page 103: Regulatory Compliance Notices
However, there is no guarantee that interference will not occur in a particular installation. HP ProLiant ML110 Server Operations and Maintenance Guide... -
Page 104: Declaration Of Conformity For Products Marked With The Fcc Logo, United States Only
Hewlett-Packard Company may void the user’s authority to operate the equipment. Cables Connections to this device must be made with shielded cables with metallic RFI/EMI connector hoods in order to maintain compliance with FCC Rules and Regulations. HP ProLiant ML110 Server Operations and Maintenance Guide... -
Page 105: Canadian Notice (Avis Canadien
EN55024 (IEC61000-4-2, 3, 4, 5, 6, 8, 11) – Electromagnetic Immunity • EN61000-3-2 (IEC61000-3-2) – Power Line Harmonics • EN61000-3-3 (IEC61000-3-3) – Power Line Flicker • EN60950 (IEC950) – Product Safety Japanese Notice HP ProLiant ML110 Server Operations and Maintenance Guide... -
Page 106: Bsmi
Device Notices Laser Device Notices All HP systems equipped with a laser device comply with safety standards, including International Electrotechnical Commission (IEC) 825. With specific regard to the laser, the equipment complies with laser product performance standards set by government agencies as a Class 1 laser product. -
Page 107: Mouse Compliance Statement
IEC 825. Laser Product Label The following label or equivalent is located on the surface of the HP supplied laser device. This label indicates that the product is classified as a CLASS 1 LASER PRODUCT. This label appears on a laser device installed in your product. -
Page 108: Battery Replacement Notice
Regulatory Compliance Notices Battery Replacement Notice Your HP ProLiant server is equipped with a 3V 200 mAh internal lithium battery. There is a danger of explosion and risk of personal injury if the battery is incorrectly replaced or mistreated. Unless specific replacement instructions are provided as part of this guide, replacement is to be done by an authorized service provider using the HP spare designated for this product. -
Page 109: Appendix B Electrostatic Discharge
If you do not have any of the suggested equipment for proper grounding, have an authorized HP service provider install the part. For more information on static electricity, or assistance with product installation, contact your authorized reseller. HP ProLiant ML110 Server Operations and Maintenance Guide... -
Page 110: Power Cord Set Requirements
10 A/125 volts AC, or 10A/250 volts AC, as required by the power system of each country. • The appliance coupler must meet the mechanical configuration of an EN60320/IEC 320 Standard Sheet C13 Connector, for mating with the appliance outlet on the server. HP ProLiant ML110 Server Operations and Maintenance Guide... -
Page 111: Country-Specific Requirements
Japanese Dentori Law. Flexible cord must be Type VCT or VCTF, 3-conductor, 1.0 mm conductor size. Wall plug must be a two-pole grounding type with a Japanese Industrial Standard C8303 (7A, 125V) configuration. HP ProLiant ML110 Server Operations and Maintenance Guide... - Page 112 System Summary Screen 5-4 drive activity indicator 2-2 updating BIOS 5-8 DS mode 4-19 BIOS Update/Recovery diskette 5-8 dual-channel lock step mode See DS mode boot block switch 2-7 dynamic addressing mode 4-19 Index-1 HP ProLiant ML110 Server Operations and Maintenance Guide...
- Page 113 DIMM population guidelines 4-20 hibernate mode 3-8 DS mode 4-19 hot-plug HDD cage dynamic addressing mode 4-19 cabling diagram 8-1 installing DIMM 4-21 installing in chassis 8-5 MCH operating modes 4-18 Index-2 HP ProLiant ML110 Server Operations and Maintenance Guide...
- Page 114 C-1 system 4-28 obtaining additional information C-1 server dimensions requirements C-1 depth 1-3 voltage rating C-1 height 1-3 wall plug specifications C-2 weight 1-3 power indicator 2-2 width 1-3 Index-3 HP ProLiant ML110 Server Operations and Maintenance Guide...
- Page 115 C-2 warranty viii environmental specifications 1-3 physical specifications 1-3 weight power supply requirements 1-3 basic 1-3 system structure full 1-3 width 1-3 external structure 2-1 front panel 2-1 Index-4 HP ProLiant ML110 Server Operations and Maintenance Guide...
Need help?
Do you have a question about the proliant ML110 and is the answer not in the manual?
Questions and answers