Advertisement
Quick Links
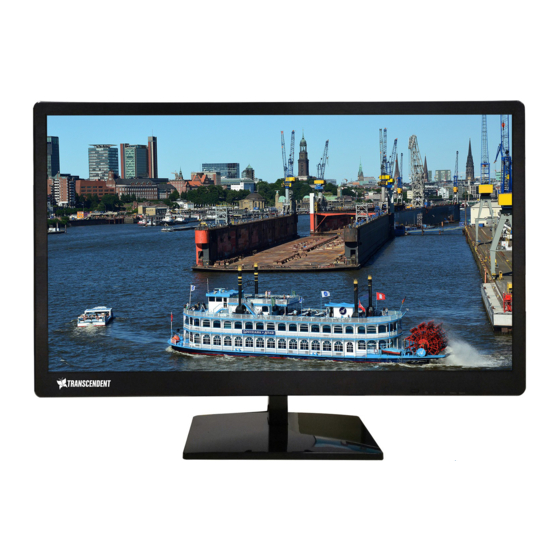
VTM-TLM28P-4K
Transcendent 28" 4K HDMI(3x) LED
CCTV Monitor with 3D Comb
Filter and De-interlacing
FEATURES:
• 28" Display with 16:9 Aspect Ratio
• 4K Resolution (3840x2160)
• 3 x HDMI Inputs
• 1 x DP Input + Audio Output
• 3D Noise Reduction
• Super Slim Design
• Built-in 3D Comb Filter, Supports De-interlacing
• Contrast Ratio of 1000:1
• 5ms Response Time
• 1.073G Colors
• 170° / 170° Horizontal and Vertical Viewing Angle
• LED Backlit
• Professional grade display designed for 24/7 continuous
use in security applications with 50,000 hour panel life
• 3 Year Warranty
Advertisement

Subscribe to Our Youtube Channel
Related Manuals for Vitek VTM-TLM28P-4K


Summary of Contents for Vitek VTM-TLM28P-4K
- Page 1 VTM-TLM28P-4K Transcendent 28” 4K HDMI(3x) LED CCTV Monitor with 3D Comb Filter and De-interlacing FEATURES: • 28” Display with 16:9 Aspect Ratio • 4K Resolution (3840x2160) • 3 x HDMI Inputs • 1 x DP Input + Audio Output • 3D Noise Reduction •...
-
Page 2: Table Of Contents
Table of contents Safety Symbols & Precautions------------------------------------------ 2~5 Accessories----------------------------------------------------------------------6 Installation-----------------------------------------------------------------------6 Controls & Functions--------------------------------------------------------- 7 OSD setup under HDMI & DP input mode--------------------------8~20 Care and Cleaning----------------------------------------------------------- 21 Mounting Your MONITOR to a Pole or Wall----------------------------21... -
Page 3: Safety Symbols & Precautions
WARNING Failure to abide by the information in a WARNING may result in serious injury and can be life threatening. CAUTION Failure to abide by the information in a CAUTION may result in moderate injury and/or property or product damage. Alert electrical hazard. - Page 4 WARNING If the unit begins to emit smoke, smells like something is burning, or makes strange noises, disconnect all power connections immediately and contact your dealer for advice. Attempting to use a malfunctioning unit may result in fire, electric shock, or equipment damage. Do not open the cabinet or modify the unit.
- Page 5 To disconnect the power cord, grasp the plug firmly and pull. Tugging on the cord may damage and result in fire or electric shock. The equipment must be connected to a grounded main outlet. Not doing so may result in fire or electric shock. Use the correct voltage.
- Page 6 Do not block the ventilation slots on the cabinet. Do not place any objects on the ventilation slots. Do not install the unit in a closed space. Do not use the unit laid down or upside down. Blocking the ventilation slots prevents proper airflow and may result in fire, electric shock, or equipment damage.
-
Page 7: Accessories
Accessories Please check the following listed accessories before installation: AC cable X 1, HDMI cable X 1, User Manual X 1, LCD Monitor X 1, 12VDC Power Supply X 1, LCD Monitor X 1, Desktop Stand X 1, Installation 1. Rear Interface Explanation of connectors DC: power supply 12V 4A HDMI (1/2/3): Lets you connect a device, such as a digital cable box,... -
Page 8: Controls & Functions
video and audio data by way of an integrated mini-plug cable. Since HDMI technology is based on Digital Visual Interface (DVI), the jack on the back of your MONITOR is also compatible with DVI devices. HDMI Input lets you connect a device, such as a digital cable box, with an HDMI output. HDMI1[2.0 &... - Page 9 Turn on / off the monitor 2.SOURCE: Accesses the available video input signals (DP), HDMI1[2.0], HDMI2[1.4], HDMI3[1.4] 3.MENU : : Bring up the MONITOR main menu. 4. + + : Turn on the brightness. In the MONITOR menu system, adjusts menu controls.
- Page 10 Remote control ( ( OPTIONAL ) ) Remote control ( ( OPTIONAL ) ) Turn on & off the monitor POWER Display or exit the main menu MENU Turn on & off the monitor POWER VIDEO Source switching / Cursor up VIDEO/UP when OSD appears Display or exit the main menu...
-
Page 11: Osd Setup Under Hdmi & Dp Input Mode
OSD setup OSD setup under HDMI & DP input mode Menu Input Source: Remark The monitor will automatically Display the channel that with signal feed in. - Page 12 Menu Brightness/Contrast: Brightness:Set the image brightness (0-100) Remark Contrast:Set the image Contrast (0-100) DCR: Set the dynamic contrast ratio (on / off)
- Page 13 Menu Color Set: Gamma: Set the image gamma (1.8, 2.0, 2.2, 2.4, 2.6) Remark Picture Mode: Set the image mode (Standard, photo, movie, game) Color Temperature: Set the color temperature (Normal, warm, cool, user)
- Page 14 Hue: Set the image hue (0-100) Saturation: Set the image saturation (0-100) Low Blue Light: Set the low blue light (0-100) Menu...
- Page 15 Remark Picture Quality Set: Sharpness: Set the picture sharpness (0-100) Response Time: Set the picture response time (off, high, middle, low) Noise Reduction: Set the picture noise reduction (off, high, middle, low) Super Resolution: Set the picture super resolution (off, high, middle, low) Dynamic Luminous Control: Set the picture dynamic luminousity (on / off)
- Page 16 Menu Display: Remark Aspect Ratio: Screen aspect ratio Set (wide screen, 4:3, 1:1, auto)
- Page 17 Menu Audio: Remark Mute: Mute the audio output to the earphone (on / off) Volume: Set the audio output volume to the earphone (0-100)
- Page 18 Menu Multi-Window: Multi-Window: Set the screen multi-window (off, PIP mode, PBP 2win, Remark PBP 3Win, PBP 4Win) Sub Win2 Input: Set the sub win2 input (HDMI2[1.4]) Sub Win3 Input: Set the sub win3 input (HDMI3[1.4])
- Page 19 Sub Win4 Input: Set the sub win4 DP PIP Size: Set the PIP picture size (small, medium, large) PIP Position: Set the PIP sub window position (top right, top left, bottom right, bottom left) Swap: Switch the main window with the sub window Menu...
- Page 20 Remark OSD: Language: OSD language selection (English, Chinese, Korean, Russian, Spanish, Japanese, French) OSD H-Position: Change OSD horizontal position adjustment (0-100) OSD V-Position: Change OSD vertical position adjustment (0-100) OSD Transparency: OSD transparency adjustment (0-100) OSD Time Out: OSD display dwell time selection (0-100 seconds) OSD Rotation: OSD rotation adjustment (Normal, 90, 180, 270)
- Page 21 Menu Other: Reset: Reset the monitor to default factory setting. Remark...
-
Page 22: Care And Cleaning
(consult specs on following page for weight) without causing damage. To mount your MONITOR to a wall or pole you need to purchase a VESA wall mount. See VITEK Models VT-LCD/WMT-R (wall) or VT-LCD/PMT (Pole) sold separately. - Page 23 VTM-TLM28P-4K Specifications Panel Type 28’’ 16:9 LED Backlit Monitor Resolution 3840 x 2160 Pixel Pitch 0.16 x 0.16mm Contrast Ratio 1000:1 Display Features Brightness 300 cd/m² Response Time Colors 1.073G Viewing Angle (H/V) 170º/170º Inputs 3 x HDMI + DP Audio 1 x Audio (2.5mm line level output)
- Page 24 (3) years, or as otherwise stated above, from the date of purchase by the end user. This warranty is nontransferable and extends only to the original buyer or end user customer of a VITEK Authorized Reseller. The product must have been used only for its intended purpose, and not been subjected to damage by misuse, willful or accidental damage, caused by excessive voltage or lightning.
Need help?
Do you have a question about the VTM-TLM28P-4K and is the answer not in the manual?
Questions and answers