
Related Manuals for Carf-Models Ultra Lightning


Summary of Contents for Carf-Models Ultra Lightning
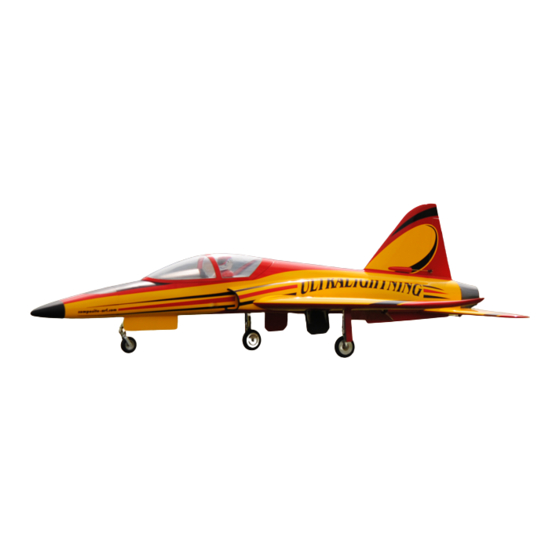
- Page 1 I n s t r u c t i o n Ma n u a l C A R F Mo d e l s ‘ U l t r a L i g h t n i n g ’...
-
Page 2: Liability Exclusion And Damages
However, as manufacturers, we at CARF-Models are not in a position to influence the way you build and operate your model, and we have no control over the methods you use to install, operate and maintain the radio control system components. -
Page 3: Important/General Notes
This ‘jet’ aircraft is a high-end product and can create an enormous risk for both pilot and spec- tators, if not handled with care, and used according to the instructions. Make sure that you oper- ate your ‘Ultra Lightning’ according to the AMA rules, or those laws and regulations governing model flying in the country of use. - Page 4 Why? Because the axis of the hinge is not at the centreline of the aileron/elevator, so it moves slightly in and out when Centreline of hinge axis operated, and the control surface gets a little "smaller" in surface area when moving downwards. The slot needs some explanation, too.
- Page 5 We know that even good things can be made better ! Accessories This is a list of the main additional items you will need to get your CARF-Models Ultra Lightning into the air. Some of them are mandatory, and some can be chosen by you. What we list here are highly recommended items, and have been thoroughly tested.
- Page 6 Did you read the hints and warnings above and the instructions carefully? Did you understand everything in this manual completely? Then, and only then, let’s start assembling your CARF-Models Ultra Lightning If not, please read it again before you continue.
- Page 7 About the ‘Lightning’ The ‘Lightning’ was conceived early in 2004, and almost 1 year was taken for careful design, development and testing before the full production commenced. The original concept was to design a no-compromise highly-prefabricated ‘Giant Scale’ sport jet for precision aerobatics, with 3D capability, for the 15 - 16 kg (30 - 38Lbs) thrust range of turbines.
- Page 8 In its final ‘production’ form the Lightning is almost a ‘Ready-To-Fly’ model, and we complete more assembly in the factory for it than for any of our other products. ∗ ∗ Inlet ducts completely fitted and painted. ∗ ∗ Vertical fin and stabilisers completed, including the retention systems. ∗...
-
Page 9: Building Instructions
Building Instructions Landing Gear The Lightning, and the complete landing gear set and it’s mounting system, is designed to handle grass runways. The C-ARF landing gear set is specially manufactured for the Lightning, integrat- ing the very high quality engineering of Behotec (Germany) for the retract units and oleo legs, with the superb reliability of the well-known Intairco (Australia) - Page 10 If using our large 115mm wheels you will need to sand away a curve in the lip at the front and back edges of the wheel well for clearance (photo P1). Now complete the final assembly of the oleos, wheels and brakes to the retract units, grinding small flats as needed for the set-screws and ‘Loctiting’...
- Page 11 The steel pin that is fitted in the nose gear retract block to connect the oleo legs is secured with a single 6mm wheel collet on top. Make sure that the steel pin does not project thru’ the collet more than about 1 or 2mm, or it will hit the inside of the retract unit when operated. For Main Gear Door installation - see ‘Wing’...
- Page 12 the door opening for additional stiffening if you wish. Finally secure the 1” stroke BVM door cylinder to the milled plywood sub-former supplied, (photo P6) and route the tubes to suit your retract and door system valve. Alternative Dual Nose Doors As with all jet models, the nosewheel tends to throw up debris into the cockpit and R/C bay - which is especially (above and below) A nice neat...
- Page 13 The bypass duct itself is designed as an integrated struc- tural part of the plane, and is incredibly strong when prop- erly installed, in effect giving a ‘monocoque’ construction and providing extra torsional strength to the fuselage. Note: The ‘upper’ bypass is the one that will be at the top when the plane is the normal way up, but all the next sec- tion is done with the plane upside down - working thru’...
- Page 14 over the back of the bypass duct to check lengths. The fixing tabs on the exhaust duct should be about 10 - 12mm in front of the rear bulkhead. You might find that about 5 - 6mm needs cutting off the back of the bypass. When satisfied, fit the carbon rear cone over the back edge of the upper bypass, and drill 3 holes of 3mm Ø...
- Page 15 range of turbines and it is, therefore, a compromise - but has already been used very success- fully with several different turbines including JetCat Titan, P160, P180 and AMT NL Pegasus HP types. If you find that you have a warm fuselage after an extended idle period, then you can increase the cooling air around the outside of the outer tube by making a couple of small addi- tional air inlet holes in the bottom hatch (see photo P19).
- Page 16 when all holes and pins line up and fit nicely, apply a little slow epoxy to each pin, push into the holes in the front of the hatch, and then install the hatch and tape it down firmly until the glue has cured. Additional glue/micro-balloons mixture can be added to the ends of the pins that project inside the plywood in the hatch afterwards, and any excess carbon rod cut off.
- Page 17 Wings The wings are almost completely finished at the factory. The control surfaces are hinged and trimmed, and the phenolic control surface horns are installed already. The wings are mounted using the anodised aluminium alloy 6061-T6 spar tube (40mm Ø x 990mm long), and a pair of 10mm diameter carbon anti-rotation pins in each wing, which have been installed for you and the wing incidences checked.
- Page 18 Ailerons The aileron servos are mounted on milled plywood mounts, supplied, and these are secured in the wing with three M3 x 12mm bolts and M3 washers onto the pre-installed plates (photo P22). Please don’t forget the washers as otherwise the bolts could touch the top wing surface.
- Page 19 If your Ultra Lightning does not have these installed in the factory please contact your Rep, or email us directly on: info@carf-models.com and we will send them to you immediately. The inner hinge support should be glued up against the inside edge of the wing root rib and flap root rib.
- Page 20 Mill a 4 mm diameter hole in the back of the balsa spar box for the front plastic tube, right up against the inside of the wing sandwich. The hole is oversize to allow for some adjustment. As the wing construction sandwich is a bit thicker than the door thickness you must relieve the sand- wich above the hole a little, and also in the position for the back hinge tube, so that the doors close completely flush.
- Page 21 the wing in 8 positions (as shown in the photo below), diam- eter 1.7mm for the small 2.2 Ø x 10mm sheetmetal screws. Open up the holes in the cover only to 2.2mm Ø. Cut 8 small squares of ply (from the 12mm wide strip supplied) and glue these underneath the wing skin with thin CA to cover the holes as reinforcement for the screws (photo P32).
- Page 22 Stabiliser The stabiliser is 95% completed at the factory. It is held to the fuselage with a pair of 6mm diameter carbon pins at the back, and two M4 x 60 bolts at the front into T-nuts in the fuselage. The dual phenolic elevator horns are also installed for you, and set at the correct angles with a jig.
-
Page 23: Vertical Fin And Rudder
Vertical Fin and Rudder The vertical fin is 99% completed at the factory, and just needs the rudder servo and linkage fitting. The Rudder is elastic-hinged and cut loose for you. The carbon spar tube is shipped fitted into the tube in the fin (for protection and fit checking), but it must be glued into the fibreglass tube in the fuselage - not glued into the vertical fin. -
Page 24: Fuel System
the ball-link and clevise from turning. Supplied in the kit is plastic linkage fairing, pre-painted to match the fin colour, which can be glued in place to cover the linkage (see photo page 23). IMPORTANT NOTE: As the pin in the clevise is made from aluminium, and it fits tightly into the hole in the aluminum servo arm it is imperative that you apply a little grease or light oil to this joint too make sure that it can swivel smoothly and cannot stick together. - Page 25 We have also included 2 Festo 4mm barbed Tee’s for connecting the 2 ’feed’ and ‘overflow’ tubes from the main tanks together, in par- allel, as shown in the instal- lation photos. Connect the main tanks together, with equal lengths of tube (supplied), in paral- lel, and then take a single tube from the Festo Tee to...
-
Page 26: Tail Cone
feed tube and the fuel pump and disconnect here to fill, and this has the added advantage that you cannot accidentally fill the turbine with fuel if the manual shut-off valve has been left open, or the fuel solenoid valve allows a small amount of fuel to pass thought it. It’s your choice. Use the same method as for the main tanks to assemble the tubes, with either fuel barbs or small brass tube rings soldered onto them to make sure that there can be no leaks. - Page 27 Cockpit Frame and Canopy The moulded fibreglass canopy frame has already been trimmed at the factory, and the securing method completed for you. It only remains for you to fit the clear cockpit canopy, and optional plastic cockpit tub if you wish. The cockpit canopy is held in place by a pair of phenolic hooks at the back, located in the middle with 2 small pheno- (above) The front of the canopy is...
- Page 28 Cockpit Tub A moulded ABS plastic cockpit tub will be included in the kits. It consists of 4 pieces, which should be joined with plas- tic cement and painted/trimmed to your choice, in the usual way. When completed it is glued permanently inside the cockpit canopy frame.
- Page 29 Important note for UL-Customers: Please, before you fly, take note of this important information: Please reinforce the carbon tube which connects the rudder fin to the fuselage. We did have a failure in flight recently. It seems when you snap the plane violently, this tube can break.
-
Page 30: Centre Of Gravity
Setting Up Your Aircraft Depending on your turbine and battery choice, and what accessories you use, your completed Lightning (dry) should weigh between 13 - 14.5kgs. The 1st (rather heavy!) Lightning prototype with a Jetcat P160, dual 5-cell receiver Nicads (2400 mAH) and a full Powerbox system weighed just over 14kg. -
Page 31: Flying Characteristics
? All this is possible with the CARF-Models Ultra Lightning. ONLY the pilot is the limit. With the set- tings given in this instruction manual you can enjoy the whole wide performance envelope as if this were a top class aerobatic plane. - Page 32 We have tried to make this airplane as complete as possible, and with good feedback from cus- tomers you will help us to continue making good things even better. We appreciate your com- ments very much. Email: info@carf-models.com Thank you! Your Composite-ARF Team...
-
Page 33: Hardware Bag
Hardware bag: Fuselage pack Quantity Description M4 x 50mm Allen bolt (nose section fixing) Washers M4 (nose section fixing) M4 x 20 bolt - spare (canopy frame fixing) M4 X 16 Allen bolt (nose landing gear fixing) M4 T-nut (nose landing gear fixing) Crimp tubes, inside diameter 2mm (nosegear steering) Steel cable 0.8mm x 800mm (nosegear steering) Sheetmetal screws 2.9 Ø... - Page 34 Vertical Fin/Rudder pack Quantity Description M6 Plastic Nut (for fin fixing) includes 1 spare Ball-link M3 (for rudder linkage) M3 x 20mm Allen bolt (for rudder linkage) M3 lock-nut (for rudder linkage) M3 nuts (for rudder linkage) Aluminium clevise with pin and C-clip (for rudder linkage) Brass tube 4mmØ...
- Page 35 Landing Gear pack (Option) Quantity Description Retract units (Behotec C50) 1 nose unit and 2 main units. Steel connecting pins for retract/oleo legs (8mm Ø) Wheel collar (8mm I.D) for nose connection pin Main wheels 115mm Ø, with 2 brakes and 2 axles (Intairco) Nose wheel 75mm Ø...
- Page 36 (above) Kit Contents (above) Fuselage hardware bag (above) Wing hardware bag...
- Page 37 (above) Vertical Fin hardware bag (above) Stabiliser hardware bag (above) Wood and Phenolic parts bag...
- Page 38 (above) Complete Fuel system set (incl. in standard kit) (above) Extra Fuel tank set (optional) (above) Cockpit Tub parts (incl. in standard kit) Mac Version 1.1 Mike C (27 September 2005)
Need help?
Do you have a question about the Ultra Lightning and is the answer not in the manual?
Questions and answers