
Related Manuals for Carf-Models MiG-15


Summary of Contents for Carf-Models MiG-15
- Page 1 MiG-15 bis “Fagot” Construction Manual Museum Scale All Composite Jet Aircraft techsupport@composite-arf.com / V2.1, March. 2012...
-
Page 2: Table Of Contents
contents 1. Nose gear installation & nose gear doors 2. Ataching the wing to the fuselage 3. Installing the ailerons and servos 4.Installing flaps and servos 5. Bottom rudder and servo installation 6. Elevator and top rudder 7. Fuselage hatches 8. - Page 4 safety instructions and warnings In the interests of your own safety and that of others, the model must only be operated by experienced, disciplined modellers with sufficient specialised expertise, and it must be serviced and maintained regularly and competently. If you have no experience in building and operating models of this type, it is vital that you enlist the help and advice of an experienced jet modeller if you are to avoid potentially catastrophic errors;...
- Page 5 LIABILITY EXCLUSION AND DAMAGES You have acquired a kit which can be assembled into a fully working RC model when fitted out with suitable accessories, as described in the building instructions in the kit. However, as manufacturers, we at Composite-ARF are not in a position to influence the way you build and operate your model, and we have no control over the methods you use to install, operate and maintain the radio control system components.
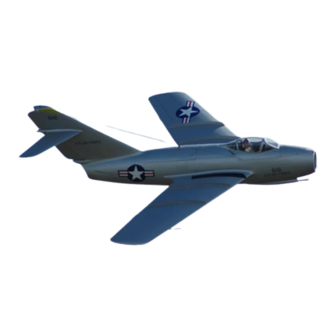
- Page 6 The full scale just did not have it either!!! Recommended CARF accessories 1x # 370550 Mig-15 retract set 1x # 370600 Mig-15 Fuel Tank set 3x # 961100 Electronic 2-Way retract valve 1x # 961150 Electronic 1-Way brake valve 6x # 630530 Robart cylinder 3/8" no165 You should use at least a gyro on rudder, we recommend even to use a gyro on ailerons to make the plane “fly on rails”-performance, even in heavy winds.
-
Page 7: Nose Gear Installation & Nose Gear Doors
Nose gear installation and nose gear doors The front air intake duct and the nose gear formers are already pre-installed. The nose gear unit is preassembled already. Still you might better take off the strut, so that you can mount and handle everything easier. - Page 8 The cylinder of the retract unit will stick into the fuselage as shown. This gives easy access to the air nippels later. File a grove in the former to easyly slide the air nippel through. Now cut the nose gear door in half, and check the fit in the gear door cutout.
- Page 9 Be very careful with the CA glue on the hinges, as said before, it makes the plastic weak. Only apply glue to the hinge tips. The rest will be filled with epoxy, after the correct position is confirmed. door fuselage point of rotation cut out!
- Page 10 The gear door cypinders (we recommend Robart #165) are mounted to the front gear former. Determine the correct position of the mounting holes, and predrill these holes with a small drill bit. to dertermine the correct position, take the cylinder and extend it to full.
- Page 11 As the nosegear will get it‘s steering connection with two pull-pull wires, the servo will have to be mounted at an angle, therfore a plywould block of 9mm should be glued under the rear mounting as shown in the previous picture.
-
Page 12: Ataching The Wing To The Fuselage
2. Ataching the wings to the fuselage The wings are already allinged and the mounting is already installed in the factory. Slide the carbon wing rods in the funselage sleves and then slide the wing on to doublecheck propper fit of the allingmet between Fuselage and wing. -
Page 13: Installing The Ailerons And Servos
So glue the hinges into the wood only. Robart Hinge Tip for the Pro’s: In case of the MiG-15’s swept back wing the hinges should not be mounted perpendicular to the leading edge of the aileron. They should be mounted parallel to the aileron’s tip. - Page 14 When you trial fit the ailerons to the wings please check on 3 mm! the photos left hand side. The trailing edge of the aileron steps back 3 mm from the wing tip, and the trailing edge then continues in one line to the trailing edge of the wing.
- Page 15 top side of the ailerons. Then glue in the control horn with 5 minute epoxy, so that the hole is approx. 6-8mm above the aileron surface (1/4 - 3/8th”). Make sure the horn is placed exactly perpendicular to the axis of rotation. Mounting the servo is a bit tricky.
-
Page 16: Installing Flaps And Servos
5. Installing Flaps and Servos our MiG-15’s flaps are Working Steps: already precut and hinged with a special nylon elastic hinge. - cut flap servo hatch and mount servo The flaps are stiff already, but - install control horn and linkage... - Page 17 ake out the hatch and assemble the servo mount. The photo shows, which parts to use. Make sure that you glue the milled wood parts very well to the hatch cover. Use CA glue first, and then fill excessively with epoxy and milled fiber to get a strong bond.
- Page 18 See the photos of a finished flap. If you install the vacuum formed sheet you should prepare it with the holes shown in the photos. The effect you get is 100% realistic. Us a few triangle balsa wood ribs to stiffen the vacuum formed sheet.
-
Page 19: Bottom Rudder And Servo Installation
- milled rudder servo mount, 3 robart hinges, torsion linkage, 2 pushrods 2mm, 2 clevises M2, 2 threaded ends M2, rudder servo, extension servo lead, 2 sheet metal screws Your MiG-15 has only the bottom rudder working. the top rudder is fixed. This simplifies... - Page 20 You will have to cut some areas of the rudder fin and the one-piece-stab to accept the rounded leading edge of the rudder. These cutouts could not be molded in for production reasons. Cut both parts according to the photos, assemble the parts to confirm sufficient clearance, so that the rudder can move without hitting any other part.
- Page 21 The rudder servo is mounted upside down in the rudder fin. Place the servo mount (3mm milled plywood) in the fin. Make sure that the rudder linkage can connect the torsion linkage of the rudder and the servo horn in a straight line and perpendicular to the rudders axis of rotation.
- Page 22 These photos show, where to cut or drill the holes for the linkage to pass the rudder post. These holes should be fairly large, so that the linkage does not bend ot lock at any position. When all is done and adjusted, drill the holes for the hinges into the rudder post of the fuselage and insert the rudder...
-
Page 23: Elevator And Top Rudder
7. Elevator and Top Rudder Work Steps: The elevator servos are hooked to a hidden torsion - install the hinges and torsion linkage in the elevator linkage, which does not - install the elevator servos and set up the linkage interfere with any scale - glue elevator in and glue in the fixed part of rudder ambitions in regards to static... - Page 24 Now install the servos with short servo arms into the servo mount. You will have to make sure that the servo arms do not hit the fiberglass. It is very tight inside, and it might afford several attempts to install servos and linkages so that everyting moves smoothly.
-
Page 25: Fuselage Hatches
7. Fuselage hatches Start with fitting the rear hatch to the fuselage. Sand the rear end of the hatch and the fillet of the rudder fin so that everything fits nicely. Do not worry to sand off some material in the vertical frame areas, especially rounding corners, the fiberglass is thick enough in these areas. - Page 26 The center hatch which covers the engine is locked by two piano wires running all the way from the small hatch at the nose into the rear hatch which we permanently glued on in an earlier stage. The piano wire runs through the white 2mm ID plastic tubing.
- Page 27 The nose hatch is a small challenge only. The 3 milled plywood parts have to be glued in place Also glue in the hatch latch. Make sure that the slot for the latch is long enough, so that you can release the hatch easily.
- Page 28 Cutting out the canopy works best with a very sharp X-Acto knife. The layup in this area is very thin, so be careful not to cut into the frames. After cutting out the windows roughly, use rounded file and sand paper sticks to finish the cutting borders.
-
Page 29: Speed Brake Doors
8. Speed brake doors If you do not want to operate the speed brake doors in flight, you can skip this whole chapter 8. But a plane that scale should definitely have the speed brake doors working, and they are very efficient too. - Page 30 Make yourself confident with the parts. All items are supplied with the kit. The photo on the left shows a set of parts and an assembled speed brake door. The next photo explains, how the axle has to be placed. Basically it is a 4 mm aluminum tube, with flat ends, curved according to the...
- Page 31 Next step is to frame the inside of the speedbrake doors. Milled balsa parts are supplied with the kit. Follow the photos to install these frames in the fuselage. At this stage, do not glue in the inner cover. Leave the area open, until the air cylinder and further detailing are installed in the door setup.
- Page 32 Now install the air cylinder for the speed brakes. Locate the position in the top rear corner of the frame. Reinforce this area with thin plywood from the back side, and mount the cylinder with sheet metal screws. Note, that the cylinder is pointed a little bit downwards, so you will have to use a little balsa wood triangle...
- Page 33 Further detailing is left up to you. We recommend at least cover the frame with the 0.8 mm plywood sheet. See the photo for further detailing of the inside of the speed brake door. This detailing is basically a very thin frame of plywood, 3 mm (1/ 8th”) high, and then filled with 2 additional ribs, which you can...
-
Page 34: Engine Installation
9. Engine installation First of all, we show the installation of a JetCat P- 120SX. If you use other engine brands, go ahead. Any engine between 8.5 and 12 kg of thrust will do fine. We do not mention the installation of the additional components such as fuel pump, gas tank, valves, and so... -
Page 35: Main Gear And Doors
10. Main Gear & Doors Work steps: - fit the gear units into the mounts - install struts, brakes and wheels - mount the gear with each 4 M4 screws - install the support air cylinder - install small outer gear door and linkage - install main gear door to the gear strut - detail with vacuum formed sheets - install inner gear door to fuselage... - Page 36 Let’s get started with mounting the gear units. Cut out the gear cutout in the former approx. 10 mm further. (first production run kits only!). Slide the unit in, and see where to girnd off the plywood support rib, to fit the cylinder perfectly. The cutout in this rib is very small on purpose.
- Page 37 After it is confirmed that the gear fits the gear well, mark the position of the holes for the mounting screws with a pencil, and take the gear out. Then drill 5.5 mm holes, insert the T-nuts and trial mount the landing gear.
- Page 38 When the movement of the gear units is exactly as you want it to be, get started with the outer small gear door. The angles of this small gear door are very complicated as well. Basically, it is hinged with 2 Robart hinges, and connected to the strut by a 2mm rod, which has a clevis on on the...
- Page 39 A slightly easier job is mounting the main gear door to the strut. The M3 threads are in already, and you now have to adjust the length of the brass tubes, which are used as spacers between strut and gear door. You can take off wheel and brakes at that stage.
- Page 40 Cut out the styrene parts and sand the shape, so that they fit on the gear doors well. Glue them on with a few drops of CA glue. If you glue only in the top and bottom center area, you can later bend the gear door a little, to get perfectly matching fit in the wing, and then glue the...
- Page 41 The support ar cylinder is not only a dummy for the characteristical scale look, it is s real active cylinder which is needed to safly opperate the landing gear as the strut and wheel are quite heavy for the smal sylinder of the retract unit itself.
- Page 42 The inner gear wells usually have a lot of structure inside. We duplicated this for the model airplane as well. Cut the styrene sheet accord- ing to the shape of the gear box, and glue it in with CA glue. Dont use too much , as the CA might wrinkle the top surface of the wing, if it gets hot during curing.
- Page 43 Now, we are installing the gear doors. The hinges are mounted to the outside of the root rib. Therefore the half round cutouts must be filled with plywood. The cylinder is mounted to the front spar, just in top of the wing tube sleeve.
- Page 44 Note that the control horn sticks out of the root rip toward the fuselage when the gear door is closed. Make sure to gernerate enough clearance in the root rib and also you will have to grind a hole in the root rib on the fuselage to allow the control horn to stick in when the wing is mounted to the...
-
Page 45: Ideas For Elecronic And Hardware Installation
11. Ideas for Elecronic & hardware installation Here are some ideas, how to fit the electronic hardware into your plane. As this plane is not a beginners project, we must leave it up to you, to install all the components you are going to use. -
Page 47: Optional Fuel Tank Installation
12. Optional fuel tank installation The Fuel Tank for the Mig-15 is available through CARF as an accessory item whci we highly recommend to use. With a volume of almost 4 liters it is a ferfect size Tank for long flight times. -
Page 49: Control Throws / Cg Settings
25-30%. Take offs: The full scale MiG-15 is known for very low climb rate at takeoff, same as the F-86 Sabre and other jets of that age. The MiG does it perfectly. Take off with 1/3 throttle, and the plane gets off the ground like a glider. - Page 50 If your plane at the very end looks as impressive as these, you did a good job...
- Page 51 scale drawing 3-view...
-
Page 52: Appendix
14. Appendix Kit Contents:...
Need help?
Do you have a question about the MiG-15 and is the answer not in the manual?
Questions and answers