
Subscribe to Our Youtube Channel
Related Manuals for Blaupunkt Aspen IVDM-7003


Summary of Contents for Blaupunkt Aspen IVDM-7003
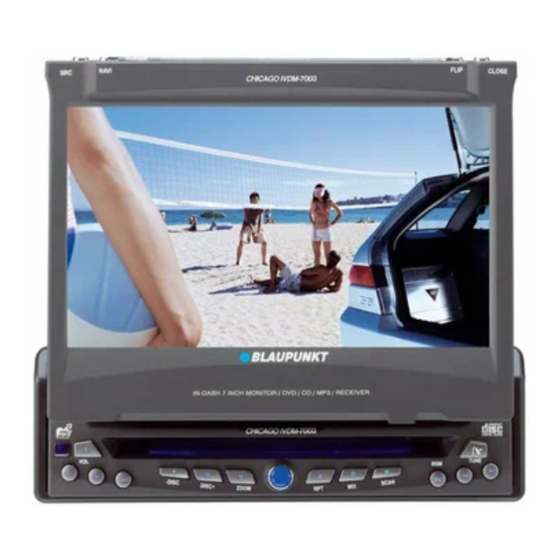
- Page 1 In Car Entertainment Multimedia Aspen IVDM-7003 7 607 003 531 Chicago IVDM-7003 7 607 004 504 Operating Instructions www.blaupunkt.com...
-
Page 2: Controls - Remote Control
Remote control – General functions... - Page 3 Remote control – General functions MUTE button TILT buttons Press once to mute the car sound system Tilt monitor forward with button Press again to cancel mute Tilt monitor backward with button OPEN/CLOSE button LCD button Open or close the monitor Select the colour of the display illumination DISP / WALLPAPER button SRC button...
- Page 4 Remote control – DVD operation...
- Page 5 Remote control – DVD operation TA / AUDIO button REPEAT button Select playback language Repeat a chapter or title AF / SUBTITLE button RDS / MENU button Select the language of the subtitles or hide the subtitles Call and exit the DVD main menu Number buttons 0 - 9 button Enter the title and chapter number...
- Page 6 Remote control – Radio operation TA / AUDIO button Switch priority for traffic announcements on/off AF / SUBTITLE button Switch AF function (Alternate Frequency) on/off Number buttons 1 - 6 Call up stored stations > buttons Manual station search up/down PTY / ZOOM button Call up a list with available programme types RDS / MENU button...
- Page 7 Remote control – CD/CD changer/MP3 mode / PLAY/PAUSE button Pause and restart playback button Stop playback buttons Scroll file list up/down buttons Select CD or folder up/down < ENTER button Call up the file selected in the file list via scrolling >...
-
Page 8: Controls - Device
Controls – Device 32 33 35 36 47 46 39 38... - Page 9 Controls – Device SRC button Station button 1 / -DISC Select the signal source CD changer/MP3 mode: Select CD/folder downward NAVI button Station button 2 / DISC+ Select the navigation mode (only with connected naviga- CD changer/MP3 mode: Select CD/folder upward tion system, e.g.
-
Page 10: Safety Notes
Safety notes Road safety Failure to observe traffic may result in serious accidents. To avoid any distraction from the traffic, observe the following items: • Familiarise yourself with the operation of the Aspen/Chicago IVDM-7003 before driving. • Operate the Aspen/Chicago IVDM-7003 while driving only if the traffic situation allows it. In case of doubt, stop at a suitable location and operate the Aspen/Chicago IVDM-7003 while the vehicle is standing. -
Page 11: Table Of Contents
Contents Controls – Remote control ..........2 Introduction ..............20 Operating options .................. 20 Controls – Device ............8 Switching the device on/off ..............20 Safety notes ..............10 Inserting a CD/DVD ................21 Ejecting a CD/DVD ................21 User notes ..............14 Adjusting the volume ................ - Page 12 Contents DVD operation .............. 35 CD-changer mode ............46 DVD menu .................... 35 CD changer menu ................. 46 Touch screen menu in DVD mode ............35 Touch screen menu in CD changer mode ..........46 Switching to DVD mode ................ 36 CD changers ..................
- Page 13 Setting Dolby ProLogic 2 (Chicago IVDM-7003 only) ......60 Glossary ................ 82 Setting environment audio effects (Chicago IVDM-7003 only) ..... 61 Setting bass and treble (Aspen IVDM-7003 only) ......... 61 Specifications ............... 83 Setting the speaker balance ..............62 Downmix function (Aspen IVDM-7003) ..........62 DVD language code table ..........
-
Page 14: User Notes
User notes Safety precautions Thank you for choosing a Blaupunkt product. We hope you enjoy using this new piece of equipment. Observe all warnings, safety precautions and notes for service in Please read these operating instructions before using the these operating instructions to extend the useful life of the device. -
Page 15: Care Instructions For Cds/Dvds
(label side). Blaupunkt does not provide any guarantee for faultfree playback. If possible, only grasp the CD/DVD at the edge. To ensure proper functioning of audio CDs, use only CDs with the Compact-Disc logo. -
Page 16: Region Code
User notes Region code License The Aspen/Chicago IVDM-7003 and the DVDs are labelled with Manufactured under license of Dolby Laboratories. the region code that is applicable for the pertinent country. “Dolby”, “Pro Logic” and the double-D symbol are trademarks of Dolby Laboratories. -
Page 17: Notes About These Instructions
Notes about these instructions These instructions describe the functions of the Aspen/Chicago IVDM-7003 and are intended to familiarise you with its operation. Read these instructions before starting up the device. To help you in quickly locating information, the following symbols are used in these instructions: Safety and warning notes contain important information concerning the safe usage and point to accident sources. -
Page 18: Theft Protection
Theft protection ✔ The device is equipped with a detachable control panel (flip- After removing the control panel from the device, device release panel) as theft protection and a four-digit device code. switches off after approx. 30 seconds. All the current settings are saved. -
Page 19: Activating The Device Code
Theft protection Activating the device code Switching on coded devices after a voltage interruption If a coded device is switched on after disconnecting the battery In addition to a detachable control panel, the device is equipped voltage, e.g. in case of a repair to the vehicle, the code query with a four-digit device code. -
Page 20: Introduction
Introduction This chapter contains a description of the most important basic Note: The monitor is automatically opened at switch- functions. on if this function was activated in the setup menu. For further details, read the section “Configuring the monitor position” in the chapter “Setup menu”. If the Operating options monitor was closed at switch-off, it remains in this Several options are available to operate the Aspen/Chicago IVDM-... -
Page 21: Inserting A Cd/Dvd
Introduction Inserting a CD/DVD Ejecting a CD/DVD Push the CD/DVD into the CD/DVD tray with the printed Press the button on the device. side facing up. ✔ The drive automatically pulls in the CD/DVD. Note: You must not hinder or assist the drive as it draws in the media. -
Page 22: Adjusting The Volume
Introduction Adjusting the volume Activating mute On the device: To increase the volume, press the On the device: Briefly press the button. button. On the remote control: Press the MUTE button. To decrease the volume, press the VOL button. ✔ Playback is muted. -
Page 23: Closing/Opening The Monitor
Introduction Closing/opening the monitor Selecting the signal source On the device: Press the / CLOSE button. On the monitor: Touch the center of the monitor to call up the touch screen menu. Touch the button of the desired On the remote control: Press the OPEN/CLOSE button. signal source A. -
Page 24: Sound Settings
Sound settings Selecting and setting sound effects: The following sound settings are possible: On the monitor: Aspen IVDM-7003 Touch the center of the monitor to call up the touch screen menu. Bass -7 … -1 < 0 > +1 … +7 Touch the button. -
Page 25: Switching The Downmix Mode On/Off
Introduction On the remote control: Switching the Downmix mode on/off Press the SOUND / DSP button. If the Downmix mode is activated, the multi-channel surround sig- nal is transferred into a conventional stereo signal. ✔ The sound effects menu appears on the display. On the remote control: Press the DOWNMIX button to acti- vate the downmix mode. -
Page 26: Show/Hide The Image Of A Back-Up Camera
Introduction Show/hide the image of a back-up camera Automatic through connection of telephone calls A back-up camera (optional equipment) can be connected to the If your Aspen/Chicago IVDM-7003 is connected to a hands-free Aspen/Chicago IVDM-7003. The camera image is automatically system for cell phones, the active signal source is muted if a tel- displayed when the reverse gear is selected if the back-up cam- ephone call arrives and the call is played back using the car sound... -
Page 27: Radio Mode
Radio mode Radio menu Touch screen menu in radio mode 92 94 100 104 RADIO RADIO STATIO Info Info RADIO RADIO CD - C CD - C CD - C A A UX 1 AUX 1 A A UX 2 AUX 2 NAVI NAVI... -
Page 28: Switching To Radio Mode
Radio mode Switching to radio mode On the monitor: On the monitor: Touch the center of the monitor to call up Touch the button on the touch screen menu. R·D·S R·D·S the touch screen menu. Touch the button to switch ✔... -
Page 29: Switching The Rds Function Af (Alternate Frequency) On/Off
Radio mode Switching the RDS function AF (Alternate Frequency) on/off Switching the RDS function REG (Regional Programmes) on/off If the RDS function AF (Alternate Frequency) is activated, the device automatically tunes into the best receivable frequency for At certain times, some RDS stations divide their programme into the station that is currently set. -
Page 30: Selecting The Waveband/Memory Bank
Radio mode Selecting the waveband/memory bank Automatic station search This device can receive programmes broadcast over the FM and On the monitor: Touch the button on the AM wavebands. Three memory banks are available for the FM touch screen menu. waveband and one memory bank for the AM waveband. -
Page 31: Storing Stations Manually
Radio mode ✔ Storing stations manually The device changes to memory bank FM3, if necessary, and automatic storing of stations starts. 18 memory locations are available in the FM waveband (6 on ✔ each memory bank) and 6 memory locations in the AM wave- After the process is completed, each stored station is band. -
Page 32: Station Search By Programme Type
Radio mode Station search by programme type Note: If “All” is selected, the PTY function is deacti- vated. Some RDS stations broadcast information about the type of pro- ✔ gramme broadcast (e.g. news, sports, rock, pop). By using this Seek tuning starts and the next station with the selected information, the device perform a directed search for stations of programme type is tuned. -
Page 33: Traffic Information Stations
Radio mode Traffic information stations Switching traffic announcement priority on/off Traffic information stations are RDS stations broadcasting traffic The priority for traffic announcements is activated if the display announcements. If you are listening to a traffic information station, shows the TA symbol B. the TP symbol is displayed on the monitor A. -
Page 34: Setting The Volume For Traffic Announcements
Radio mode On the remote control: Cancelling the current traffic announcement Press the RDS / MENU button. A current traffic announcement can be cancelled if you do not want to listen to it. ✔ The RDS menu is displayed at the bottom of the monitor. On the device: During a traffic announcement, press the Select the “TA Set”... -
Page 35: Dvd Operation
DVD operation DVD menu Touch screen menu in DVD mode RADIO RADIO CD - C CD - C CD - C A A UX 1 AUX 1 A A UX 2 AUX 2 NAVI NAVI TITLE CHAP 00:16’35 00:16’35 Sound Setup Rear Track... -
Page 36: Switching To Dvd Mode
DVD operation Switching to DVD mode Starting playback On the monitor: Touch the center of the monitor to call up After an inserted DVD is loaded, either the DVD main menu is the touch screen menu. Touch the button. displayed or the playback starts. This action is dependent upon the DVD. -
Page 37: Selecting A Chapter
DVD operation Selecting a chapter TITLE CHAP 00:16’35 A DVD title can be divided into several chapters. 00:16’35 Selecting the next chapter: On the monitor: Touch the button repeatedly on the touch screen menu. On the device or on the remote control: Press the button repeatedly. -
Page 38: Fast Search
DVD operation Fast search You found the desired position and want to continue the play- back with regular speed. To search for a specific section during the playback of a DVD, you can use the fast search function. On the monitor: Touch the button on the touch screen menu. -
Page 39: Selecting The Subtitle Language
DVD operation Selecting the subtitle language Switching the image format On the monitor: On the monitor: Touch the button on the touch Pict Pict screen menu. To toggle between wide image 16:9 (WIDE) Touch the button on the touch screen menu. Track Track and normal image 4:3 (NORMAL), touch the... -
Page 40: Image Settings
DVD operation Image settings Use the button to end the setting and call up the EXIT EXIT menu for the image settings again. During playback, you can adjust brightness, colour, contrast, tint and dimmer. Touch the button to exit the menu. EXIT EXIT On the monitor: Touch the... -
Page 41: Calling The Dvd Main Menu
DVD operation Calling the DVD main menu The main menu is stored on the DVD. The selection options of- fered by the main menu are dependent upon the respective DVD. The main menu of a DVD can offer the following: ●... -
Page 42: Audio Cd Mode
Audio CD mode Audio CD menu Touch screen menu in Audio CD mode AUDIO AUDIO RADIO RADIO CD - C CD - C CD - C A A UX 1 AUX 1 A A UX 2 AUX 2 NAVI NAVI - CD - CD Audio–CD... -
Page 43: Activating The Audio Cd Mode
Audio CD mode Activating the audio CD mode Exiting playback On the monitor: Touch the center of the monitor to call up On the monitor: Touch the button on the touch the touch screen menu. Touch the button. screen menu. AUDIO AUDIO - CD... -
Page 44: Fast Search
Audio CD mode Fast search You found the desired position and want to continue the play- back with regular speed. To search for a specific section during the playback of a track, you can use the fast scan function. On the monitor: Touch the button on the touch screen menu. -
Page 45: Random Track Play (Mix)
Audio CD mode Random track play (MIX) Scanning all tracks (Scan) The Mix function plays the tracks of a CD in random order. The Scan function plays all the tracks of the CD in sequential order for approx. 10 seconds each. On the monitor: Touch the button on the touch Func... -
Page 46: Cd-Changer Mode
CD-changer mode CD changer menu Touch screen menu in CD changer mode RADIO RADIO CD - C CD - C CD - C A A UX 1 AUX 1 A A UX 2 AUX 2 NAVI NAVI CD–C TRACK CD–C 00:00’35 00:00’35 NORMAL... -
Page 47: Cd Changers
CD-changer mode CD changers Interrupting playback (pause) The following Blaupunkt CD changers can be connected: CDC - Playback can be interrupted and restarted. A03, CDC - A08 and IDC - A09. On the monitor: Touch the button or touch the Notes: How to fill the magazine with CDs and insert button on the touch screen menu. -
Page 48: Selecting Tracks On The Currently Playing Cd
CD-changer mode Selecting tracks on the currently playing CD Repeating tracks (Repeat) Selecting the next track: The Repeat function is used to repeatedly play the current track or the current CD. On the monitor: Touch the button repeatedly or touch button repeatedly on the touch screen menu. -
Page 49: Random Track Play (Mix)
CD-changer mode Random track play (MIX) Scanning all tracks (Scan) The Mix function plays the tracks of the current CD or all CDs in The Scan function plays all the tracks of the current CD or all the magazine in random order. CDs in the magazine in sequential order for approx. -
Page 50: Mp3 Cd Mode
MP3 CD mode MP3 CD menu Touch screen menu in MP3 CD mode RADIO RADIO CD - C CD - C CD - C A A UX 1 AUX 1 A A UX 2 AUX 2 NAVI NAVI CD–MP3 FILE CD–MP3 00:02’44 00:02’44... -
Page 51: Activating The Mp3 Cd Mode
MP3 CD mode Activating the MP3 CD mode Exiting playback On the monitor: Touch the center of the monitor to call up On the monitor: Touch the button on the touch the touch screen menu. Touch the button. screen menu. On the device or on the remote control: Press the SRC On the remote control: Press the button. -
Page 52: Fast Search
MP3 CD mode Scrolling up/down in file list: Repeating files (Repeat) On the monitor: Touch the button repeatedly. To The Repeat function is used to repeatedly play the current file or confirm the selected file, touch the button of the file in the the current folder. -
Page 53: Random Play Of Files (Mix)
MP3 CD mode Random play of files (MIX) Scanning all files (Scan) The Mix function plays the files of the current folder or all folders The Scan function plays all the files of the current folder or all on the CD in random order. folders on the CD in sequential order for approx. -
Page 54: External Sources
External sources Add-on equipment Selecting a connected device as signal source. On the monitor: Touch the button of the desired signal Two external audio/video sources can be connected to the AUX source on the touch screen menu. inputs of the Aspen/Chicago IVDM-7003. If the AUX inputs are activated in the setup menu, they can be selected as signal source. -
Page 55: Navigation System
External sources Navigation system On the monitor: Touch the center of the monitor to return to the previous operating mode. If a navigation system (e.g. TravelPilot EX-V) is connected to the On the device or on the remote control: Press the NAVI Aspen/Chicago IVDM-7003, you can display the navigation screen button again to return to the previous operating mode. -
Page 56: Setup Menu
Setup menu Setup menu Selecting the setup menu The setup menu of the Aspen/Chicago IVDM-7003 offers a variety of options to customise the device. Language Language On the monitor: Touch the button on the touch Setup Setup AUDIO OTHERS AUDIO screen menu. -
Page 57: Performing Settings In The Setup Menu
DVD setup menu DVD setup Performing settings in the setup menu The settings in the setup menu can be performed using the but- Selecting a language tons of the setup menu or the buttons of the remote control. You can preset your preferred playback language for the DVD The detailed information about the individual menus contain only sound and whether and in which language subtitles are shown. -
Page 58: Selecting The Screen Display Mode
DVD setup menu Select by touching “AUDIO” (playback language), Touch the button on the touch screen menu. Setup Setup “SUB-TITLE” (subtitle) or “MENU” (language of menu Touch the button. texts). ✔ The DVD “Display” submenu is displayed. Perform the setting by touching the desired menu entry. Touch the button to confirm the setting. -
Page 59: Setting The Parental Control Level
DVD setup menu Setting the parental control level Touch the button on the touch screen menu. Setup Setup You can set the parental control level so that children can view Touch the button. only movies that are age appropriate. If a DVD features a higher ✔... -
Page 60: Audio Setup
AUDIO setup menu Audio setup Setting Dolby ProLogic 2 (Chicago IVDM-7003 only) Touch the button on the touch screen menu and Setup Setup Setting the input level for external audio sources then touch the button. Touch the button on the touch screen menu and Setup Setup Touch the... -
Page 61: Setting Environment Audio Effects (Chicago Ivdm-7003 Only)
AUDIO setup menu Setting environment audio effects (Chicago IVDM-7003 Setting bass and treble (Aspen IVDM-7003 only) only) Touch the button on the touch screen menu and Setup Setup Touch the button on the touch screen menu and then touch the button. -
Page 62: Setting The Speaker Balance
(“OFF” setting) the centre loudspeaker and subwoofer in the au- dio setup’s “Speaker Setup” submenu. Studio Hall Church Since the Aspen IVDM-7003 is equipped with only one digital signal processor (DSP), the downmix function for the audio/vid- DownMIX DownMIX Stereo... -
Page 63: Downmix Function (Chicago Ivdm-7003)
AUDIO setup menu Touch the button on the touch screen menu and Downmix function (Chicago IVDM-7003) Setup Setup then touch the button. The downmix function on the remote control is used to control Touch the button. the downmix mode for the loudspeaker/preamp outputs. If the downmix mode is activated using the DOWNMIX button on the ✔... -
Page 64: 7-Band Equaliser (Chicago Ivdm-7003 Only)
AUDIO setup menu 7-band equaliser (Chicago IVDM-7003 only) Audio Effect Control Audio Effect Control The Chicago IVDM-7003 model features a 7-band equaliser which allows you to optimise the music sound to your vehicle or to opti- ProLogic2 ProLogic2 ProLogic Music mise the music style. -
Page 65: Speaker Setup (Aspen Ivdm-7003)
To confirm the setting, touch the EXIT EXIT Speaker setup (Aspen IVDM-7003) Repeat steps 3 - 5 to perform additional settings, or If you connected a center speaker or subwoofer to the Aspen Touch the button to exit the menu. -
Page 66: Speaker Setup (Chicago Ivdm-7003)
AUDIO setup menu Speaker setup (Chicago IVDM-7003) Select “FRONT” (front speaker), “REAR” (rear speaker), “CENTER” (center speaker) or “SUB WOOFER” by The Chicago IVDM-7003 can be set according to the playback touching it. frequency ranges of the connected speakers. Before performing the settings, check which speakers (except for the subwoofer) Perform the setting by touching the desired speaker can produce low frequencies. -
Page 67: Setting A Delay Time
EXIT EXIT speakers. Repeat steps 3 - 5 to perform additional settings, or Note: For the Aspen IVDM-7003, the delay time can be Touch the button to exit the menu. EXIT EXIT set only if you called the setup menu in DVD mode. -
Page 68: Setting The Dynamic Range
Touch the EXIT ting for full dynamic adjustment. EXIT Note: For the Aspen IVDM-7003, the dynamic range can be adjusted only if you called the setup menu in DVD mode. The setting affects only the DVD mode. -
Page 69: Setting Volume Decrease For Voice Output
AUDIO setup menu Setting volume decrease for voice output Activate “RESIDUAL” (residual value) by touching it. If a navigation system is connected, the voice output of the navi- Repeatedly touch to the left or right of the scale to adjust gation system is mixed with the sound of the currently set signal the desired volume difference. -
Page 70: Monitor Setup
SCREEN setup menu Monitor setup Touch the desired speaker. Note: Deactivated speakers cannot be selected. For Setting the monitor position instructions, please read the section “Speaker setup” Set the monitor tilt so that you have the best possible view of the in this chapter. -
Page 71: Image Settings
SCREEN setup menu Select “TILT” (monitor tilt), “POSITION” or “OPEN/CLOSE” by touching it. Control Control Touch the desired setting. Brightness Brightness Note: The setting “+2” for the monitor tilt cannot be selected if “BACKWARD” was set for the position and Color Color vice versa. -
Page 72: Activating/Deactivating The Touch Screen Monitor
SCREEN setup menu Activating/deactivating the touch screen monitor Deactivating the touch screen monitor: Before the screen can respond to the touch of a finger, the func- Touch the button on the touch screen menu. Setup Setup tion must be activated (ON). With deactivated function (OFF), Touch the button, followed by the button. -
Page 73: Setting The Touch Position
SCREEN setup menu Setting the touch position Sequentially touch the fields at the bottom left and right on the monitor. This setting is required if the display position on the monitor and ✔ the touch position on the monitor do no longer match. This may This concludes the setting and the “Touch Screen”... -
Page 74: User Setup
USER setup menu User setup Activate “OLD CODE” (old password) by touching it. To change the password, first enter the current password Changing the password using the buttons and confirm the entry with the You must change the password (0000 in the delivery state) to button. -
Page 75: Selecting The Wallpaper
USER setup menu Selecting the wallpaper Touch a memory location (IMG1 - IMG7) to activate the preview mode. You can select the wallpaper to be displayed in radio, MP3, audio CD and CD changer mode. Note: The automatic image change should be deacti- vated for this operation. -
Page 76: Automatic Image Change
USER setup menu Automatic image change Deleting wallpapers If image change is activated, the wallpaper changes with every Proceed as follows to delete stored images: track played by an audio or MP3 CD. In radio mode, the wall- Touch the button on the touch screen menu. -
Page 77: Loading Wallpapers
USER setup menu Loading wallpapers You can also load your own wallpaper into the device from a CD- ROM. The software required for this purpose is located on the enclosed CD-ROM. Create a download CD according to the programme instructions. Use a CD-R blank for this purpose. Insert the download CD into the CD tray. - Page 78 USER setup menu You have the following options: If you want to delete the displayed image, select the “CLEAR” entry and press the ENTER button. ✔ A confirmation dialogue appears. Confirm with “YES” and “OK” by pressing the ENTER button. If you want to replace the displayed image with a new image, select the “UPDATE”...
-
Page 79: Setting Date And Time
USER setup menu Setting date and time Touch the button to confirm the setting. EXIT EXIT You can set the date, the time format (12/24 hours) and the time. Repeat steps 4 - 6 to perform additional settings, or In audio sources, the time is displayed at the bottom right of the touch the button to exit the menu. -
Page 80: Factory Settings
USER setup menu Touch the button on the touch screen menu. Factory settings Setup Setup Sequentially touch the button. You can reset the Aspen/Chicago IVDM-7003 to the standard values (factory setting). Touch the button. Note: To return the settings to their original value, you ✔... -
Page 81: Restart Of The Device Software
USER setup menu Activate “RESET” by touching it. Touch the “Load Default Config” entry. ✔ The password entry menu appears. Enter the four-digit password using the buttons and confirm the entry with the button. Switch the device off and on again. ✔... -
Page 82: Glossary
Glossary CD text ID3 tag Information on an audio CD that may contain the following data: Identification in an MP3 file that may contain the following data: Name of track Name of track Name of artist Name of artist CD name Name of volume on which the title was released Year of release Dolby Digital... -
Page 83: Specifications
Specifications Control panel / Monitor Output power: 4 x 16 watt sine according to DIN 45 324 at 14.4 V System: NTSC/PAL auto switch 4 x 45 watt max. power Power supply: 10.8 - 16.0 volt Center speaker (Chicago IVDM-7003 only): Current consumption max: 1 x 12 watt sine according Standby:... -
Page 84: Dvd Language Code Table
DVD language code table 6566 Abkhazian 7587 Cornish 7285 Hungarian 7684 Lithuanian 8073 Pali 8476 Tagalog 6565 Afar 6779 Corsican 7383 Icelandic 7775 Macedonian 8065 Panjabi 8489 Tahitian 6570 Afrikaans 7282 Croatian 7378 Indonesian 7771 Malagasy 7065 Persian 8471 Tajik 8381 Albanian 8372 Croatian 7365 Interlingua... - Page 85 Czech. Rep. (CZ) 02-6130 0446 02-6130 0514 Hungary 76 511 803 76 511 809 Poland (PL) 0800-118922 022-8771260 Turkey (TR) 0212-335 06 71 0212-346 00 40 Blaupunkt GmbH, Robert-Bosch-Straße 200, D-31139 Hildesheim 02/06 CM-AS/SCS1 (GB) 8 622 404 595 Index B...
Need help?
Do you have a question about the Aspen IVDM-7003 and is the answer not in the manual?
Questions and answers