
Subscribe to Our Youtube Channel
Related Manuals for Blaupunkt IVMR 7001


Summary of Contents for Blaupunkt IVMR 7001
- Page 1 In Car Video IVMR-7001 Operating and installation instructions http://www.blaupunkt.com...
-
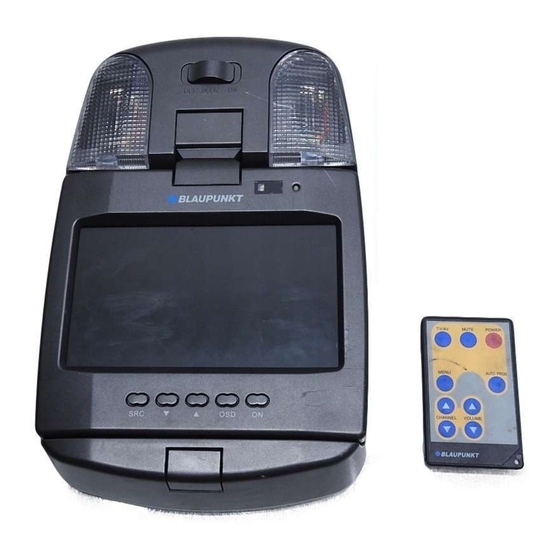
Page 2: Device Overview
Front view Monitor release button AUX socket Headphones socket Rear view Screws Control buttons LCD screen Light switch Main light unit Light cable for the main unit DEVICE OVERVIEW Infrared receiver Connecting cable... -
Page 3: Table Of Contents
CONTENTS Notes for the user ... 19 Supplied equipment ... 20 Using for the first time ... 21 Using the interior light ... 21 Changing the light bulb ... 22 Light bulb specifications ... 22 Wiring ... 22 Monitor connection ... 22 Installing the monitor ... -
Page 4: Notes For The User
Notes for the user Please observe all the warning notices, precautionary measures and mainte- nance tips contained in these operat- ing instructions so as to extend the life of your monitor. To avoid causing a road accident, never use the monitor during the journey. -
Page 5: Supplied Equipment
NOTES FOR THE USER Do not subject the monitor to the wet or moisture. After installing the monitor, avoid knocking it or pulling it downwards excessively, since this will loosen the screws and the monitor could drop off. SUPPLIED EQUIPMENT Supplied equipment The monitor is supplied with all parts list- ed below. -
Page 6: Using For The First Time
Using for the first time Using the interior light There are three settings for the interior light: OFF, DOOR and ON (see diagram below). OFF: The lights are switched off. DOOR: With this setting, the lights only come on when the vehicle’s doors are opened. -
Page 7: Changing The Light Bulb
USING FOR THE FIRST TIME Changing the light bulb To fit a new bulb, proceed as follows: Set the light switch to “OFF”. Push back the bulb cover and open it (see diagram below). Remove the old bulb and dispose of it. -
Page 8: Installing The Monitor
Installing the monitor Select a suitable position for secure in- stallation of the monitor: The device must not distract the driver or restrict the driver’s view. The ability to enter and get out of the vehicle must not be impeded. The device must not be installed in such a way that could prevent the other vehicle components from... -
Page 9: Operation
OPERATION Operation Opening the monitor Press the monitor release button to flip down the LCD display. To watch the television, lower the monitor until it is at an angle of 90 degrees to the main unit. Repositioning the monitor The monitor can be rotated by up to 30 degrees to the right and left from its central viewing position (see the follow- ing diagram). -
Page 10: Display Controls
Display controls POWER: This button is used to switch the main unit on/off. OSD: Press the “OSD” button to open the OSD menu or select a function in the OSD menu. SRC: Press this button to select the AV channel (channel 1 – channel 5) of the AV signal converter. -
Page 11: Osd Menu
OPERATION Note: This function is only available if the E/A box is connected together with the tun- er box. MENU: You can use this button to open the OSD menu. CHANNEL: These buttons allow you to select the selected channels or functions in the OSD menu. - Page 12 FM CHAN: Use this option to select the FM chan- nel. This channel is set by default to “OFF”. The specifications are as follows: TV system FM frequency (MHz) in steps of 0.2 MHz OFF / 88.1 - 91.9 JAPAN OFF / 77.1 - 80.9 PALB/G OFF / 88.1 - 91.9...
-
Page 13: Ir-Headphones
IR-HEADPHONES 1. Infrared sensors 2. On/off switch 3. Stereo / mono 4. Volume control Operating instructions 1. Switch on the audio/video device that is connected to the transmit- ter. 2. Move the on/off switch on the headphones to the on position. 5. - Page 14 4. For stereo audio, move the switch to the stereo position. Move the switch to the mono position for mono audio/video devices. Specifications Surround transmitter: Power consumption Effective angle Weight Stereo headphones: Type Transducer system Impedance Frequency response Sound intensity level Distortion Infrared wavelength Modulation...
-
Page 15: Specifications
SPECIFICATIONS Specifications Screen size: 7" Monitor, A1 Screen resolution: 1440 (H) x 234 (V) Active area: 154.08 (H) x 86.58 (V) Pixel pitch (mm): 0.107 (H) x 0.370 (V) Signal system: Dual system NTSC/ Brightness: 400 cd/m Contrast ratio: Viewing angle: Left/right: 60/60 degrees Top/bottom:... -
Page 16: Guarantee
If you wish to enforce a claim under the manufacturer’s guarantee that is provid- ed by Blaupunkt, please send the faulty equipment together with the purchase receipt to the Blaupunkt customer serv- ice centre in your country. You can find... - Page 17 01-4010 7320 01-89583 8394 01-576 9473 01-4598830 02-369 6464 40 2085 023-565 6331 66-817 157 01-2185 11111 916-467952 08-7501810 01-8471650 02-6130 0514 01-324 8756 022-8771260 0212-3460040 708-6817188 +604-6413 640 Blaupunkt GmbH CM/PSS2 - 8 622 403 175 A WWW: http://www.blaupunkt.com...
Need help?
Do you have a question about the IVMR 7001 and is the answer not in the manual?
Questions and answers