
Subscribe to Our Youtube Channel
Related Manuals for Hoist Fitness RS-1201


Summary of Contents for Hoist Fitness RS-1201
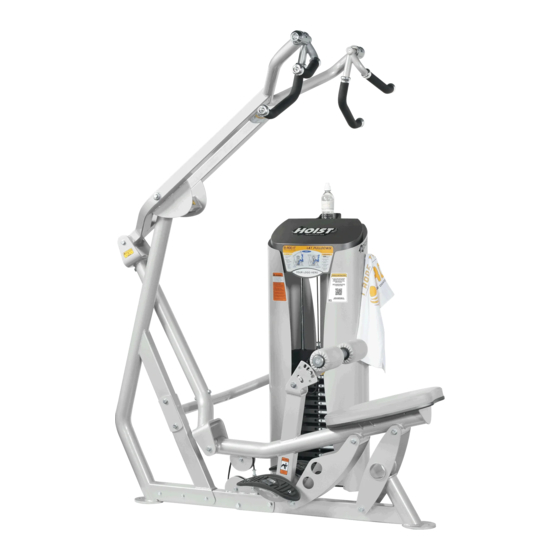
- Page 1 RS-1201 PULL DOWN Note: Both Serial Number and Model Number are Required when Ordering Parts Customer Service RECORD SERIAL NUMBER HERE (800) 548-5438 (858) 578-7676 CATALOG NUMBER (858) 578-9558 0406 - 015...
-
Page 2: Table Of Contents
OWNER'S MANUAL CONTENTS INSTRUCTIONS ..............FRAME ASSEMBLY .............. PRE-ASSEMBLY..............DECAL PLACEMENT............. DECAL REFERENCE............. PART LIST................ABBREVIATIONS..............BOLT SIZING CHART............WASHER SIZING CHART............MAINTENANCE SCHEDULE..........GENERAL MAINTENANCE INFORMATION......WEIGHT TRAINING TIPS............WEIGHT RATIOS..............EXERCISE LOG..............LIMITED WARRANTY............RS-1201 ASSEMBLY PAGE 01... -
Page 3: Instructions
Be sure to have your serial number and this manual when calling. When all parts have been accounted for, continue on. TOOLS REQUIRED Ratchet Wrench 1/2", 9/16" and 3/4" Sockets Adjustable Wrench Rubber Mallet Tape Measure Level Hex Key Wrench Set PAGE 02 RS-1201 ASSEMBLY... - Page 4 OWNER'S MANUAL ***THIS PAGE WAS INTENTIONALLY LEFT BLANK*** RS-1201 ASSEMBLY PAGE 03...
-
Page 5: Frame Assembly
OWNER'S MANUAL FRAME ASSEMBLY ALTERNATE WEIGHT CAGE POSITION ALTERNATE POSITION THE ROC-IT WEIGHT CAGE IS DESIGNED TO BE INSTALLED ON EITHER THE LEFT OR RIGHT SIDE OF THE RS-1201 IN ORDER TO ACCOMADATE THE USER. PAGE 04 RS-1201 ASSEMBLY... - Page 6 *ASSEMBLE WEIGHT CAGE FIRST* NOTE: - HAND TIGHTEN HARDWARE. - SOME PARTS MAY HAVE BEEN REMOVED FOR CLARITY. - INSTALL CABLE AND PULLEYS AT THE SAME TIME. ENSURE THE USE OF WEIGHT STACK #2 135 9/32" 3436 RS-1201 ASSEMBLY PAGE 05...
- Page 7 OWNER'S MANUAL FRAME ASSEMBLY NOTE: - WRENCH TIGHTEN HARDWARE. - WRENCH TIGHTEN ALL HARDWARE FROM PREVIOUS STEPS. - SOME PARTS MAY HAVE BEEN REMOVED FOR CLARITY. - INSTALL CABLE AND PULLEYS AT THE SAME TIME. PAGE 06 RS-1201 ASSEMBLY...
- Page 8 OWNER'S MANUAL FRAME ASSEMBLY NOTE: - WRENCH TIGHTEN ALL HARDWARE THEN LOOSEN NUT JUST ENOUGH FOR (8,31 & 38) TO PIVOT FREELY. - SOME PARTS MAY HAVE BEEN REMOVED FOR CLARITY. RS-1201 ASSEMBLY PAGE 07...
- Page 9 OWNER'S MANUAL FRAME ASSEMBLY NOTE: - WRENCH TIGHTEN HARDWARE (60) THEN LOOSEN NUT JUST ENOUGH FOR (6) TO PIVOT FREELY. - WRENCH TIGHTEN ALL OTHER HARDWARE. - SOME PARTS MAY HAVE BEEN REMOVED FOR CLARITY. PAGE 08 RS-1201 ASSEMBLY...
- Page 10 A MINIMUM OF 3/8" INTO THE WEIGHT STEM WITH JAM NUT TIGHTENED SECURELY TO ENSURE PROPER CONNECTION. JAM NUT FINE TUNING: LOOSEN JAM NUT AND THREAD BOLT IN/OUT TO GIVE THE CABLE PROPER TENSION. RE-TIGHTEN JAM NUT. RS-1201 ASSEMBLY PAGE 09...
- Page 11 FRAME ASSEMBLY NOTE: - WRENCH TIGHTEN HARDWARE (59, 61) THEN LOOSEN NUT JUST ENOUGH FOR (5, 14, 6) TO PIVOT FREELY. - WRENCH TIGHTEN ALL OTHER HARDWARE. - SOME PARTS MAY HAVE BEEN REMOVED FOR CLARITY. PAGE 10 RS-1201 ASSEMBLY...
- Page 12 - WRENCH TIGHTEN HARDWARE (61 & 62) THEN LOOSEN NUT JUST ENOUGH FOR (4 & 5) TO PIVOT FREELY. - WRENCH TIGHTEN ALL OTHER HARDWARE. - SOME PARTS MAY HAVE BEEN REMOVED FOR CLARITY. REPEAT ASSEMBLY FOR OPPOSITE SIDE. RS-1201 ASSEMBLY PAGE 11...
- Page 13 PLEASE SEE ROC-IT WEIGHT CAGE MANUAL FOR FINAL ASSEMBLY. *IMPORTANT* NOW THAT THE RS-1201 IS COMPLETELY ASSEMBLED TAKE TIME TO ASSURE THAT YOUR UNIT IS ASSEMBLED SQUARE AND PERPENDICULAR. USE A LEVEL TO CHECK THAT THE GUIDE RODS ARE PERPENDICULAR IN BOTH DIRECTIONS.
-
Page 14: Pre-Assembly
OWNER'S MANUAL PRE-ASSEMBLY RS-1201 ASSEMBLY PAGE 13... -
Page 15: Decal Placement
OWNER'S MANUAL DECAL PLACEMENT NOTE: - ALL DECALS ARE CENTERED UNLESS OTHERWISE STATED. - SOME PARTS MAY HAVE BEEN REMOVED FOR CLARITY. SAME DECAL ON OPPOSITE SIDE. #1-12 DECALS SAME DECAL ON OPPOSITE SIDE. PAGE 14 RS-1201 ASSEMBLY... -
Page 16: Decal Reference
OWNER'S MANUAL DECAL REFERENCE 021-0013302 021-0003419 021-0003408 021-0003422 021-0003093 021-0003113 RS-1201 ASSEMBLY PAGE 15... -
Page 17: Part List
1.00" X 2.97" LG. 026-01P3021 BACKING PLATE 026-01P2475 FRONT LINK PLATE 026-01P2650 CABLE SHIELD 026-01P2653 'H' PLATE 026-01P2722 STAINLESS STEEL WEAR PLATE 022-01PDR018 ROLLER PAD 5.00" X 8.00" LG. 026-01PL0144 PLASTIC WASHER 1.53" I.D. X 2.50" O.D. RS-1201 ASSEMBLY PAGE 16... - Page 18 ROC-IT WEIGHT CAGE 026-01X2975 FOOT PLATE MOUNT ASSEMBLY 026-01PL2200 PINETREE PLUG 026-01M1137 CABLE ANCHOR SHAFT Ø.38"O.D. X 3.06" LG. 012-0102006 5/16"-18UNC THICK NYLOCK NUT (WZ) 026-01M0937 END CAP: ALUMINUM 1.00" I.D. 026-01M0936 ALUMINIUM RING: 1.00" I.D. PAGE 17 RS-1201 ASSEMBLY...
-
Page 19: Abbreviations
BZ = Black Zinc WZ = White Zinc HHB = Hex Head Bolt FHCS = Flat Head Cap Screw BHCS = Button Head Cap Screw SHCS = Socket Head Cap Screw SHSS = Socket Head Shoulder Screw RS-1201 ASSEMBLY PAGE 18... -
Page 20: Bolt Sizing Chart
3 1/2" 4 1/2" 5 1/2" 1" 2" 3" 4" 5" 0" 1 3/4" 2 3/4" 3 3/4" 1/2" SHSS 1 1/4" 2 1/4" 3 1/4" 1 1/2" 2 1/2" 3 1/2" 1" 2" 3" 4" 0" PAGE 19 RS-1201 ASSEMBLY... - Page 21 2 3/4" 2 1/4" 1 1/4" 1 1/2" 2 1/2" 1" 2" 3" 0" 3/8" BHCS 3/8" SHCS 3/4" 3/4" 1" 0" 0" 1/4" HHB 1/2" FHCS 3/4" 3/4" 1 1/4" 1 1/2" 1" 0" 1" 0" PAGE 20 RS-1201 ASSEMBLY...
-
Page 22: Washer Sizing Chart
CURVED WASHER LOCK WASHER LOCK WASHER LOCK WASHER SPACER 026-01M0238 016-0009003 013-0003002 2" ALUMINUM 1" SHIM WASHER 3/8" FENDER WASHER FLATHEAD CAP 013-0003004 026-01PL151 1 1/16" PLASTIC 1 1/16" FENDER WASHER FENDER WASHER 014-0018002 1" LONG SPACER PAGE 21 RS-1201 ASSEMBLY... - Page 23 026-01M0762 026-01M0768 .44" LONG HEAVY 1 1/4" LONG HEAVY 1 1/2" LONG HEAVY FLANGED SPACER FLANGED SPACER FLANGED SPACER 026-01M0239 026-01M0240 1 5/8" ALUMINUM 1 3/8" ALUMINUM FLATHEAD CAP FLATHEAD CAP 026-01M0600 .625" LONG FLANGED SPACER PAGE 22 RS-1201 ASSEMBLY...
-
Page 24: Maintenance Schedule
Repack with Grease; 6 MONTHS YEARLY Linear Bearings Replace; Cables, Belts and Connecting Parts YEARLY 3 YEARS Your equipment comes with a commercial maintenance decal. For personal, in home use, please follow the home maintenance schedule listed above. PAGE 23 RS-1201 ASSEMBLY... -
Page 25: General Maintenance Information
OWNER'S MANUAL HOIST FITNESS SYSTEMS GENERAL MAINTENANCE INFORMATION Links, Pull-Pins, Snap Hooks, Swivels, Weight Stack Pins: • Check all pieces for signs of visible wear or damage. • Check springs in snap hooks and pull-pins for proper tension and alignment. - Page 26 Insert the shaft back into the bearing and wipe off excess grease. PLEASE KEEP THIS FOR YOUR RECORDS RS-1201 ASSEMBLY PAGE 25...
- Page 27 OWNER'S MANUAL ***THIS PAGE WAS INTENTIONALLY LEFT BLANK.*** RS-1201 ASSEMBLY PAGE 26...
-
Page 28: Weight Training Tips
To be successful in your exercise program, it is important to develop an understanding of the basic principles of strength training. Now that you have your RS-1201 HOIST® Fitness System, it is only natural that you want to get started immediately. First, determine a set of realistic goals and objectives for yourself. -
Page 29: Weight Ratios
OWNER'S MANUAL WEIGHT RATIOS The above chart shows the standard weight stack for this unit. The weights listed are approximate. HOIST reserves the right to modify the machine without prior notice. PAGE 28 RS-1201 ASSEMBLY... -
Page 30: Exercise Log
OWNER'S MANUAL PAGE 29 RS-1201 ASSEMBLY... -
Page 31: Limited Warranty
Hoist Fitness Systems warrants this product to the original purchaser to be free from defects in workmanship and/or materials under normal use or service. If at any time a component part is defective, Hoist Fitness Systems shall repair or replace it (at Hoist Fitness Systems option) within a reasonable period of time. This warranty does not cover costs of removal.
Need help?
Do you have a question about the RS-1201 and is the answer not in the manual?
Questions and answers