
Related Manuals for Casio MZ-X500


Summary of Contents for Casio MZ-X500
- Page 1 MZ - X500 MZ - X300 USER’S GUIDE ( Tutorial ) ● Before using this Digital Keyboard for the first time, be sure to read the separate USER’S GUIDE (Basics) to familiarize yourself with basic operations. MZX500/300-E-2A...
-
Page 2: Table Of Contents
Contents General Guide EN-2 Editing Events EN-62 Displaying the EVENT EDIT Screen ..EN-62 Editing a Tone (User Tones) EN-5 Using the EVENT EDIT Screen ... EN-63 Editing a Tone . -
Page 3: General Guide
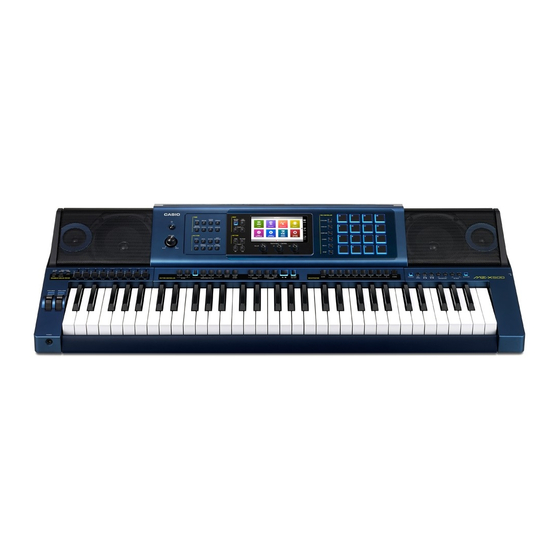
General Guide MZ-X500 MZ-X300 er es ∗ ∗ ek el em en co cp cq dk dl dn do EN-2... - Page 4 K2 knobs eqSUSTAIN button PAD CONTROLLER area (MZ-X500) erPITCH BEND wheel brSYNCHRO button esMODULATION wheel bsPHRASE button etUSB flash drive port btSAMPLING button fkPHONES jack...
- Page 5 General Guide Back LINE IN R, L/MONO jacks LINE OUT R, L/MONO jacks PEDAL2, EXPRESSION jack MIC VOLUME controller PEDAL1 jack MIC IN jack AUDIO VOLUME controller MIDI OUT/THRU, IN terminals DC 24V terminal USB port AUDIO IN jack EN-4...
-
Page 6: Editing A Tone (User Tones
Editing a Tone (User Tones) Use the procedures in this section to edit the tones of After inputting the tone name, touch “Enter”. each part (Upper1-2, Lower1-2), and to add effects to Touch the destination tone number. suit your needs. •... -
Page 7: Deleting A Tone
Editing a Tone (User Tones) Touch the destination tone number. Tone Editing Screen and • If the tone number already has data assigned, there Editable Parameters will be an asterisk (*) next to it. Touch “Execute”. • Shaded cells in the table on pages EN-7 through EN-25 indicate a group made up of multiple setting Touch “Yes”. - Page 8 Editing a Tone (User Tones) ■ Melody Tone Editing Screen Parameters frequently used for tone editing Advanced settings Effect settings. For more information, see “Editable Effect Parameters” (page EN-18). Display Text Description Settings Pitch Pitch envelope.
- Page 9 Editing a Tone (User Tones) Display Text Description Settings Stretch Tune Stretch tuning. Sharpens high notes and flattens low notes to achieve Off, Piano1, Piano2, characteristic piano stretch tuning. Turn off this setting to play with Piano3, Piano4, Piano5, normal (non-stretch) tuning. E.Piano1, E.Piano2 Filter Filter.
- Page 10 Editing a Tone (User Tones) Display Text Description Settings Pitch Rise Rise. Specifies the time it takes from the start of application of the LFO –64 to 0 to +63 Filter Rise until the effect reaches the level specified by Depth, above. Amp Rise Pitch Mod.Depth Modulation depth.
- Page 11 Editing a Tone (User Tones) Editable Drawbar Organ Tone Parameters These are tones of a vintage drawbar organ with nine drawbars and a rotary speaker. The Digital Keyboard’s cr Sliders operate as drawbars with these tones. • Drawbar organ tone can be assigned to Part 1 (Upper 1) only. •...
- Page 12 Editing a Tone (User Tones) Editable Drum Tone Parameters ■ Drum Sound Editable Parameters For changing the parameter settings of each keyboard key. Touch the desired keyboard key and then change its parameters. Touch the left (U) or right (I) button to scroll the keyboard on the screen. Parameters can also be ...
- Page 13 Editing a Tone (User Tones) Display Text Description Settings Amp. • For details and information about the setting items below, see the melody tone “Amp” (page EN-8). Volume • For details about the setting items below, see the melody tone “Pitch Envelope”...
- Page 14 Editing a Tone (User Tones) Editable Hex Layer Tone Parameters (MZ-X500 only) Up to six tones are layered for ensemble sounds with plenty of depth. Each of the layered sounds can be edited individually. ■ Hex Layer Tone Editable Parameters ...
- Page 15 Editing a Tone (User Tones) Display Name Description Settings Velocity Range Low Velocity range low. Specifies the minimum value of the effective velocity. 0 to 127 No sound is produced when playing at a velocity less than this setting. Velocity Range High Velocity range high.
- Page 16 Editing a Tone (User Tones) Display Name Description Settings Envelope • For details about the setting items below, see the melody tone “Filter” (page EN-8). You can input a value in the range from 0 to 127. Attack Level, Envelope Depth •...
- Page 17 Editing a Tone (User Tones) Display Name Description Settings Amp. For details, see the melody tone “Amp” (page EN-8). • For details about the setting items below, see the melody tone “Amp” (page EN-8). Volume, Velocity Sense • For details about the setting items below, see the drum sound “Amp” (page EN-12).
- Page 18 Editing a Tone (User Tones) Display Name Description Settings Low Frequency Oscillator. This is a group of editable LFO parameters applied to the pitch of a layered tone. For details, see the melody tone “LFO” (page EN-8). • For details about the setting items below, see the melody tone “LFO” (page EN-8).
- Page 19 Editing a Tone (User Tones) Editable Effect Parameters These parameters configure effect settings of each tone. ■ Effect Editing Screen Touching “Effect” on a tone editing screen (pages EN-6, 10, 11, and 13) displays a screen for advanced effect settings. Touch Controller Display Name Description...
- Page 20 Editing a Tone (User Tones) ■ Editable DSP Parameters DSP type/Parameter Description Settings Through Select this option if you do not want to apply a DSP effect. There are no parameters that can be set while this option is selected. Equalizer This is a three-band equalizer.
- Page 21 Editing a Tone (User Tones) DSP type/Parameter Description Settings Limiter Limits the input signal level so it does not rise above a preset level. Limit (X) Adjusts the volume level of the limit at which limiting is applied. 0 to 127 Attack Adjusts the attack amount of the input signal.
- Page 22 Editing a Tone (User Tones) DSP type/Parameter Description Settings Chorus Gives notes depth and breadth. LFO Rate (X) Adjusts the LFO rate. 0 to 127 LFO Depth (Y) Adjusts the LFO depth. 0 to 127 LFO Waveform Selects the LFO waveform. Sin, Tri Feedback Adjusts the strength of feedback.
- Page 23 Editing a Tone (User Tones) DSP type/Parameter Description Settings Rotary This effect is a rotary speaker simulator. Speed (X) Switches the speed mode between fast and slow. Slow, Fast Brake Stops speaker rotation. Rotate, Stop Fall Accel Adjusts acceleration when the speed mode is switched from fast 0 to 127 to slow.
- Page 24 Editing a Tone (User Tones) DSP type/Parameter Description Settings Auto Wah This is a “wah” effect that can automatically shift the frequency in accordance with the level of the input signal. Input Level Adjusts the input level. The input signal can become distorted 0 to 127 when the level of the sound being input, the number of chords, or the Resonance value is large.
- Page 25 Editing a Tone (User Tones) DSP type/Parameter Description Settings Pitch Shifter This effect transforms the pitch of the input signal. Pitch (X) Adjusts the pitch shift amount in quarter tone steps. –24 to 0 to +24 High Damp Adjusts the high-range damp. A smaller number increases 0 to 127 damping.
- Page 26 Editing a Tone (User Tones) DSP type/Parameter Description Settings Piano Effect This effect is suited to acoustic piano play. Lid Type (Y) Adjusts how sound resonates in accordance with the opening Closed, Semi Opened, state of a piano lid. Full Opened Reflection Level (X) Adjusts the level of the initial reflection.
-
Page 27: Using The Pattern Sequencer
Using the Pattern Sequencer You can use the pattern sequencer to create Instrument Part Editing and User Areas accompaniment patterns that sound while using the As a general rule, pattern sequencer editing operations Digital Keyboard’s Auto Accompaniment function and are performed on an instrument part basis. The pattern store them as user rhythms. -
Page 28: Creating And Editing A User Rhythm
Using the Pattern Sequencer User Rhythm Storage To record a rhythm to each part You can store up to 100 user rhythms in Digital On the PATTERN SEQUENCER screen, Keyboard memory. To recall a stored user rhythm, touch “Recorder”. press one of the rhythm selector buttons in the This displays the PATTERN RECORDER screen. - Page 29 Using the Pattern Sequencer Configure the settings below as required. Touch “” to start recording. This causes the on-screen “” to change to “Y”. Item Description Setting • Only the operations below can be perform while Tone name Changes the tone. See the separate recording is in progress.
- Page 30 Using the Pattern Sequencer To edit an element On the PATTERN SEQUENCER screen, touch “Element Edit”. This displays the ELEMENT EDIT screen. Configure parameter settings as required. • Touch a display item and then select from the list that appears. Use the 9 w/NO, q/YES buttons to change setting values.
- Page 31 Using the Pattern Sequencer To edit the data of each part On the PATTERN SEQUENCER screen, touch “Part Edit”. This displays the PART EDIT screen. Configure parameter settings as required. • Touch a display item and then select from the list that appears. Use the 9 w/NO, q/YES buttons to change setting values.
- Page 32 Using the Pattern Sequencer Item Description Setting Inversion Specifies whether or not chords during Auto Accompaniment play should use Off, On, 7th inverted forms of the original chord (EGC and GCE for CEG). For example, let’s say that the original recorded C major chord is CEG and an F chord is fingered on the chord keyboard.
- Page 33 Using the Pattern Sequencer ■ Table (Chord Conversion Table) Recording of each accompaniment pattern is normally performed in C major (root C, major type). When playing an Auto Accompaniment, you can use a root other than C and a chord type other than major. To do this, the Digital Keyboard converts the C major recorded data to another root and/or chord type.
- Page 34 Using the Pattern Sequencer To adjust the balance between parts To import MIDI data into Digital Keyboard memory from a USB flash drive On the PATTERN SEQUENCER screen, touch “Mixer Edit”. This displays the MIXER EDIT screen. • The following procedure imports SMF format MIDI data stored on a USB flash drive into Digital Keyboard memory as a User Rhythm.
-
Page 35: Saving A User Rhythm
Using the Pattern Sequencer Configure advanced settings for the data to To initialize data being edited be imported. On the RHYTHM EDIT MENU screen, touch • Touching “” plays the data specified by “Start “Pattern Sequencer”. Measure” and “Measure Length”. This way you can check the measures to be imported. -
Page 36: Deleting A User Rhythm
Using the Pattern Sequencer Deleting a User Rhythm On the MENU screen, touch “RHYTHM”. Touch “Edit”. Touch “Clear”. Touch the user rhythm you want to delete. Touch “Execute”. Touch “Yes”. This deletes the selected user rhythm. • To cancel the operation, touch “No”. EN-35... -
Page 37: User Presets
User Presets Edit the music preset parameters. Creating an Original Music 5-1. To edit the chord progression Preset (User Preset) Touch “Chord Edit”. Next, perform the editing operation described In addition to the Digital Keyboard’s built-in Music under “To edit a chord progression” (page EN-37). - Page 38 User Presets ■ To edit preset chord information To edit a chord progression On the CHORD EDIT screen, touch the “e” On the MUSIC PRESET EDIT screen, touch and “r” icons to display the step you want to “Chord Edit”. edit.
- Page 39 User Presets ■ To insert a sequential series of steps On the CHORD EDIT screen, touch the “e” and “r” icons to select the step that comes immediately before the location where you want to insert the step. Touch “Step Rec”. Touch the note icon.
- Page 40 User Presets To change how an Auto Accompaniment is played On the MUSIC PRESET EDIT screen (page EN-36), touch “Parameter Edit”. This displays the PARAMETER EDIT screen. Parameter Setting Touch the parameter whose setting you want to change, and then use the 9 w, q buttons to change the setting value.
- Page 41 User Presets ■ Timing Setting and Chord Progression Playback This section explains how chord progressions are played in accordance with the “Timing Set” settings in step 2 under “To change how an Auto Accompaniment is played” (page EN-39). Note that this setting affects playback only.
-
Page 42: Deleting A User Preset
User Presets 3/4 Plays chords measure-by-measure at a timing that is 3/4 times that of the recording. This setting is best for use with a 6/8 time rhythm. Playing back a chord progression like that shown for “Half” above while “3/4” is specified results in the progression shown below. -
Page 43: Editing An Arpeggio
Editing an Arpeggio To edit each step Editing an Arpeggio You can edit a Digital Keyboard built-in arpeggio to • This editing operation can be performed on a step create an original arpeggio of your own. type arpeggio only. There are two arpeggio types: step type and variation type. - Page 44 Editing an Arpeggio You can change the settings below. • Touch a display item and then select from the list that appears. Use the 9 w/NO, q/YES buttons to change setting values. Item Description Setting Type Starting from the lowest note of the keyboard keys that are pressed (Low 1) as the basis, Low 1 to Low 8 specifies which note (1 through 8) should sound.
- Page 45 Editing an Arpeggio To change an arpeggio parameter setting On the MENU screen, touch “ARPEGGIATOR”. On the ARPEGGIATOR screen, touch “Edit”. This displays the ARPEGGIATOR EDIT screen. Touch “Parameter Edit”. Configure parameter settings as required. • Touch a display item and then select from the list that appears. Use the 9 w/NO, q/YES buttons to change setting values.
-
Page 46: To Save An Edited Arpeggio
Editing an Arpeggio To save an edited arpeggio To delete an edited arpeggio On the ARPEGGIATOR EDIT screen, touch On the MENU screen, touch “Write”. “ARPEGGIATOR”. This displays the ARPEGGIATOR screen. On the ARPEGGIATOR WRITE screen, Touch “Edit”. touch “Rename”. This displays an input screen. -
Page 47: Sequentially Recalling Registered Setups (Registration Sequence
Sequentially Recalling Registered Setups (Registration Sequence) You can configure the Digital Keyboard so its setup Repeat step 5 as required to specify areas for changes in a preset sequence each time a specified the other steps of the sequence. pedal is pressed. Setups are those registered in areas •... -
Page 48: Using A Registration Sequence While Playing
Sequentially Recalling Registered Setups (Registration Sequence) Using a Registration Sequence while Playing On the MENU screen, touch “REGISTRATION”. This displays the REGISTRATION screen. Touch “Sequence Enable” to turn it on. Touch the “Sequence Data No.” number and then use the 9 w/NO, q/YES buttons to specify the number of the sequence you want to use. -
Page 49: Using Pads (Tutorial
C to B, as the point at which Auto Accompaniment bass and chord notes drop one octave. Velocity When “On”, velocity changes in Off, On Control accordance with how hard the pad (MZ-X500 is tapped. When “Off”, velocity is only) fixed. EN-48... -
Page 50: Modifying Recording Settings
These settings can be configured after saving the sample as user data. Select the pad whose settings you want to ■ Chord Progression Setting Items configure. (MZ-X500 only) Touch “0”. Setting This displays the PAD RECORD SELECT screen. Item... -
Page 51: Overdubbing Phrase Recordings
Using Pads (Tutorial) Setting Item List Overdubbing Phrase ■ Phrase and Chord Progression Setting Items Recordings Item Description Setting Item Use the procedure below to record a phrase onto an existing phrase and create a phrase that is a Length Specifies the length of the Auto, combination of both. -
Page 52: Changing The Start Point Of Sampled Data
Using Pads (Tutorial) Changing the Start Point of Saving Pad Data Sampled Data Use the procedure below to save data and/or setting recorded to a pad. Use the procedure below to change the playback start point of a sample. While the data you want to save is recorded to a pad, touch “Pad Edit”... -
Page 53: Renaming Pad Data
Using Pads (Tutorial) Renaming Pad Data Deleting a User Bank Use the procedure below to rename pad data that you Use the procedure below to delete a user bank that you recorded or edited. previously created. While there is a recording and/or data within a On the MENU screen, touch “PAD”. -
Page 54: Renaming A User Bank
Using Pads (Tutorial) Renaming a User Bank Use the procedure below to rename a user bank that you edited. On the MENU screen, touch “PAD”. Select the bank you want to rename. • For information about how to select a bank, see the Digital Keyboard’s USER’S GUIDE (Basics). -
Page 55: Midi Recorder (Tutorial
MIDI Recorder (Tutorial) ■ Supported Track Data Recording to a Specific Song The following describes the data that can be recorded Performance Part to each type of track. (Track Recording) System Track, Tracks 01 through 16 Keyboard performance* , the keyboard tone setting* You can record specific instruments, the left hand and pedal and pitch bend wheel operation, mixer settings right hand, or other parts of a song individually, and... -
Page 56: Re-Recording Part Of A Recorder Song (Punch-In Recording
MIDI Recorder (Tutorial) Touch the track name. Re-recording Part of a Recorder Song (Punch-in Recording) You can use punch-in recording to re-record a specific part of recorder song that you want to improve or correct. Mistake Playback Touch the track (Solo Track 1 through Solo Track 16) you want to record. -
Page 57: Specifying The Punch-In Recording Location (Auto Punch-In Recording
MIDI Recorder (Tutorial) After you are finished punch-in recording, Touch “”. touch “Y”. • Punch-in recording automatically starts when playback reaches the start point and ends when it Anything in the track following the point where you reaches the end point you specified in step 3. touched “Y”... -
Page 58: Overdubbing A Recorded Track
MIDI Recorder (Tutorial) When playback reaches the point where you Overdubbing a Recorded want to end punch-in recording, touch Track “Set B”. • After touching “Measure”, “Beat”, or “Tick” for Point Use the procedure below to record a new performance B, you can then use the 9 w, q buttons to make into a track that already contains recorded data and fine adjustments to the end point. -
Page 59: Editing Midi Data
MIDI Recorder (Tutorial) To delete recorded MIDI data Editing MIDI Data On the MENU screen, touch “MIDI Use the procedures in this section to rename, copy, and RECORDER”. delete recorded MIDI data. Touch the data name. To rename recorded MIDI data Touch “User Data Edit”. - Page 60 MIDI Recorder (Tutorial) To copy one track to another To clear a track On the MENU screen, touch “MIDI On the MENU screen, touch “MIDI RECORDER”. RECORDER”. Touch “Monitor”. Touch “Monitor”. Touch “Edit”. Touch “Edit”. Touch “Track Edit”. Touch “Track Edit”. Touch “Copy”.
- Page 61 MIDI Recorder (Tutorial) To delete a specific measure from a To quantize a specific step* specific track * Quantize is an operation that automatically adjusts the timing of the note on operation of each step to On the MENU screen, touch “MIDI match a reference note.
- Page 62 MIDI Recorder (Tutorial) To key shift a specific measure from a specific track On the MENU screen, touch “MIDI RECORDER”. Touch “Monitor”. Touch “Edit”. Touch “Track Edit”. Touch “Key Shift”. Touch the track you want to key shift. Touch the item whose setting you want to change, and then use the 9 w, q buttons to change it.
-
Page 63: Editing Events
Editing Events Pattern sequencer data, pad phrases and chord progressions, and MIDI recorder data are recorded as • Pattern sequencer event editing can be performed series of “events”. An event is the smallest component while the instrument status (page EN-26) is either unit of data. -
Page 64: Using The Event Edit Screen
Editing Events Using the EVENT EDIT Screen EVENT EDIT Screen The EVENT EDIT screen shows the individual events that make up the data. Event locations (timing) are displayed as measures, beats, and ticks. A “tick” is a unit of time that is shorter than one beat. - Page 65 HL Volume Hex Layer Volume Layer Layer1 to Layer6 (MZ-X500 only) Hex Layer Volume 000 to 127 HL Pan (MZ-X500 only) Hex Layer Pan Layer Layer1 to Layer6 Hex Layer Pan –64 to 0 to +63 HL Oct Shift Hex Layer Octave Shift Layer...
- Page 66 Chord Track through 16 HL F.L. Depth Hex Layer Filter LFO Depth Layer Layer1 to Layer6 (MZ-X500 only) Hex Layer Filter LFO Depth 000 to 127 HL A.L. Depth Hex Layer Amp LFO Depth Layer Layer1 to Layer6 (MZ-X500 only)
- Page 67 Editing Events MIDI Recorder Pads Pattern Event Name Parameter Name Settings System Tracks 01 Sequencer Phrase Chord Track through 16 D.Enh Low Frequency DSP Enhancer Low Frequency 000 to 127 D.Enh Low Gain DSP Enhancer Low Gain 000 to 127 D.Enh High Frequency DSP Enhancer High Frequency 000 to 127...
- Page 68 Editing Events MIDI Recorder Pads Pattern Event Name Parameter Name Settings System Tracks 01 Sequencer Phrase Chord Track through 16 D.Rot Speed DSP Rotary Speed Slow, Fast D.Rot Brake DSP Rotary Brake Rotate, Stop D.Rot Fall Accel DSP Rotary Fall Accel 000 to 127 D.Rot Rise Accel DSP Rotary Rise Accel...
- Page 69 Editing Events MIDI Recorder Pads Pattern Event Name Parameter Name Settings System Tracks 01 Sequencer Phrase Chord Track through 16 D.Dst Routing DSP Distortion Routing Dist, Wah, Wh-Dst (Wah-Dist), Dst-Wh (Dist-Wah) D.Dst Speaker DSP Distortion Speaker Bypass, PR Cmb (PR Combo), RV Cmb (RV Combo), JC Cmb...
- Page 70 Editing Events MIDI Recorder Pads Pattern Event Name Parameter Name Settings System Tracks 01 Sequencer Phrase Chord Track through 16 D.Dly Feedback Type DSP Delay Feedback Type Streo (Stereo Feedback), Cross (Cross Feedback) D.Dly Feedback DSP Delay Feedback 000 to 127 D.Dly High Damp DSP Delay High Damp 000 to 127...
- Page 71 000 to 127 Pad Bank See the “Pad Bank List” in the separate Appendix. Pad Number MZ-X500 : 01 to 16 MZ-X300 : 01 to 04 Pad Velocity 000 (Off) to 127 Pad Hold Pad Hold Number MZ-X500 : 01 to 16...
- Page 72 Editing Events MIDI Recorder Pads Pattern Event Name Parameter Name Setting System Tracks 01 Sequencer Phrase Chord Track through 16 S.Cho Return System Chorus Return 000 to 127 S.Dly Type System Delay Type See the “Parameter List” in the separate Appendix. S.Dly Time System Delay Time 000 to 127...
- Page 73 Editing Events To hide a particular event type To change the parameters displayed for a note event Display the EVENT EDIT screen. Touch “Setting”. • Use the procedure below to change gate time value of a note event displayed on the pad and MIDI Touch “View Filter”.
- Page 74 Editing Events To select an event for editing To select multiple events Display the EVENT EDIT screen. Display the EVENT EDIT screen. Event being edited (selected event) Operation button Use the operation buttons to select the first event. Touch an operation button to select an event. Operation Button Description Touch “Select”.
-
Page 75: Editing An Existing Event
Editing Events To copy an event Editing an Existing Event On the EVENT EDIT screen, select the event Use the procedures in this section to change the value you want to copy. of a parameter or to copy a parameter. •... - Page 76 Editing Events To quantize an event* To adjust the key of an event * Quantize is an operation that automatically adjusts the note on timing of a note event to match a • You can adjust the key of the events below. reference note.
- Page 77 Editing Events To adjust the velocity value of a note event On the EVENT EDIT screen, touch “Setting”. Touch “Note Modify Setting”. Touch one of the items below and then use the 9 w/NO, q/YES buttons to change the setting. •...
- Page 78 Editing Events To adjust the gate time value of a note event On the EVENT EDIT screen, touch “Setting”. Touch “Note Modify Setting”. Touch one of the items below and then use the 9 w/NO, q/YES buttons to change the setting. •...
-
Page 79: Deleting An Event
Accompaniment chords (chord events) into the MIDI On the EVENT EDIT screen, select the event recorder system track. In the case of the MZ-X500, you can also input chord you want to delete. event steps into a pad that is assigned a chord •... - Page 80 Touch one of the items below and then use system track only. the 9 w/NO, q/YES buttons to change • In the case of the MZ-X500, you can also input chord event steps into a pad that is assigned a chord the setting.
-
Page 81: Configuring Settings (Tutorial
Init By Wave Parameter initialization by wave selection. Select “On” to link the envelope and Off, On (MZ-X500 only) other parameters when a wave is selected or select “Off” not to link. Exp. Pedal Calibration Performs an expression pedal calibration operation. Before performing this operation, select “Exp. -
Page 82: Effect Screen Reverb Effect Settings
Configuring Settings (Tutorial) EFFECT Screen Reverb Effect Settings This section explains reverb type, chorus type, and delay time settings. For information about other effect settings, see the Digital Keyboard’s USER’S GUIDE (Basics). On the MENU screen, touch “EFFECT”. This displays the EFFECT screen. Touch a setting item and then configure the settings described below. - Page 83 Configuring Settings (Tutorial) Item Description Setting Manual Adjusts the reference phaser shift amount.* –64 to +63 LFO Rate Adjusts the LFO rate.* 0 to 127 LFO Depth Adjusts the LFO depth.* 0 to 127 LFO Waveform Selects the LFO waveform.* Sin, Tri, Random Delay Send Adjusts the send level to system delay.
-
Page 84: Configuring The Function Performed By Controllers
Rhythm S/S <Pedal only> Plays the assigned pad. Pad 1 to Pad 16 (MZ-X500) Pad 1 to Pad 4 (MZ-X300) * For details about each setting, see the MIDI Implementation Chart at the back of this manual and/or MIDI documentation at http://world.casio.com/. -
Page 85: Information
Information Part and MIDI Channel Assignments and Diagram Though this Digital Keyboard has a sound source that supports simultaneous play of 48 parts, the MIDI standard supports handling of information for up to a maximum of 16 parts. As a result, the 48 parts of the Digital Keyboard are divided among three 16-part ports, resulting in the equivalent of three built-in 16-part MIDI sound sources. -
Page 86: Block Diagram
Information Block Diagram Mono Stereo Chorus Send Port A/B/C : Part1-16 Delay Send Note1: Tone Reverb Send If an effect is selected for DSP 1 and/or DSP 2, Generator Volume changing the tone setting of Part 1 to 5 (keyboard tones) changes the DSP 1 effect to that of the newly selected tone. - Page 87 Information STLport Copyright 1994 Hewlett-Packard Company Copyright 1996,97 Silicon Graphics Computer Systems, Inc. Copyright 1997 Moscow Center for SPARC Technology. Permission to use, copy, modify, distribute and sell this software and its documentation for any purpose is hereby granted without fee, provided that the above copyright notice appear in all copies and that both that copyright notice and this permission notice appear in supporting documentation.
- Page 90 MA1601-A...
Need help?
Do you have a question about the MZ-X500 and is the answer not in the manual?
Questions and answers