Table of Contents
Advertisement
Quick Links
Advertisement
Table of Contents

Related Manuals for Fuji Xerox DocuPrint C2535


Summary of Contents for Fuji Xerox DocuPrint C2535
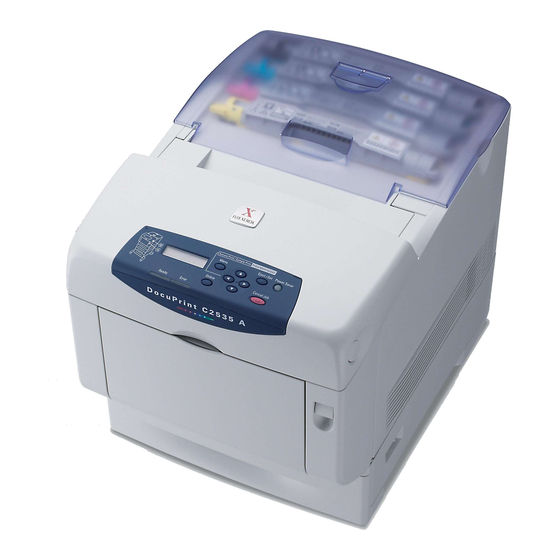
- Page 1 DocuPrint C2535 A User Guide...
- Page 2 Important This manual may not be reproduced in any form, whole or part without the prior written consent of Fuji Xerox. Fuji Xerox reserves the right to change the contents of this manual at any time without notice.
-
Page 3: Preface
Keep this guide handy for a quick reference on using the machine. The illustrations used in this guide are based on DocuPrint C2535 A. This guide is written with the assumption that you are familiar with the basic knowledge and way of operating your computer environment and the network environment. -
Page 4: Types Of Manuals
Types of Manuals Setup Guide Explains the way of installation of this printer. Quick Reference Guide Explains the way of setting, loading paper, and troubleshooting of this printer. For more information, refer to “Contents of the Quick Reference Guide (Reference)” User Guide (PDF) Explains printer settings, and describes control panel menu items and (This manual) -
Page 5: How To Use This Manual
How to Use This Manual Manual Overview This is a brief introduction to the manual. The sections of this manual are classed according to the following conventions: 1 Basic Operations This chapter explains the parts’ names and their functions and basic operations. -
Page 6: Table Of Contents
Contents Preface......................3 Types of Manuals....................4 How to Use This Manual................... 5 Contents......................6 Contents of the Quick Reference Guide (Reference) ........9 The Objective of the International Energy Star Program ........ 10 Illegal Copies and Printouts ................11 Basic Operations .................. - Page 7 Paper That Can Be Set To the Trays ..............44 Unusable Paper .....................45 Storing and Handling Paper ..................46 Loading Paper ....................... 47 Loading Paper in the Paper Tray ................47 Loading Paper in the Bypass Tray ................48 Loading Envelopes in the Bypass Tray ..............50 Setting Paper Types ....................
- Page 8 Checking Total Printed Pages on Print Meter Report ..........105 Cleaning the Printer..................... 106 Cleaning the Density Sensor ................106 Cleaning the Drum Cartridge ................108 When Moving the Printer ..................110 Appendix ....................113 Specifications ...................... 113 Product Specifications ..................113 Printable Area ......................115 Optional Accessories and Consumables.............
-
Page 9: Contents Of The Quick Reference Guide (Reference)
Contents of the Quick Reference Guide (Reference) Preface Features in Brief Types of Manuals Conventions Contents Contents of the User Guide (Reference) Safety Notes Adjusting Color Registration............... SQ-12 Printing the Color Registration Correction Chart Determining Values Entering Values Setting the Printer Environment ............SQ-13 Supported Environment Setting IP Address Setting Printer Configurations via CentreWare Internet Services... -
Page 10: The Objective Of The International Energy Star Program
The Objective of the International Energy Star Program To protect the global environment and conserve energy sources, the International Energy Star Program encourages the following product features. Fuji Xerox confirms DocuPrint C2535 A satisfies the requirements for this program. Power Saver Mode Feature This product has a power-saving feature, which switches the machine to the power saver mode automatically if the machine is on and not operated for a certain period of time. -
Page 11: Illegal Copies And Printouts
Illegal Copies and Printouts Copying or printing certain documents may be illegal in your country. Penalties of fines or imprisonment may be imposed on those found guilty. The following are examples of items that may be illegal to copy or print in your country. Currency Banknotes and checks Bank and government bonds and securities... -
Page 12: Basic Operations
Basic Operations Main Components and Their Functions Main Body Front View Name Description Face down tray Print jobs are output with the printed side facing down. Control panel Consists of operation buttons, indicators, and the display. Button A Push up this button when opening the front cover. Bypass tray Load paper here. -
Page 13: Rear View
Rear View Name Description Ventilation hole Releases heat to prevent the interior of the printer from heating up. Power cord connector Connect the power cord here. USB port Connect the USB cable here. Parallel port Connect the parallel cable here. Ventilation hole Air intake to prevent the interior of the printer from heating up. -
Page 14: Control Panel
Control Panel Name Description LCD display Displays the setting items, machine status, and messages. Refer to • “Display” (P. 15) <Menu> button Press to move to the menu operation. <Eject/Set> button Press to set the menu candidate values. Use this too to print report/list. <Power Saver>... -
Page 15: Display
Display There are two types of screens shown: Print screen (for displaying printer status) and Menu screen (for configuring settings). Note • The message displayed differs according to the optional accessories installed and setting status. Print Screen The Print screen appears when the printer is printing or waiting for data. The following contents are shown on the screen. -
Page 16: Switching On And Off The Printer
Switching On and Off the Printer Switching On the Power Press the power switch of the printer to the < | > position. When the power is on, “Diagnosing...” will be displayed on the control panel. Check that this display changes to “Ready to print”. -
Page 17: Power Saver Modes
Power Saver Modes This printer is equipped with a power saver mode 1 and a power saver mode 2 to reduce power consumption when it is left idle. When no print data is received for 3 minutes, the printer will enter the power saver mode 1. When no data is received for a further 5 minutes (a total of 8 minutes lapse (default) since the last receiving data), it will enter power saver mode 2 by default. -
Page 18: Canceling/Checking Printing
Canceling/Checking Printing Canceling Printing To cancel printing, you can either cancel the print job at this printer or at the computer. Canceling Printing of Data Being Printed or Received at the Printer Press the <Cancel Job> button on the control panel. However, pages being printed at the moment will continue to be printed. -
Page 19: Displaying Optional Accessory Configuration And Paper Tray Settings
Displaying Optional Accessory Configuration and Paper Tray Settings When using this printer as a network printer and having enabled SNMP protocol, you can display on the printer driver, the optional accessory configuration or settings configured at the control panel such as paper type or size. These settings are displayed on the [Options] tab. -
Page 20: Printing
Printing Printing From the Computer This section explains the basic flow when printing from application software in Windows environment. (The procedure may differ according to the computer or system configuration used.) Important • Do not switch off the power of this printer when printing is in progress. It may lead to a paper jam. From the [File] menu of the application software, select [Print]. -
Page 21: Printing On Envelopes/Transparencies
Printing on Envelopes/Transparencies This section explains how to print on envelopes and transparencies. Loading Envelopes/Transparencies Envelopes and transparencies can be loaded in the bypass tray. Note • For details on the procedure to load paper in bypass tray, refer to “Loading Paper in the Bypass Tray” (P. -
Page 22: Printing On Envelopes/Transparencies
The following explains how to load envelopes in the bypass tray using Monarch as an example. Important • The reverse side of the envelope cannot be printed on. • Envelopes can get wrinkled or the print quality is reduced depending on the type used. For details about the usable envelope sizes, refer to “Usable Paper”... - Page 23 Select [Tray 1 (Bypass)] from [Paper Source]. When changing the paper type setting, click [MPF Settings] to display the [MPF Settings] dialog box. Select the appropriate paper type from [Paper Type (Bypass)] and click [OK]. Click the [Paper] tab. From [Paper Size], select the size of the original document. From [Output Size], select the size of the transparency, and then click [OK].
-
Page 24: Printing On Custom Size Paper/Long Paper
Printing on Custom Size Paper/Long Paper This section explains how to print on custom size paper. Custom size paper can be loaded in the bypass tray. The paper sizes that can be selected on this printer are as follows: For bypass tray Paper feed direction Long edge: 139.7 to 355.6 mm... - Page 25 Click [Custom Paper Size]. Use the [Details] list box to select the custom setup you want to define. Specify the length of the short edge and long edge under [Change Setting For]. You can specify the values either by entering directly or using [ ] [ ]. The length of the short edge cannot be longer than the long edge, even if it is within the specified range.
-
Page 26: Printing On Custom Size Paper
Printing on Custom Size Paper The procedure to print on custom size paper is as follows. This section explains the procedure using WordPad on Windows XP as an example. Note • The way to display the printer properties dialog box differs according to the application software. Refer to the manual of your respective application software. -
Page 27: Printing Confidential Document - Secure Print
Printing Confidential Document - Secure Print When the internal hard disk (optional) has been installed, you can use the secure print feature. Important • The hard disk may be damaged and erase important data saved in the hard disk. We recommend you back up your data. - Page 28 From [Job Type] on the [Paper] tab, select [Secure Print]. Enter the user ID in [User ID]. You can enter up to eight characters for the user ID. To enter a password, enter it in [Password]. Enter up to 12 numeric characters. From [Retrieve Document Name], select either [Enter Document Name] or [Auto Retrieve].
- Page 29 At the Control Panel This section explains the procedure to print data stored in the printer by Secure Print. Note • You can also delete, without printing, secure print data stored in the printer. For details, refer to “RAM Disk” (P. 60). Press the <...
-
Page 30: Print After Checking Printing Result - Sample Print
Print After Checking Printing Result - Sample Print When the internal hard disk (optional) has been installed, you can use the sample print feature. Important • The internal hard disk may be damaged and erase important data saved in the internal hard disk. We recommend you back up your data. - Page 31 Select [Sample Print] from [Job Type]. Note • You must specify at least 2 for [Copies] before [Sample Print] can be selected. Enter the user ID in [User ID]. You can enter up to eight characters for the user ID. From [Retrieve Document Name], select either [Enter Document Name] or [Auto Retrieve].
-
Page 32: Print At A Specified Time - Delayed Print
At the Control Panel This section explains the procedure to print and delete data stored in the printer by Sample Print. Press the < > button. Press the < > or < > button until [Sample Print] is displayed and then press the <... -
Page 33: Registering Delayed Print
Registering Delayed Print The procedure to configure Delayed Print is as follows. This section explains the procedure using WordPad on Windows XP as an example. The procedure is the same for other OS. From the [File] menu, select [Print]. Select this printer as the printer to be used and click [Preferences]. From [Job Type] on the [Paper] tab, select [Delayed Print]. -
Page 34: Canceling Delayed Print
Canceling Delayed Print Use the control panel to cancel Delayed Print or to print without waiting for the specified time. Press the < > button. Press the < > or < > button until [Delayed Print] is displayed and then press the <... - Page 35 Printing Activate the computer and web browser. At the address column of the web browser, enter the IP address or URL of the printer and then press the <Enter> key. • Example of a URL entry • Example of an IP address entry The CentreWare Internet Services screen appears.
-
Page 36: Printing Via E-Mail - E-Mail Printing
Printing via E-mail - E-mail Printing When the internal hard disk (optional) has been installed and the printer is connected to a network, enabling it to receive e-mails via TCP/IP communication, e-mails can be sent from the computer to this printer. Printing of e-mail contents and TIFF or PDF attachments can be done from this printer. - Page 37 Configuring the E-mail Environment (at This Printer) Configure the following items according to your e-mail environment under [Properties] of the CentreWare Internet Services. Note • After configuring the settings, always click [Apply New Settings] and switch off/on the printer to reboot. •...
- Page 38 *: Default Required settings for the Receiving Item to be Protocol Item Description Value configured SMTP POP3 Protocol Receiving Set the e-mail receiving • SMTP* Settings > Protocol method. • POP3 E-mail Print Mail Set to print the attachments • None Headers and (TIFF, PDF) of the received mail •...
-
Page 39: Sending E-Mails
Sending E-mails Attachments That Can Be Sent The following files can be sent as an attachment. • PDF file created by Adobe Acrobat 4 and Adobe Acrobat 5 (except one part of the features added by PDF1.4) • TIFF file Note •... -
Page 40: Points To Note When Sending E-Mails
Points to Note When Sending E-mails Security Issues E-mails are sent via internet, connecting computers from all over the world. As a result, caution must be made relating to security issues such that information is not easily seen or altered by third parties. Therefore, you are recommended to use methods to ensure that important information is secured. -
Page 41: About Paper
About Paper About Paper Using unsuitable paper may lead to paper jams, poor print quality, breakdown and damage to your printer. In order to use the features of this printer effectively, we suggest using only paper that is recommended here. If you use paper that is not recommended, contact our Customer Support Center or your dealers. -
Page 42: Standard Paper
Standard Paper The following table shows the standard paper for this printer. Paper name Weight Paper type Paper characteristics and caution on usage XC-4200DP 20 lb 20 lb Plain Medium weight papers for internal distribution Letter (standard paper and general office use for black/white printing) XC Premier 80gsm A4 Plain... -
Page 43: Special Media
Special Media The following types of paper can be used for printing on this printer. Load these types of paper in the bypass tray. Paper name Weight Paper type Paper characteristics and caution on usage 3M PP-2500 Transparency Transparency without any white frame V516 XEROX 3R12520 Label... -
Page 44: Paper That Can Be Set To The Trays
Paper That Can Be Set To the Trays Paper Trays and Types You can load the following types of paper into the paper tray or bypass tray. Bypass Tray Paper that can be loaded in the bypass tray is as follows: Paper type Maximum capacity Standard paper... -
Page 45: Unusable Paper
Using the following types of paper might cause paper jams, malfunctions or damage to the machine. Do not use them. • Fuji Xerox full-color transparencies (example: V556, V558, V302) • Paper exclusively for ink-jet printer use • Paper that is too thick or thin •... -
Page 46: Storing And Handling Paper
Important • Postcards with pictures sometimes do not feed because the background image suppression agent adheres to the feed roll. Storing and Handling Paper Even for suitable papers, poor storage conditions may lead to a change in the paper quality, paper jams, poor print quality and printer breakdown. -
Page 47: Loading Paper
Loading Paper Loading Paper in the Paper Tray This section describes how to load paper in the standard and optional paper trays. All trays are loaded the same way. Important • Do not remove the tray during printing. It may cause a paper jam. Pull the tray out of the printer until it stops. -
Page 48: Loading Paper In The Bypass Tray
Slide the width guides and length guide until they rest lightly against the edge of the print media stack. Insert the tray into the printer, and push until it stops. Important • Do not use excessive force on the tray. Doing so could damage the tray or the inside the printer. - Page 49 Slide the width guides to the edge of the tray. The width guides should be fully extended. Insert all media face down and top edge first into the bypass tray. Important • Do not force the paper. Slide the width guides until they rest lightly against the edge of the paper stack.
-
Page 50: Loading Envelopes In The Bypass Tray
Loading Envelopes in the Bypass Tray To load envelopes that are under 220 mm (8.66 inches) in width in the bypass tray, insert the envelopes with the flaps open and at the rear. To load envelopes that are over 220 mm (8.66 inches) in width in the bypass tray, insert the envelopes with the flaps closed and at the right side. -
Page 51: Setting Paper Types
Setting Paper Types Important • Paper type settings must match those of the actual paper loaded in the trays. Otherwise, image quality cannot be processed accurately. Toner may not fuse properly on the paper, resulting in dirty and poor quality printouts. Refer to •... -
Page 52: Overview Of The Common Menu
Setting on the Control Panel Overview of the Common Menu Menu Configuration The menus that can be accessed from the control panel are as follows: Menu Content Tray Settings Use the [Tray Settings] menu to define the print media loaded in each tray. Report/List Use the [Report/List] menu to print various types of reports and lists. -
Page 53: Changing Menu Settings
Changing Menu Settings Basic Operations (Example: Changing the Low Power Mode Settings) Press one of the following buttons to display the menu screen or to set the printer by browsing though each menu structure. In this example, you set the transitional time to the low power mode 1 to 30 mins. - Page 54 Continued from previous page Mode 1 30 mins 10. Press the <Eject/Set> button to confirm your settings. The settings that have been confirmed are displayed with the affix “ * ”. Mode 1 30 mins * 11. Press the < > button to move one level up. PowerSaver Mode Mode 1 12.
-
Page 55: Description Of Menu Items
Description of Menu Items This section describes the items that can be configured on each menu. Tray Settings Use the Tray Settings menu to define the paper size and type loaded in each tray. Item Description Display Popup Specifies whether to display the message that prompts you to set the paper size and type or not every time you load paper to the bypass tray or 550 sheet feeder (optional). -
Page 56: Report/List
Note • When the size or type of paper that is loaded is different from the setting, the print quality may fall or paper may jam. Specify the correct paper type and size. • When installing the optional sheet feeders if [Paper Source] is set to [Auto] on the printer driver, the feeding tray is automatically specified according to the setting on the control panel. -
Page 57: Admin Menu
Admin Menu This menu contains five sub menus, [Network], [Parallel], [Basic Settings], [Maintenance], and [Security]. Network Specifies printer settings affecting jobs sent to the printer through a network port. Note • The settings in the [Network] cannot be set when entering this menu during printing. •... - Page 58 Item Description IPX/SPX Specifies the operational frame type of IPX/SPX (NetWare). • [Auto] (default) Select this to automatically configure the frame type. • [Ethernet-II] Select this to use the Ethernet frame type. • [802.3] Select this to use the IEEE802.3 frame type. •...
-
Page 59: Basic Settings
Basic Settings [Basic Settings] menu is used to make the printer operation settings such as for alarm and power saver mode. Item Description Power Saver Specifies whether to enable the transition to power saver mode 2 or not. Select [Disable] to disable the setting. •... - Page 60 Item Description Text Print Specifies whether the printer outputs PDL data, which is not supported by the printer, as text when the printer receives it. Text data is printed on A4 or Letter size paper. • [Off] (default) Does not print the received data. •...
-
Page 61: Adjusting Color Registration
Maintenance Use this menu to initialize the NV (non-volatile) memory, configure the plain paper or labels quality adjustment settings. Also, use this menu to adjust the reference voltage for the transfer roller of each paper type. Item Description Adjust Paper Type Specifies the paper type of plain paper and labels. - Page 62 Item Description Format HDD Formats the internal hard disk (optional). This menu is available when the optional internal hard disk is installed. Security Specifies whether to limit menu operations with a password to avoid changing the printer settings by accident. Item Description Panel Lock...
-
Page 63: Menu List
Menu List For details on each feature, refer to “4.2 Description of Menu Items” (P. 55). • Main operation and buttons on the control panel Display/Close the Menu screen <Menu> button Switch between the menu levels < > button (moves one level downwards) or < >... - Page 64 Continued from previous page Continued on next page 4 Setting on the Control Panel...
- Page 65 Continued from previous page 4.3 Menu List...
-
Page 66: Troubleshooting
Troubleshooting When Paper Jams If a paper jam occurs, refer to the illustration below to select the appropriate corrective action and clear the paper the paper jam immediately. Note • The illustration below shows the printer with the optional 500 sheet feeder and1100 sheet feeder are installed. -
Page 67: Paper Jams In The Paper Tray
Close the bypass tray once. Push up the button A and fully open the front door. Confirm that there are no scraps of paper remaining inside the printer. Close the front door. Paper Jams in the Paper Tray Follow the procedure below to remove paper jammed in the paper tray. Slowly, completely remove the tray from the printer. -
Page 68: Paper Jams Between The Drum Cartridge And Fuser Unit
If jammed paper cannot be found, pull down the green cover along the top of the hole where the tray cartridge was in the printer, and pull the jammed paper out carefully. Push up the button A and fully open the front door. - Page 69 Completely push down the levers at both ends of the fuser unit. Close the front door. Paper Jams at the Fuser Unit Press the button B and open the front door-B. Lift the levers at both ends of the fuser unit, and remove the jammed paper.
- Page 70 Push up the button A and fully open the front door. Remove the jammed paper if you see it and proceed to the step 7. If you cannot see the jammed paper, close the front cover and skip the rest of the procedure. Close the front door.
- Page 71 10. If there is jammed paper remaining inside the printer, pull it out carefully to avoid tearing it. 11. If jammed paper cannot be found, pull down the green cover along the top of the hole where the tray cartridge was in the printer, and pull the jammed paper out carefully.
-
Page 72: Paper Jams In The Optional Sheet Feeder
When Long Paper Jams When long paper (longer than 355.6 mm) jams inside the printer, cut the paper as needed, then remove it in the proper way depending on the place that the paper jam occurs. When it is difficult to open the front cover, do not force it. Turn the power off immidiately and contact your Xerox dealer or a Xerox Customer Service Center for assistance. - Page 73 Remove all jammed and/or creased paper from the tray. Pull the jammed paper out carefully to avoid tearing it. If the paper is torn, confirm that there are no scraps of paper remaining inside the printer. Push up the button A and fully open the front door.
-
Page 74: Power Problems
Power Problems Before treating the problem as a machine breakdown, refer to the following table and check the printer condition again. WARNING • Never open or remove machine covers that are secured with screws unless specifically instructed in the user guide. A high voltage component can cause electric shock. •... - Page 75 Symptom Reason/Action Light of <Error> indicator is An error that you cannot rectify by yourself has occurred. Record the displayed error blinking. message or error code, switch off the power, pull out the power plug from the outlet, and then contact our Customer Support Center or your dealers. The light of the <Ready>...
- Page 76 Symptom Reason/Action Paper cannot be fed. Is the paper correctly loaded? Load the paper correctly. For labels, transparencies, or Paper jam. envelopes, fan them well first to allow air to enter between each sheet before loading. Multiple paper are fed. Paper is fed at an angle.
-
Page 77: Print Quality Problems
Print Quality Problems When the print quality is poor, select the closest symptom from the following table to rectify the problem. If the print quality does not improve after carrying out the appropriate action, contact our Customer Support Center or your dealers. Symptom Reason/Action Printing is light (faded,... - Page 78 Symptom Reason/Action White dots appear in black The paper used is not suitable. Load the correct type of paper. filled areas. Refer to • “Usable Paper” (P. 41) The paper is damp. Replace with paper from a new ream. Refer to •...
- Page 79 Symptom Reason/Action Text is blurred. The paper used is not suitable. Load the correct type of paper. Refer to • “Usable Paper” (P. 41) The paper is damp. Replace with paper from a new ream. Refer to • “3.2 Loading Paper” (P. 47) Condensation may have occurred inside the printer.
-
Page 80: Paper Transport Problems
Paper Transport Problems Symptom Reason/Action Paper does not feed The paper is not loaded correctly. Reload the paper in the paper tray or bypass tray. Paper jams Several sheets feed at once Refer to Paper does not feed straight • “3.2 Loading Paper” (P. 47) The paper is outside the recommended specification range. -
Page 81: Error Messages
Error Messages This section describes the messages displayed on the control panel. Messages About Consumables Message Condition/Reason/Action Insert Fuser The fuser unit is either missing or not fully inserted into the printer. Contact your Xerox dealer or a Xerox Customer Service Center for assistance. Insert Transfer Roller The transfer roll is either missing or not fully inserted into the printer. -
Page 82: Messages About The Printer And Other Items (In Alphabetical Order)
Message Condition/Reason/Action An unsupported drum cartridge or fuser unit is installed. Replace the drum cartridge Type Error or contact your Xerox dealer or a Xerox Customer Service Center. Refer to • “Replacing the Drum Cartridge” (P. 90) Ready to Print The specified toner cartridge needs to be replaced. - Page 83 Message Condition/Reason/Action Check Paper in MPF Incorrect paper size is loaded in the bypass tray. Change the paper size in the bypass tray. Clean ADC Sensor. The printer’s automatic density control (ADC) sensor is dirty. Clean the printer’s ADC sensor. Refer to •...
-
Page 84: List Of Error Codes
Message Condition/Reason/Action Ready to Print The printer’s automatic density control (ADC) sensor needs to be checked soon. Check the printer’s ADC sensor. Check ADC Sensor Refer to • “Cleaning the Density Sensor” (P. 106) Ready to Print The printer is in the custom toner mode. Though some of the toner cartridges reach Non-Dell Toner the end of their lives, you can continue printing. -
Page 85: Network Related Troubles
Network Related Troubles Regarding troubles such as being unable to print in a network environment, refer to the manual (HTML document) that is included in the CentreWare CD-ROM. This section describes how to identify the cause and fix an error when a problem occurs by using the CentreWare Internet Services and the StatusMessenger function. -
Page 86: Mail Related Troubles
Mail Related Troubles This section explains how to fix the troubles when the StatusMessenger features are used. Symptom Reason/Action During mail notification Check the following settings in [Properties] of CentreWare Internet services, the printer status was Services. not notified by e-mail. •... -
Page 87: Replacing Consumables
Daily Care Replacing Consumables The message to prompt you to replace the toner cartridge or drum cartridge is displayed on the control panel, replace the indicated cartridge. Note • About the possible number of pages that can be printed with the toner cartridge or drum cartridge, refer to “Life of Consumables”... -
Page 88: Replacing The Toner Cartridge
Replacing the Toner Cartridge Remove any paper in the face down tray. Remove the top cover. Grip the levers at the ends of the toner cartridge that you want to replace and pull them up. Pull out the toner cartridge. Select the new toner cartridge whose color matches the cartridge holder and remove it from its packaging. - Page 89 Align the toner cartridge with the corresponding insertion point in the printer and insert it. Grip the levers at each end of the toner cartridge with your fingers, then push down firmly to rotate the levers forward. Pull the toner seal straight up to remove it. Note •...
-
Page 90: Replacing The Drum Cartridge
About the Custom Mode The high print quality and the high speed printing of this printer are designed to be most stabilized when genuine toner cartridges are used. Using the consumables whose specifications differ from genuine consumables may cause degradation of printer performance. - Page 91 Replacing the Drum Cartridge Important • Remove any print jobs from the face down tray and close the bypass tray before opening the top cover or front door. Remove any paper in the face down tray. Push up the button A and fully open the front door.
- Page 92 Holding the drum cartridge by the handle and the flat part facing the back of the printer, align the bosses that arrow marks are attatched on both sides of the drum cartridge with the slots that are indicated by the arrow marks on the printer. Gently lower the drum cartridge into the printer.
-
Page 93: Replacing The Transfer Roll
Replacing the Transfer Roll This section describes procedures for replacing the transfer roll. CAUTION • Never throw a used transfer roll into a fire. It could explode resulting in burns and injuries. • Do not touch the edge of the plate at the upper side of the transfer roll because it is sharp. - Page 94 To lock the transfer roll into the printer push down the tabs until you hear a click. Close the front door. 6 Daily Care...
-
Page 95: Printing Reports/Lists
Printing Reports/Lists This section explains the types of reports/lists and how to print them. Types of Reports/Lists Other than print data from the computer, this printer has the feature to print the following reports/lists. Reports Description Printer Settings Prints status of the printer such as hardware configuration and network information. -
Page 96: Checking / Managing The Printer Status On A Web Browser
Checking / Managing the Printer Status on a Web Browser When the printer is installed in a TCP/IP environment, you can check printer status and configure settings using a web browser on a network computer. This feature is known as CentreWare Internet Services. You can also check the remaining volume of consumables and paper loaded in this printer via CentreWare Internet Services. -
Page 97: Procedure
Browsers The following browsers can be used for CentreWare Internet Services. • Netscape Communicator 4.7, Netscape 7 • Internet Explorer ver6.0 Web Browser Settings for CentreWare Internet Services You are recommended to bypass the proxy server and specify the printer’s address directly when using the CentreWare Internet Services. -
Page 98: Using Online Help
The CentreWare Internet Services screen appears. Changing the Network Settings You can set this printer to be used as a network printer in the [Properties] tab. However, the administrator mode is set in CentreWare Internet Services as a default. To specify the settings, you need the administrator’s name and a password. -
Page 99: Ip Filter Feature Via Ip Address List
IP Filter Feature via IP Address List This feature allows you to register the IP addresses of computers that can be used in this printer. This will limit IP address used for receiving print data. Click [Properties] in CentreWare Internet Services. Click [Protocol Settings] >... - Page 100 When receiving print data from specified network address (192.168), and the print data from a part of the network address (192.168.200) are rejected, and specified user (IP address: 192.168.200.10) in the rejected network address is permitted to print. 6 Daily Care...
-
Page 101: Checking Printer Status Via Status Monitor
Checking Printer Status via Status Monitor Status Monitor is a tool to check the status of print jobs and the printer from your computer. This tool can be installed on your computer from the CentreWare CD-ROM. Note • For details about installing the Status Monitor, refer to the ReadMe file from the product information (HTML document) on the CentreWare CD-ROM. -
Page 102: Checking Printer Status Via E-Mail
Checking Printer Status via E-mail About Mail Notice Service When connected in a network environment where sending and receiving of e-mails is possible, this printer can send an e-mail with the following report to a specified e-mail address. • The network settings and the printer status •... - Page 103 Item to be Item Description configured Port Status StatusMessenger Select [Enable]. Protocol Settings Device E-mail Select appropriate settings for sending and receiving > SMTP/POP3 Address, SMTP e-mail. Server Address, POP3 Server Address, POP User Name, POP User Password, APOP Setting Transport Protocol Select appropriate settings for using TCP/IP protocol.
- Page 104 Select the [Notify Job End by E-mail] check box. Enter the e-mail address for notification in [E-mail Address]. Click [OK]. 6 Daily Care...
-
Page 105: Checking Printed
Checking Printed Pages This section explains how to check the total number of printed pages. Checking Total Printed Pages on Meter The total number of printed pages for different meters can be checked on the display of the control panel. The meter is divided according to the color modes. -
Page 106: Cleaning The Printer
Cleaning the Printer This section describes how to clean the printer in order to maintain it in good condition and print clean printouts all the time. CAUTION • Be sure to switch off and unplug the machine before accessing the interior of the machine for cleaning, maintenance, or fault clearance. - Page 107 Grip the tabs at both ends of the transfer roll and gently lift it out of the printer. Note • Do not touch inside the printer with your hands. Some parts may be hot. Allow time for the printer to cool before attempting to remove parts in this area.
-
Page 108: Cleaning The Drum Cartridge
Close the front door. Turn on the printer. Cleaning the Drum Cartridge When the colored dots appears on the printed paper at regular intervals (about 30 mm), clean the drum cartridge as following procedure. Note • Remove any print jobs from the face down tray, close the bypass tray cover before opening the front door. - Page 109 Place the drum cartridge next to the print sample on which the colored dots appear to find the part that needs to be cleaned. Note • You must find the part to be cleaned yourself. • The illustration shows the parts, one to four, to be cleaned.
-
Page 110: When Moving The Printer
Close the paper outlet cover. 10. Close the front door. When Moving the Printer Carry out the following procedure when moving the printer. CAUTION • The machine, without the optional accessories, paper trays, consumables and paper, weighs 31.5 kg. When moving the equipment, make sure that there are two or more persons carrying it. - Page 111 On the right side of the printer, press < > on the power switch to turn off the printer. Disconnect the power cord, interface cable, and any other cables. WARNING • To prevent electric shock, never touch the power plug with wet hands. CAUTION •...
- Page 112 Push up the button A and fully open the front door, then press the button C and open the paper outlet cover. Grab the drum cartridge by the handle, and pull it up and out. Important • Do not touch inside the printer with your hands. Some parts may be hot.
-
Page 113: A Appendix
Appendix Specifications Product Specifications Item Contents Machine type Desktop Printing system Laser xerography Fusion method Heat roller (oil-less) 25 seconds or less (when power is switched on, temperature: 22 °C) Warm-up time However, the printer’s electrical system is ready 10 seconds after switching on the printer. - Page 114 Item Contents Paper type Bypass tray: Plain paper (60 - 80 g/m ), bond paper (81 - 105 g/m heavyweight paper (106 - 216 g/m coated paper (105 - 216 g/m ), transparencies (for monochrome printing), labels, envelopes, postcards Tray module: Plain paper (60 - 80 g/m ), bond paper (81 - 105 g/m Duplex printing:...
-
Page 115: Printable Area
Item Contents Power source AC 100 - 127 V±10% or AC 220 - 240 V±10%, 15 A, 50/60 Hz (both) Important * Recommended AC outlet capacity. Maximum power current of the machine is 7.0 A (110 - 127 V model) or 4.0 A (220 - 240 V model). -
Page 116: Optional Accessories And Consumables
Optional Accessories and Consumables Optional Accessories The main optional accessories are as follows. Contact our Customer Support Center or your dealers to order these. Product Product name Reference code 128 MB memory The additional memory may be necessary when you print color documents that have a 256 MB memory large amount of data, such as complicated graphics. -
Page 117: Consumables
Consumables This section explains how to handle the types of consumables. For details on the replacement procedure of the consumables, refer to the procedure listed in the packaging box of the consumables and “6.1 Replacing Consumables” (P. 87). Important • If you are not using the consumables recommended by our company, the performance of the machine may not be at its optimum level. -
Page 118: Life Of Consumables
Life of Consumables and Regular Replacement Parts Life of Consumables Product name Possible number of pages printed Toner cartridge [K] About 9,000 sheets Toner cartridge [C] [M] [Y] About 8,000 sheets Drum cartridge (Including the toner collection cartridge) About 35,000 sheets Retard roll About 100,000 sheets Retard roll (Bypass tray) -
Page 119: A.4 How To Obtain Product Information
• Please take note that the communication cost will be borne by the customers. Click [About] on the [##Detailed Settings] tab of the printer properties dialog box. Click the [##Fuji Xerox Web Site] button. The web browser will be activated and the website displayed. -
Page 120: A.5 Glossary
Glossary 100BASE-TX An extension of 10BASE-T and a predominant form of FastEthernet. Its transmission speed is 100 Mbps, a great jump in speed from 10 Mbps of 10BASE-T. 10BASE-T The 10Base-T system uses a twisted-pair cable, base band transmission and operates at 10 Mbps. -
Page 121: Interface Cable
Abbreviation of dot per inch, a unit expressing the number of dots that can be printed in a width of 1 inch (about 25.4 mm). Used as a unit expressing resolution. Driver A device to spin the disk. Types of drivers available include floppy disk drive, CD-ROM drive, and hard disk drive. -
Page 122: Network Printer
A network communication method able to send data on Windows 95/Windows 98/Windows Me/Windows 2000/Windows XP/Windows Server 2003. For Windows 95/Windows 98/ Windows Me, the TCP/IP Direct Print Utility (Utility software is supplied by Fuji Xerox) must be installed. For Windows 2000/Windows XP/Windows Server 2003, Port9100 can be used on the standard TCP/IP port monitor. -
Page 123: Printer Driver
Printer driver Software that converts data created by application software to data that can be interpreted by the printer. Protocol An agreed-upon format for transmitting data between multiple devices and the computer system. It is an agreed procedure to transfer information between hardware or communicate between two network computers. -
Page 124: Index
Index Symbols, Numerics < > < > < > < > buttons ..14, 63 Delayed Print ......32 Drum cartridge . - Page 125 The whole piece of paper is printed black ........78 Paper Transparencies and envelopes are not printed Paper that can be set .
- Page 126 Paper transport problems → Paper Transport Problems Poor print quality → Print Quality Problems Types of Reports/Lists ....95 Upgrading Firmware version ....119 Printer driver .
- Page 127 Customer Response Sheet DocuPrint C2535 A User Guide (MEXXXXXX-X) To improve our publications, we would appreciate your feedback regarding this guide. Please take a few moments to complete and return this form to us. About Yourself 1. How often do you use this guide?
- Page 128 DocuPrint C2535 A User Guide Human Interface Design Development MEXXXXXX-X (Edition 1) Document Products & Supply Company © Fuji Xerox Co., Ltd. Copyright 2005 by Fuji Xerox Co., Ltd.
Need help?
Do you have a question about the DocuPrint C2535 and is the answer not in the manual?
Questions and answers