
Related Manuals for ALLIANCE BF3LLFSG401UN01


Summary of Contents for ALLIANCE BF3LLFSG401UN01
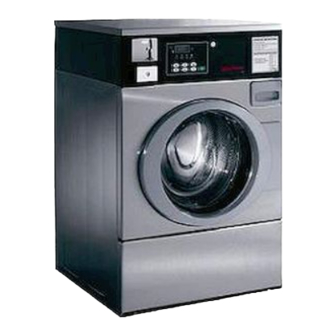
- Page 1 Frontload Washer Refer to Page 4 for Model Numbers FLW20R Keep These Instructions for Future Reference. (If this machine changes ownership, this manual must accompany machine.) Part No. 802953R4 July 2011...
- Page 3 NOTE: The WARNING and IMPORTANT WARNING instructions appearing in this manual are not meant to cover all possible conditions and situations that may occur. It must be understood that common Failure to install, maintain, and/or operate sense, caution, and carefulness are factors which this machine according to the cannot be built into these washers.
-
Page 4: Table Of Contents
Table of Model Identification ................Preliminary Information..............About the Control ................. Contents Glossary of Terms................. Power Failure Recovery ............... Communications ................... Control Identification................. Select Cycle Pads.................. START Keypad ..................Soil Level Pad..................Display Identification ................. Light Emitting Diodes (LEDs) ............. Washer Operation ................ - Page 5 7. Default Cycle “dCYC” ..............31 8. OPL Mode “oPL” ................ 32 9. Audio Signal “AUd” ..............33 10. Card Reader Display Control “CArd” ......... 35 11. Error Code Programming “Err” ........... 36 12. Cycle Programming “CyC-” ............37 13. Vend Price #2 “AtS2” ..............43 14.
- Page 6 Model Identification Information in this manual is applicable to these washer models: BF3LLFSG401UN01 NF3LXFSG401UN01 BF3LLFSG401UW01 NF3LXFSG401UW01 BF3LLFSP401UN01 NF3LXFSP401UN01 BF3LLFSP401UW01 NF3LXFSP401UW01 BF3LXFSG401UN01 NF3LYFSG401UW01 BF3LXFSG401UW01 NT1LLFSP411UW06 BF3LXFSP401UN01 NT1LXFSP401UW01 BF3LXFSP401UW01 NT1LXFSP401UN01 BT3LLFSG401UN01 NT2LLFSP401UW01 BT3LLFSG401UW01 NT2LLFSP401UW06 BT3LLFSP401UN01 NT2LLFSP401UN01 BT3LLFSP401UW01 NT2LXFSP401UW01 BT3LXFSG401UN01 NT2LXFSP401UN01 BT3LXFSG401UW01 NT3LLFSP401NN22...
-
Page 7: Preliminary Information
Contact Alliance Laundry Glossary of Terms Systems for a list of approved PDAs and other external devices. -
Page 8: Control Identification
Control Identification Select Cycle Pads START Keypad SELECT CYCLE pads are used to select the specific The START keypad is used to start the washer after the washer cycle. These pads include NORMAL 90, full vend price has been satisfied. NORMAL 60, NORMAL 40, PERM PRESS 60, DELICATES 30 and DELICATES COLD. - Page 9 Control Identification Electronic Control FLW20R FLW20R LED Light SELECT CYCLE pads Four 7-Segment Digits Display LED Status Lights SOIL LEVEL pad START pad Figure 1 © Published by permission of the copyright owner – DO NOT COPY or TRANSMIT 802953...
-
Page 10: Display Identification
Display Identification Light Emitting Diodes (LEDs) INSERT COINS/CARD LED INSERT COINS/CARD LED prompts the user for (Refer to Figure 1.) coins or a card to satisfy the vend price. Four digits LIGHT EMITTING DIODES (LEDs) are used to show the vend price remaining to be satisfied. The indicate the chosen cycle, wash temperature, cycle vend price displayed will decrease with each coin status and door lock information. -
Page 11: Washer Operation
Washer Operation Start Up Start Mode When power is applied to the washer, the control will The control enters this mode when the full vend price display its software version as “S XX” (“XX” is the is satisfied, the vend price is zero or the control is in version number) for one (1) second. -
Page 12: Signals
Washer Operation Signals Changing Cycles There are five options when a signal can be used during Cycles can be changed anytime during the first fill the washer operation. These five options are listed below: step. After the first fill step, all key presses are ignored. -
Page 13: Special Features
Special Features Programming Control Rapid Advance Feature The control allows the washer owner to program the This feature allows the user to quickly advance control with the use of the keypad. Cycle and vend through active cycles or advance into a cycle from the options may be programmed, audit information may ready mode. -
Page 14: Service Door And Coin Vault Openings
Special Features Service Door and Coin Vault OPL Mode Openings This feature allows the user to start a cycle without satisfying the vend price. The control will capture the times and dates of the openings of the Coin Vault and the Service Door. The For details on enabling OPL Mode, refer to information is saved in memory. -
Page 15: Opening The Service Door
Opening the Service Door Coin and Card Reader Units NOTE: If the Break-In Alarm option is enabled, it must be turned off or disabled by pressing the two Manual programming requires the user to open and programmed keys before opening service door. For close the service door. -
Page 16: Entering The Manual Mode
Entering the Manual Mode For programming, testing, and retrieving information Manual Mode is broken into three groups: Manual from the control, it is often necessary to enter the Programming, Manual Rapid Advance and Manual Manual Mode by following the four simple steps below. Diagnostics. - Page 17 Entering the Manual Mode Manual Mode : Enter by opening and closing service door. Then press NORMAL 90 and PERM PRESS 60 keypads pads at same time. Press the START Press the START (enter) (enter) keypad. "rAPd" keypad to begin Rapid Rapid Advance Advance cycle and to advance through cycle steps.
-
Page 18: Programming Control
Programming Control What Can Be Programmed? Each description includes instructions on when and why the option might be used and, more importantly, This feature allows the owner to program cycle how to program the option. information, standard vend pricing, special vends and For an overview of the programming organization, other features by using the keypads. - Page 19 Programming Control (continued) Option Option Description Factory Default Value Range Number Display “AtS6” Vend Price #6 0 - 65,535 “rtC-” Real Time Clock — — “rtC1” Set Real Time Clock Minutes — — “rtC2” Set Real Time Clock Hours — —...
- Page 20 Programming Control (continued) Option Option Description Factory Default Value Range Number Display “CnP1” Cycle Modifier B Price 0 - 65,535 “CnP2” Cycle Modifier C Price 0 - 65,535 “CnP3” Cycle Modifier B Option 0 - 15 “CnP4” Cycle Modifier C Option 0 - 15 “CnP5”...
- Page 21 Programming Control "Prog" Manual Programming To enter a programming "AtS1" option, press the START Press the (enter) keypad. To exit, Vend Price #1 START (enter) press the DELICATES 30 Press the NORMAL 40 or keypad. keypad. the DELICATES COLD "dEn1" keypad to scroll through Coin #1 Value the programmable...
- Page 22 Programming Control continued To enter a programming option, press the START (enter) keypad. To exit, "CyC-" Cycle Programming press the DELICATES 30 keypad. "StEn" "CyCX" "StAX" Cycle "on" or Cycle Cycle "oFF" Stage Number 1-3 Stage 1-8 Enable Press the NORMAL 40 or "AgIt"...
- Page 23 Programming Control continued "FSEn" "FSPI" "on" or Press the NORMAL 40 or Final Spin Final Spin Step the DELICATES COLD "oFF" Step Enable keypad to scroll through the programmable options. "SnIn" Final Spin To enter a programming Minutes option, press the START (enter) keypad.
- Page 24 Programming Control continued "SPA-" "SA01" "SA20" Special Vend A data Special Vend A Days Enable Special Vend A Added Wash #4 Fill/Agitate Time To enter a Press the NORMAL 40 "SA02" special vend or the DELICATES Special Vend A Start Hour option, press the COLD keypad to scroll "SA21"...
-
Page 25: F "Cnp6" Default Cycle Modifier
Programming Control continued Press the NORMAL 40 To enter a programming or the DELICATES "SPb-" option, press the START COLD keypad to scroll Special Vend B Days Enable (On/Off) (enter) keypad. To exit, through the press the DELICATES 30 programmable options. keypad. - Page 26 Programming Control continued Press the NORMAL 40 To enter a programming or the DELICATES option, press the START "droP" COLD keypad to scroll (enter) keypad. To exit, Drop Off Mode through the press the DELICATES 30 programmable options. (On/Off) keypad. "LPSA"...
-
Page 27: Vend Price #1 "Ats1
Programming Control Vend Price #1 “AtS1” 6. Press the START (enter) keypad to enter the fifth digit and display remaining four digits. The This option allows the owner to set the vend price for a active digit will flash one second on and one NORMAL 90 wash. -
Page 28: Coin #1 Value "Den1
Programming Control Coin #1 Value “dEn1” NOTE: To go back to the current programmable option without changing the value, press the This option allows the owner to set a specific DELICATES 30 (<) keypad. numerical value for a coin entered. For example, in the 7. -
Page 29: Coin #2 Value "Den2
Programming Control Coin #2 Value “dEn2” NOTE: To go back to the current programmable option without changing the value, press the This option allows the owner to set a specific DELICATES 30 (<) keypad. numerical value for a coin entered when using the dual 7. -
Page 30: Start Pulse Value "Plse
Programming Control Start Pulse Value “PLSE” NOTE: To go back to the current programmable option without changing the value, press the This option allows the owner to program the value of DELICATES 30 (<) keypad. the Start Pulse if used for multiple pulses with an after- 7. -
Page 31: On/Off
Programming Control Start Pulse Mode “PLSn” 5. Locate the desired number in the first column of Table 1 below. This option allows the owner to program the Start Pulse Input. The Start Pulse Mode can be used for “PLSn” after-market central pay or card systems. The central Start Pulse Start Pulse Single Pulse/... -
Page 32: Available Type "Atyp
Programming Control Available Type “AtyP” 5. Press the NORMAL 40 ( ) or the DELICATES COLD ( ) keypad to increase or decrease the This option allows the owner to program when the current number to the desired number selected control provides an available output for card and from Table 2. -
Page 33: Published By Permission Of The Copyright Owner – Do Not Copy Or Transmit
Programming Control Default Cycle “dCYC” How to Read Table 3 To determine the correct number required to program This option allows the owner to set the default cycle Default Cycle, use the following table. The Default that the machine will enter when in the Ready Mode. Value column contains the number required in step 5. -
Page 34: Opl Mode "Opl
Programming Control OPL Mode “oPL” NOTE: To program “AUd” (Audio Signal), refer to option 9. To program other options, refer to the This option allows the owner to enable or disable the appropriate section. OPL Mode in which no vend price needs to be How to Exit Programming Feature satisfied to operate the machine. -
Page 35: Audio Signal "Aud
Programming Control Audio Signal “AUd” 4. When “AUd” appears in the display press the START (enter) keypad. A number will appear in This option allows the owner to program when the the display. This number corresponds to the audio signal will sound. current Audio Signal Programming Value. -
Page 36: On Off
Programming Control How to Read Table 4 Coin/ Signal Start Remove End of Card Value Mode Card Cycle Pressed To determine the correct number required to program Input the Audio Signal, use the following chart. The Signal Value column contains the number required in step 6. The other columns correspond to individual options. -
Page 37: Card Reader Display Control "Card
Programming Control 10. Card Reader Display Control 5. Press the NORMAL 40 ( ) or the DELICATES COLD ( ) keypad to change the current status. “CArd” 6. Press the START (enter) keypad when the This option allows the owner to program whether the desired status appears in the display. -
Page 38: Error Code Programming "Err
Programming Control 11. Error Code Programming “Err” 5. Press the NORMAL 40 ( ) or the DELICATES COLD ( ) keypad to select error code. This option allows the owner to turn on or turn off 6. Press the START (enter) keypad when the correct certain errors in the control. -
Page 39: Cycle Programming "Cyc
Programming Control 12. Cycle Programming “CyC-” This option allows the owner to program different aspects for various steps in each type of cycle. There are six cycles available for programming. For an overview of the cycle programming options, refer to Table 6. “CyCX”... -
Page 40: How To Enter Cycle Programming
Programming Control How to Enter Cycle Programming How to Program Cycle Stages “StAx” 1. Control must be in Manual Mode. Refer to There are eight programmable cycle stages. Within Entering the Manual Mode. each stage, there are three programmable options. 2. - Page 41 Programming Control Programming Fill/Agitate Step Programming Drain Step 1. When “AgIt” appears in the display, press the 1. When “drAn” appears in the display, press the START (enter) keypad. The first Fill/Agitate step START (enter) keypad. “SPry” will appear in the programming option will appear in the display.
-
Page 42: Off/133
Programming Control Fill/Agitate Factory Default Factory Default Factory Default Description Status/Value Step Setting – Stage 4 Setting – Stage 6 Setting – Stage 8 “AdUr” Agitate 1-25 NORMAL 90, NORMAL Duration 60 = 9 (in minutes) NORMAL 40 = 7 PERM PRESS 60 = 6 DELICATES 30, DELICATES COLD = 5... -
Page 43: Normal 90, Normal
Programming Control How to Program Final Spin Step “FSPI” 5. Press the NORMAL 40 ( ) or the DELICATES COLD ( ) keypad to change the current status/ This option allows the owner to set the amount of time value. and speed for a final spin. - Page 44 Programming Control How to Program Breakaway Step Speed 3. Press the NORMAL 40 ( ) or the DELICATES COLD ( ) keypad to change the current status. “brAy” 4. Press the START (enter) keypad when the This option allows the owner to set the breakaway desired status appears in the display.
-
Page 45: Vend Price #2 "Ats2
Programming Control 13. Vend Price #2 “AtS2” 5. Press the NORMAL 40 ( ) or the DELICATES COLD ( ) keypad to increase or decrease the This option allows the owner to set the vend price for a value of the fifth digit. NORMAL 60 wash. -
Page 46: Vend Price #3 "Ats3
Programming Control 14. Vend Price #3 “AtS3” 5. Press the NORMAL 40 ( ) or the DELICATES COLD ( ) keypad to increase or decrease the This option allows the owner to set the vend price for a value of the fifth digit. NORMAL 40 wash. -
Page 47: Vend Price #4 "Ats4
Programming Control 15. Vend Price #4 “AtS4” 5. Press the NORMAL 40 ( ) or the DELICATES COLD ( ) keypad to increase or decrease the This option allows the owner to set the vend price for a value of the fifth digit. PERM PRESS 60 wash. -
Page 48: Vend Price #5 "Ats5
Programming Control 16. Vend Price #5 “AtS5” 5. Press the NORMAL 40 ( ) or the DELICATES COLD ( ) keypad to increase or decrease the This option allows the owner to set the vend price for a value of the fifth digit. DELICATES 30 wash. -
Page 49: Delicates Cold
Programming Control 17. Vend Price #6 “AtS6” 5. Press the NORMAL 40 ( ) or the DELICATES COLD ( ) keypad to increase or decrease the This option allows the owner to set the vend price for a value of the fifth digit. DELICATES COLD wash. -
Page 50: Set Real-Time Clock "Rtc
Programming Control 18. Set Real-Time Clock “rtC-” NOTE: The hours will be displayed in military time. For day of week, Sunday is considered day This option allows the owner to set the control’s one (1), Monday is day two (2) and so on. For year, internal clock to the correct time and date. -
Page 51: Special Vend A Data "Spa
Programming Control 19. Special Vend A Data “SPA-” How to Program Special Vend A Days Enable “SA01” This option allows the owner to set the day or days of a special vend. 1. Control must be in Manual Mode. Refer to Entering the Manual Mode. - Page 52 Programming Control How to Read Table 10 To determine the correct number required to program Each column of days contains a unique combination of the Special Vend Days Enable, use the following table. the words “ON” and “OFF” that indicates if that The Special Vend Value column contains the number column’s day is turned on or off when the value is required in step 6.
-
Page 53: On Off On
Programming Control Table 10 (continued) “SA01” SPECIAL VEND THUR ON/OFF VALUE Table 10 (continued) © Published by permission of the copyright owner – DO NOT COPY or TRANSMIT 802953... - Page 54 Programming Control Table 10 (continued) “SA01” SPECIAL VEND THUR ON/OFF VALUE Table 10 (continued) © Published by permission of the copyright owner – DO NOT COPY or TRANSMIT 802953...
- Page 55 Programming Control Table 10 (continued) “SA01” SPECIAL VEND THUR ON/OFF VALUE Table 10 © Published by permission of the copyright owner – DO NOT COPY or TRANSMIT 802953...
- Page 56 Programming Control How to Program Special Vend A Start How to Program Special Vend A Start Hour “SA02” Minute “SA03” This option allows the owner to set the hour that This option allows the owner to set the minute that Special Vend A will begin.
- Page 57 Programming Control How to Program Special Vend A Length in How to Program Special Vend A Start Hours “SA04” Month “SA05” This option allows the owner to set the length in hours This option allows the owner to set the month that for Special Vend A.
- Page 58 Programming Control How to Program Special Vend A Start Date How to Program Special Vend A Start Year “SA06” “SA07” This option allows the owner to set the date that This option allows the owner to set the year that Special Vend A will begin.
- Page 59 Programming Control How to Program Special Vend A End How to Program Special Vend A End Date Month “SA08” “SA09” This option allows the owner to set the month that This option allows the owner to set the date that Special Vend A will end.
- Page 60 Programming Control How to Program Special Vend A End Year 4. Press the START (enter) keypad when the correct year appears in the display. The next Special “SA10” Vend A option, “SA11”, will appear in the This option allows the owner to set the year that display.
- Page 61 Programming Control How to Program Special Vend A Vend NOTE: To go back to the current programmable Special Vend A option without changing the value, Price #1 “SA11” press the DELICATES 30 (<) keypad. This option allows the owner to set the vend price for a 5.
- Page 62 Programming Control How to Program Special Vend A Vend NOTE: To go back to the current programmable Special Vend A option without changing the value, Price #2 “SA12” press the DELICATES 30 (<) keypad. This option allows the owner to set the vend price for a 5.
- Page 63 Programming Control How to Program Special Vend A Vend NOTE: To go back to the current programmable Special Vend A option without changing the value, Price #3 “SA13” press the DELICATES 30 (<) keypad. This option allows the owner to set the vend price for a 5.
- Page 64 Programming Control How to Program Special Vend A Vend NOTE: To go back to the current programmable Special Vend A option without changing the value, Price #4 “SA14” press the DELICATES 30 (<) keypad. This option allows the owner to set the vend price for a 5.
- Page 65 Programming Control How to Program Special Vend A Vend NOTE: To go back to the current programmable Special Vend A option without changing the value, Price #5 “SA15” press the DELICATES 30 (<) keypad. This option allows the owner to set the vend price for a 5.
- Page 66 Programming Control How to Program Special Vend A Vend NOTE: To go back to the current programmable Special Vend A option without changing the value, Price #6 “SA16” press the DELICATES 30 (<) keypad. This option allows the owner to set the vend price for a 5.
- Page 67 Programming Control How to Program Special Vend A Added How to Program Special Vend A Wash #4 Fill/Agitate Time “SA20” Subtracted Wash #4 Fill/Agitate Time “SA21” This option allows the owner to add time to the wash agitate part of the cycle in Special Vend A. This option allows the owner to subtract time from the wash agitate part of the cycle in Special Vend A.
-
Page 68: Special Vend B Days Enable "Spb
Programming Control 20. Special Vend B Days Enable 21. Special Vend C Days Enable “SPb-” “SPC-” This option allows the owner to enable or disable a This option allows the owner to enable or disable a second special vend. third special vend. Special Vend B can be programmed using an external Special Vend C can be programmed using an external device or network. -
Page 69: Special Vend D Days Enable "Spd
Programming Control 22. Special Vend D Days Enable 3. Press the NORMAL 40 ( ) or the DELICATES COLD ( ) keypad to scroll through the “SPd-” programmable options until “SPd-” appears in the display. This option allows the owner to enable or disable a fourth special vend. -
Page 70: Cycle Modifier Programming "Cnp
Programming Control 23. Cycle Modifier Programming “CnP-” This option allows the owner to program the machine to offer an added prewash, extra wash time, an added extra rinse, a warm rinse, or any combination of the above to the customers for an added vend price. This option is selected when B or C is selected using the CHM507R SOIL LEVEL keypad. - Page 71 Programming Control How to Program Cycle Modifier C Price 4. Press the START (enter) keypad to enter the fifth digit and display remaining four digits. The “CnP2” active digit will flash one second on and one This price setting will be added to the current vend second off.
-
Page 72: Table 11
Programming Control How to Program Cycle Modifier B Option How to Read Table 11 “CnP3” To determine the correct number required to program the Cycle Modifier Option, use the following chart. This option allows the owner to enable or disable the The Cycle Modifier Value column contains the Cycle Modifier B Option. - Page 73 Programming Control How to Program Cycle Modifier C Option How to Program Cycle Modifier Added “CnP4” Wash Time “CnP5” This option allows the owner to enable or disable the This option allows the owner to set the amount of Cycle Modifier C Option. additional wash time for the B and C Cycle Modifier Options.
-
Page 74: Factory Default Setting - Stage
Programming Control How to Program Default Cycle Modifier NOTE: To program “PCt-” (Cycle Time Display), press the DELICATES 30 (<) keypad and refer to “CnP6” (software version “S 02” or higher option 24. To program other options, press the only) DELICATES 30 (<) keypad and refer to the This option allows the owner to set the Default Cycle appropriate section. - Page 75 Programming Control 24. Cycle Time Display “PCt-” How to Program Cycle #1 Time “PCt1” (software version “S 02” or This option allows the owner to set the Cycle #1 Time higher only) display. 1. Press the NORMAL 40 ( ) or the DELICATES This option allows the owner to program the machine COLD ( ) keypad to scroll through the to display a chosen cycle time in minutes instead of...
- Page 76 Programming Control How to Program Cycle #2 Time “PCt2” How to Program Cycle #3 Time “PCt3” This option allows the owner to set the Cycle #2 Time This option allows the owner to set the Cycle #3 Time display. display. 1.
- Page 77 Programming Control How to Program Cycle #4 Time “PCt4” How to Program Cycle #5 Time “PCt5” This option allows the owner to set the Cycle #4 Time This option allows the owner to set the Cycle #5 Time display. display. 1.
- Page 78 Programming Control How to Program Cycle #6 Time “PCt6” NOTE: The Cycle #6 Time can be set from 0 to 255. The factory default setting is 28. This option allows the owner to set the Cycle #6 Time display. 4. Press the START (enter) keypad when the desired number of minutes appears in the display.
-
Page 79: Drop Off Mode (On/Off) "Drop
Programming Control 25. Drop Off Mode (On/Off) “droP” 26. Low Power/Auto Shutdown A Days Enable “LPSA” This option allows the owner to limit machine use to an attendant without requiring vend. This option allows the owner to set Low Power/Auto Shutdown on certain day(s) of the week. -
Page 80: Low Power/Auto Shutdown B Days Enable "Lpsb
Programming Control 27. Low Power/Auto Shutdown B 28. Low Power/Auto Shutdown C Days Enable “LPSb” Days Enable “LPSC” This option allows the owner to set Low Power/Auto This option allows the owner to set Low Power/Auto Shutdown on certain day(s) of the week. Low Power Shutdown on certain day(s) of the week. -
Page 81: Low Power/Auto Shutdown D Days Enable "Lpsd
Programming Control 29. Low Power/Auto Shutdown D 30. Power Fail Reset “PFr” Days Enable “LPSd” This option allows the owner to set the amount of time the control will store active cycle information in the This option allows the owner to set Low Power/Auto event of a power failure. -
Page 82: How To Read Table
Programming Control How to Read Table 13 Use this table to set the amount of time for Power Fail If 133 is entered, the current cycle will be saved for up Reset. to five minutes. If power is not restored within five minutes, the control will erase the cycle status. -
Page 83: Ir Access (On/Off) "Ira
Programming Control 31. IR Access (On/Off) “IrA” 32. Manual Rapid Advance (On/Off) “rAEn” This option allows the owner to enable or disable allowing the control to be read by an external device. This option allows the owner to enable or disable the rapid advance feature. -
Page 84: Manual Diagnostics (On/Off) "Daen
Programming Control 33. Manual Diagnostics (On/Off) 34. Production Test Cycle (On/Off) “dAEn” “PtEn” This option allows the owner to enable or disable the This option allows the owner to enable or disable manual diagnostics option. Refer to Testing Machine access to the production test cycle. Refer to and Electronic Control Functions section for more Production Test Cycle section for more information. -
Page 85: Collecting Audit Information
Collecting Audit Information This feature allows the owner to retrieve audit Audit Options List information stored in the washer by pressing a sequence of pads on the control. For an explanation of the audit Display Description options available, refer to Table 14. “... -
Page 86: Manual Reset
Manual Reset This feature allows the owner to reset the washer control’s programming data to the factory default settings by pressing a sequence of pads on the control. For an explanation of the Factory Default Settings, refer to Default Washer Settings. How to Enter Manual Reset 1. - Page 87 Testing Machine and Electronic Control Functions How to Enter Testing Feature This feature allows the owner to run diagnostic tests on various washer operations without servicing the 1. Control must be in Manual Mode. Refer to washer. The following tests are available: Entering the Manual Mode.
-
Page 88: Testing Machine And Electronic Control Functions
Testing Machine and Electronic Control Functions Diagnostic (Testing) Mode – Quick Reference Chart Software Version “S 02” or higher Test Number Diagnostic Mode Display “d001” Control Software Version # Test “SXX” “d002” Service Door Opening Test “SXX” “d003” “UXX” Coin Vault Opening Test “d004”... - Page 89 Testing Machine and Electronic Control Functions "dIAg" Software Version "S 01" Software Version "S 02" or higher Diagnostic Tests "d001" "d001" ---------------------- Press the Control Software Control Software START (enter) Version Number Test Version Number Test keypad. Press the NORMAL 40 or the DELICATES "d002"...
-
Page 90: Diagnostic Test Descriptions
Testing Machine and Electronic Control Functions Diagnostic Test Descriptions Control Software Version Number Test Coin Drop #1 Input Test This option displays the control software version This option tests coin drop #1. To start test, control number. To start test, control must be in the Testing must be in the Testing Mode. - Page 91 Testing Machine and Electronic Control Functions Door Switch Input Test Show Fill Time Test This test will display whether the washer door is open This test will display the average fill time. This or closed. average will be calculated by taking the average of the last 10 fill times.
- Page 92 Testing Machine and Electronic Control Functions Configuration #1 Display Test Configuration #2 Display Test This option shows the machine configuration values. This option shows the machine configuration values. To start test, control must be in the Testing Mode. To start test, control must be in the Testing Mode. Refer to How to Enter Testing Feature at the Refer to How to Enter Testing Feature at the beginning of this section.
-
Page 93: Production Test Cycle
Testing Machine and Electronic Control Functions Table 17 (continued) NETWORK CARD COIN DROP COIN DROP CONFIG COIN HEADER BOARD READER VALUE PRESENT PRESENT PRESENT PRESENT PRESENT NOTE: Configuration values 80-95 are on software version “S 02” or higher only. Table 17 Production Test Cycle To Enter Production Test Cycle 1. - Page 94 Testing Machine and Electronic Control Functions Production Test Cycle Quick Reference Chart Display Test Mode Comments S XX Software Version XX is the software version number. CtXX XX is the control type. Control Type FL X Machine Type X is either P for pump equipped machines or d for gravity drain equipped machines.
- Page 95 Testing Machine and Electronic Control Functions Table 18 (continued) Production Test Cycle Quick Reference Chart Display Test Mode Comments PunP or drAi Pump/Gravity Drain Test Pump is turned on or gravity drain is opened. The control will not advance to next step until pressure switch is closed indicating drum is empty and PERM PRESS 60 keypad is pressed.
-
Page 96: Error Codes
Error Codes The following table is a list of possible error codes for Errors beginning with “EC” refer to card reader errors. an electronic control. Errors beginning with “EI” refer All other errors refer to machine errors. to external device Infra-red communication errors. Cause/ Display Description... - Page 97 Error Codes Table 19 (continued) Cause/ Display Description Corrective Action EC18 No Communication Card reader is initialized, communication lost. Power down, power up and try again. If error persists, replace control or card reader. EC19 No Card Reader Communication Communication failure. Power down, power up and try again.
-
Page 98: Rapid Advance Feature
Rapid Advance Feature How to Enter Rapid Advance During The Rapid Advance feature allows the owner to quickly advance through active cycles or advance into an Active Cycle a cycle from the ready mode. 1. Be certain service door is open. How to Enter Rapid Advance 2. -
Page 99: Clear Vend Feature
Clear Vend Feature The Clear Vend feature allows the owner to clear a control which is in the middle of satisfying a vend price, and set it back to the ready mode. How to Clear Vend 1. Open the service door. Refer to Opening the Service Door. -
Page 100: Power Fail Recovery
Power Fail Recovery The Power Fail Recovery feature allows the cycle If the power failure lasted longer than 30 seconds, the status to be saved in memory in the event of a power Power Fail Reset option is turned “OFF,” and the door failure. -
Page 101: Communications Mode
Communications Mode Infra-red Communications Card Reader Communications (Card Models Only) The Infra-red Communications feature allows the washer control to communicate with an external The Card Reader Communications feature allows the device. The washer control can be programmed and washer control to communicate with the card reader. have its data read without using the keypad. -
Page 102: Default Cycle Time
Default Cycle Time The cycle listed is the default PERM PRESS 60 cycle programmed in at the factory. This cycle can be made longer or shorter by reprogramming the fill/agitate times. Refer to Programming Control to change these times. All other times are not programmable. Cycle Default Wash Fill/Agitate...
Need help?
Do you have a question about the BF3LLFSG401UN01 and is the answer not in the manual?
Questions and answers