Chapters
Table of Contents

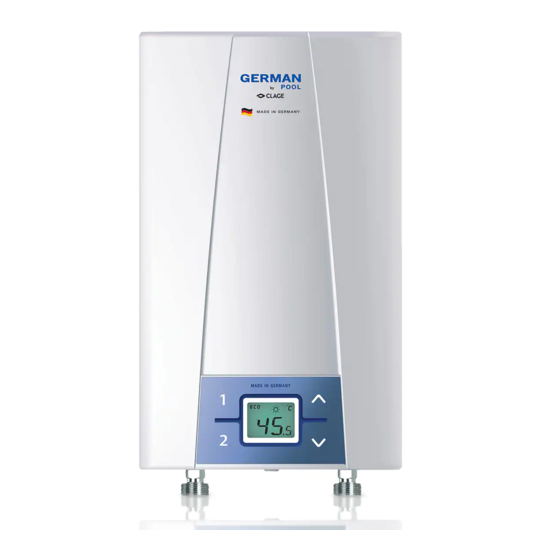
Related Manuals for German pool cex9


Summary of Contents for German pool cex9
- Page 1 MADE IN GERMANY Printed in Germany WHI-CEX9-M-11(1)
-
Page 2: Overview
CEX 9 1. Overview When ordering spare parts, please always specify the appliance model and serial number. Grommet 82806 Bottom part Connecting terminal 82809 86250 Flow sensor 82819 Heating element with STDB 82810 Non-return valve 82246 Electronic Temperature sensor set 82811 82512 CEX 9 control panel... -
Page 3: Table Of Contents
Deactivation of the Lock level ..... . . 13 2. Environment and recycling German Pool is very conscious of environmental protection, and this also includes packaging materi- als. You can care for the environment by carefully segregating waste. -
Page 4: Safety Instructions
CEX 9 3. Safety instructions Installation, initial operation and maintenance of this appliance must only be conducted by an authorised professional, who will then be responsible for adherence to applicable standards and installation regulations. We assume no liability for any damages caused by failure to observe these instructions. • Do not use the appliance until it has been correctly installed and unless it is in perfect working order. -
Page 5: Technical Specifications
5. Technical specifications Model CEX 9 ElECTrOnIC MPS ® Article no. 26239 Rated capacity / rated current 6,0..9,6 kW (27,3..40 A) Chosen capacity @ 230 V 6,6 kW (28,7 A) 8,8 kW (38,3 A) Electrical connection 1/N/PE 220..240 V AC Min. -
Page 6: Typical Installations
CEX 9 7. Typical installations... - Page 7 7. Typical installations Direct connection: Supply for one outlet Direct connection: Supply for multiple outlets recommended handset: CXH (art.no. 0300-0086) MADE IN GERMANY MADE IN GERMANY Maßangaben in mm Wall mounted mixer: Supply for one sink MADE IN GERMANY...
-
Page 8: Installation
CEX 9 8. Installation The following regulations must be observed: • Installation must comply with all statutory regulations, as well as those of the local electricity and water supply companies. • The specifications on the rating plate • Technical specifications Installation site • Appliance must only be installed in frost-free rooms. -
Page 9: Mounting The Appliance
8. Installation Mounting the appliance 1. Thoroughly rinse the water supply pipes before installation to remove soiling from the pipes. 2. Hold the appliance on the wall, and mark the drill lines at top and bottom, right and left, corresponding to the small notches at the edge of the appliance hood (see bot- tom figure). -
Page 10: Electrical Connection
CEX 9 9. Electrical connection Only by a specialist! Please observe: • The installation must comply with current IEC or national local regulations Wiring diagram and any particular regulations, specified by the local electricity supply com pany • Observe the rating plate and technical specifications • The unit must be earthed! Structural prerequisites • The appliance must be installed via a permanent connection. -
Page 11: Initial Operation
10. Initial operation 1. Before making the electrical connec tion, fill the mains and the appliance with water by carefully opening and closing the hot water tap in order to vent completely. After every draining (e.g. after work on the plumbing sys tem or following repairs to the appli ance), the heater must be revented in this way before starting it up again. -
Page 12: Note "Reinstallation
CEX 9 10. Initial operation note “reinstallation“ In case the appliance will be commis sioned again under different installation conditions than during its initial ope ration, it may be necessary to adapt the maximum power rating. A temporary short-circuit of the two pins, e.g. with a screwdriver acc. to EN 60900 (see figure), will reset all heater para meters to works setting and lock the hea- ting. -
Page 13: Lock Level
10. Initial operation lock level The operating mode of the appliance can be restricted. The service menu can be used to configure the appliance. Activation of the lock level 1. Set required lock level in the service menu (refer to chapter “Service menu” in this installing instructions). -
Page 14: Cleaning And Maintenance
CEX 9 11. Cleaning and maintenance • Plastic surfaces and fittings should only be wiped with a damp cloth. Never use abrasive cleaners or solvents.. • For a good water supply, the outlet fittings (jet regulators and shower heads) should be unscrewed and cleaned at regular intervals. -
Page 15: Temperature Limitation
12. How to use Temperature limitation Scalding protection on The instantaneous water heater is equipped with an optional temperature limiting func- tion. This scalding protection is deactivated in the factory setting. • Switch on: Select the limit tempe ra ture, then press simul taneously for at Press least 3 sec. -
Page 16: Power Limit
CEX 9 12. How to use Power limit Leistungsgrenze erreicht Power limit If the full power of the instantaneous heater is not sufficient to heat the water to the required temperature, this is indicated by “MAX“ at the display. The temperature can be restored by reducing the hot water flow rate at the tap. -
Page 17: Service Menu
13. Service menu The service menu offers an overview of system parameters and is used for diagnostics. Press key and key simultaneously for at least 2 seconds to call up the service menu, the display confirms by “FL” and by a flashing point. Using the arrow keys Service menu , you can switch between the individual menus. - Page 18 CEX 9 13. Service menu “ll“: lock level The operating mode of the appliance can be restricted. Menu item order of “Service menu“: Setting Options: “0” no restriction (factory setting) “1” factory reset via key (countdown) not possible, parameters can be seen, but not be modi- fied in setup menu “2”...
-
Page 19: Trouble-Shooting And Service
14. Troubleshooting and service Your instantaneous water heater CEX was manufactured conscientiously and checked several times before delivery. Should malfunctions nevertheless occur, it is usually only due to a bagatelle. First attempt to switch the house fuses off and on again in order to reset the electronics. -
Page 20: 概述
CEX 9 1. 概述 訂購零部件時,務請說明熱水器型號和序列號 墊圈 82806 底部部件 接線端子 82809 86250 流量感測器 82819 配有溫度安全保護器 的加熱元件 82810 單向閥 82246 電子器件 溫度感測器裝置 82811 82512 CEX 9控制面板 82816 進水管 82802 CEX外殼 82818 冷/熱水接頭 82813 螺絲和銷子 82817... -
Page 21: 環境和迴圈利用
目錄 1.·概述·......... . . 20 11.·清潔保養·... -
Page 22: 安全說明
CEX 9 3. 安全說明 只有經認可的專業人員方可從事本款熱水器的安裝、初始操作及維護工作,該等專業人員須遵守適用標準和安裝規 定。德國寶不對由於未遵守以下說明而導致的任何損害負責。 · 使用本款熱水器之前須確保其安裝正確且處於良好工作狀態。 · · 本款熱水器僅可在家庭和封閉、無霜的房間使用,僅可用於加熱統一供應的飲用水。 · · 本款熱水器禁止暴露於霜凍環境中。 · · 本款熱水器須始終接地。 · · 耐水性最低值不得低於標籤規定值。 · · 最高水壓不得高於標籤值。 · · 首次試運行之前以及每次排空熱水器時(例如由於維修管道系統、存在凍結風險或進行維護保養),鬚根據本手 · 冊使用說明採取正確方法排空熱水器。 · 切斷總電源之前,任何情況下均勿拆下前蓋。 · · 勿對熱水器、電路導線及水管進行技術改造。 · · 請注意:水溫超過43·°C即被視為熱水,對兒童而言尤其如此,使用者可產生灼傷感。熱水器使用一段時間後, · 配件和龍頭均可能過熱。 · 進水口溫度不得超過70·°C。 ·... -
Page 23: 技術規格
5. 技術規格 CEX 9 ElECTrOnIC MPS 型號 ® 貨號 26239 額定功率·/·額定電流 6,0..9,6·kW··(27,3..40·A) 230·V實際功率 6,6·kW·(28,7·A)· 8,8·kW·(38,3·A)· 電氣連接 1/N/PE··220..240·V·AC 所需最小電線尺寸· 3×·4·mm 3×·6·mm 熱水 (l/分鐘) 最大值·∆t·=·25·K 額定容量 0,3·l 類型 關閉, 1·MPa·(10·bar)公稱壓力·/·壓力類型 加熱系統 裸線加熱系統IES· ® 水溫為15·° C時的比電阻 ≥·1100·Ωcm 導電性 ≤·90,9·mS/m 出水口溫度 ≤·70·°C 啟動流速–最高流速 2,0·–·5,0·l/min· 2.5升/分鐘:0.2巴... -
Page 24: 典型安裝
CEX 9 7. 典型安裝... - Page 25 7. 典型安裝 直接連接:適用於單個出水口 直接連接:適用於多個出水口 推薦套件: CXH(貨號0300-0086) MADE IN GERMANY MADE IN GERMANY 測量單位mm 掛壁式混合型熱水器:適用於單個水槽 MADE IN GERMANY...
-
Page 26: 安裝
CEX 9 8. 安裝 必須遵守以下規定: · 安裝期間須遵守所有相關法規以及當地供電和供水公司規定。 · 銘牌規格 · 技術規格 安裝地點 · 熱水器僅可安裝在無霜房間內。禁止將熱水器暴露於結霜環境中。 · · 熱水器適合掛壁安裝,須使用向下水接頭。 · · 熱水器符合保護類型IP·25規定。 · · 為避免出現熱損失,應儘量縮短即熱式電熱水器與觸點之間的距離·· · (<·2m)。 · 為了便於進行維護保養工作,應在供水管線內安裝切斷閥。熱水器須便於 · 進行維護保養工作。 · 可使用銅制或鋼制連接管。若使用塑膠管,必須符合德國工業標準(DIN)· · 16893,2系列要求。熱水管須為保溫設計。 · 水的比電阻在15·°C時最低須達1100·Ωcm。可向您所在地區的供水公司 · 諮詢電阻率數值。... -
Page 27: 安裝熱水器
8. 安裝 安裝熱水器 1.· 安裝前徹底清洗供水管,清除管內汙物。 2.· 將熱水器貼牆放置,標注頂部和底部以及左右兩邊的鑽孔線,與熱水器防 護罩邊緣的小孔對應(參見底部數字)。 3.· 垂直連接頂部和底部標記·(A-A)。 4.· 水準連接左右兩邊標記·(B-B)。 5.· 鑽孔線的交叉點為鑽孔點。 6.· 使用6·mm鑽孔器鑽孔。插入銷子和螺絲。螺絲須伸出5·mm。 7.· 將熱水器放入後掛開孔,然後將其向下滑入設定位置。 安裝熱水器 1.· 在熱水器水管接頭處安裝連接水管。使用密封墊。 2.· 開關熱水龍頭,直至水管內無空氣逸出且熱水器排出所有空氣。... -
Page 28: 電氣連接
CEX 9 9. 電氣連接 僅專業人員方可操作! 請注意: · 安裝過程須遵守國際電工委員會或國家地方現行法規以及當地供電公司的 接線圖 相關規定。 · 遵守銘牌和技術規格 · 裝置必須接地! 結構前提 · 必須通過永久連接裝置安裝熱水器。熱水器必須接地! · · 不可損壞電線。 · · 安裝結束時,應提供全極斷開裝置(例如通過保險絲),每極接觸開孔寬 · 1· 電路板 度須超過3·mm。· 2· 加熱元件 · 為保護熱水器,須安裝保險絲,其脫扣電流應等於熱水器額定電流。 · 3· 安全壓力開關和溫度安全保護器 1.· 去掉電源線表皮,將帶有鍍層的電源線通過防濺式保護套管插入熱水器的 線纜接頭。將電源線通過防濺式保護套管插入熱水器,將電源線鍍層與線 4· 接線盒 纜接頭安全固定。如有必要,採用三個預留中斷點之一(分別設在左邊、 右邊及頂部)作為線纜接入端。保護套管可防止水順著連接線進入熱水... -
Page 29: 初始操作
10. 初始操作 1.· 進行電氣連接前,小心開關熱水龍頭,向總水管和熱水器注水,使其徹底 排空。每次排水後(例如維護管道系統或修理熱水器之後),必須採用該 方法將熱水器重新排空後方可再次啟動。· ··· 若熱水器無法運轉,請確保溫度安全保護器(STDB)運輸期間未受損。為 此,請打開熱水器外殼,如有必要,請打開開關重新打開溫度安全保護器。 “額定功率選擇”說明 (僅經認可的專業人員方可操作,否則安全保證失效)。首次將熱水器連接電 源電壓後,請選擇最大額定功率。設定額定功率後,熱水器的標準操作模式 方可使用。安裝地點可允許的最大額定功率取決於現場情況。必須遵守“技 術規格”表中的所有資料規定,尤其是電氣連接要求達到的電線尺寸和熔斷 保護相關資料。此外,進行電氣安裝工作期間必須遵守所在國家和當地供電 公司的相關法規·(德國:DIN·VDE·0100)。 2.· 打開熱水器電源。須確保熱水器的數字顯示器點亮。 3.· 首次打開電源電壓後,顯示器閃爍數值“88”。否則,請認真閱讀以下“ 重新安裝”說明。 ® 4.· 根據當地情況,使用· ·和· ·按鍵選擇可允許的最大額定功率:8.8或6.6· kW·(顯示器:“66”)·230V。 5.· 按下按鍵· ·,確認設置。熱水器開始運行。 6.· 在銘牌上標注已設定的額定功率。 多電源系統: 7.· 設定可允許的最大額定功率。水流約10秒鐘後,加熱元件將被啟動。 額定容量(最大功耗)為8.8·kW·/· 8.· 打開熱水龍頭。檢查熱水器功能。 230·V,可降至6.6·kW。 9.· 向用戶說明即熱式電熱水器工作原理,將操作說明書交給客戶。填寫質保 登記卡,將登記卡寄至佳捷客戶服務中心。... -
Page 30: 重新安裝"說明
CEX 9 10. 初始操作 “重新安裝”說明 除首次運行外,熱水器在不同安裝環境中可能重新啟動。在此情況下,可能 需要改變最大額定功率。兩個引腳之間短時短路(例如使用螺絲刀按照EN· 60900)會使熱水器所有工作參數復位並鎖定加熱。· 顯示器閃爍數值“88”,直至選擇最大額定功率。該狀況在啟動和關閉電源 電壓期間保持不變。... -
Page 31: 功能許可權
10. 初始操作 功能許可權 熱水器運行模式可能受限。可使用服務功能表安裝熱水器。· 功能許可權啟動 1.· 確定服務功能表中的所需功能許可權·(參見本安裝說明書中的“服務功能 表”章節)。 2.· 切斷熱水器電源·(例如斷開保險絲)。 3.· 將供電電路上的跳線從引腳1切換至引腳2·(參見示意圖)。 4.· 重新運行熱水器。 功能許可權取消 1.· 切斷熱水器電源·(例如通過斷開保險絲)。 2.· 將跳線從引腳1切換至引腳2。 3.· 重新運行熱水器。... -
Page 32: 清潔保養
CEX 9 11. 清潔保養 · 塑膠表面和配件僅可用濕布擦拭。切勿使用磨砂清潔劑或溶劑。 · · 為確保穩定供水,應定期卸下出水口配件(射流調節器和噴頭)的螺絲並 · 清洗配件。電氣和管道部件應由經認可的專業人員每三年檢查一次,以此 確保始終正常工作和運行安全。 12. 使用方法 打開熱水龍頭後,即熱式電熱水器自動啟動。· MADE IN GERMANY 關閉龍頭後,熱水器自動關閉。 溫度設定 · 您可使用· ·和· .·按鍵逐漸調低或調高所需溫度。溫度每次變化1·°C, · 在35·°C和42·°C之間的常用溫區,若快速按鍵,溫度可變化0.5·°C。延 長按鍵時間可連續改變溫度。所需出水口溫度可設在20·°C和55·°C之 設定溫度 間。 +1 °C –1 °C 說明:若使用· ·按鍵將溫度設在20·°C以下,顯示器將顯示“—”,熱水器 將關閉加熱功能。 35,0..42,0 °C常用溫區 +0,5 °C –0,5 °C 程式按鈕... -
Page 33: 溫度限制
12. 使用方法 溫度限制 防燙傷保護開啟 本款即熱式電熱水器設有可選溫度限制功能。防燙傷保護功能已在出廠設置 中取消。 · 啟動:選擇極限溫度。同時按下程式鍵· ·和 · ·至少3秒鐘。顯示器即刻 · 按下 以“HI”確認啟動。 ≥ 3秒 · 關閉:同時按下程式鍵· ·和· ·至少3秒鐘。顯示器即刻以“--”確認取 · 消。· 說明:啟動溫度限值會對程式鍵構成影響。·因此,改變溫度限值後必須檢查 程式鍵的固定值。· · · 確認啟動 · · · · · 防燙傷保護關閉 按下 恢復出廠設置 確認取消 ≥ 3秒 所有出廠設置均可恢復: · 同時按下· ·和· ·。現在,顯示器從“10”倒數至“00”,逐秒遞減。熱 ·... -
Page 34: 功率極限
CEX 9 12. 使用方法 功率極限 功率極限 若即熱式電熱水器在全功率運行的情況下不足以將水加熱至所需溫度,顯示 器將顯示“MAX”。可通過降低水龍頭的熱水流速恢復溫度。若熱水器連接 兩個或更多出水口,可能僅有一個出水口流出熱水。 無輸出單元 預熱水操作 若進水口溫度超過設定值,數位顯示器上的標誌“SUN”顯示加熱功率關 閉。使用太陽能系統時,自動混合閥須確保進水口溫度不超過70·°C。 保養工作後的排空 本款即熱式電熱水器設有自動氣泡保護裝置,可防止由於疏忽造成幹燒現 象。然而,必須在首次使用前排空熱水器。每次排空熱水器後(例如由於維 修管道系統、存在霜凍風險或進行維修後),須在再次使用前重新排空熱水 器。 1.· 通過斷開保險絲總電源關閉即熱式電熱水器的總電源。 2.· 卸下出水口配件上射流調節器的螺絲,打開冷水龍頭閥門,將水管沖洗乾 淨,避免污染熱水器和射流調節器。 3.· 打開並關閉熱水龍頭,直至水管內無空氣逸出且熱水器排出所有空氣。 4.· 此後方可將即熱式電熱水器重新接通電源並擰上射流調節器的螺絲。 5.· 水流持續10秒後,熱水器啟動。... -
Page 35: 服務功能表
13. 服務功能表 服務功能表列有系統參數,供診斷期間使用。·· 同時按下按鍵· ·和按鍵· ·至少2秒鐘調用服務功能表,顯示器以“FL”和閃 點形式確認啟動。使用按鍵· ·和· 在不同功能表之間切換。 服務功能表 按下按鍵,觀察當前所選菜單數值。顯示器閃爍數值·(可使用按鍵· ·和· ·切 換至某些菜單的數值)。再次按下按鍵· ·後可回到下拉菜單。按下按鍵· ·可 回到標準顯示狀態·(標稱值)。若兩分鐘內未按下任何按鍵,系統將自動切換 按下 ≥ 2秒 回標準顯示狀態。· 菜單條目如下: “FL”:流量 顯示當前流速,單位:升/分鐘。 “Po”:功率 顯示當前功耗·(kW)。 “t1”:進水口溫度 顯示器閃爍 顯示進水口溫度·(°C)。 “t2”:出水口溫度 顯示出水口溫度·(°C)。 “CA”:控制值 顯示控制系統的校準值。正常範圍:40·–·60。· “PL”:功率極限 顯示熱水器當前最大額定功率·(kW)。 “Er”:診斷 “服務功能表”條目順序 顯示最近十條診斷資訊。· 按下按鍵· ·後,首次出現的數值顯示錯誤代碼·(參見防護罩上的“故障檢查 流量... - Page 36 CEX 9 13. 服務功能表 “LL”:功能許可權 可限制熱水器的運行模式。 設置選擇:· “0”無限制·(出廠設置) “1”無法使用按鍵重設出廠值,可觀察到參數,但不可在設置菜單中修改 “2”與“1”相同。此外,設置功能表無法打開· “3”與“2”相同。此外,標稱值記憶體1和2不可改變 “服務功能表”條目順序 “4”與“3”相同。此外,標稱值不可改變 說明:選擇設置“1”、“2”、“3”或“4”後,服務功能表中的系統參數 流量 將不可修改。· 功率 若要修改系統參數,必須去除供電電路的跳線。“功能許可權取消”部分已 說明。 進水口溫度 “nr”:軟體版本 出水口溫度 關於已安裝軟體版本的資訊。 控制值 “Ch”:無線通道 關於熱水器及其遙控器當前無線通道的資訊。 功率極限·· “rS”:接受強度 診斷 關於遙控器當前信號品質的資訊,以百分比表示。·根據遙控器與熱水器之間 的距離,該數值在10%至100%之間變化。 功能許可權 “IIC”:信號 軟體版本·· 關於連接診斷顯示器後無線通訊品質的資訊。 無線通道 接收強度·· 信號...
-
Page 37: 故障檢修
14. 故障檢修 德國寶在生產即熱式電熱水器CEX期間盡心盡責,並在發貨前檢驗數次。通 常不會發生嚴重故障。若發生故障,首先切斷並打開總保險絲,以此重設電 路。然後參考以下表格解決問題,從而避免產生不必要的客服開支。 只有經認可的專業人員方可進行維 問題 原因 解決方案 修。若按照以上表格所列方法無法排 總保險絲跳閘 更換或接通保險絲 除熱水器故障,請聯繫您的出口商的 水溫一直處於低位 服務機構或佳捷客戶服務中心。請記 溫度安全保護器 請客服人員重設溫度安全 錄銘牌詳細資訊。 跳閘 保護器 斷開後接通保險絲。若仍 顯示閃爍錯誤資訊“Er” 控制系統切斷 閃爍“Er”,請聯繫客服人 員。 出水口配件變髒 清潔淋浴頭、射流調節器或 或鈣化 過濾網 熱水流速過低 精濾器變髒或 請專業人員清潔精濾器 鈣化 未達到選擇溫 水流速度過高 降低龍頭水流速度 度,“MAX”亮 MADE IN GERMANY 未達到選擇溫... -
Page 38: 概述
CEX 9 1. 概述 订购零部件时,务请说明热水器型号和序列号 垫圈 82806 底部部件 接线端子 82809 86250 流量传感器 82819 配有温度安全保护器 的加热元件 82810 单向阀 82246 电子器件 温度传感器装置 82811 82512 CEX 9控制面板 82816 进水管 82802 CEX外壳 82818 冷/热水接头 82813 螺丝和销子 82817... -
Page 39: 环境和循环利用
目录 1.·概述·......... . . 38 11.·清洁保养·... -
Page 40: 安全说明
CEX 9 3. 安全说明 只有经认可的专业人员方可从事本款热水器的安装、初始操作及维护工作,该等专业人员须遵守适用标准和安装规 定。德国宝不对由于未遵守以下说明而导致的任何损害负责。· · 使用本款热水器之前须确保其安装正确且处于良好工作状态。 · · 本款热水器仅可在家庭和封闭、无霜的房间使用,仅可用于加热统一供应的饮用水。 · · 本款热水器禁止暴露于霜冻环境中。 · · 本款热水器须始终接地。 · · 耐水性最低值不得低于标签规定值。 · · 最高水压不得高于标签值。 · · 首次试运行之前以及每次排空热水器时·(例如由于维修管道系统、存在冻结风险或进行维护保养),须根据本手册使 · 用说明采取正确方法排空热水器。 · 切断总电源之前,任何情况下均勿拆下前盖。 · · 勿对热水器、电路导线及水管进行技术改造。 · · 请注意:水温超过43·°C即被视为热水,对儿童而言尤其如此,使用者可产生灼伤感。热水器使用一段时间后, · 配件和龙头均可能过热。 · 进水口温度不得超过70·°C。 ·... -
Page 41: 技术规格
5. 技术规格 CEX 9 ElECTrOnIC MPS 型号 ® 货号 26239 额定功率·/·额定电流 6,0..9,6·kW··(27,3..40·A) 230·V实际功率 6,6·kW·(28,7·A)· 8,8·kW·(38,3·A)· 电气连接 1/N/PE··220..240·V·AC 所需最小电线尺寸· 3×·4·mm 3×·6·mm 热水 (l/分钟) 最大值Δt·=·25·K 额定容量 0,3·l 类型 关闭, 1·MPa·(10·bar)公称压力·/·压力类型 加热系统 裸线加热系统IES· ® 水温为15·°C时的比电阻 ≥·1100·Ωcm 导电性 ≤·90,9·mS/m 出水口温度 ≤·70·°C 启动流速–最高流速 2,0·–·5,0·l/min· 2.5升/分钟:0.2巴 压力损耗... -
Page 42: 典型安装
CEX 9 7. 典型安装... - Page 43 7. 典型安装 直接连接:适用于单个出水口 直接连接:适用于多个出水口 推荐套件: CXH·(货号0300-0086) MADE IN GERMANY MADE IN GERMANY 测量单位mm 挂壁式混合型热水器:适用于单个水槽 MADE IN GERMANY...
-
Page 44: 安装
CEX 9 8. 安装 必须遵守以下规定: · 安装期间须遵守所有相关法规以及当地供电和供水公司规定。 · 铭牌规格 · 技术规格 安装地点 · 热水器仅可安装在无霜房间内。禁止将热水器暴露于结霜环境中。 · · 热水器适合挂壁安装,须使用向下水接头。 · · 热水器符合保护类型IP·25规定。 · · 为避免出现热损失,应尽量缩短即热式电热水器与触点之间的距离·· · (<·2m)。 · 为了便于进行维护保养工作,应在供水管线内安装切断阀。热水器须便于 · 进行维护保养工作。 · 可使用铜制或钢制连接管。若使用塑料管,必须符合德国工业标准·(DIN)· · 16893,2系列要求。热水管须为保温设计。 · 水的比电阻在15·°C时最低须达1100·Ωcm。可向您所在地区的供水公司 · 咨询电阻率数值。 · ·... -
Page 45: 安装热水器
8. 安装 安装热水器 1.· 安装前彻底清洗供水管,清除管内污物。 2.· 将热水器贴墙放置,标注顶部和底部以及左右两边的钻孔线,与热水器防 护罩边缘的小孔对应·(参见底部数字)。 3.· 垂直连接顶部和底部标记·(A-A)。 4.· 水平连接左右两边标记·(B-B)。 5.· 钻孔线的交叉点为钻孔点。 6.· 使用6·mm钻孔器钻孔。插入销子和螺丝。螺丝须伸出5·mm。 7.· 将热水器放入后挂开孔,然后将其向下滑入设定位置。· 安装热水器 1.· 在热水器水管接头处安装连接水管。使用密封垫。 2.· 开关热水龙头,直至水管内无空气逸出且热水器排出所有空气。... -
Page 46: 电气连接
CEX 9 9. 电气连接 仅专业人员方可操作! 请注意: · 安装过程须遵守国际电工委员会或国家地方现行法规以及当地供电公司的 接线图 相关规定。 · 遵守铭牌和技术规格 · 装置必须接地! 结构前提 · 必须通过永久连接装置安装热水器。热水器必须接地! · · 不可损坏电线。· · · 安装结束时,应提供全极断开装置(例如通过保险丝),每极接触开孔宽 · 1· 电路板 度须超过3·mm。· 2· 加热元件 · 为保护热水器,须安装保险丝,其脱扣电流应等于热水器额定电流。· · 3· 安全压力开关和温度安全保护器 1.· 去掉电源线表皮,将带有镀层的电源线通过防溅式保护套管插入热水器的 4· 接线盒 线缆接头。将电源线通过防溅式保护套管插入热水器,将电源线镀层与线 缆接头安全固定。如有必要,采用三个预留断点之一(分别设在左边、右 边及顶部)作为线缆接入端。保护套管可防止水顺着连接线进入热水器。... -
Page 47: 初始操作
10. 初始操作 1.· 进行电气连接前,小心开关热水龙头,向总水管和热水器注水,使其彻底 排空。每次排水后·(例如维护管道系统或修理热水器之后),必须采用该方 法将热水器重新排空后方可再次启动。· · 若热水器无法运转,请确保温度安全保护器·(STDB)·运输期间未受损。为此, 请打开热水器外壳,如有必要,请打开开关重新打开温度安全保护器。· “额定功率选择”说明 (仅经认可的专业人员方可操作,否则安全保证失效)。首次将热水器连接电 源电压后,请选择最大额定功率。设定额定功率后,热水器的标准操作模式 方可使用。安装地点可允许的最大额定功率取决于现场情况。必须遵守“技 术规格”表中的所有数据规定,尤其是电气连接要求达到的电线尺寸和熔断 保护相关数据。此外,进行电气安装工作期间必须遵守所在国家和当地供电 公司的相关法规·(德国:DIN·VDE·0100)。 2.· 打开热水器电源。须确保热水器的数字显示器点亮。 3.· 首次打开电源电压后,显示器闪烁数值“88”。否则,请认真阅读以下“ 重新安装”说明。 4.· 根据当地情况,使用· ·和· ·按键选择可允许的最大额定功率:8.8或6.6· ® kW·(显示器:“66”)·230V。 5.· 按下按键· ·,确认设置。热水器开始运行。 6.· 在铭牌上标注已设定的额定功率。 7.· 设定可允许的最大额定功率。水流约10秒钟后,加热元件将被激活。 多电源系统: 8.· 打开热水龙头。检查热水器功能。。 额定容量·(最大功耗)·为8.8·kW·/·230· 9.· 向用户说明即热式电热水器工作原理,将操作说明书交给客户。填写质保 V,可降至6.6·kW。... -
Page 48: 重新安装"说明
CEX 9 10. 初始操作 “重新安装”说明 除首次运行外,热水器在不同安装环境中可能重新启动。在此情况下,可 能需要改变最大额定功率。两个引脚之间短时短路·(例如使用螺丝刀按照EN· 60900)·会使热水器所有工作参数复位并锁定加热。· 显示器闪烁数值“88”,直至选择最大额定功率。该状况在启动和关闭电源 电压期间保持不变。... -
Page 49: 功能权限
10. 初始操作 功能权限 热水器运行模式可能受限。可使用服务菜单安装热水器。· 功能权限启动 1.· 确定服务菜单中的所需功能权限·(参见本安装说明书中的“服务菜单”章 节)。 2.· 切断热水器电源·(例如断开保险丝)。 3.· 将供电电路上的跳线从引脚1切换至引脚2·(参见示意图)。 4.· 重新运行热水器。 功能权限取消 5.· 切断热水器电源(例如通过断开保险丝)。 6.· 将跳线从引脚1切换至引脚2。 7.· 重新运行热水器。... -
Page 50: 清洁保养
CEX 9 11. 清洁保养 · 塑料表面和配件仅可用湿布擦拭。切勿使用磨砂清洁剂或溶剂。 · · 为确保稳定供水,应定期卸下出水口配件·(射流调节器和喷头)·的螺丝并清 · 洗配件。电气和管道部件应由经认可的专业人员每三年检查一次,以此确 保始终正常工作和运行安全。 12. 使用方法 打开热水龙头后,即热式电热水器自动启动。· MADE IN GERMANY 温度设定 · 您可使用· ·和· ·按键逐渐调低或调高所需温度。温度每次变化1·°C,在 · 35·°C和42·°C之间的常用温区,若快速按键,温度可变化0.5·°C。延长 按键时间可连续改变温度。所需出水口温度可设在20·°C和55·°C之间。· 设定温度 说明:若使用· ·按键将温度设在20·°C以下,显示器将显示“—”,热水器 +1 °C –1 °C 将关闭加热功能。 35,0..42,0 °C常用温区 程序按钮 +0,5 °C –0,5 °C 可使用两个程序按钮快速选择预设温度。按下程序键后,即选择并显示预设... -
Page 51: 温度限制
12. 使用方法 温度限制 防烫伤保护开启 本款即热式电热水器设有可选温度限制功能。·防烫伤保护功能已在出厂设置 中取消。 · 启动:选择极限温度。同时按下程序键· ·和 · ·至少3秒钟。显示器即刻 · 按下 以“HI”确认启动。 ≥ 3秒 · 关闭:同时按下程序键· ·· · 和· ·至少3秒钟。显示器即刻以“--”确认取消。· · 说明:启动温度限值会对程序键构成影响。因此,改变温度限值后必须检查 程序键的固定值。·· · 确认启动 · · · · · 防烫伤保护关闭 · 按下 确认取消 ≥ 3秒 恢复出厂设置 所有出厂设置均可恢复: ·... -
Page 52: 功率极限
CEX 9 12. 使用方法 功率极限 功率极限 若即热式电热水器在全功率运行的情况下不足以将水加热至所需温度,显示 器将显示“MAX”。<可通过降低水龙头的热水流速恢复温度。若热水器连 接两个或更多出水口,可能仅有一个出水口流出热水。· 预热水操作 无输出单元 若进水口温度超过设定值,数字显示器上的标志“SUN”显示加热功率关 闭。使用太阳能系统时,自动混合阀须确保进水口温度不超过70·°C。 保养工作后的排空 本款即热式电热水器设有自动气泡保护装置,可防止由于疏忽造成干烧现 象。然而,必须在首次使用前排空热水器。每次排空热水器后(例如由于维 修管道系统、存在霜冻风险或进行维修后),须在再次使用前重新排空热水 器。 1.· 通过断开保险丝总电源关闭即热式电热水器的总电源。 2.· .·卸下出水口配件上射流调节器的螺丝,打开冷水龙头阀门,将水管冲洗 干净,避免污染热水器和射流调节器。 3.· 打开并关闭热水龙头,直至水管内无空气逸出且热水器排出所有空气。 4.· 此后方可将即热式电热水器重新接通电源并拧上射流调节器的螺丝。 5.· 水流持续10秒后,热水器启动。... -
Page 53: 服务菜单
13. 服务菜单 服务菜单列有系统参数,供诊断期间使用。·· 同时按下按键· ·和按键· ·至少2秒钟调用服务菜单,显示器以“FL”和闪点 形式确认激活。使用按键· ·和· ,·在不同菜单之间切换。 服务菜单 按下按键,观察当前所选菜单数值。显示器闪烁数值·(可使用按键· ·和· 切 换至某些菜单的数值)。再次按下按键· ·后可回到下拉菜单。按下按键· ·可 回到标准显示状态·(标称值)。若两分钟内未按下任何按键,系统将自动切换 按下 ≥ 2秒 回标准显示状态。· 菜单条目如下: “FL”:流量 显示当前流速,单位:升/分钟 “Po”:功率 显示当前功耗·(kW)。 “t1”:进水口温度 显示器闪烁 显示进水口温度·(°C) “t2”:出水口温度 显示出水口温度·(°C)。 “CA”:控制值 显示控制系统的校准值。正常范围:40·–·60。· “PL”:功率极限 显示热水器当前最大额定功率·(kW)。 服务菜单”条目顺序 “Er”:诊断 显示最近十条诊断信息。· 按下按键· ·后,首次出现的数值显示错误代码·(参见防护罩上的“故障检查 流量... - Page 54 CEX 9 13. 服务菜单 “LL”:功能权限 可限制热水器的运行模式。 “服务菜单”条目顺序 设置选择:· “0”无限制(出厂设置) “1”无法使用按键重设出厂值,可观察到参数,但不可在设置菜单中修改 ““2”与“1”相同。此外,设置菜单无法打开· 流量 “3”与“2”相同。此外,标称值存储器1和2不可改变 功率 “4”与“3”相同。此外,标称值不可改变 说明:选择设置“1”、“2”、“3”或“4”后,服务菜单中的系统参数将 进水口温度·· 不可修改。· 出水口温度 若要修改系统参数,必须去除供电电路的跳线。“功能权限取消”部分已说 明。 控制值 “nr”:软件版本 功率极限 关于已安装软件版本的信息。 诊断 “Ch”:无线通道 关于热水器及其遥控器当前无线通道的信息。 功能权限 “rS”:接受强度 软件版本 关于遥控器当前信号质量的信息,以百分比表示。根据遥控器与热水器之间 的距离,该数值在10%至100%之间变化。 无线通道 “IIC”:信号 接收强度 关于连接诊断显示器后无线通讯质量的信息。 信号...
-
Page 55: 故障检修
14. 故障检修 德国宝在生产即热式电热水器CEX期间尽心尽责,并在发货前检验数次。通 常不会发生严重故障。若发生故障,首先切断并打开总保险丝,以此重设电 路。然后参考以下表格解决问题,从而避免产生不必要的客服开支。 只有经认可的专业人员方可进行维 问题 原因 解决方案 修。若按照以上表格所列方法无法排 总保险丝跳闸 更换或接通保险丝 除热水器故障,请联系您的出口商的 水温一直处于低位 服务机构或佳捷客户服务中心。请记 温度安全保护器 请客服人员重设温度安全 录铭牌详细信息。 跳闸 保护器 断开后接通保险丝。若仍 显示闪烁错误信息“Er” 控制系统切断 闪烁“Er”,请联系客服人 员。 出水口配件变脏 清洁淋浴头、射流调节器或 或钙化 过滤网 热水流速过低 精滤器变脏或 请专业人员清洁精滤器 钙化 未达到选择温 水流速度过高 降低龙头水流速度 度,“MAX”亮 MADE IN GERMANY 未达到选择温... -
Page 58: Notes
CEX 9 15. notes / 備註 / 备注 15. notes 15. 備註 15. 备注... -
Page 59: Alignment Template
16. Alignment template... - Page 60 WHI-CEX9-M-11(1)
Need help?
Do you have a question about the cex9 and is the answer not in the manual?
Questions and answers