German pool GPI-M6 User Manual
Hide thumbs
Also See for GPI-M6:
- Operating and installation instructions (10 pages) ,
- User manual (17 pages)
Chapters
Table of Contents

Related Manuals for German pool GPI-M6


Summary of Contents for German pool GPI-M6
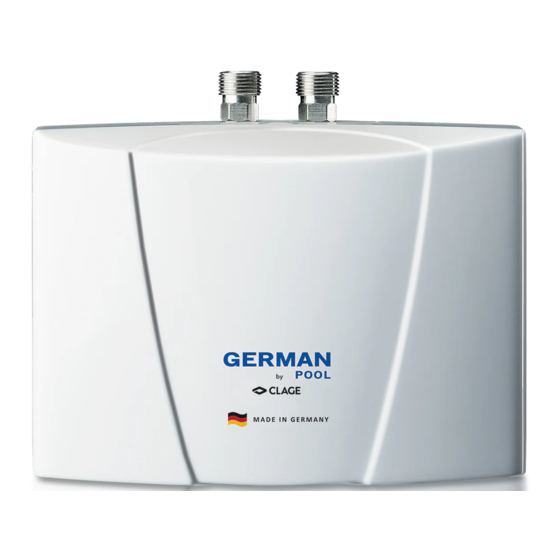
- Page 1 GPI-M6 即 熱 式 電 熱 水 器 Instantaneous Electric Water Heater 在使用之前請詳細閱讀「使用說明書」及「保用條款」 , 並妥為保存。 Please read these instructions and warranty information carefully before use and keep them handy for future reference. U S E R M A N U A L...
- Page 2 請即進行保用登記﹗ 有關保用條款細則,請看本說明書最後一頁。 Please register your warranty information now ! For Warranty Terms & Conditions, please refer to the last page of this user manual.
-
Page 3: Table Of Contents
Content 1. Important notes 1.1 Using the instructions 1.2 Safety instructions 2. Description of appliance 2.1 Technical specifications 2.2 Dimensions 2.3 Scope of delivery 3. Installation 3.1 Typical installations 3.1.1 Vented (open) installation 3.1.2 Pressure-resistant (closed) outlet installations 3.2 Installation instructions 3.3 Water connection 3.4 Electrical connection 3.5 Initial start-up... -
Page 4: Important Notes
1.Important Notes 1.1 Using the instructions Please read these instructions carefully before installing or using the appliance! Keep the instructions handy with the appliance for future use! These instructions are intended for the specialist who is responsible for the installation of the appliance, and for the end user. The latest version of the instructions can be found online at www.germanpool.com. -
Page 5: Description Of Appliance
It is only then that the appliance uses electricity. The temperature increase depends on the flow rate. 2.1 Technical specifications Model GPI-M6 Energy efficiency class Capacity 0.2 l Nominal pressure 1 MPa / 10 bar Minimum resistance of the water at 15 °C... -
Page 6: Dimensions
2. Description of appliance 2.2 Dimensions Dimensions: mm 2.3 Scope of delivery Instantaneous water heater Wall bracket Fixing screws and plugs Operating and installation instructions... -
Page 7: Installation
3.Installation Installation, initial operation and maintenance of this appliance must only be conducted by an authorised professional, who will then be responsible for adherence to applicable standards and installation regulations. We assume no liability for any damages caused by failure to observe these instructions! 3.1 Typical installations 3.1.1 Vented (open) installation Insert the special tap aerator:... -
Page 8: Pressure-Resistant (Closed) Outlet Installations
3.2 Installation instructions The heater is installed directly to the connecting pipes of the tap. We guarantee trouble-free operation of the instantaneous water heater only if German Pool x Clage fittings and accessories are used. Note the following during installation: •... - Page 9 3.Installation Installing the wall bracket 4. Rinse the water pipes thoroughly before connecting them to the appliance. 5. Connect the water connectors with the relevant tap connectors. The water inlet is indicated in blue on the rating plate (under the cover) and the water outlet in red. a.
-
Page 10: Electrical Connection
3.Installation 3.4 Electrical connection Fill the appliance with water by repeatedly opening and closing the hot water tap before connecting to electrical power and purge completely. The heating element may be damaged if this is not done! 1. Check that the power supply is switched off. 2. -
Page 11: Initial Start-Up
3.Installation 3.5 Initial start-up Do not switch on the electric power at this time! 1. To purge the instantaneous water heater, open the hot water tap and wait until the water emerges free of air bubbles. 2. Switch on the electric power. 3. -
Page 12: Adjusting The Water Flow And Temperature
4. Use 4.2 Adjusting the water flow and temperature - The maximum temperature and flow depend on the conditions at the installation site. - In case of quite low or high cold water temperatures, you may reduce or increase the flow with the adjustment screw to achieve a comfortable outlet temperature. -
Page 13: Purging
4. Use 4. Lever the strainer out of the connection piece of the instantaneous electric water heater and clean or replace it. 5. Insert the clean strainer into the connection piece and connect the water pipe to the water inlet of the instantaneous electric water heater. -
Page 14: Troubleshooting
Flow rate is too high or inlet Adjust the water flow temperature is too low Hot water temperature is Power supply is too low Check the power supply too low Replace heating element (by authorised GPI-M6:A faulty heating element technician) P.14... -
Page 15: Disposal
5. Troubleshooting Spare parts When ordering spare parts, please always specify the appliance model and serial number. Strainer Cold water Hot water connection connection Wall bracket Power supply cable Heating element 6. Disposal 6.1 Disassembly 1. Switch off the power supply to the instantaneous water heater. 2. -
Page 16: Environment And Recycling
6. Disposal 1 ~10 2 ~15 6.2 Environment and recycling GERMAN POOL is conscious of the importance of environmental protection. We extend our belief to our packaging materials. You can help the environment by carefully segregating waste. The packaging is essential for protecting the components during transportation. - Page 17 目錄 重要說明 使用本說明書 安全指示 產品描述 技術規格 尺寸 包裝內容 安裝說明 一般安裝方式 3.1.1 使用特殊開口水龍頭的排氣安裝方式 3.1.2 使用加壓熱水器專用水龍頭的非排氣安裝方式 (封閉出水管線) 安裝步驟說明 連接水管 連接電源線 初始使用 使用方式 銘牌外蓋 4.1.1 拆下外蓋 調整水流量及溫度 更換濾網 排氣 保養與維護 常見問題及疑難排解 處置 拆卸 環境與回收 P.17...
-
Page 18: 重要說明
1. 重要說明 1.1 使用本說明書 - 為安全起見,安裝產品及初次使用產品前請先細閱本說明書,並保存說明書,以便作參考之用。 - 本產品使用說明書以 www.germanpool.com 網上版為最新版本。本說明書適用於負責安裝熱水器 之專業人士及熱水器用戶。 1.2 安全指示 - 熱水器尚未完全穩妥安裝或被確定一切操作正常之前,請勿使用熱水器。 - 在任何情況下,均勿於關掉電源前打開前蓋。 - 切勿對本熱水器 (包括熱水器機體、電線或水管) 進行任何技術性改動。 - 本熱水器必須接地。 - 請注意,高於43℃的水會被界定為熱水 (對於兒童尤甚),且可能導致燙傷。熱水器經使用一段時 間後,配件和水龍頭的溫度可能非常高。 - 本熱水器只適宜用於家居用途,及在封閉、不結霜的室內使用,且只可用於加熱自來水。 - 切勿將本熱水器置於結霜環境下。 - 必須注意銘牌上所標籤之數值。 ... -
Page 19: 產品描述
2. 產品描述 在節電的大前提下,本即熱式電熱水器使用於加熱廚房水槽或洗臉槽單次使用所需水量,可與衛浴配件一 同安裝。 打開熱水水龍頭後,熱水器會自動開啟並將流經熱水器的水加溫。熱水器僅於此時耗電。水溫的上升溫度 取決於入水流量。 2.1技術規格 GPI-M6 型號 能源標簽 0.2 公升 額定容量 1 MPa / 10 bar 額定壓力 1100 Ω cm 要求最低來水電阻@15℃ 1~ / N / PE 220 V AC 接駁電源 6.0 kW 額定功率 24.8 A 額定電流 最高熱水量Δt = 25 K 3.3公升/分... -
Page 20: 尺寸
2. 產品描述 2.2 尺寸:毫米 2.3 包裝內容 即熱式電熱水器 掛接背板 螺絲及壁塞 使用說明書 P.20... -
Page 21: 安裝說明
3. 安裝說明 本設備的安裝、初始操作和維護只能由經過授權的專業人員進行,他們將負責遵守適用的標準和安裝規 定。我們對由於不遵守這些說明而導致的任何損壞概不負責。 3.1 一般安裝方式 3.1.1 使用特殊開口水龍頭的排氣安裝方式 加入特殊噴水調節器: GPI-M6: CSP6 電源接駁位 接駁喉咀G ⅜” ≧70 使用特殊開口水龍頭的排氣安裝方式(單位:毫米)。 P.21... -
Page 22: 使用加壓熱水器專用水龍頭的非排氣安裝方式
3. 安裝說明 3.1.2使用加壓熱水器專用水龍頭的非排氣安裝方式 (封閉出水管線) 加入特殊噴水調節器: GPI-M6: CSP6 電源接駁位 接駁喉咀G ⅜” ≧70 使用加壓熱水器專用水龍頭的非排氣安裝方式 (封閉出水管線)(單位:毫米)。 3.2 安裝步驟說明 熱水器直接接駁至水龍頭之水喉。唯安裝時使用German Pool x Clage之原裝配件方可確保順利安裝。 - 安裝時必需遵守下列指示: 按照DIN VDE 0100、DIN 1988或EN806-2及當地有關之電線安裝條例、安全標準、電力供應商或水 務署之安全條例進行安裝 - 技術規格及銘牌上的產品規格 。 - 請務必將熱水器安裝在容易操作的位置。必須安裝外接止回閥。 - 確認已拆下所有配件的包裝材料。· - 使用隨機水喉管時,請務必注意水喉最低彎曲半徑為27毫米。安裝及使用熱水器時,水喉不可承 受任何拉壓或下壓力。... -
Page 23: 連接水管
3. 安裝說明 3.3 連接水管 1.安裝熱水器時,供水接頭必須垂直朝上或朝下,直接連接瓷盤水龍頭。 2.使用螺絲和尺寸適中的壁塞固定掛接背板。 3.將熱水器置於掛接背板上,再將其卡入定位 (圖6)。熱水器必須正確裝妥於掛接背板,否則不可操作。 圖6 安裝掛接背板 4.連接水管前,請以清水將水管徹底沖洗乾淨。 5.連接水龍頭:冷水入水管 (藍色) 和熱水出水管 (紅色) 均標示於銘牌上 (銘牌位於外蓋下方)。 a.密封墊 b.濾網 c.冷水接管 (入水) d.熱水接管 (出水) e.銘牌外蓋 6.避免水管等零件對熱水器施加負重壓力。 7.安裝完畢後,開啟熱水水龍頭,仔細檢查所有連接處是否有滲漏情形。 8.請將隨附的特殊噴水調節器插入水龍頭出水口套咀內,以便在低水流量時發揮最佳噴水效能。 此插件可配合市售的M22或M24螺紋套咀。 P.23... -
Page 24: 連接電源線
3. 安裝說明 3.4 連接電源線 接上電源前,請反覆開關熱水水龍頭,將熱水器內的空氣排出。如果未進行此步驟,可能會損壞發熱線! 1.先確認已關閉電源。 2.線路橫切面符合技術規格。 3.電源線及穿線喉管之橫切面要與斷路器同一規格。 4.a)接線箱的電源端必須要有符合VDE 0700標準的斷路器 (每一極的接觸開口至少要有3厘米)。 b)連接管經由接線盒連接到供電電源,如電路圖所示。 5.連接到永久安裝電纜 a)接線箱的電源端必須要有符合VDE 0700標準的斷路器 (每一極的接觸開口至少要有3厘米)。 b)電線的橫截面必須滿足最低電線尺寸要求,請查閱「技術規格」章節 。電線最高適用橫截面為 6平方毫米。 c)打開前蓋。 d)卸載預先裝好之電線。 e)把用作永久安裝之電線穿過電線封套並把電線如電路圖所示連接。確保電線封套緊密包裹電線 周圍,以達到最佳防水保護。 f)裝回前蓋。 請務必接上接地線。 電路圖 P.24... -
Page 25: 初始使用
3. 安裝說明 3.5 初始使用 此時切勿打開電源! 1.打開熱水水龍頭,讓水流出直到沒有氣泡為止。 2.打開電源。 3.設定所需的出水溫度,如果無法達到理想溫度或有其他問題,請調整水流量。此步驟請參閱 「使用方式」章節。 4.向使用者解釋熱水器的功能及使用方式,並將使用說明書交給用戶作日後參考之用。 4. 使用方式 熱水龍頭打開時,熱水器自動啟動。關閉熱水水龍頭,熱水自動關閉。 4.1 銘牌掩冚 掩冚內側會註明熱水器類型名稱(1)、序號(2)以及貨號(3)。 BBBB AAAA Gerät an Schutzleiter CCCC anschließen! Appliance must be earthed! 4.1.1 拆下掩冚 銘牌和水量調整螺絲皆位於此掩冚內。 1.按住皺摺處將掩冚朝掛接背板方向推。 2.按住後方的兩個角落,將掩冚向下壓,直到前端向上翹起。 3.向外拉出即可拆下掩冚。 P.25... -
Page 26: 調整水流量及溫度
4. 使用方式 4.2 調整水流量及溫度 - 溫度與流量會因應安裝的環境情況而定。 - 如入水溫過低或過高,可調低或調高流量以達至所需溫度。旋轉方向請參閱下圖: 旋轉方向 流量 溫度 6,5kw 5,7kw 4,4kw 3,5kw .0,0 熱水輸出 [l/min] 4.3 更換濾網 即熱式電熱水器的冷水連接裝有一個濾網。濾網上之污垢積聚可能令熱水輸出減少。清洗或更換 步驟如下。 1.關閉即熱式電熱水器電源。 2.關掉冷水入水喉內的閘制。 3.把水喉從進水口中解開。進水口於銘牌(前蓋下)上以藍色標示。此步驟可能會導致漏水。 P.26... -
Page 27: 排氣
4. 使用方式 4. 從冷水連接件取出濾網,清潔或更換。 5. 將清潔的濾網放回冷水連接件,重新連接水管到 即熱式電熱水器的入水口。 6. 根據「排氣」章節內容為熱水器排氣。 7. 再連接電源。 4.4 排氣 為避免損壞本熱水器,第一次使用前、進行供水系統維修後或後續維修後必須先排空熱水器中的空 氣,才能再度使用熱水器。 1.拔下熱水器的電源插頭。 2.開關熱水水龍頭,直到水管不再排出任何空氣,而且熱水器內部的空氣全數排空為止。 3.完成此步驟之後,才能插回熱水器電源插頭。 4.5 保養與維護 - 請一律使用濕布擦拭本熱水器和配件。請勿使用具侵蝕作用或含氯的清潔劑或溶劑。 - 堆積在水管和熱水器中的污物和水垢會影響熱水器功能。如果水流量變小或出水時發出雜音,表 示可能堆積了過多的污物和水垢。此時需請技術人員檢查熱水器,如有必要則需清潔冷水入水口 的濾網。 P.27... -
Page 28: 常見問題及疑難排解
5. 常見問題及疑難排解 如果電源線損壞,必須使用原廠電源線並由授權之專業人員更換以避免發生危險。 如參閱下表後若仍無法排除故障,請聯絡客戶服務及維修中心。 下表可協助您判斷發生問題的可能原因及排解問題。 故障 原因 解決方法 流不出水 供水管未打開 打開自來水管水閥和止水閥 未有安裝噴水調節器 安裝噴水調節器 水流速度低於預期 水壓不足 檢查水壓 水管中有污物 清掉濾網、水閥和水龍頭的污物 熱水器開關自動啟動 清掉污物或將水壓調大,關上其他水龍 水壓忽高忽低,水流量太低 和關閉 頭,將止水閥開得更大 電源供應不正確 檢查電源供應 熱水器已經啟動,但水 沒有電壓 檢查斷路器 溫沒有升高 發熱線損壞 更換發熱線 (需由合格技術人員進行) 水管連接錯誤 檢查入水口和出水口的安裝 熱水器沒有啟動,水溫 檢查水壓,檢查水流調整情形,將止水閥 水壓不足 沒有升高 開得更大 水管中有污物 清掉濾網、水閥和水龍頭的污物... -
Page 29: 處置
5. 常見問題及疑難排解 備用零件 訂購備用零件時,請務必指定熱水器型號、額定功率和序號。 濾網 熱水接頭 供水接頭 掛接背板 電源線 發熱線 6. 處置 6.1 拆卸 1.關閉即熱式電熱水器電源。 2.關閉入水管的截流閥。 3.切斷接線盒的供電電源。如熱水器帶有電源插頭,切斷保護接地插頭。 4.把水喉從進水口中解開。此步驟可能會導致漏水。 5.將熱水器從掛接背板取下。將平頭螺絲批子尖端插入水管連接之間的交界處,直到盡頭,輕壓螺絲 批子使其朝上方翹起,將熱水器傾斜 (不超過15°),朝上拆下熱水器。 6.把掛接背板卸下。 P.29... -
Page 30: 環境與回收
6. 處置 1 ~10 2 ~15 6.2 環境與回收 德國寶注重環保,選用包裝物料方面亦以環保 為原則。請妥善處理廢棄物以改善環境。包裝 物料對保護熱水器免於運送途中受損致為重要。 電器產品應在其使用壽命完結後與生活垃圾分 開處理。請把這件產品棄置到電子廢料回收點。 P.30... - Page 31 - 產品經非認可之技術人員改裝或加裝任何配件; - serial number is modified, damaged or removed from the product. - 機身編號被擅自塗改、破壞或刪除。 4. German Pool will, in its discretion, repair or replace any 4. 總代理有權選擇維修或更換配件或其損壞部份。 defective part. 5. 產品一經被轉讓,其保用即被視作無效。 5. This warranty will be void if there is any transfer of ownership from the original purchaser.
- Page 32 傳真 Fax:+853 2875 2661 HONG KONG TOP BRAND TEN YEAR ACHIEVEMENT AWARD © 版權所有。未獲德國寶授權,不得翻印、複製或使用本說明書作任何商業用途,違者必究。 © All rights reserved. Copying, reproducing or using the contents of this manual is not allowed without prior authorization from German Pool, violators will be prosecuted. P.16 WH-GPI-M6-M-15(2)
Need help?
Do you have a question about the GPI-M6 and is the answer not in the manual?
Questions and answers