Table of Contents
Advertisement
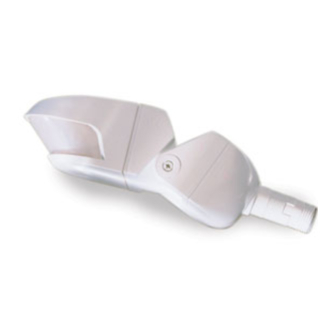
EW-200 & EW-205
Model#s:
EW-200-120
EW-205-120
SPECIFICATIONS
Voltage:
EW-200-120, EW-205-120 ............................................. 120VAC, 60Hz
EW-200-277, EW-205-277 ............................................. 277VAC, 60Hz
Mountable Locations ......................................Wall, ceiling or under eaves
Operating Temperature...................................-40° to 130°F (-40° to 55°C)
Lens Coverage: .................................................................................... 270°
Load Ratings ................................. 0–1000W ballast or tungsten @120VAC
................................................................... 0–1000W ballast @277VAC
Motor Load: ........................................................................1/6 HP @20VAC
...................................................................................1/3 HP @277VAC
Current Consumption
Without Isolated Relay.......................................................22 mA max.
With Isolated Relay ...........................................................34 mA max.
Time Delay Adjustment . . . . . .............................................. 12sec.–16min.
Light Level Adjustment .......................................................... 0.5FC–200FC
Isolated Relay on EW-200 (both -120 & -277 models)
Normally Open & Normally Closed contacts.
Isolated Relay Rating: .........................................................1A @ 30VAC/DC
UL 773A Raintight Rated
IEC-IP-55 Rated
EW-200-277
EW-205-277
Outdoor PIR Motion Sensors
U.S.Patents: 4,787,722; 5,640,113
Santa Clara, CA 95050
800.879.8585
Advertisement
Table of Contents

Subscribe to Our Youtube Channel
Related Manuals for wattstopper EW-200-120


Summary of Contents for wattstopper EW-200-120
-
Page 1: Specifications
EW-200-277 EW-205-120 EW-205-277 SPECIFICATIONS Voltage: EW-200-120, EW-205-120 ..........120VAC, 60Hz EW-200-277, EW-205-277 ..........277VAC, 60Hz Mountable Locations ........Wall, ceiling or under eaves Operating Temperature........-40° to 130°F (-40° to 55°C) Lens Coverage: ..................270° Load Ratings ......... 0–1000W ballast or tungsten @120VAC .............. -
Page 2: Table Of Contents
WARRANTY INFORMATION . . . . . . . . . . . . . . . . . . . . . . . . . . . . . . . . . . . . . . . . . . . . . . . . . . . . . .10 Box Contents • One (1) EW-200-120, EW-205-120, EW-200-277 or EW-205-277 • Accessory bag: Cover plate for 4"... -
Page 3: Unit Description
UNIT DESCRIPTION Attachment The EW sensors are outdoor passive infrared holes with Cover plugs plate (PIR) motion sensors rated for wet conditions. They are preassembled with a junction box cover and are ready to install to standard round outdoor junction boxes. The EW sensors utilize advanced PIR technology and a superior lens design to detect motion. -
Page 4: Motion Sensor Placement
Locking ring and collar must post into the cover plate by the desired angle, then be securely seated against the rotating the sensor. tighten the locking ring. cover plate locking ring. Check Our Web Site For FAQs: www .wattstopper .com... -
Page 5: Mounting And Sensor Positioning Guidelines
Mounting and sensor positioning guidelines Warning: lamp bulb must be 1/2 inch or more from sensor housing Mount to flat, stable, vibration-free surface Avoid runoff; sheltered locations preferred Mount motion sensor level Mount sensor below lamps to avoid heat effects Aim motion sensor downward to limit sensing Do not mount by vents or above lamps Call 1(800) 879-8585 or 1(972)578-1699 For Technical Support... -
Page 6: Wiring And Installation
4" round outdoor Lamp holder junction-box (CANLET lamp holder shown) NOTE: Weather proof caulking may be required around junction box and cover plate to provide a weatherproof seal in some installations. Check Our Web Site For FAQs: www .wattstopper .com... - Page 7 WIRING AND INSTALLATION (CONTINUED) Wire the sensor as shown below: • BLACK wire from sensor to line voltage. • WHITE wire from sensor to Neutral. • RED wire is connected to lighting loads, if used, as shown (see diagram above and below), not to exceed load rating (see Specifications, front cover).
-
Page 8: Dial Adjustments
We suggest initially setting the light level adjustment to half way between minimum and maximum. If a different setting is desired after installation, then follow the Making Changes procedures, next page. Minimum = Maximum = Check Our Web Site For FAQs: www .wattstopper .com... -
Page 9: Making Changes
Making Changes If you want the lights to turn on/high sooner—turn the light level dial toward the sun icon, as desired; this raises the light level setting. (Remember, the sensor must detect motion for lights to turn on.) • The lights turn on sooner in the evening. • The lights stay on longer in the morning. -
Page 10: Security Override
(see Wiring and Installation, page 5 & 6). CAUTION: Make sure power is turned off at the circuit breaker before checking wiring. 4. If the sensor is wired correctly, call our Technical Support number. Check Our Web Site For FAQs: www .wattstopper .com... -
Page 11: Ordering Information
Round outdoor junction boxes & cover plates WARRANTY INFORMATION WattStopper warranties its products to be free of defects in materials and workmanship for a period of five years. There are no obligations or liabilities on the part of WattStopper for consequential... - Page 12 2800 De La Cruz Boulevard, Santa Clara, CA 95050, USA Technical Support: 800.879.8585 www.wattstopper.com Please 00335r4 09/2014 Recycle...
Need help?
Do you have a question about the EW-200-120 and is the answer not in the manual?
Questions and answers