Advertisement
Quick Links
Advertisement

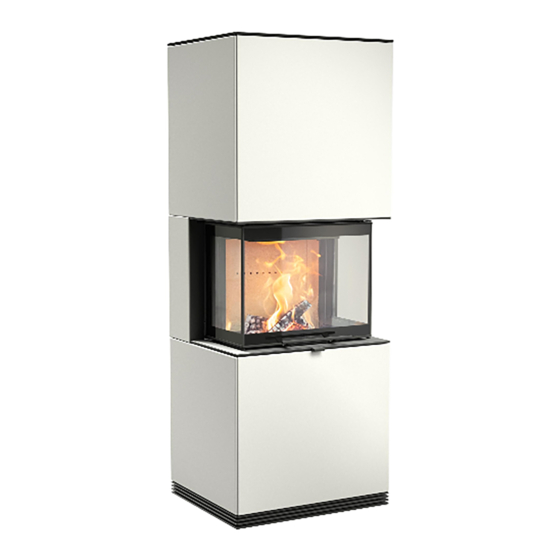
Summary of Contents for Contura Ci61
- Page 1 Installation instructions Ci61 Ci61A Ci61AN Ci61T contura.eu...
- Page 2 See rating plate on the insert Intended area of use Heating of rooms in residential buildings Fuel Wood MANUFACTURER Name NIBE AB / Contura Address Box 134, Skulptörvägen 10 SE-285 23 Markaryd, Sweden CHECKS According to AVCP System 3 European standard...
-
Page 3: Table Of Contents
CONTENTS A warm welcome to Contura. Welcome to the Contura family. We hope you will get a great deal of pleasure from your new insert. Congratulations on your purchase of a Contura insert. You have acquired a reliable quality product with a timeless design and long service life. -
Page 4: Technical Specifications
Contura dealers can recommend suitable joist, a structural engineer should be installers. Dealer information is available If your Contura i61 is to be installed consulted to make sure the floor is able at www.contura.eu against a combustible wall, the wall to hold its weight. -
Page 5: Chimney
CHIMNEY Chimney The insert is approved for connection to a chimney designed to Note that sharp bends and horizontal lengths in a flue pipe reduce withstand flue gas temperatures of up to 350°C. The external the draft in the chimney. The maximum horizontal length of flue diameter of the connection sleeve is Ø... -
Page 6: Combustion Air Supply
SUPPLY Combustion air supply A supply of air for combustion must be provided. Combustion air can be drawn directly via a duct from outside, or indirectly via a vent in the outer wall of the room where the stove is placed. The amount of combustion air that is used for combustion is approx. -
Page 7: Installation Distances
INSTALLATION DISTANCES Installation distances Ci61 / Ci61A / Ci61AN / Ci61T Important! The dimension diagrams only show the minimum permitted chimney must also be observed. A clearance of at least 1 m installation distances for the stove. When connecting to a... - Page 8 INSERT PLACEMENT 8 mm Allen screw 4 10 mm 13 mm PH2 / PZ2 / T20 / T25...
-
Page 9: Placement And Adjustment Of Insert
INSERT PLACEMENT Placement and adjustment of insert Ci61 / Ci61A / Ci61AN / Ci61T 13 mm 13 mm... - Page 10 INSERT PLACEMENT Ci61 / Ci61A / Ci61AN / Ci61T M5 x 9 Tool T25...
-
Page 11: Assembling The Surround
ASSEMBLING THE SURROUND Assembling the surround Ci61 / Ci61A / Ci61AN / Ci61T M5 x 9 Tool T25 90°... - Page 12 ASSEMBLING THE SURROUND Ci61 / Ci61A / Ci61AN / Ci61T M5 x 9 Tool T25 M6 x 25 Allen screw 4 Turn to page 112 to continue with assem- bly instructions for a stone or soapstone surround...
- Page 13 ASSEMBLING THE SURROUND Ci61 90° x 16 Nut M5 Tool 8 mm 90° x 12 Nut M5 Tool 8 mm M6 x 10 Allen screw 4...
- Page 14 ASSEMBLING THE SURROUND Ci61 M5 x 9 Tool T25...
- Page 15 ASSEMBLING THE SURROUND Ci61 M6 x 20 Tool 10 mm M5 x 9 Tool T25 Turn to page 19 for installation instructions for the grate and top.
- Page 16 ASSEMBLING THE SURROUND ...continued from page 12. Ci61T Ci61A / Ci61AN M6 x 10 Allen screw 4 M6 x 10 Allen screw 4...
- Page 17 ASSEMBLING THE SURROUND Ci61A / Ci61AN / Ci61T M5 x 9 Tool T25...
- Page 18 ASSEMBLING THE SURROUND...
-
Page 19: Assembling The Grate And Top
ASSEMBLING THE GRATE AND TOP Assembling the grate and top If connecting at the rear M6 x 10 Allen screw... - Page 20 ASSEMBLING THE GRATE AND TOP...
- Page 21 ASSEMBLING THE GRATE AND TOP For top connection M6 x 10 Allen screw...
- Page 22 ASSEMBLING THE GRATE AND TOP...
- Page 23 ASSEMBLING THE GRATE AND TOP Disc base Final inspection of the installation When it has been installed, the stove must be inspected by an authorised inspection body before it can be used. You should also read the “Lighting instructions” before lighting the stove for the first time.
- Page 24 NIBE AB · Box 134 · 285 23 · Markaryd · Sweden contura.eu Contura reserves the right to change dimensions and 811416 IAV SE-EX Ci61 Plåt/Sten-1 procedures specified in these instructions without 2019-11-06 prior notice. Access the latest version at contura.eu...


Need help?
Do you have a question about the Ci61 and is the answer not in the manual?
Questions and answers