Table of Contents
Advertisement
Quick Links
Advertisement
Table of Contents

Related Manuals for Ganz ZN-CM1


Summary of Contents for Ganz ZN-CM1
-
Page 2: Table Of Contents
Contents 1. Product Features ....................4 2. Accessing the Camera..................7 2.1 Access from a browser ...................7 2.2 Accessing the camera from the Internet.............7 2.3 Adjusting the image and focus .................8 2.4 Back focus adjustment..................8 2.5 The Live View page..................9 2.6 Video stream types ..................9 2.7 How to stream H.264 .................. - Page 3 12. System......................34 12.1 System > User.................... 34 12.2 System > Date & Time ................. 34 12.3 System > Maintenance ................35 12.4 System > Information .................. 37...
-
Page 4: Product Features
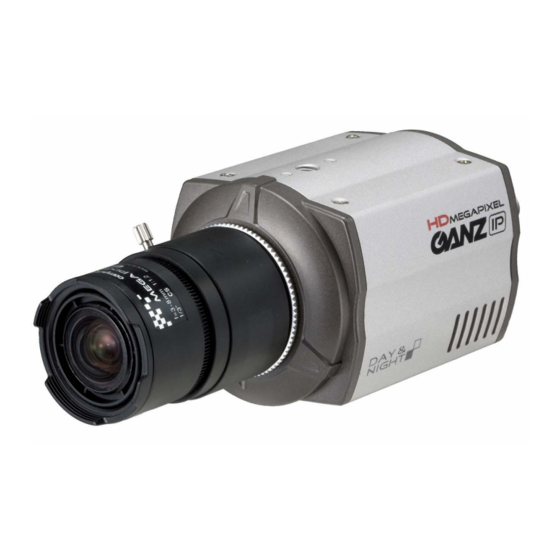
1. Product Features The GANZ ZN-C Series camera (ZN-Cx) is a high performance H.264 network camera, designed for demanding security installations. It delivers crisp, clear images, disclosing every detail, thanks to its top quality 5.0 Megapixel progressive CMOS sensor, Megapixel lens and advanced image processing. GANZ ZN-Cx features a removable infrared cut filter, which enables color video in high and low light conditions, as well as IR sensitive black/white video at night. - Page 5 Save still shot on Micro SD card. 4. Network connector The GANZ ZN-Cx connects to the network via a standard network cable, and automatically detects the speed of the local network segment (10BaseT/100BaseTX Ethernet). This socket could also be used to power the GANZ ZN-Cx via Power over Ethernet (PoE).
- Page 6 6. Power connector IRIS12Vdc or 24Vac power connector LED indicator Color Description Green Steady for connection to 10/100 Mbit/s network. Network Amber Flashes for network activity. Unlit No network connection. Green On if network connection is established Status Flashes during boot process Flashes one per second during F/W upload.
-
Page 7: Accessing The Camera
2. Accessing the Camera Follow the instructions in the GANZ ZN-Cx Installation Guide to install the camera. The GANZ ZN-Cx can be accessed with most standard operating systems and browsers. The recommended browser is Internet Explorer for Windows. 2.1 Access from a browser 1. -
Page 8: Adjusting The Image And Focus
1. Loosen the flange back locking screw that holds the C/CS-mount ring. CS-mount is standard on GANZ ZN-XXX. In case your lens is C-mount type, please mount C-mount adaptor ring already given in the box. 2. Direct the camera towards an object at least 3 meters away, set the zoom puller to wide- and adjust back focus by rotating C/CS-mount ring. -
Page 9: The Live View Page
2.5 The Live View page Not all the buttons described below will be visible unless the Live View page has been customized to display them. PC(Client) Speaker PC(Client) Mic Digital Zoom Snap Shot The Snapshot button saves a still image which is currently displayed. Full Screen Stream change: First stream Second stream... -
Page 10: How To Stream H.264
service for exchanging data in a network which uses the Internet Protocol (IP). UDP is an alternative to the Transmission Control Protocol (TCP). The advantage of UDP is that it is not required to deliver all data and may drop network packets when there is network congestion. -
Page 11: The Setup
3. The Setup The GANZ ZN-Cx is configured from the Setup tab, which is available on the top left hand side in the web interface. This configuration could be done by: • Administrators, who have unrestricted access to all settings under the Setup link •... -
Page 12: Installation Setup
720p or 1080p streaming. 5. Camera and Image The following descriptions show examples of some of the features available in the GANZ ZN-Cx. 5.1 Codec These are the tools for adjusting the H.264, MJPEG settings and controlling the video bit rate. - Page 13 1 Mbit/s. The H.264 standard provides the scope for a large range of different coding tools for use by various applications in different situations, and the GANZ ZN-Cx provides certain subsets of these tools.
- Page 14 Bandwidth Limit Limit the bandwidth that the GANZ ZN-Cx can use during a network connection. MAX Bandwidth Specify the maximum bandwidth that the GANZ ZN-Cx can use during a network connection. < Output resolution table for Full HD model >...
-
Page 15: Camera Picture Needs To Fit
< Output resolution table for VGA model > First Stream Second Stream 704x576 704x576 352x288 704x480 704x480 352x240 640x480 640x480 320x240 352x288 352x288 352x240 352x240 320x240 320x240 5.2 Camera picture needs to fit on page properly 5.2.1 Exposure Control Enable AE (Auto Exposure) ON: Use these settings to control full automatic exposure control. -
Page 16: Day & Night Control
The GANZ ZN-Cx Network Camera could be set automatically to identify the light source used and compensate for its color. If necessary, the type of light source could be set manually. -
Page 17: Image Property Control
Audio from a connected in line source could be connected to the Audio in connector of the GANZ ZN-Cx. If there are problems with the sound input being too low or high, adjust the input gain for the microphone connected to the GANZ ZN-Cx. -
Page 18: Live
7. Live GANZ ZN-Cx could support 10 simultaneous users. In case of multicast, GANZ ZN-Cx could support an unlimited number of users. If supported on the network, consider using the multicast function, as the bandwidth consumption will be much lower. -
Page 19: Sd Card
8. SD Card 8.1 SD Card > Config SD Card Configuration This configuration page allows you to save still images to the Micro SD card. This function cannot be used when Installation mode is on. Please set the first stream 1280x720 or 1280x720(wide) in Video->... -
Page 20: Sd Card > Event
8.2 SD Card > Event Event SD Writing You can configure the camera to store still images based on events such as Alarm In and Motion detection. This feature cannot be used when the camera is in Installation mode. Please set the first stream to 1280x720 or 1280x720(wide) in Video-> Codec setting and second stream to MJPEG or None. -
Page 21: Sd Card > Periodical
8.3 SD Card > Periodical Periodical SD Writing It is setting page to save the still shot in the Micro SD card periodically.This feature cannot be used when the camera is in installation mode. Please set the first stream to 1280x720 or 1280x720(wide) in Video->... -
Page 22: Ftp
9. FTP 9.1 FTP > Config Server Configuration This allows you to Enable/Disable the FTP function to download the configuration set on the SD Card menu remotely. When it is set as Enable, the FTP client can download the saved content without getting the SD Card. Client Configuration This is the settings page used to transmit the still images to remote sites, using the FTP server. -
Page 23: Ftp > Periodical
Event FTP Sending It is setting page to transmit the still shot to the FTP server at remote sites when event such as Alarm In and Motion detection happens. This feature cannot be used when the camera is in installation mode. Please set the first stream to 1280x720 or 1280x720(wide) in Video->... -
Page 24: Event
10. Event 10.1 Event > Alarm Port Alarm Input Used for connecting external alarm devices and triggering images for specific alarm- based events. The input is typically connected to a motion detector or any other external security device, and images could be uploaded whenever the detector is activated. Maximum 5VDC is allowed on the input. -
Page 25: Event > Motion
10.2 Event > Motion Motion Detection Motion detection is used to generate an alarm whenever movementoccurs in the video image. A total of ???(how many windows) 4 windows could be configured. Configuring Motion Detection 1. Click Motion Detection in the Event Config menu. 2. -
Page 26: Event > Mapping
10.3 Event > Mapping It is possible to define conditions that would cause the camera to respond with certain actions. A triggered event happens as a result of a trigger, which could be motion detection or an external alarm input. For example, Alarm out events could be triggered by video motion detection or alarm in. -
Page 27: Network
Click the Setup > Network > IP Setup to see the current network settings. IP Address Configuration The GANZ ZN-Cx supports both IP version 4 and IP version 6 (IPv6 will be supported in V3.00). Both versions may be enabled simultaneously, and at least one version should be always enabled. - Page 28 How to assign IP address Default setting of network is set to “DHCP” and “UPnP” function is set to ON. So if yo ur network has a DHCP server and UPnP function is enabled on your PC, you can find the network camera in “My network”. If a DHCP server is not available on your network, please assign an IP address as fo llows.
-
Page 29: Network > Service Port
11.2 Network > Service Port Service Port HTTP port- The default HTTP port number (80) could be changed to any port within the range 1-65535. This is useful for simple port mapping. RTSP port- The RTSP protocol allows a connecting client to start an H.264 stream. Enter the RTSP port number to use. -
Page 30: Network > Rtp
11.3 Network > RTP RTP port range These settings are the IP address, port number, and Time-To-Live value to use for the video stream(s) in multicast H.264 format. Only certain IP addresses and port numbers should be used for multicast streams. 11.4 Network >... -
Page 31: Network > Ddns
11.5 Network > DDNS The GANZ Internet Dynamic DNS Service can provide your GANZ product with its own URL (web address), which can then be used to access it over the Internet. The product can be unregistered from the service at any time. To do this click Network > DDNS and turn the DDNS off. -
Page 32: Network > Upnp
11.6 Network > UPnP UPnP function enable you to find the IP camera automatically on your network. - Page 33 In order to detect the camera automatically, enable both UPnP function on both the camera and your PC. Camera : Select UPnP to “ON” : Open “Control Panel” =>”Nertwork Connection” Select “Advanced”=>”Optional Networking Components…” Select “Network Services” and click “Detailes”. Then select “UPnP user Interface”...
-
Page 34: System
12. System 12.1 System > User Access the camera and the Configure Root Password dialog appears. Enter the User name: ADMIN and password is 1234 to log in. To change the password or add a user, click SETUP > SYSTEM > USER. Fill in the User ID, Password and E-mail server. -
Page 35: System > Maintenance
Firmware Update -When you upgrade the firmware with a file from GANZ, your camera will receive the latest available features. Always read the upgrade instructions and release notes available with each new release, before updating the firmware. - Page 36 Firmware Update procedure: 1. Save the firmware file to your computer. 2. Go to Setup > System > Maintenance in the camera’s Web page. 3. In the Firmware Update section, browse to the desired firmware file on your computer. C lick O.K.
-
Page 37: System > Information
12.4 System > Information System information: After updating firmware, you can confirm the F/W version here. - Page 40 ^...
Need help?
Do you have a question about the ZN-CM1 and is the answer not in the manual?
Questions and answers