Table of Contents
Advertisement
Quick Links
Download this manual
See also:
Quick User Manual
Advertisement
Table of Contents

Related Manuals for Ganz PixeIPro Series ZN-C2M


Summary of Contents for Ganz PixeIPro Series ZN-C2M
- Page 1 PixelPro Series User’s Manual ZN-C2M/ZN-C1M/ZN-C1 Ver1.30...
-
Page 2: Table Of Contents
PixelPro Series User’s Manual ZN-C2M/ZN-C1M/ZN-C1 Ver1.30 Contents 1. Product Features ................4 2. Accessing the Camera ..............7 2.1 Access from a Web Browser ............7 2.2 Accessing the Camera from the Internet ........7 2.3 Adjusting the Image and Focus ..........8 2.4 Back Focus Adjustment............. - Page 3 PixelPro Series User’s Manual ZN-C2M/ZN-C1M/ZN-C1 Ver1.30 10. Event ..................24 10.1 Alarm Port ................24 10.2 Motion .................25 10.3 Mapping ................26 11. Network ..................27 11.1 IP Setup ................27 11.2 Service Port ................29 11.3 RTP ..................30 11.4 E-mail .................30 11.5 DDNS ...................31 11.6 UPnP ...................32 12.
-
Page 4: Product Features
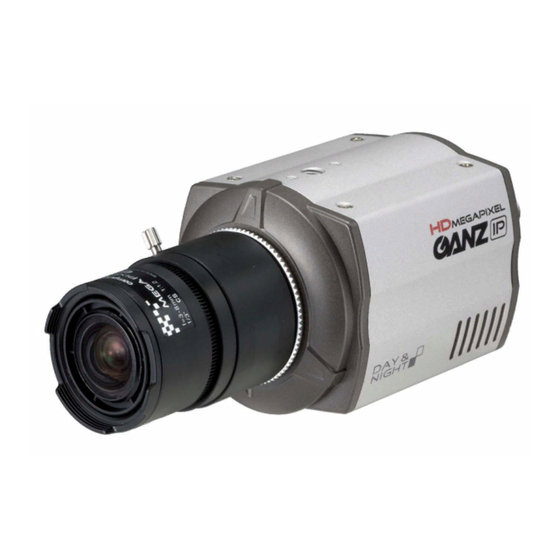
Ver1.30 1. Product Features The GANZ PixelPro Series HD / Megapixel IP camera (ZN-Cx) is a high performance H.264 network camera, designed for demanding security installations. It delivers crisp, clear images, disclosing every detail, thanks to its top quality progressive-scan CMOS sensor and advanced image processing. - Page 5 (10BaseT/100BaseTX Ethernet). This socket could also be used to power the GANZ PixelPro via Power over Ethernet (PoE). The camera auto-senses the correct power level when using a PoE switch, router or injector.
- Page 6 ZN-C2M/ZN-C1M/ZN-C1 Ver1.30 5. Factory Default / Control Button Press this button to install the camera using the GANZ Dynamic Domain Name Service (DDNS), or to restore the camera configuration to its factory default settings. 6. Power Connector 12VDC or 24VAC power connector 7.
-
Page 7: Accessing The Camera
2. Accessing the Camera Follow the instructions in the GANZ PixelPro Installation Guide to install the camera. The GANZ PixelPro can be accessed with most standard operating systems and browsers. The recommended browser is Internet Explorer for Windows. 2.1 Access from a Web Browser Launch a web browser (Internet Explorer or compatible equivalent) Enter the IP address (or name server address) of the camera into the Address Bar. -
Page 8: Adjusting The Image And Focus
1. Loosen the flange back locking screw that holds the C/CS-mount ring. CS-mount is standard on GANZ PixelPro. In case your lens is C-mount type, please use the 5mm adapter ring, which is provided in the product packaging. -
Page 9: Live View
PixelPro Series User’s Manual ZN-C2M/ZN-C1M/ZN-C1 Ver1.30 2.5 Live View Client PC Speaker (enable / disable) Client PC Microphone (enable / disable) Digital Zoom Snapshot Full Screen Video Stream Change (1 Stream <> 2 Stream) Play: Start Video Stream Stop: Stop Streaming NOTE: It is possible that not all the buttons described below will be visible unless the Live View page has been customized to display them. -
Page 10: How To Stream H.264
PixelPro Series User’s Manual ZN-C2M/ZN-C1M/ZN-C1 Ver1.30 H.264 Protocols & Communication Methods (continued) Unicasting is communication between a single sender and a single receiver over a network. This means that the video stream is transmitted independently to each user, and each user receives their own video stream. -
Page 11: Setup
Ver1.30 3. Setup The GANZ PixelPro is configured from the Setup tab, which is available on the upper-left hand side in the web interface. This configuration could be performed by: - Administrators, who have unrestricted access to all settings under the Setup tab. -
Page 12: Camera And Image
ZN-C2M/ZN-C1M/ZN-C1 Ver1.30 5. Camera and Image The following descriptions show examples of some of the features available with GANZ PixelPro. 5.1 Video Codec This section allows you to choose the compression codec for each of the video streams. Motion JPEG This format uses standard JPEG still images in the video stream. - Page 13 Select Video Mirroring mode NONE/ HORIZONTAL / VERTICAL / FLIP(H+V) Bandwidth Limit Limit the bandwidth that the GANZ PixelPro can use during a network connection. Max Bandwidth Specify the maximum bandwidth that the GANZ PixelPro can use during a network connection.
- Page 14 PixelPro Series User’s Manual ZN-C2M/ZN-C1M/ZN-C1 Ver1.30 < Output resolution table for 1080p (Full HD) model > Second Stream First Stream 1080p (1920 x 1080) 1.3MP (1280 x 1024) 720p (1280 x 720) ** 720p (1280 x 720) VGA (640 x 480) QVGA (320 x 240) 720p Wide Mode 720p Wide Mode **...
-
Page 15: Camera
PixelPro Series User’s Manual ZN-C2M/ZN-C1M/ZN-C1 Ver1.30 5.2 Camera This section allows you to adjust various camera settings. 5.2.1 Exposure Control Exposure Mode AUTO (indoor) : Use this setting for automatic exposure control at indoor. AUTO (outdoor) : Use this setting for automatic exposure control at outdoor. MANUAL : Use these settings to control camera exposure manually. -
Page 16: Day & Night Control
The GANZ PixelPro camera can be set to automatically identify the light source and compensate for its color temperature. If necessary, the type of light source could be set manually. -
Page 17: Audio
Ver1.30 6. Audio The GANZ PixelPro can transmit audio to other clients, and can also play audio received from other clients. This section describes the basic audio settings, such as setting the communication codec, and adjusting the sound levels for the microphone and speakers connected to the camera. -
Page 18: Live
GANZ PixelPro can support up to 10 simultaneous users via unicast. With multicasting, GANZ PixelPro can support an unlimited number of users. If supported on the network, consider using the multicast function, as the bandwidth consumption will be much lower. -
Page 19: Sd Card
PixelPro Series User’s Manual ZN-C2M/ZN-C1M/ZN-C1 Ver1.30 8. SD Card 8.1 Configuration SD Card Configuration This configuration page allows you to save still images to the Micro SD (SDHC) card. NOTE: This function cannot be used when Installation mode is turned ON. Set the first stream to 1280x720 or 1280x720(wide) in the Video >... -
Page 20: Event
PixelPro Series User’s Manual ZN-C2M/ZN-C1M/ZN-C1 Ver1.30 8.2 Event Event SD Writing You can configure the camera to store still images based on events such as Alarm In and Motion detection. NOTE: This function cannot be used when Installation mode is turned ON. Set the first stream to 1280x720 or 1280x720(wide) in the Video >... -
Page 21: Periodical
PixelPro Series User’s Manual ZN-C2M/ZN-C1M/ZN-C1 Ver1.30 8.3 Periodical Periodical SD Writing It is setting page to save the still images in the Micro SD card periodically. NOTE: This function cannot be used when Installation mode is turned ON. Set the first stream to 1280x720 or 1280x720(wide) in the Video >... -
Page 22: Ftp
PixelPro Series User’s Manual ZN-C2M/ZN-C1M/ZN-C1 Ver1.30 9. FTP 9.1 Configuration Server Configuration Enable / Disable the FTP function to download saved content from the SD Card remotely. When it is Enabled, the FTP client can download the saved content without removing the SD Card. Client Configuration Allows transmission of still images to remote sites, using the FTP server. -
Page 23: Periodical
PixelPro Series User’s Manual ZN-C2M/ZN-C1M/ZN-C1 Ver1.30 Event FTP Sending Allows transmission of still images to the FTP server at remote sites when an event occurs. NOTE: This function cannot be used when Installation mode is turned ON. Set the first stream to 1280x720 or 1280x720(wide) in the Video >... -
Page 24: Event
PixelPro Series User’s Manual ZN-C2M/ZN-C1M/ZN-C1 Ver1.30 10. Event 10.1 Alarm Port Alarm Input Used for connecting external alarm contacts and triggering specific alarm-based events. The input is typically connected to a motion detector or any other external security device, so that recording can be triggered and/or still images could be recorded and/or uploaded whenever the sensor is activated. -
Page 25: Motion
PixelPro Series User’s Manual ZN-C2M/ZN-C1M/ZN-C1 Ver1.30 10.2 Motion Motion Detection Motion detection is used to generate an alarm whenever movement occurs within the video image. A total of 4 motion detection zones can be configured. Configuring Motion Detection Click Motion Detection in the Event Config menu. Click ‘Add Window’, and select an area for motion detection by checking the relevant box. -
Page 26: Mapping
PixelPro Series User’s Manual ZN-C2M/ZN-C1M/ZN-C1 Ver1.30 10.3 Mapping Event Mapping It is possible to define conditions that would cause the camera to respond with certain actions. A triggered event happens as a result of an event which is mapped within this menu. This could be caused by motion detection or an external alarm input. -
Page 27: Network
11.1 IP Setup IP Address Configuration The GANZ PixelPro supports both IP version 4 and IP version 6 (IPv6 will be supported as of v3.0). Both versions may be enabled simultaneously, and at least one version should be always enabled. - Page 28 PixelPro Series User’s Manual ZN-C2M/ZN-C1M/ZN-C1 Ver1.30 How to Assign an IP Address Default setting is set to “DHCP” and “UPnP” function is set to ON. If your network has a DHCP server and the UPnP function is enabled on your PC, you can find the camera in “My Network”. Execute the PixelPro Discovery Tool (from the Installation CD).
-
Page 29: Service Port
PixelPro Series User’s Manual ZN-C2M/ZN-C1M/ZN-C1 Ver1.30 11.2 Service Port Service Port HTTP port The default HTTP port number (80) could be changed to any port within the valid port range (1-65535). This is useful for simple port mapping. RTSP port The RTSP protocol allows a connecting client to start an H.264 stream. -
Page 30: Rtp
PixelPro Series User’s Manual ZN-C2M/ZN-C1M/ZN-C1 Ver1.30 11.3 RTP RTP Port Range The IP address, port number, and Time-To-Live (TTL) value to use for the video stream(s) in multicast H.264 format. Only certain IP addresses and port numbers should be used for multicast. 11.4 E-mail You must turn Notification to ‘On’... -
Page 31: Ddns
Ver1.30 11.5 DDNS The GANZ Dynamic Domain Name Service (DDNS) can provide your GANZ product with its own name server address (URL), which can then be used to access it over the Internet. The product can be unregistered from the service at any time. To do this click Network > DDNS and turn the DDNS off. -
Page 32: Upnp
PixelPro Series User’s Manual ZN-C2M/ZN-C1M/ZN-C1 Ver1.30 11.6 UPnP Universal Plug & Play (UPnP) allows you to find the IP camera automatically on your network. - Page 33 PixelPro Series User’s Manual ZN-C2M/ZN-C1M/ZN-C1 Ver1.30 In order to be able to detect the camera automatically, you must enable the UPnP function on both the camera and on your PC. Camera : Set UPnP to “ON” PC : Open “Control Panel” >”Network Connection” Select “Advanced”...
-
Page 34: System
PixelPro Series User’s Manual ZN-C2M/ZN-C1M/ZN-C1 Ver1.30 12. System 12.1 User When you access the camera, the Configure Root Password dialog box appears. Enter the user name ADMIN and password 1234 to log in. To change the password or add a user, go to Setup > System > User. Fill in the User ID, Password and E-mail server. -
Page 35: Maintenance
PixelPro Series User’s Manual ZN-C2M/ZN-C1M/ZN-C1 Ver1.30 Local Time / PC Sync/SAVE Specify Local time manually or Synchronize to PC time automatically. Time Zone Setup You may select your time zone from the drop-down list. D.S.T (Daylight Saving Time) Toggle automatic DST clock adjustment on/off. 12.3 Maintenance System Name Choose a system name to identify the camera when using e-mail notifications. - Page 36 PixelPro Series User’s Manual ZN-C2M/ZN-C1M/ZN-C1 Ver1.30 Firmware Update Procedure 1. Save the firmware file to your computer. 2. Go to Setup > System > Maintenance within the camera web browser setup. 3. In the Firmware Update section, browse to the desired firmware file on your computer. Click OK. NOTE: Do not disconnect power to the unit during the upgrade.
-
Page 37: Information
PixelPro Series User’s Manual ZN-C2M/ZN-C1M/ZN-C1 Ver1.30 12.4 Information System Information After updating firmware, you can confirm the new F/W version here. - Page 38 PixelPro Series User’s Manual ZN-C2M/ZN-C1M/ZN-C1 Ver1.30...
- Page 39 PixelPro Series User’s Manual ZN-C2M/ZN-C1M/ZN-C1 Ver1.30...
- Page 40 PixelPro Series User’s Manual ZN-C2M/ZN-C1M/ZN-C1 Ver1.30...
Need help?
Do you have a question about the PixeIPro Series ZN-C2M and is the answer not in the manual?
Questions and answers