Table of Contents
Advertisement
Quick Links
Advertisement
Table of Contents

Related Manuals for Ganz ZN-M2AF


Summary of Contents for Ganz ZN-M2AF
-
Page 2: Table Of Contents
Contents 1. PRODUCT FEATURES ......................... 2 2. INSTALLATION ............................. 3 ............................ 3 2.1 I NSTALL CAMERA .......................... 4 2.2 A SSIGN ADDRESS ......................... 4 2.3 A CCESS FROM A BROWSER .................. 5 2.4 A CCESSING THE CAMERA FROM THE NTERNET ... -
Page 3: Product Features
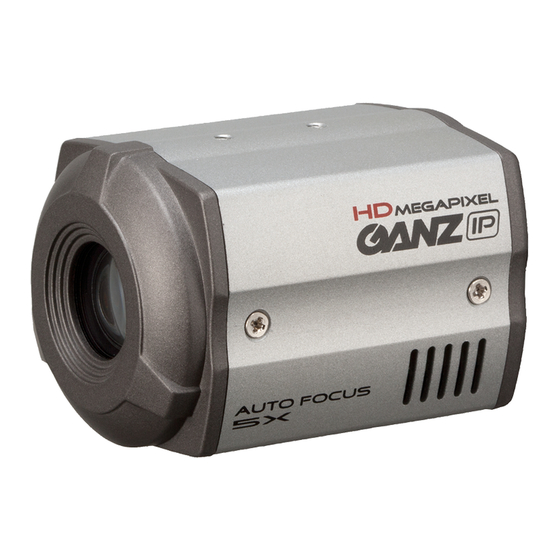
1. Product Features The GANZ PixelPro Series (ZN-M2AF) is a high performance H.264 network camera, designed for demanding security installations. It delivers crisp, clear images, disclosing every detail, thanks to its top quality Megapixel progressive CMOS sensor and advanced image processing. -
Page 4: Installation
1. Network (RJ-45 PoE required) The ZN-M2AF connects to the network via a standard network cable, and automatically detects the speed of the local network segment (10BaseT/100BaseTX Ethernet). This socket must be used to power the ZN-M2AF via Power over Ethernet (PoE). The camera auto-senses the correct power level when using a PoE (Class 2) switch, router or injector. -
Page 5: Assign Ip Address
1) After the camera is listed in camera list, select the camera. 2) Type in the all network information. 3) Click “Apply” button The GANZ PixelPro can be accessed with most standard operating systems and browsers. The recommended browser is Internet Explorer 7 and above for Windows. -
Page 6: Accessing The Camera From The Internet
1. Start a browser (Internet Explorer) 2. Enter the IP address or host name of the camera in the Location/Address field of your browser. Press Enter. 3. Login dialog will appear when the camera is accessed for the first time. 4. -
Page 7: Live View
3. Live View Digital Zoom Snap Shot Full Screen Video Stream change: First stream Second stream Play: Click this button by manually to start the stream Stop: Click this button by manually to stop streaming NOTE: It is possible that not all the buttons described below will be visible unless the Live View page has been customized to display them. -
Page 8: How To Stream H.264
RTSP traffic. 4. Setup The GANZ PixelPro is configured from the Setup link, which is available on the top left hand side in the web interface. This configuration could be done by: •... -
Page 9: Install
4.1 Install 4.1.1 Installation Setup Installation Mode allows use of the analog BNC output from the camera to connect the camera NTSC, PAL: Analog Output is enabled. OFF: Analog output will be disabled. 4.2 Video 4.2.1 Codec This section allows you to choose the compression codec for each of the video streams. - Page 10 The H.264 standard provides the scope for a large range of different coding tools for use by various applications in different situations, and the GANZ PixelPro provides certain subsets of these tools. Using H.264, it is also possible to control the bit rate, which in turn allows the amount of bandwidth usage to be controlled.
-
Page 11: Camera
< Output resolution and Frame rate table for ZN-M2AF > Second Stream 720p 4CIF 4CIF* VGA 4:3 VGA 16:9 VGA* 16:9 QVGA RESOLUTION Table 1280x720 704x480 704x576 640x480 640x360 640x352 352x240/288 352x240 1080p 1920x1080 25/30 25/30 25/30 25/30 25/30 SXGA... - Page 12 The GANZ PixelPro camera can be set to automatically identify the light source and compensate for its color temperature. If necessary, the type of light source could be...
-
Page 13: Live
Contrast (Default: 15, Range: 0~30) Color (Default: 15, Range: 0~30) 4.3 Live GANZ PixelPro can support up to 10 simultaneous users via unicast. 4.3.1 Viewer Setup Live View Protocol RTP Unicast (UDP) / RTP over RTSP (TCP) Buffering Time (frame based) -
Page 14: Ftp
4.4.FTP 4.4.1 Config Server Configuration Allows transmission of still images to remote sites, using the FTP server. Set the information for FTP transmission by inserting the IP address, Username and Password of the remote FTP Server. 4.4.2 Event Event FTP Sending You can configure the camera to upload still images to FTP server based on event such as Motion detection. -
Page 15: Periodical
FTP Send Mapping Choose which types of events will be recorded to the FTP server by checking the desired event. Effective Period This parameter lets you decide whether to save all the events that are happening at all hours of the day, or only the events that occur within during specific times of the day. The Schedule method is used to save events into the FTP server during a specific time range. -
Page 16: Event
4.5.Event 4.5.1 Motion Motion Detection Motion detection is used to generate an alarm whenever movement occurs within the video image. A total of 4 motion detection zones can be configured. Configuring Motion Detection Click Motion Detection in the Event Config menu. Select an area for motion detection from Area 1 to Area 4. -
Page 17: Mapping
If your DHCP server can update a DNS server, you can access the GANZ PixelPro by a static host name, regardless of having a dynamic IP address. Configure the options for notification of IP address change (under... - Page 18 DNS Configuration DNS (Domain Name Server) provides the translation of host names to IP addresses on your network. Primary DNS server Enter the IP address of the Primary DNS server for your network. Secondary DNS server Enter the IP of the Secondary DNS, which is used if the Primary DNS server is unavailable.
-
Page 19: Service Port
4.6.2 Service Port Service Port HTTP port The default HTTP port number (80) could be changed to any port within the valid port range (1-65535). This is useful for simple port mapping. RTSP port The RTSP protocol allows a connecting client to start an H.264 stream. Enter the RTSP port number to use. -
Page 20: System
You must turn Notification to ‘On’ and then enter the host names or addresses for your mail servers in the fields provided, to enable the sending of event and error email messages from the camera to predefined addresses via SMTP. Note1) Frequency : Mail server may register the sender to SPAM list when frequency is set to “1 Min”. -
Page 21: Date / Time
4.7.2 Date / Time Date & Time Format Specify the formats for the date and time (12h or 24h) displayed in the Live View video streams. NTP Server Synchronize the time from an NTP server every 60 minutes. Specify the IP address or host name of the NTP server you are using. -
Page 22: Maintenance
4.7.3 Maintenance System Name Choose a system name to identify the camera when using e-mail notifications. System Reboot Reboots the camera. Factory Default To reset the camera back to the original factory default settings. Firmware Update From time to time, CBC will release firmware updated for the PixelPro Series camera, which will contain feature additions and other improvements. -
Page 23: Firmware Update Procedure
Firmware Update Procedure 1. Save the firmware file to your computer. 2. Go to Setup > System > Maintenance within the camera web browser setup. 3. In the Firmware Update section, browse to the desired firmware file on your computer. Then Click OK. NOTE: Do not disconnect power to the unit during the upgrade. -
Page 24: Information
4.7.4 Information System Information You can confirm the system information of the camera. F/W version / Model Name / MAC address / IP address settings... -
Page 25: Dimensions
5.Dimensions...
Need help?
Do you have a question about the ZN-M2AF and is the answer not in the manual?
Questions and answers