Advertisement
Table of Contents
- 1 Technical Specifications
- 2 Connecting the Radio
- 3 Screen Icons
- 4 Operating Controls
- 5 Storing Frequencies into Memory
- 6 Doing “Splits” with the Two Vfos
- 7 Systems Menu
- 8 Use of the Computer Interface
- 9 Audio Filter Option
- 10 Microphone Pin out
- 11 Case Removal
- 12 Setting the Side Tone
- 13 Firmware Update
- 14 Alignment Procedure
- 15 Acknowledgments
- Download this manual
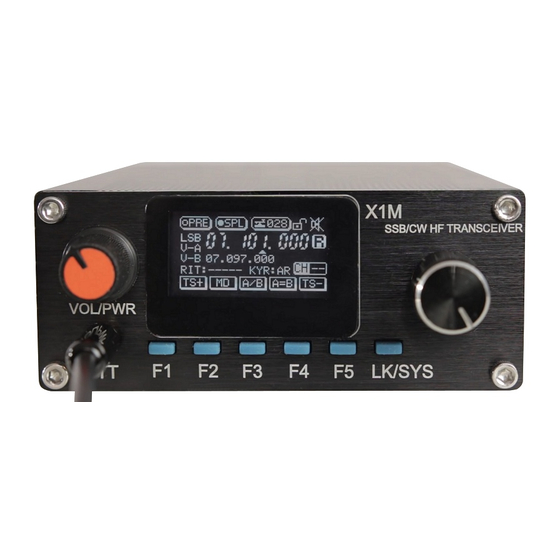
This guide is for the X1M HF PRO (Platinum) model QRP transceiver, manufactured by Chonqinq
Xiegu Technology Co., Ltd. of China.
Technical Specifications
The published specifications for the radio are as follows:
Receive: 0.1 - 30MHz continuous.
Transmit:
The full range of transmission from 0.1 to 30 MHz is available with suitable external
bandpass filters. Otherwise, transmission is limited to the listed amateur bands via
internal programming.
Operating modes: USB, LSB, and CW.
Receiver sensitivity: better than 0.45 μVolts.
RF power output: 4.5 Watts.
Frequency stability: better than 0.5 parts per million.
Memory storage locations: 32 pairs of VFO settings (both VFOa and VFOb)
Operating voltage: 9.6 – 14.5 Volts DC
A User's Guide for the X1M PRO Transceiver
Frederick A. Lesnick, VE3FAL
Paul W. Ross, W3FIS
Charles O. Vest, W5COV
Revision 3.1.4 – 12/19/13
Band 1 3.5 – 4.0 MHz (80 Meters)
Band 2 7.0 – 7.3 MHz (40 Meters)
Band 3 14.0 – 14.35 MHz (20 Meters)
Band 4 21.0 – 21.45 MHz (15 Meters)
Band 5 28.0 – 29.7 MHz (10 Meters)
1
Advertisement
Table of Contents

Summary of Contents for XIEGU X1M Pro
- Page 1 A User's Guide for the X1M PRO Transceiver Frederick A. Lesnick, VE3FAL Paul W. Ross, W3FIS Charles O. Vest, W5COV Revision 3.1.4 – 12/19/13 This guide is for the X1M HF PRO (Platinum) model QRP transceiver, manufactured by Chonqinq Xiegu Technology Co., Ltd. of China.
- Page 2 Receive/Standby current: 0.5A Transmitting current: 1.8A, Maximum Size: 97 x 40 x 155 mm [3-13/16 x 1-9/16 x 6-1/8 inches] Connecting the Radio The power jack is a standard 5.5 x 2.1 mm jack coaxial power jack. The center pin is the positive connection, and the outer shell is the negative connection.
- Page 3 Screen Icons R/T Receive mode /Transmit mode. USB/LSB/CW Current operating mode. PRE Receive pre-amplifier is on when there is a solid dot on the icon. SPL Split-Frequency Mode is on when there is a solid dot on the icon. Key Symbol – keyer speed. RIT Receiver Incremental Tuning.
- Page 4 Screen 2: V/M: Frequency mode or Channel mode. MC: Under channel mode, clears the current selected channel. V>M: Save the VFO frequencies and modes to the currently selected channel. Screen 3: PRE: Turn the preamplifier on or off. KS: Keyer Speed – adjust with Frequency Knob, press KS again to set. SPL: Run in “split”...
- Page 5 Storing Frequencies into Memory 1. Set VFO frequency and transmit mode, and preamp options as desired. The system will remember the mode and preamp setting as well as the frequency. Both VFOa and VFOb are stored to memory. When in memory mode, the A/B button will toggle between the two stored VFOs.
- Page 6 13. DDS MLT: RCLK Ratio DDS frequency setting. 14. RST ALL: Reset all parameters to factory values. A reset resets only the items in this parameter menu. Mode, VFOs, channel memories, etc., are not altered. A caveat --- Setting (and storing) Parameter 11 (a value of “1”) to the value to “open up” the radio is done at your own risk.
- Page 7 audio filter, which provides for the design of a very compact audio filter without the necessity of either bulky or precision components. The left hand knob sets the center frequency for the filter. When turned on, the unit powers up from the power applied to the rear of the unit (9 volt battery, or 12.8 volt supply), with a standard 5.5 x 2.1 mm power jack.
- Page 8 Setting the Side Tone The side tone is often too loud. This is controlled by an internal trim pot setting. 1. Remove the case – see the foregoing instructions. 2. There are two trim pots on the display end of the board. 3.
- Page 9 same firmware version as previously (if the firmware update did not work, or the versions are the same), or a newer firmware version indicating build time and date etc. Alignment Procedure If you find that the radio sounds “muffled” on either USB or LSB, you likely do not have the radio aligned correctly.
- Page 10 Notes This will save you some headaches later on. Keep your notebook handy to make notes in for the actual operation of your X1M PRO. Also, note any problems and what you were doing when the problem showed up. Everyone should access the SYSTEMS MENU and record the present values currently stored for each item in the list.


Need help?
Do you have a question about the X1M Pro and is the answer not in the manual?
Questions and answers