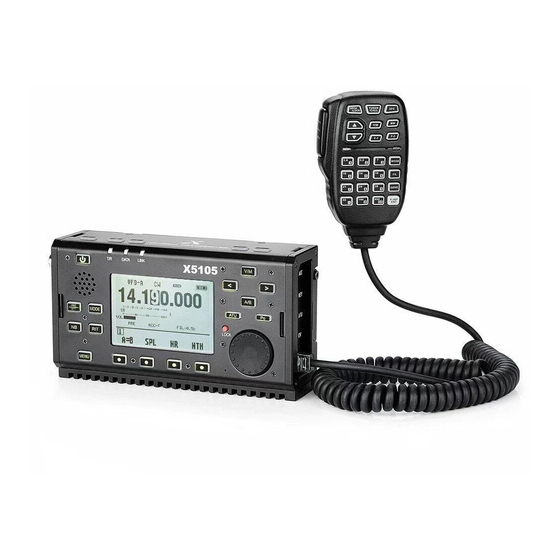
XIEGU X5105 Manual
Hf+50mhz portable hf transceiver
Hide thumbs
Also See for X5105:
- Operation manual (62 pages) ,
- Instruction manual (31 pages) ,
- Quick start manual (13 pages)
Table of Contents
Advertisement
Quick Links
Xiegu Communication X5105
HF+50MHz Portable HF Transceiver
©
Distributed Exclusively in the USA by MFJ Enterprises
Features:
High-Visibility 3.6- Inch LCD Screen
Built-in 3800-mAh high-capacity battery
Built-in SWR Bridge and ATU
All modes (USB/LSB/CW/AM/FM/Digital)
All Bands (160-M through 6-M)
General Coverage Receiver
st
1
-IF Signal Output for Spectrum Display
DSP-NR, Noise Blanker, Notch Filter
Memory Keyer with CW trainer
Speech-Processing Compressor
Firmware Download Upgradable
Multi-function Keypad Microphone
Built-in Desktop Stand
Advertisement
Table of Contents

Related Manuals for XIEGU X5105


Summary of Contents for XIEGU X5105
- Page 1 Xiegu Communication X5105 HF+50MHz Portable HF Transceiver © Distributed Exclusively in the USA by MFJ Enterprises Features: High-Visibility 3.6- Inch LCD Screen Built-in 3800-mAh high-capacity battery Built-in SWR Bridge and ATU All modes (USB/LSB/CW/AM/FM/Digital) All Bands (160-M through 6-M) General Coverage Receiver...
- Page 2 Bridge and Automatic Antenna Tuner (ATU) that will put you on the map from virtually any portable location using improvised antenna systems. When it comes to pulling weak DX signals out of the noise, the X5105’s “big-radio” features make all the difference! There’s a built-in Pre-Amp and Attenuator, pulse-type Noise Blanker, Digital Noise Reduction (DNR), Notch Filter, adjustable AGC-Rate (fast, slow, automatic, off), plus variable high and low pass audio filters, built in speaker, and plenty of audio power to drive an external speaker.
-
Page 3: Specifications
Xiegu X5105 QRP Transceiver SPECIFICATIONS Receive Range: Continuous, 500kHz to 54MHz Transmit Range: 160-M through 6-M (Amateur bands only) Operating Mode: A1A(CW),A3E(AM),J3E(USB/LSB),F3E(FM) Temperature Range: -10℃ ~ +60℃ Stability: First Hour, + 4ppm @25℃. After First Hour, 1ppm Voltage: 13.8VDC ± 15%, (9–15 Vdc) Current: Rx, 500 mA Peak, Tx, 2.5 A Peak... -
Page 4: External Connections
Xiegu X5105 QRP Transceiver EXTERNAL CONNECTIONS INTERNAL BATTERY... - Page 5 . At this point, you should switch to an external supply or recharge the battery right away. Note that during the recharge cycle, it is normal for the X5105 heatsink and case to become slightly warm. Normal life span for the internal battery is about three years. Contact MFJ Enterprises to order a replacement when you observe a significant drop in capacity or if the battery fails to hold a charge.
- Page 6 Press to access a desired function (functions appear above each button on the screen). 11. Main Tuning Knob: Tunes the X5105 VFO, also adjusts some menu parameters. 12. ATU Button: Press momentarily to bring the ATU (automatic antenna tuner) on line.
- Page 7 Xiegu X5105 QRP Transceiver Press to toggle between VFO-A and VFO-B. 15. (<) Button: Press to shift VFO frequency step one decimal place to the left. 16. (>)Button: Press to shift VFO frequency step one decimal place to the right.
-
Page 8: Left-Side Panel Connections
1. Desk Stand Bracket: Swings down to prop radio upright on a table or desktop. 2. Antenna Connector: Accepts 50 Ω BNC-Male connector from antenna system 3. IF-Signal Output: Connects 1st-IF output to Xiegu XDT1 data terminal. 4. External Speaker/Phones: Accepts 3.5mm stereo plug (3 wire) for speaker or phones. -
Page 9: Handheld Microphone
5. Right bracket: Swings down to prop up radio on table or desk top. 6. MIC (microphone) Jack: Accepts X5105 microphone connector. NOTE For best results on the 3.5mm Jacks use the included 3.5mm Stereo Plug to insure the plug can fully plug in. -
Page 10: Basic Operation
[ ] Power ON: Press and hold BOOT (power) button for 1-2 seconds. The radio will beep three ascending tones* and the Xiegu logo will appear on screen. Then, in 2-3 seconds, the screen will change to the regular operating display (freq., mode, etc.). Note that the radio’s CSN menu will allow you to personalize your radio by adding your call and/or name to the power-on boot screen. - Page 11 [ ] Data MODEM: The X5105 has a built-in receive modem for copying PSK31 (see Function Menu section). [ ] VFO-A/B: The X5105 features two independent VFOs. These may be set up for two in-band frequencies, for frequencies on two different bands, and even for split operation using two different modes. Press the A/B button (above tuning knob) to toggle between VFO-A and VFO-B.
- Page 12 [ ] Display Backlight: Press and hold the LOCK button for approximately 3 seconds to toggle the display backlight on or off. FUNCTION MENU: Many of the X5105’s advanced features are accessed via the Function Menu. Use this section of the manual to “walk through” and become familiar with each one.
- Page 13 The radio will continue scanning until you press QUIT. Quit returns the radio to receive mode. Note that SWR measurements may be limited to in-band frequencies -- the X5105 does not generate transmit signals outside US ham bands.
- Page 14 Xiegu X5105 QRP Transceiver press the YES soft key (or press NO to escape). The radio will store the entry and return to normal VFO operation. Should you accidentally try to overwrite an occupied memory slot, the operation will abort and switch the radio back to VFO operation.
- Page 15 Xiegu X5105 QRP Transceiver load it into the memory. [ ] CSN: Use this file to personalize the boot screen that appears when the radio is turned on. It holds up to 13 characters for your name, call letters, etc. Press CSN to bring up the Text Editor and use the same procedure outlined for the RE files to load your information.
- Page 16 Press again to return to Speaker Mode (a loudspeaker icon will replace the headphone icon). System Menu Each X5105 is adjusted individually at the factory to ensure optimum performance, but you may access the System Menu and fine-tune some of the parameters to preference. To enter System Menu, press and hold MENU for 1-2 seconds.
-
Page 17: Operation
5405.0 MHz REMOTE BAND TRACKING The X5105 Accessory Port (ACC) provides dc voltage levels to drive remotely controled band-switching circuitry in RF amplifiers and other devices. The band-tracking voltage appears on the Band pin of the connector (see ACC connector diagram on page-3). - Page 18 [ ] Click the OK button Firmware Install: [ ] Unplug power from the X5105. Press and Hold the VOL UP and VOL DN buttons as you plug the power cable back in. Release both buttons. [ ] Press the space bar on your computer keyboard. A menu should display on-screen.
- Page 19 [ ] Plug in the programming cable to the computer. Note that there are two versions of the X5105 program cable. The first is a Prolific clone that requires an old version of the driver. It can be downloaded from the MFJ website. The newer version uses an internal FTDI chip.
- Page 20 24-MONTH MFJ WARRANTY: If your X5105 was purchased from an authorized MFJ dealer -- or directly from MFJ -- and if you are the original owner, we warrant that it shall be free from defects in material and workmanship for a period of 24 months from date-of-purchase, subject to the following terms and conditions: 1.
Need help?
Do you have a question about the X5105 and is the answer not in the manual?
Questions and answers