XIEGU X5105 Instruction Manual
Hf+50mhz portable hf transceiver
Hide thumbs
Also See for X5105:
- Operation manual (62 pages) ,
- Instruction manual (28 pages) ,
- Manual (21 pages)

Related Manuals for XIEGU X5105


Summary of Contents for XIEGU X5105
- Page 1 XIEGU COMMUNICATION X5105 HF+50MHz Portable HF Transceiver Instruction Manual V1.0.03 Chongqing Xiegu Technology Co.,Ltd. www.cqxiegu.com...
-
Page 2: Important Reminder
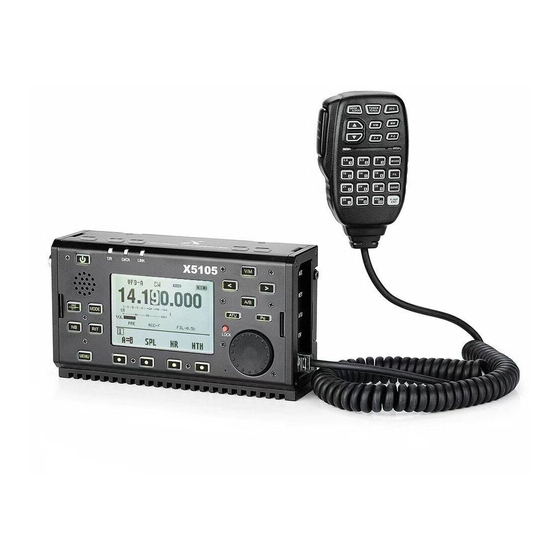
Very small in size and ultra portable Note RF high-voltage of antenna connector! ① Packing list: ① X5105.......... 1 ② Power supply cable......1 ③ Hand microphone......1 ④ USB Cable..........1 ⑤... - Page 3 CW trainer, large capacity battery pack, and computer-aided control functions. X5105 has a small size (about 168 * 93 * 47mm, without protrusions), light body (about 0.94kg). It provides up to 5W of RF power over the full frequency range. It operates normally from 9 to 15V DC;...
- Page 4 1 X5105 Specifications Basic Specifications Frequency range: Receive: 500kHz-30MHz 50MHz-54MHz Transmitting: 160 meters -6 meters (Amateur band only) Operating mode: A1A(CW),A3E(AM),J3E(USB/LSB),F3E(FM) minimum frequency stepping: 1Hz Antenna impedance: 50Ω Operating temperature range: -10℃ ~ +60℃ Frequency stability: after turn on the radio 1-60 minutes is + 4ppm, @25℃:1ppm/hour supply voltage: normal: 13.8VDC + 15%, negative grounding...
- Page 5 Receiving parameters Circuit type: double frequency conversion superheterodyne + audio DSP IF frequency: first IF: 70.455MHz second IF: 10.695MHz third IF: 455kHz(NFM) Sensitivity SSB/CW 1MHz-1.8MHz 0.35uV 10uV 1.8MHz-28MHz 0.25uV 28MHz-30MHz 0.25uV 0.35uV 50MHz-54MHz 0.25uV 0.35uV (PRE=on,ATT=off,NB=off,NR=off,SSB/CW/AM = 10dB S/N,FM = 12dB SINAD) Image rejection: 70dB If Rejection: 60dB Selectivity: SSB:-6dB:2.4kHz/-60dB:4.6kHz...
-
Page 6: Optional Accessories
Packing List Item Quantity X5105 1pcs 1pcs power cable 1pcs Data cable 1pcs Instructions 1pcs Certificate 1pcs warranty card 1pcs ================================================== Optional accessories Item Description CE-19 ACC Wiring expansion card XPA125 120W PA and ATU integrated machine... -
Page 7: Interface Definition
Interface definition... - Page 8 5 The maximum charge time is about 12~15 hours. When the battery is full, the charging will stop automatically. When the battery is powered for X5105, when the battery power is about to run out, the power indication sign on the upper right corner of the screen is displayed as .
- Page 9 External power supply connection External DC power supply output voltage: 13.8;electric current load capacity:3A Cable connection method: white wire connect "+", shielded wire connect "-". Shielded white EMC magnetic ring installation method:As shown; The headphone cable Loop two Loop around the magnetic ring .
-
Page 10: Description Of Equipment
Press these four buttons to turn on or off the corresponding function displayed on the menu area on the current screen. ○ 1 1 Major tuning knob The main tuning knob of X5105, can be used either for frequency regulation or set the parameters. ○ 1 2 ATU button... -
Page 11: Status Indicator
With this key, you can increase current volume. ○ 2 2 PTT button Press and hold this button, X5105 will go into the transmit state. ○ 2 3 LOCK button If you press this button for a short time, you will lock all buttons and knobs on the panel;... - Page 12 B DATA indicator When the data signal or channel are busy, the indicator light flashes. C LINK indicator When the host is connected with the external equipment, the indicator light will shine. Function menu corresponding to 4 multi-function buttons below screen. Copy VFOA to the Split On/Off Digital noise...
- Page 13 Set CW message Set CW message Set CW message Power on display 1(Press this button 2(Press this button 3(Press this button call sign for a long time to for a long time to for a long time to editing(Press this enter the message enter the message enter the message...
- Page 14 ③ IF signal output port The first IF signal is output for use by the XDT1. * XDT1 is a data terminal equipment of Xiegu. ④ External speaker / earphone interface This interface is 3.5mm stereo socket (3 line), it can connect external speaker (impedance 4-16).
- Page 15 ① ACC interface The interface is a 8PIN micro DIN interface, it can be used for external power amplifier connection, PTT control, band signal transmission, it can also be used to communicate with the computer for PSK communication when the audio signal input / output. ②...
-
Page 16: Operation
1. LOCK button, you can lock the host button and the mouse button via this button, and press it again to unlock. 2. PTT button, transmitting control button. 3. Move up/down, Increase and decrease of frequency. 4. Receiving / Transmitting indicator light, microphone operated indicator light. 5. - Page 17 If you have not used the X5105 transceiver for more than 20 days, we recommend that you plug it in with an external power source and charge the device until the display is done. For details, please refer to [Charge] section.
- Page 18 When you do not understand the current state of the antenna, minimize the set transmit power value for the first time you use the X5105 transceiver. 3.7 Use the host PTT button X5105 comes with a PTT button, you can start the transceiver's transmission through this button. Operation method: A.
-
Page 19: Set Operating Frequency
3.8 Set operating frequency There are two ways to set the X5105 operating frequency, use the big knob to set the frequency, or use the multi-function mic to set the frequency. Operation method: A. Use large knob to set frequency Press the button [<] or [>], move the cursor of the frequency bit to the left or to the... - Page 20 receiving frequency of the maximum ±1.5kHz. Operation method: A. Press [RIT] button to start RIT function. B. The rotating knob can change the receiver frequency in the range of ±5kHz. The screen has the corresponding area to display the frequency change value. C.
- Page 21 D. Press [MDN] again, then Exit. 3.15 Pilot frequency operation SPL and VFOA/B setting There are two independent VFO in X5105 transceiver, which can set different frequencies and modes respectively. Set the VFO reasonably, and with the menu SPL function, you can easily achieve pilot frequency transceiver operation mode.
- Page 22 C. Press [MENU] button, switch to the first page menu, select the SPL function, it opens the pilot frequency transceiver working mode. *You can also make full use of VFOA/B to set different frequencies or modes, so double frequency monitoring can be achieved via real-time switching. 3.16 VFO mode /MEMO mode (V/M) setting Transceiver can switch between VFO mode and MEMO mode, and realize flexible operation mode.
- Page 23 E. Press the key, you can do the CW communication. *Practice mode You can use X5105 as a CW code trainer, as follows: Press the [MENU] button briefly, switch to the fourth page menu, select the BK function as "OFF".
- Page 24 Press the [MENU] button shortly and switch to the fourth page menu. l Press the [KSP] button, rotate the encoder to adjust the automatic key rate. 3.19 CW automatic calling device The X5105 host provides 3 sets of CW preset message storage to realize automatic call in CW mode. Operation method: l Quickly press the [MENU] button, switch to the fifth page menu.
- Page 25 2. CW mode: We recommend to adjust the minimum HPF to 500Hz ,the LPF adjust to 900 ~ 1200Hz. 3.22 Speaker / headphone mode switch Operation method: A. Light press[MENU] to Page 9; B. Select [SPK], Switch between speaker / headphone mode. At this point, the left side of the screen will display the corresponding speaker icon or headset icon.
-
Page 26: System Menu Operation
E. In the channel mode, press the [TAG] button shortly, you can switch between the channel number /user-defined channel name. 3.26 Boot interface call sign setting This machine can set up the call sign information displayed on the boot interface, as follows: l Press [MENU] button shortly, switch to page 5 menu, select [CSN] function, enter the call sign editor. -
Page 27: Restore Factory Settings
A. From the ACC port (MINI-DIN8), the computer audio output / input is connected to X5105. B. Use the data cable to connect the CIV port of the X5105 with the computer and ensure the driver is installed correctly. The PC software can control the X5105... - Page 28 X5105. 6.2 Band data format The ACC port of the X5105 provides band data for each band. The band data can be used to control the peripheral, to make automatic band switching, or to identify the band information for other devices.
- Page 29 E. Product’s serial number is missing, torn or blurred so we cannot determine if the radio is under warranty; F. Product was not bought from XieGu or authorized distributor of XieGu. *None of the following conditions, are covered by the warranty: A.
- Page 30 Xiegu communication www.cqxiegu.com...
Need help?
Do you have a question about the X5105 and is the answer not in the manual?
Questions and answers