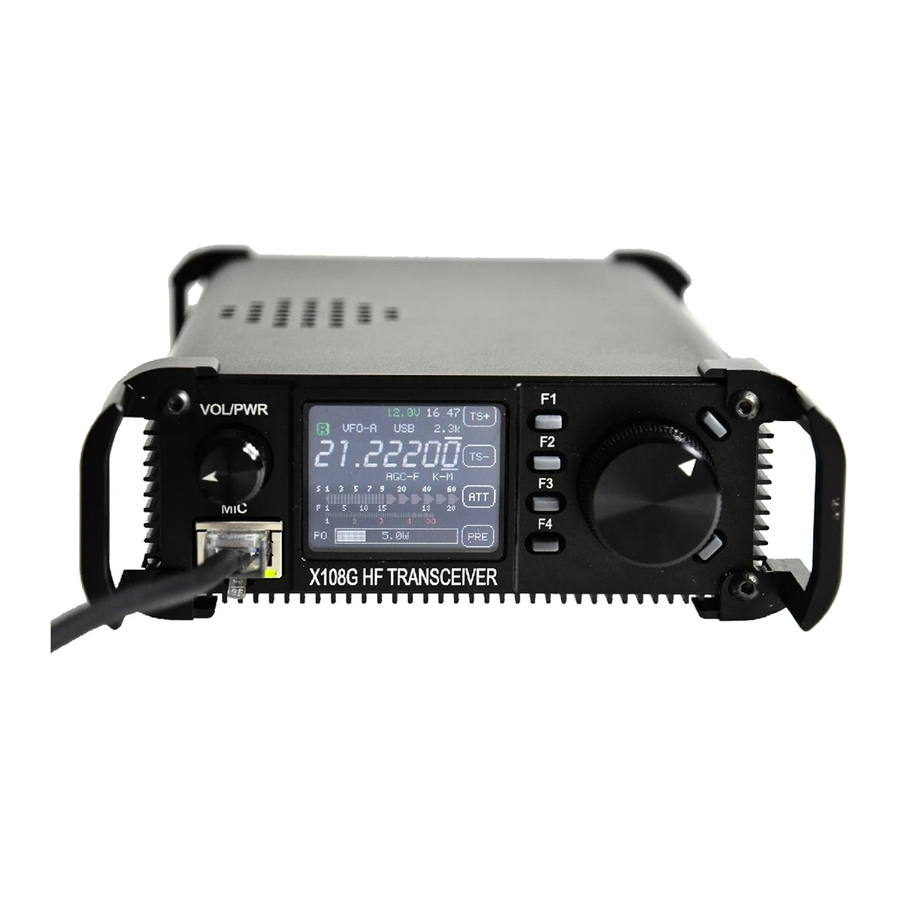
XIEGU X108G Operating Instructions Manual
Hide thumbs
Also See for X108G:
- Service manual (37 pages) ,
- Operating manual (18 pages) ,
- Operating manual (17 pages)
Summary of Contents for XIEGU X108G
- Page 1 HF TRANSCEIVER X108G Operating Manual XIEGU TECH V1.0A Outdoor Edition Revise: 2015-07 Copyright © 2015, XIEGU, Inc.
-
Page 2: All Rights Reserved
All Rights Reserved Security considerations: Important reminder: Before operating the equipment, please read our operating manual carefully and keep the manual, so as not to lose. Do not use equipment during a lightning Features: storm. Low noise, single conversion HF transceiver . Double balanced diode mixer for extended dynamic range. - Page 3 一、Machine parameters Basic parameters 0.5~30MHz ( Continuous ) Frequency range: Receive: Transmitting: All HF Amateur bands including WARC bands Operating mode: SSB(J3E) CW (A1A) AM (A3E) minimum frequency stepping: 1Hz Antenna impedance: 50Ω Operating temperature range: -10℃ ~ +60℃ Frequency stability: ±0.5ppm @ Open the power about 5 minute , -10℃~+60℃ Operating voltage: 12~14.5V DC Current draw: Receiving:...
- Page 4 Dynamic range: Better than 90db RIT Frequency control range: ±1kHz audio output: 0.5W@8Ω 二、 Description of equipment 2.1 Front panel Description 2.2 Rear panel Description ~ 4 ~...
- Page 5 1. SO-239 Antenna Jack. 2. AUX 3. External speaker output 4. CW key input. 5. ACC port. 6. USB port. 7. DC power input 8. Ground connection. 2.3 Microphone 1. Lock button/ Press it unlock again 2. PTT button 3. Up / Down frequency/channel 4.
- Page 6 【ATT】Switch receive signal attenuator on or off. 【PRE】Switch receive preamp on or off. 【MODE】 Select desired operating mode – CW/AM/LSB/USB. 【AGC】 Select AGC level – FAST/SLOW/OFF. 【NB】 Select NB level between 1 and 4. 【A/B】 Switch between VFO A & VFO B. 【A=B】...
- Page 7 【FIL】Select filter 【KEY】 Select keyer – Manual/Auto L/Auto R. 【KSPD】Select keying speed - adjust via selector knob B, speed displayed under KEY in OLED 【TIME】Set Internal Clock – adjust via selector knob B, select hour/minute with Up/Down buttons. 【SQL】 Select to adjust Squelch level via selector knob B, level shown on line display in OLED. voice compression settings 【VCMP】...
- Page 8 3.2.4: Preamplifier on/off Press the frequency knob to switch the current menu page, then press [PRE]. When the preamplifier is on, PRE will be highlighted green. When the preamplifier is off, PRE will appear dark. 3.2.5: Attenuator on/off Press the frequency knob to switch the current menu page, then press [ATT]. When the attenuator is on, ATT will be highlighted green.
- Page 9 The radio will receive on VFO-A and transmit on VFO-B. 3.2.11: RIT tuning Press the frequency knob to switch the current menu page, then press [RIT]. Turning the frequency knob will change the receive frequency but leave the transmit frequency unchanged. Pressing [RIT] again will exit this mode. 3.2.12: Transmit power setting Press the frequency knob to switch the current menu page, then press [POW].
- Page 10 the information stored in the current channel. 3.2.17: Manual / automatic telegraph key Press the frequency knob to switch the current menu page, then press [KEY]. Choose Manual Key, Automatic Left Hand telegraph key or Automatic Right Hand telegraph key. 3.2.18: Automatic telegraph key rate Press the frequency knob to switch the current menu page, then press [KSPD].
-
Page 11: Extended Interface
3.3 Extended Interface 【AUX】No function 【SPK】External speaker output Speaker or Headphone(3.5 stereo Socket); Otherwise it will damage the rig. Before using the headphone, please decrease the volume. 【KEYER】Telegraph Key The telegraph key is automatic and manual integration. You can switch in the menu. -
Page 12: Ground Screw
Band voltage parameter 【USB】USB port PC control or firmware update 【DC IN】 Power port Power socket polarity, as shown: Note : Power input range: 12~14.5V DC 12~14.5V DC Do not exceed the input voltage range and Reverse Access to power Do not exceed the input voltage range and Reverse Access to power. - Page 13 To enter menu setting mode: Power off radio. Press and hold F1 button while powering on. 1. IF SSB: SSB IF 2. IF CW: CW IF 3. BFO LSB: BFO value LSB mode 4. BFO USB: BFO value USB mode 5.
- Page 14 The dealer will ship a replacement radio to the customer. 2.10 days - 1 year. A defective radio during this time period will be returned by the customer to Xiegu via Xiegu DHL account. The customer need to provide these information: full name, address, telephone, postal encoding etc.
- Page 15 XIEGU TECH 无线科技,无限创造 www.cqxiegu.com ~ 15 ~...


Need help?
Do you have a question about the X108G and is the answer not in the manual?
Questions and answers