
Related Manuals for Contura C 480


Summary of Contents for Contura C 480
- Page 1 Installation Installationsanvisning Installationsanleitung Installasjonsanvisning instruction Installation instruction C 480 www.contura.eu...
- Page 2 See rating plate on the stove Intended area of use Heating of rooms in residential buildings Fuel Wood MANUFACTURER Name NIBE AB / Contura Address Box 134, Skulptörvägen 10 SE-285 23 Markaryd, Sweden CHECKS According to AVCP System 3 European standard...
-
Page 3: Table Of Contents
A warm welcome to the Contura family. We hope you will get a great deal of pleasure from your new stove. As a new owner of a Contura stove, you have secured a product with timeless design and long service life. -
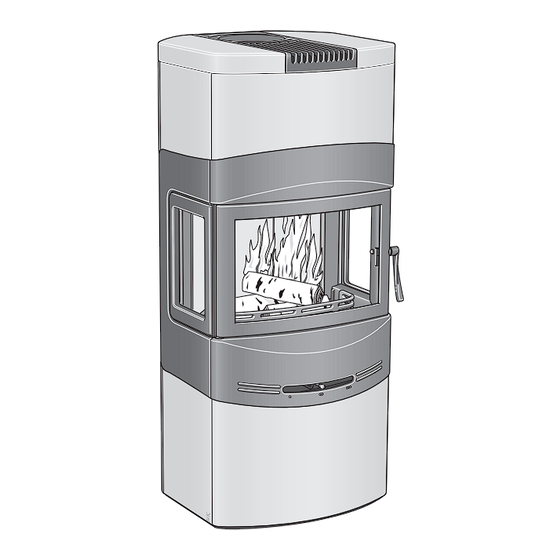
Page 4: Technical Specifications
The draught in the chimney must generate a neg ative pressure This folder contains instructions on how to assemble and install stoves in the Contura 480. The stove also comes with comprehen- of at least 12 Pa. The draught is affected both by the length and cross-sectional area of the chimney, and by how well sealed the sive Lighting and Maintenance Instructions. -
Page 5: Installation Distances To Walls And Ceilings
Installation distances to walls and ceiling Stand the stove on a floor plate, ensuring that the stove is no closer to Important! the wall/ceiling than the minimum dis tances indicated in the diagrams An extra glass side panel with a heat-reflecting surface below. -
Page 6: Air Supply
Air supply Combustion air for the stove can be supplied through a duct directly from outside, or indirectly through a vent in the wall of the room where the stove is installe d. The drawings on the right show various alternative methods of supplying the stove with air. -
Page 7: Unpacking The Stove
Unpacking the stove Lift and transport the stove The cast-iron base may be removed to make it easie r to lift and as shown in these sketches. carry the stove body. Remove the grate disc by lifting the edge furthest away from the Remove the cast-iron cover strips below the side windows. -
Page 8: Installing The Smoke Baffle
Remove the rear brick from the fire-box surround. Lift the cast-iron fire-bed at one side and tilt it so that it can be removed through the door opening. Installing the smoke baffle Raise the folded front edge of the smoke baffle up over the side pegs. - Page 9 Top flue connection to a chimney When installing the chimney, please refer to the manufacturer’s installation instructions. Below we explain how to connect the chimney to the stove. In the bag with these installation instructions are two wing screws for the cover. Stoves are supplied from the factory ready for connecting to a top flue.
- Page 10 Fitting the soapstone surround Each tile is assigned a name and number, according to the scheme illustrated below. Certain tiles can be used in more than one position and therefore have the same number. We recommend that the tiles are fitted in the order described on the following pages. Important! Handle soapstone with care.
- Page 11 Place the stove body on the base-plate. Slide the right- and left- Secure each stone with 4 screws (M6x8). The side stone should hand side stones into place from the front. Press the stone gently fit flush with the front edge of the side piece. in towards the stove body to prevent it from being scratched by the side pieces.
- Page 12 Slide the upper front stone into place behind the upper front Secure the upper front stone with 2 concrete screws (Ø6x30). piece of the stove. Take care not to damage the edge of the front Do not tighten the screws fully until all the side stones have been piece.
- Page 13 Place the six olivine blocks on top of the fire-box as shown above. Fit the screen, top grille and top stones. If the stove has a rear flue connection, place the covering plate on top of the top grille. NOTE! If a fan is to be installed on the stove, this must be done before the lower front stone is fitted (see page 62).
-
Page 14: Installing The Fan (Optional Extra)
Installing the fan (optional extra) Screw the two rubber bushings in place on the fan bracket with two screws (M6x8). Screw the fan bracket to the fan, securing it with a nut and washer. Screw the headless shank into place in the factory-fitted nut until half of the thread has passed through. -
Page 15: Operating Instructions
Installing the sensor Place the fan assembly under the stove body be tween the two front legs. Fit the fan bracket to the front right-hand leg of the Secure the sensor’s cable socket with a screw (M6x20) on the stove as shown. Then move the fan upwards until the bottom underside of the fire-box. -
Page 16: Fitting An Extra Glass Side Panel (Optional Extra)
Fitting an extra glass side panel (optional extra) Remove the cast-iron cover strip under the side window. Unscrew the metal retaining bracket above the side window. Unscrew the metal retaining bracket that holds the rear edge of Unscrew the lugs along the top and bottom edges of the side win- the side window in place. - Page 17 3 or 4 logs (weighing 2–2.5 kg in all) on the rised chimney sweep or the relevan t authorit y. Please read embers. carefully through the separat e “Lighting and Maintenance Instructions for the Contura 400 series” before lighting the stove for the first time. Ö P Grate Rostereglage Ö...
- Page 20 NIBE AB · Box 134 · SE-285 23 · Markaryd · Sweden www.contura.eu Contura reserves the right to change dimensions and procedures described in these instructions at any 511130 IAV SE/EX -6 time without special notice. The current edition can be 2014-04-28 downloaded from www.contura.eu...
Need help?
Do you have a question about the C 480 and is the answer not in the manual?
Questions and answers