Table of Contents
Advertisement
Quick Links
Download this manual
See also:
User Manual
Advertisement
Table of Contents

Related Manuals for StarTech.com RACKCONS1708


Summary of Contents for StarTech.com RACKCONS1708
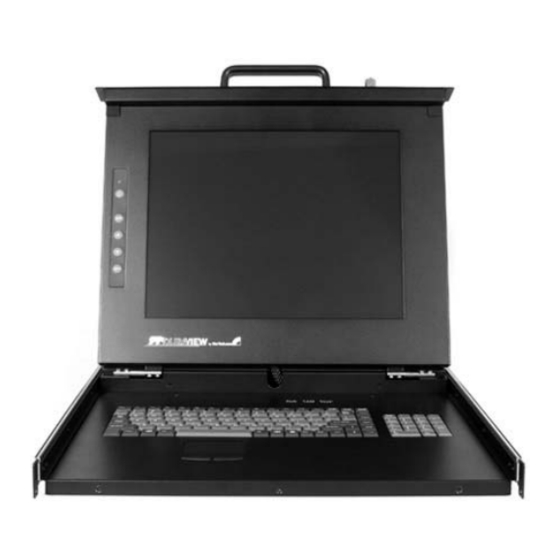
- Page 1 RACKCONS1708 RKCONS1708GB RKCONS1908GB RACKCONS1716 RKCONS1708EU RKCONS1916GB RACKCONS1908 RKCONS1716GB RKCONS1916EU RACKCONS1916 Instruction Manual Folding Rackmount Console with KVM Switch 17” LCD Rackmount Console with 8/16 Port KVM 19” LCD Rackmount Console with 8/16 Port KVM...
- Page 2 StarTech.com. Where they occur these references are for illustrative purposes only and do not represent an endorsement of a product or service by StarTech.com, or an endorsement of the product(s) to which this manual applies by the third-party company in question.
-
Page 3: Table Of Contents
Table of Contents Introduction ..............1 Packaging Contents..............1 Installation ............... 1 Hardware Installation ..............2 Connecting the console/module ..........4 Connecting computers to the module .......... 6 Cascade Configuration ..............6 Turning on the console ..............7 Configuring display settings ............7 Testing the console .............. -
Page 4: Introduction
Introduction Packaging Contents • 1 x 1U LCD Rack Console Drawer • 1 x 1U Multi-Platform KVM Module • 1 x Mounting Brackets • 1 x Mounting Rails - Set • 1 x Power Adapter Installation Hardware Kit Contents Screw kit Mounting Brackets Side Rails with front and rear brackets (2) Keys (2) -
Page 5: Hardware Installation
Rear Panel * 16-port module shown Console Front View, Open Hardware Installation Mounting the console 1. Loosen the rear screws (pre-installed in side rails) and adjust the length of the rear bracket to fit the depth of your cabinet:... - Page 6 2. Install the rails into the cabinet: 3. Tighten the screws that were loosened in Step 1: 4. Install the remaining rail, repeating Steps 1-3. 5. Slide the Module onto the Console side rails, connecting the Module and Console using the male Centronics connector provided by the Console, and the female Centronics connector provided by the Module.
-
Page 7: Connecting The Console/Module
7. Unlock the console, and pull the left and right rail-lock switches towards you simultaneously, and hold them in this position while pushing the console into the cabinet: 8. Install three screws on each side of the console: 9. Installation is now complete. Connecting the console/module To connect the KVM Console/Module to a computer, perform the following steps:... - Page 8 1. Remove the four screws from both sides of the KVM console. Be sure to retain these screws for the next installation step. 2. Attach the mounting brackets to both sides of the KVM console, using the screws removed in step 1. 3.
-
Page 9: Connecting Computers To The Module
Connecting computers to the module Attach each of your managed computers to the KVM modules PC ports using ultra-thin KVM cables. The Module is capable of using either 2-in-1 USB or 3-in-1 PS/2 cables. Use the cables to connect one of the PC ports on the back of the switch to the computer’s keyboard, mouse, and video ports. -
Page 10: Turning On The Console
Turning on the console Make sure all cables and the power cord are connected properly. Using two hands, grasp the rear of the drawer, lift the tab and pull the panel up and forward. This will disengage the momentary on/off switch and the unit should power on. -
Page 11: Testing The Console
Whenever you change the resolution, color, or refresh rate, the image size, position, or shape may change. This behavior is normal. You can readjust the image using the monitor on-screen controls. For more information on the monitor on-screen controls, refer to Panel controls and OSD functions. -
Page 12: Panel Controls And Osd Functions
Panel controls and OSD functions The following controls are located on the left side of the console monitor: Controls Descriptions Soft power on/off. Adjacent LED is lit when on. Auto-synchronize and scale down display to any valid factory preset Auto timings. - Page 13 Contrast 1. Press the Menu button. 2. Use the Down and Up buttons to scroll to Contrast. 3. Press the Menu button to enter. 4. Use the Down and Up buttons to adjust the contrast of the display. 5. Press the Menu button to save your selection. Color 1.
- Page 14 Icon Description Image Pos To adjust the position of the image OSD Pos To adjust the position of the OSD Return To exit and return to the previous page 4. Use the Down and Up buttons to scroll. 5. Press the Menu button to save your selection. Language 1.
-
Page 15: Module Operation
Exit To exit the menu, scroll to Exit and press the Menu button. Power Indicator Light Color Status Green Standby Suspend Module operation OSD Selection A computer may be selected by issuing hot-key commands or by activating the OSD window. The Auto-Scan function automatically scrolls through your connected computers. - Page 16 By hitting the left <CTRL> key twice within two seconds, you may see the Hotkey Menu (if it is enabled as an OSD option). Or, by hitting the left <CTRL> key three times within two seconds, you will see a KVM MENU screen (below) showing a list of the computers with corresponding channel addresses, names and status.
- Page 17 Function key <F2> - Use this key to switch the eye mark ( ) of a computer on or off. First, use the < > and < > arrow keys to high- light it, then press <F2> to switch its eye mark on or off. If Scan Type reads ‘Ready PC + ‘, only the power-on and eye mark selected computers will be displayed sequentially in Scan mode.
- Page 18 Auto Scan In this mode, the Console automatically switches from one powered computer to the next, sequentially in a fixed interval. During Auto Scan mode, the OSD displays the name of the selected computer. When Auto Scan detects any keyboard or mouse activity, it suspends the scanning until activity stops;...
-
Page 19: Hot-Key Commands
Keyboard Speed The Console offers keyboard typematic settings that override similar settings in the BIOS and in Windows. Available speed options are Low, Middle, Fast and Faster as 10, 15, 20 and 30 characters/sec respectively. The non-volatile memory stores the Keyboard Speed setting. - Page 20 The short form hot-key menu can be turned on as an OSD function (<F4>: more\Hotkey Menu) every time the left <CTRL> key is pressed twice. L-CTRL: is the <CTRL> key located at the left side of the keyboard. 1~8/A~H: are the number keys ‘1’ ~ ‘8’ at the upper row of the keyboard and character keys ‘A’...
- Page 21 Manual Scan enables you to manually switch back and forth between power-on computers. Left Ctrl + left Ctrl + F2 Press < > or < > to select the previous or the next computer in sequence. Press any other key to abort the Manual Scan. * Note: Scan Type determines whether an eye-marked computer is to be displayed during Auto Scan.
-
Page 22: Specifications
Specifications RACKCONS1708/GB/EU RACKCONS1908/GB RACKCONS1716/GB RACKCONS1916/GB/EU 17” 19” Display Size 8 x DE15 female input (1708 only) 8 x DE15 female input (1908 only) 16 x DE15 female input (1716 only) 16 x DE15 female input (1916 only) 1 x VGA female output... - Page 23 RACKCONS1708/GB/EU RACKCONS1908/GB RACKCONS1716/GB RACKCONS1916/GB/EU Operating 0°C ~ 50°C (32°F ~ 122°F) Temperature Storage -20°C ~ 60°C (-4°F ~ 140°F) Temperature 10% ~ 90% RH Humidity Min/Max 504mm / 1000mm 554mm / 1000mm Mounting (19.84in / 39.37in) (21.8in / 39.37in) Depth...
-
Page 24: Technical Support
Limitation of Liability In no event shall the liability of StarTech.com Ltd. and StarTech.com USA LLP (or their officers, directors, employees or agents) for any damages (whether direct or indirect, special, punitive, incidental, consequential, or otherwise), loss of profits, loss of business, or any pecuniary loss, arising out of or related to the use of the product exceed the actual price paid for the product. - Page 25 StarTech.com has been making “hard-to-find easy” since 1985, providing high quality solutions to a diverse IT and A/V customer base that spans many channels, including government, education and industrial facilities to name just a few. We offer an unmatched selection of computer parts, cables, A/V products, KVM and Serv-...
Need help?
Do you have a question about the RACKCONS1708 and is the answer not in the manual?
Questions and answers