
Related Manuals for StarTech.com DuraView RACKCONS1501


Summary of Contents for StarTech.com DuraView RACKCONS1501
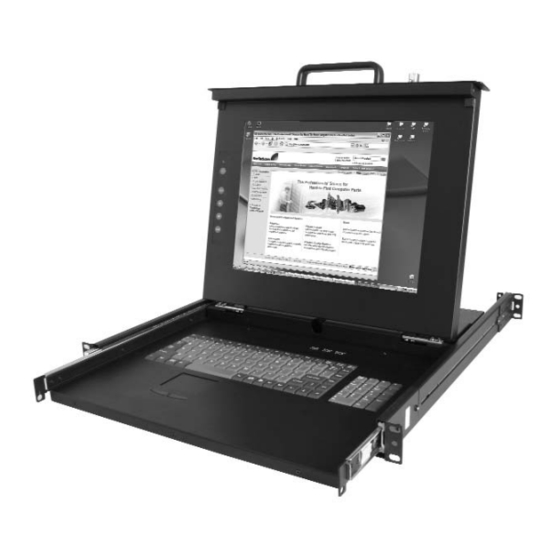
- Page 1 Folding Rackmount Console 15” Folding LCD Rackmount Console 17” Folding LCD Rackmount Console 19” Folding LCD Rackmount Console RACKCONS1501 Instruction Manual RACKCONS1701 RACKCONS1901 Actual product may vary from photo...
- Page 2 StarTech.com. Where they occur these references are for illustrative purposes only and do not represent an endorsement of a product or service by StarTech.com, or an endorsement of the product(s) to which this manual applies by the third-party company in question.
-
Page 3: Table Of Contents
T T a a b b l l e e o o f f C C o o n n t t e e n n t t s s Introduction ........... . .1 Features . -
Page 4: Introduction
I I n n t t r r o o d d u u c c t t i i o o n n Thank you for purchasing a StarTech.com 1U LCD rackmount console. This product allows you to manage one or more rack-mounted computers using an integrated keyboard, mouse, and TFT screen that slides into a compact 1U of rack space when not in use. -
Page 5: Installation
Instruction Manual I I n n s s t t a a l l l l a a t t i i o o n n Hardware kit contents Screw kit Used to attach Rail Mount to Console Side Rails with front and rear brackets (2) Keys (2) body) Mounting the console... - Page 6 3. Tighten the screws that were loosened in Step 1: 4. Install the remaining rail, repeating Steps 1-3. 5. Gently, but firmly insert the console into the left and right rails: 6. Unlock the console, and pull the left and right rail-lock switches towards you simultaneously, and hold them in this position while pushing the console into the cabinet: Instruction Manual...
-
Page 7: Connecting The Console
7. Install three screws on each side of the console: 8. Installation is now complete: Connecting the console To connect an LCD console to a computer, perform the following steps: 1. Turn off your computer. 2. Insert the video (VGA) connector of the KVM cable into the video card connector on the rear panel of your computer. -
Page 8: Turning On The Console
This will disengage the momentary on/off switch and the unit should power on. The LED located to the left of the monitor panel should turn from orange to green, verifying that the unit is operational. -
Page 9: Panel Controls And Osd Functions
Note: If the unit does not power up when the panel is pulled up, try pushing the soft power on/off button on the left side of the monitor panel to power up the unit. Note: You can adjust the horizontal and vertical position, contrast, and brightness to better suit your video card and your personal preference. - Page 10 Brightness 1. Press the Menu button. 2. Use the Down and Up buttons to scroll to Brightness. 3. Press the Menu button to enter. 4. Use the Down and Up buttons to adjust the brightness of the display. 5. Press the Menu button to save your selection. Contrast 1.
- Page 11 Position 1. Press the Menu button. 2. Use the Down and Up buttons to scroll. 3. Highlight Position and press the Menu button to enter, which will launch the following screen: Icon Description Image Pos To adjust the position of the image OSD Pos To adjust the position of the OSD Return To exit and return to the previous page...
-
Page 12: Specifications
Power Indicator Light Color Status GREEN STANDBY SUSPEND S S p p e e c c i i f f i i c c a a t t i i o o n n s s RACKCONS1501 ” Display Size Panel Type Active Matrix TFT LCD Resolution... -
Page 13: Technical Support
Limitation of Liability In no event shall the liability of StarTech.com Ltd. and StarTech.com USA LLP (or their officers, directors, employees or agents) for any damages (whether direct or indirect,... - Page 14 Visit www.startech.com for complete information about all our products and to access exclusive interactive tools such as the Parts Finder and the KVM Reference Guide. StarTech.com makes it easy to complete almost any IT solution. Find out for yourself why our products lead the industry in performance, support, and value.
Need help?
Do you have a question about the DuraView RACKCONS1501 and is the answer not in the manual?
Questions and answers