Table of Contents
Advertisement
Quick Links
TPC-1000
Operation Guide for Print&Cut
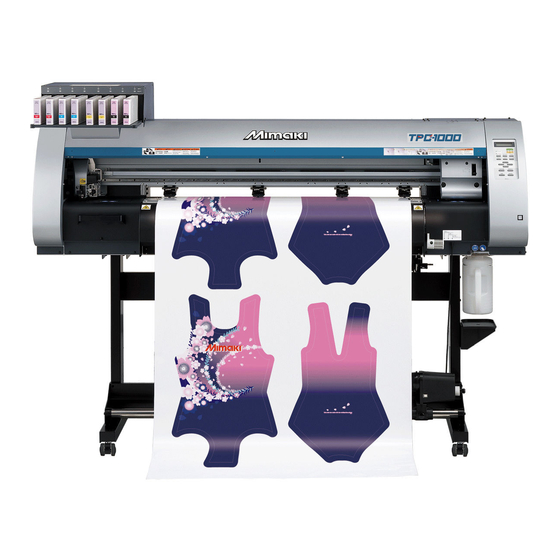
Thank you for purchasing our printer cutter TPC-1000.
Combining Printer cutter TPC-1000 with cutting software [FineCut] or [SimpleStudio] or Software RIP [Raster-
Link], you can create a seal or a sticker easily.
First, confirm the following items:
Before creating a seal or a sticker, the preparation for TPC-1000 and the application to be used is required.
First, prepare the followings:
About system configuration (P. 2)
The explanation of the system configuration to Print&Cut is described.
Prepare TPC-1000 (P. 3)
The explanation of the preparation for TPC-1000 such as the way of turning on the power supply, setting
method of a medium, etc. is provided.
Prepare the application (P. 7)
The explanation of the application to be used is provided.
For the installation of the application software, refer to each Operation Manual.
Let's create a seal/a sticker.
If TPC-1000 and the application to be used are prepared, create a seal by using sample images included in
the attached CD.
When using Illustrator (FineCut) (P. 11)
The procedure to create a seal or a sticker using [FineCut], the plug-in software of Illustrator is provided.
When using CorelDRAW (FineCut) (P. 13)
The procedure to create a seal or a sticker using [FineCut], the plug-in software of CoreIDRAW is provided.
When using SimpleStudio (P. 15)
The procedure to create a seal or a sticker using SimpleStudio is provided.
Print&Cut in the attached RasterLink (P. 19)
Advertisement
Table of Contents

Related Manuals for MIMAKI TPC-1000


Summary of Contents for MIMAKI TPC-1000
- Page 1 Link], you can create a seal or a sticker easily. First, confirm the following items: Before creating a seal or a sticker, the preparation for TPC-1000 and the application to be used is required. First, prepare the followings: About system configuration (P. 2) The explanation of the system configuration to Print&Cut is described.
-
Page 2: First, Confirm The Following Items
First, confirm the following items: About system configuration Print data and cut data created in Illustrator (FineCut) and CorelDRAW (FineCut) or SimpleStudio will be sent to the attached RasterLink and output from it. The example of the system configuration when one PC is used Data created in Illustrator (FineCut) and CorelDRAW (FineCut) or SimpleStudio will be output from the attached RasterLink. - Page 3 Prepare TPC-1000 Following the procedures below, prepare TPC-1000. Connect a PC in which the attached RasterLink is installed with TPC-1000. Connect a PC in which the attached USB cable RasterLink is installed with TPC-1000. • For details, refer to P.1-12 to 13 of TPC-1000 Operation Manual.
- Page 4 Adjust the Height-adjusting lever depending on the medium to be used. For details, refer to P.2-16 “ For the Adjusting Leve and the Range ” of TPC-1000 Operation Manual. Height-adjusting lever (2) Adjusting position of Pinch roller :For details, refer to P.2-17 of TPC-1000 Operation Man-...
- Page 5 Set the medium. • When setting the roll medium : P.2-22 to 25 of TPC-1000 Operation Manual • When setting the leaf medium : P.2-28 to 29 of TPC-1000 Operation Manual • Moving the clamp lever downward moves the screen to the pinch roller setting screen.
- Page 6 1. When creating data with register marks, as there are some restrictions, perform it with much care. For details, refer to P.4-6 to 10 of TPC-1000 Operation Manual. 2. When using the taking-up device, weaken the torque. If the torque is too strong, the medium may not return to the register mark position when it drawn back to the cutting start position after printing in Print&Cut.
-
Page 7: Prepare The Application
(2) Is the PC in whichthe attached RasterLink is installed connected with TPC-1000? Register the printer in the attached RasterLink. • For Print&Cut in TPC-1000, the registration of the printer into the attached RasterLink is required. • If the printer has already been registered, this operation can be skipped. - Page 8 “CHAPTER 1 Installation” of FineCut Operation Manual. • “FineCut menu” is displayed automatically. If “FineCut menu” is not displayed, select [Show FineCut Menu] (select [Mimaki FineCut] for Illustrator 10 or later) from the [Window] menu in the Illustrator. Click the [Plotter/User Setup] button in FineCut menu.
- Page 9 Prepare FineCut (CorelDRAW version) Start CorelDRAW. Check if the FineCut menu is displayed. • If FineCut is installed properly, FineCut menu is displayed. • For installation, refer to “CHAPTER 1 Installation” of FineCut Operation Manual. • “FineCut Command Bars” is displayed automatically. If “FineCut Command Bars” is not displayed, select [FineCut] Command Bars from the [Tools]-[Customization] menu in the CorelDRAW.
-
Page 10: Double-Click
Prepare SimpleStudio. Check if SimpleStudio is installed. • If it is installed, the icon on the right is displayed on the PC desktop. • For installation, refer to Chapter1 of SimpleStudio Operation Manual. Double-click to start SimpleStudio. • When starting SimpleStudio for the first time after installation, operate the followings: (1) The dialog to enter the product key is displayed. -
Page 11: When Using Illustrator (Finecut)
Let's create a seal/a sticker Let's create a seal/a sticker using a sample image including in the CD of TPC-1000 Operation Manual. When using Illustrator (FineCut) • Check P. 2 to P. 7 “First, confirm the following items:” without fail before creating a seal/a sticker. - Page 12 “Rectangle Tool” of Illustrator. • When creating data with register marks, there are some restrictions. Create it referring to P4-6 to 10 of TPC-1000 Operation Manual. Click the [Register Mark Creation] button of FineCut. • The Register Mark Creation dialog is displayed.
-
Page 13: When Using Coreldraw (Finecut)
Double-click to start the attached RasterLink. • The main window of the attached RasterLink is displayed. Set the CD of TPC-1000 Operation Manual into the disk drive. Click [Print & Cut Manual / Sample data]. Double-click “sample2.cdr”. • CorelDRAW will start automatically, and “sample1.eps”... - Page 14 “Rectangle Tool” of CorelDRAW. • When creating data with register marks, there are some restrictions. Create it referring to P4-6 to 10 of TPC-1000 Operation Manual. Click the [Register Mark Creation] button of FineCut. • The Register Mark Creation dialog is displayed.
-
Page 15: When Using Simplestudio
Double-click to start the attached RasterLink. • The main window of the attached RasterLink is displayed. Set the CD of TPC-1000 Operation Manual into the disk drive. Click [Print & Cut Manual / Sample data]. Copy and paste “sample3.jpg” onto the desktop. - Page 16 (2) Select [Copy] from [Change to Print Data]. Open [Print] tab and click Register Mark. • When creating data with register marks, there are some restrictions. Create it referring to P4-6 to 10 of TPC-1000 Operation Manual. - 16 -...
- Page 17 Determine the range of the register mark surrounding the quadrangle created in Step 8. Delete the quadrangle copied and pasted onto [Print] tab. • If you want to print the quadrangle, this Step is not required. Proceed to Step 13 directly. (1) Select the register mark created in Step 11.
- Page 18 Click [Output]. Select the hot folder of TPC. • From [RasterLinkPro*] - [Hot], select the folder created in P. 7 “Prepare the attached Raster- Link.”. Click [OK]. • Print data and cut data will be sent to the attached RasterLink. •...
- Page 19 (1) Click [Image Edit] tab and operate copy etc. (2) Click [Print Condition] tab and select the profile suited to ink set in TPC-1000. (3) Click [Cut Condition] tab and perform the required setting when cutting a seal.
- Page 20 (1) Right-click the data to Print&Cut. (2) Select [Cut] - [Cut after Immediate Print]. • When changing the medium in TPC-1000, perform the followings: 1. Select “TPC-01” tab on the main window. 2. Select [Media] tab and click [Update to Current Status].
- Page 21 - 21 -...
- Page 22 D201916-10-30092009 © MIMAKI ENGINEERING CO., LTD.2009...
Need help?
Do you have a question about the TPC-1000 and is the answer not in the manual?
Questions and answers