
Related Manuals for MIMAKI CG-60st


Summary of Contents for MIMAKI CG-60st
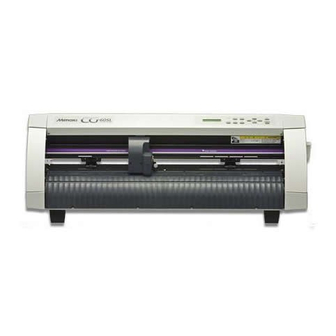
- Page 1 CUTTING PLOTTER OPERATION MANUAL MIMAKI ENGINEERING CO., LTD. TKB Gotenyama Building, 5-9-41, Kitashinagawa, Shinagawa-ku, Tokyo 141-0001, Japan Phone: +81-3-5420-8671 Fax: +81-3-5420-8687 URL: http: // www.mimaki. co. jp D200417...
-
Page 2: Foreword
Thank you for purchasing a MIMAKI CG-60st model of cutting plotter. This Operation Manual describes how to handle and operate the CG-60st model of cutting plotter (hereinafter called the "Device"). Please read and fully understand this Operation Manual before putting the machine into service. It is also necessary to keep this Operation Manual on hand. -
Page 3: Table Of Contents
How to use the operation manual Signs and symbols For the purpose of this Operation Manual, the below-stated signs are attached to important items and helpful descriptions to be remembered to prevent possible accidents and troubles and to make the most out of the device. This represents a caution. -
Page 4: Checking The Accessories
Checking the accessories The articles illustrated below are supplied with your device as accessories. Check them up for correct quantities and appearance. If you should find any fault, please contact your distributor. Water-ink ball-point pen Main unit Cutter holder 1piece Pen adapter, 1 piece Cap, 1 piece 1piece... -
Page 5: Rear Of The Main Unit
Rear of the main unit Sheet set lever Tilting the lever away from you lowers the pinch rollers to retain the sheet. Roll bar A roll sheet is placed on the two roll bars. Power switch Roll holder It turn on/off the power. Put roll-sheet from both left and right side. -
Page 6: Operation Panel
OPERATION PANEL Configuration of the operation panel is as shown below. POWER FEED FUNCTION SPEED PRESS OFFSET ENTER REMOTE TOOL SHEET SET 1. Display panel End key The display panel indicates tool conditions such as speed, It is used to cancel the value is the last input. pressure and offset, tool coordinates, functions and error mes- sages. -
Page 7: Basic Operation
Explanation is made according to the flow of basic operation up to the point where plotting is Basic operation generated From box opening to installation Open the carton box and check accessory items. Open the carton box, and make sure that all accessory items are included. Refer to "Confirmation of accessory items (See page 4)"... -
Page 8: Setting Communication Conditions [Interface]
Setting communication conditions [INTERFACE] In order to generate plotting correctly based on the data received from the host computer, communication interface conditions of your host computer and this equipment must be matched. 2 types of interface connectors as described below are used. •RS-232C compatible interface •8 bit parallel interface (Centronics compatible) If you are using RS-232C. -
Page 9: Operation Modes
Operation modes The device operates under three different operation modes as shown below. Sheet detection REMOTE Not ready The power is Local mode Remote mode mode turned on. SHEET SET Not-ready mode When the power is turned on, the device enters the not-ready mode and stays there until a sheet of media is detected. The keys other than the keys are effective. -
Page 10: Attaching A Tool
Attaching a tool The below-stated tools can be used with the device. • Cutter • Ball-point pen on the market. (8-9mm diameter) • Ball-point pen for plotter. (separately sold) Refer to "Adjusting the blade tip and the blade of cutter (--->P.29) for the cutter blade adjustment and blade replacement. Put a cutter in the tool holder. -
Page 11: Loading A Sheet Of Media
Loading a sheet of media Loading a sheet of media Sheet width Either a leaf sheet or a roll sheet can be loaded on the device. inch The pinch rollers and grid rollers hold the sheet in position. Leaf 50 to 711 mm Specify the location of the pinch rollers to match the sheet to be Roll sheet 50 to 670 mm... -
Page 12: Loading A Roll Sheet
Loading a roll sheet When roll sheet is used on this equipment, attach a roll stay. Regarding the attachment of roll stay, refer to "From box opening to installa- tion. (--->P.7)". If roll paper is attached for the first time, start from step 2, and when replacing the roll sheet, start from step 1. Press key, and raise the sheet set lever. -
Page 13: Loading A Leaf Sheet
Loading a leaf sheet When setting a leaf sheet for the first time, start from step 2, and when replacing the sheet, start from step 1. Press key, and raise the sheet set lever. Replace the leaf SHEET SET sheet. SHEET SET Replace a leaf sheet. -
Page 14: Tool Conditions Setting
Tool conditions SETTING Three different tool conditions are to be set such as cutting conditions and plotting conditions. Specify “SPEED”, “PRESS” and “OFFSET” settings that suit the tool to be used. To set tool conditions, press the key under the local mode, select tool condition with key and input settings. -
Page 15: Setting An Origin
Put the machine into local By pressing the CUT1 10 120 0.30 CUT1 20 050 0.30 mode. key, the PRESS can be changed. Press the key. TOOL CUT1 20 050 0.30 Press the key, the ENTER CUT1 10 120 0.30 The cursor will flash on SPEED. -
Page 16: Test Cutting
Test cutting Before starting to cut. Before starting to cut, check the following points. • Tool is attached correctly. Screw of the tool holder is firmly tightened. • There is a sheet, and sheet lever is pulled down toward you. Pinch roller is down. •... -
Page 17: Starting Cutting (Plotting)
Starting cutting (plotting) Start cutting after installation of tool and sheet, and tool condition setting. After the set of the origin, press the key. REMOTE CUT1 ** REMOTE ** The display on the LCD will change over to the remote mode. Send data from the host computer to the device. -
Page 18: Operation Of Keys Corresponding To The Functions
Operation of keys corresponding to the functions In the function menu flow chart section, major functions of basic operation and applied functions are explained with a mark attached. Regarding the marked function, see the referenced page on the table of functional explanations. Furthermore, see "Listing of functions (--->P.20~)"... - Page 19 •What is "setting function"? Setting function is used for setting to match the specifications on the host computer side, or for settings related to the plotter operation. The content of the setting will remain stored even if the power is shut off. BAUD RATE :1200,4800,9600,19200,38400(bps) DATA ADJ.:7,8(bit) Interface...
-
Page 20: Listing Of Functions
Listing of functions The device is provided with the following functions. As for the items with a mark, refer to the description following the table. Functions invoked with the jog keys (arrow keys) The jog function is used to move the top end of a tool to a given location to set coordinates of the plotter. Item Description of function Reference page... - Page 21 Data clear [DATA CLEAR] The device terminates cutting of the current data, and starts cutting of new data. If you want to stop cutting of the current data before the device completes it, you have to clear the data received. •...
- Page 22 Cutting area Press key to REMOTE CUT1 20 050 0.30 An area in which the device performs cutting is specified. The area switch to local mode. that has a diagonal line extending from the origin and a given UL Press either one of the (upper left) point is the effective cutting area.
- Page 23 No. of copies [No. COPIES] Send the data to be CUT1 20 050 0.30 copied from the This function is used to perform cutting of the received data on two or more sheets. computer, and perform The device stores the received data in the receiver buffer to normal cutting.
- Page 24 Distance compensation [DIST. COMP] If the data transmitted by the computer and the length of data actually plotted are compared, there may be some differences (when the sheet thickness is changed, in particular). Calculate the distance for correcting the difference, then set that correction. (See next page for the calculation method of correction value.) Press the key to...
- Page 25 Compensation value Find compensation values referring to the description given below. Compensation value = Measurement of the OFF line – Reference length input Example) Reference length input = 1000 mm Coompensation rate Measurement of the OFF line = 999.0 mm 1.00000 (1000mm+0.0mm) Reference line...
- Page 26 Division cut [DIVISION CUT] In the case where the data on cutting exceeds the sheet width, the device is able to cut the data with divided appropriately. In the case where the rotating function is set to the ON state, the result will be as illustrated below. •...
-
Page 27: Before Taking A Phenomenon As A Trouble
Before taking a phenomenon as a trouble Take appropriate remedies referring to the phenomena described below. The device cannot detect a sheet. [** NO SHEET **] Slippage of sheet arises in cutting. Cause 1 : A transparent sheet or a sheet of which wrong Cause 1 : The pinch rollers and grid rollers fail to securely side is black is used. -
Page 28: Troubles For Which Error Messages Are Given On The Lcd
Troubles for which error messages are GIVEN ON THE LCD If something is wrong with the device, a corresponding error message is given on the LCD. Take an appropriate corrective measure according to the remedies given in the table below. Message Cause Action... -
Page 29: Displays Under The Remote Mode
Displays under the remote mode The messages given below appear under the remote mode. They do not indicate errors but require an appropriate action. Message Cause Action The device is in the remote mode. A press on the key will cause the device REMOTE CUT1 * REMOTE * to enter the local mode. -
Page 30: Adjusting The Blade Tip And The Brade Of Cutter
New blades (low-pressure blade set for PVC sheet: Model SPB-0030) are available from your distributor MIMAKI sales office. • The cutter blade is sharp. Keep your fingers away from the blade. -
Page 31: Specifications Of The Main Unit
SPECIFICATIONS OF THE MAIN UNIT Item CG-60ST Acceptable sheet width 50 to 711mm (Roll sheet : 50 to 670mm) Effective cutting area (note 1) 586mm x 51 m (Normal ) 606 mm x 51 m (Expand) Maximum cutting speed 50 cm/s... - Page 32 Operation of this equipment in a residential area is likely to cause harmful interference in which cause the user will be required to correct the interference at his own expense. Printed in Japan D200417-1.50-23042004 © MIMAKI ENGINEERING CO., LTD. 2004...
Need help?
Do you have a question about the CG-60st and is the answer not in the manual?
Questions and answers