Table of Contents
Advertisement
Quick Links
Advertisement
Table of Contents

Related Manuals for GCC Technologies Jaguar IV Series


Summary of Contents for GCC Technologies Jaguar IV Series
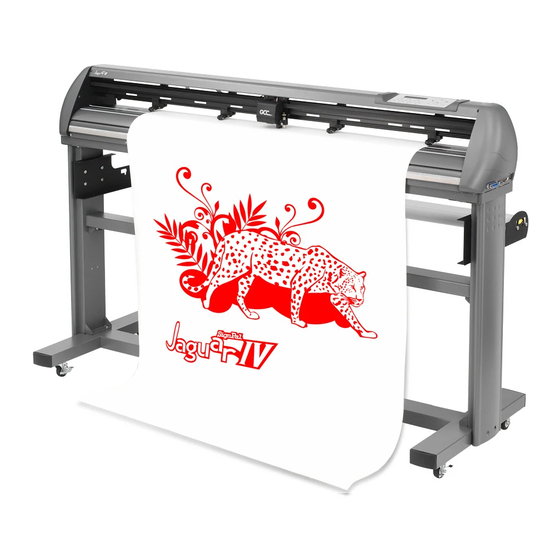
- Page 1 Jaguar IV Series User Manual http://www.GCCworld.com V.14 2014 Mar.
- Page 2 NOTICE GCC reserves the right to modify the information contained in this user manual at any time without prior notice; un-authorized modification, copying distribution or display is prohibited. All comments, queries or suggestions concerning this manual please consult with your local dealer. V.14 2014 Mar.
-
Page 3: Important Information
Jaguar IV User Manual Important Information Thank you for purchasing the GCC Jaguar IV Cutting Plotter. Before you use the cutting plotter, please make sure that you have read the safety precautions and instructions below. Caution SAFETY PRECAUTIONS! For safety concern, please always hold the cutter firmly from the bottom while moving it. - Page 4 Jaguar IV User Manual Warning Never press the top release grip and pull the bottom release grip at the same time as the pictures shown below: ╳ ╳ ╳ ╳ (INCORRECT) O (CORRECT) Press down Press down Stop bar DISABLE Note: In case the grips clipped together due to your...
-
Page 5: Table Of Contents
Jaguar IV User Manual Important Information 1. General Information Introduction Package Items Product Features Appearance of Jaguar IV 1.4.1 The Front View 1.4.2 The Back View 1.4.3 The Whole View 1.4.4 The Left-hand Side 1.4.5 The Right-hand Side 2. Installation Precaution Stand &... - Page 6 Jaguar IV User Manual 5.2.1 Media Calibration 5.2.2 AAS Calibration 5.2.3 AAS II on Jaguar IV AAS Offset Test Registration Mark Offset Range Contour Cutting Tips for AAS 6. Maintenance Cleaning the cutting Plotter Cleaning the Grid Drum Cleaning the Pinch Rollers 7.
-
Page 7: General Information
Jaguar IV User Manual 1. General Information Introduction Jaguar IV series cutting plotters have been designed to produce computer-generated images or perform contour cutting on sheets or rolls of vinyl media. This manual covers the following models of Jaguar IV series cutting plotters: ‧J4-61... -
Page 8: Product Features
1 piece of Tweezers 1 piece of Promise Card Product Features The following are the main features of the Jaguar IV series cutting plotters: ‧ Dual-port connectivity provides you with greater flexibility ‧ Up to 600-gram cutting force ‧ Up to 60-inch/per second cutting speed ‧... -
Page 9: Appearance Of Jaguar
Jaguar IV User Manual Appearance of Jaguar IV 1.4.1 The Front View (Figure 1-1) Grid Drums move – the media back and forth during operation. Tool Carriage performs the – cutting with the installed blade and pen with AAS module. Control panel consists of 14 –... -
Page 10: The Whole View
Jaguar IV User Manual The Whole View of Jaguar IV (Figure 1-3) 1.4.3 Roll Holder – holds and supplies the roll media for cutting. Roll Holder Guide Bushes serve to – keep the roll media in place when media is pulled from the roll. -
Page 11: The Left-Hand Side
Jaguar IV User Manual 1.4 4 The Left-hand Side (Figure 1-4) Power Switch – On when switches to [I]; Off to [O] Figure 1-4 Fuse – 3 Amp. AC Power Connector – used to insert the AC power cord. 1.4.5 The Right-hand Side (Figure 1-5) Serial Interface Connector (RS232C) –... -
Page 12: Installation
Jaguar IV User Manual 2. Installation Precaution Please read below information carefully before you start installation. Notice 1 Make sure the power switch is off before installing the cutting plotter. Carefully handle the cutter to prevent any injuries. Notice 2 Choosing a proper place before setting up the cutting plotter Before installing your cutting plotter, select a suitable location, which meets the following conditions. -
Page 13: Stand & Flexible Media Support System
Jaguar IV User Manual 2.2 Stand & Flexible Media Support System (for J4-101S/132S/183S) Step 1 Please examine supplied items in the accessory box of stand carton: 2 pieces of base beams 2 pieces of side beams 1 piece of stand beam 20 pieces of M6 screws 1 piece of M5 L-shape hexagon screw driver 1 piece of Installation Guide for Stand Set... - Page 14 Jaguar IV User Manual Step 3 Place the stand beam upright on the T-stand and follow number to assemble. (See Figure 2.2-4 & 2.2-5) T-Stand Stand beam Figure 2.2-4 Figure 2.2-5 Step 4 Position the stand beam perpendicularly to part and put the screws into the holes and tighten them as Figure 2.2-5.
- Page 15 Jaguar IV User Manual Step 5 Remove the cutting plotter from the carton. Position your stand under the plotter, and then insert the screws into the holes on plotter’s bottom and tighten them up as shown in Figure 2.2-6. Screws Figure 2.2-6 Installation...
- Page 16 Jaguar IV User Manual Step 6 Insert the roll holder support with the screws into the holes of the stand, and then tighten them up as shown in . You could decide roll holder support’s position by inserting into Figure 2.2-7 different holes.
- Page 17 Jaguar IV User Manual Step 8 Turn the screw counter-clockwisely for around three times after unpacking roll holder 2 ( Figure 2.2-9) Figure 2.2-9 Step 9 Insert the end of the roll holder without the damper into the left roll holder support and then insert the end of the roll holder with the damper into the right roll holder support.
- Page 18 Jaguar IV User Manual Step 10 Tighten the screw on the damper until it is securely attached to the right roll holder support Figure 2.2-11) Figure 2.2-11 Step 11 Lastly, the complete picture will be shown like below. ( Figure 2.2-12 Figure 2.2-12 Installation...
-
Page 19: Desktop Flexible Media Support System
Jaguar IV User Manual Desktop Flexible Media Support System (For J4-61 only) Step 1 Please examine the following items in stand carton’s accessory box: 1 set of Roll Media Flange (2 pieces) 1 set of Roll Holder (2 pieces) 1 set of Roll Holder Guide Bushes (4 pieces) 1 set of Roll Holder Support (2 pieces) 1 set of Desktop Support Bracket (2 pieces) 4 pieces of Plastic Foot... - Page 20 Jaguar IV User Manual Step 4 Put the bottom of machine in lateral, and position the Roll Holder Assembly beside the bottom of the machine. Then, insert the M6 screws into the holes of Roll Holder support assembly and tighten them with M6 L-shape screwdriver. Like Figure 2.3-3. M6 screws Screw holes Roll Holder Assembly...
-
Page 21: Instruction Of Damper Roller
Jaguar IV User Manual 2.4 Instruction of Damper Roller Turn the wheel as instructed below to adjust damping. The bigger the number is, the stronger the damping. The volume symbol sticker indicates the damping level (Figure 2.3-6, 2.3-7). Figure 2.3-6 Figure 2.3-7 Installation 2-10... -
Page 22: Blade Installation
Jaguar IV User Manual 2.5 Blade Installation Figure 2.5-1 is the illustrator of the blade holder. Insert a blade into the bottom of the blade holder and remove the blade by pushing the pin. Make sure that your fingers are away from the blade tip. - Page 23 Jaguar IV User Manual Step 4 Insert the blade holder into tool carriage. Please note the outward ring of the holder must put into the grooves of carriage firmly (see Figure 2.5-5), then fasten the case (Figure 2.5-6). Figure 2.5-5 Figure 2.5-6 Step 5 Use the reversing steps to remove the blade holder.
-
Page 24: Automatic Blade Length Detection
Jaguar IV User Manual 2.6 Automatic Blade Length Detection Figure 2.6-1 is the new blade holder with a scale and the carriage with a mark. This blade holder detects blade length automatically and shows how the knob needs to be turned on the LCM. Scale Roll holder 2 Mark... - Page 25 Jaguar IV User Manual EG, Turn CW 5 is telling you that you should turn the knob for 5 units clock-wisely (Figure 2.6-3, Figure 2-.6-4). Figure 2.6-3 Figure 2.6-4 5. The screen will show "Adjustment completes" when the value on the screen is 0, the blade length is perfect and no more adjustment needs to be made.
-
Page 26: Cable Connections
Jaguar IV User Manual 2.7 Cable Connection The cutting plotter communicates with a computer through a USB (Universal Serial Bus) or a Serial port (RS-232C). This chapter shows you how to connect the cutting plotter to a host computer and how to set up the computer/cutting plotter interconnection. - Page 27 Jaguar IV User Manual Win 8/ 7/ Vista/ XP Driver (Automatic Detection) Step 1: Connecting your GCC cutter 1. Turn on the machine. 2. Connect the USB connector to the machine and then USB driver will installed automatically. It will take a few minutes to find the device. Please DO NOT disconnect the USB cable until the installation has completed.
- Page 28 Jaguar IV User Manual (3) Click “Next” to start the driver installation. (4) The installation will take a few minutes to complete and you will see a message below and click on “OK” upon completion. Enjoy your GCC cutter! Note: (1) If the driver is being installed for a second time, the user will be prompted as to whether a second copy of the driver installation is required.
- Page 29 Jaguar IV User Manual (2) If the user selects yes, a second copy of the driver will be installed. For users who have upgraded Adobe Illustrator or CorelDRAW, please go to the AAS Installer page in the Properties window and click Install to access the latest version of GCC AAS Plugin.
-
Page 30: Driver Un-Installation
Jaguar IV User Manual 2.7.2 Driver Un-installation You have to remove previous version driver installed on your PC system completely before you can install the latest version successfully. Please refer to below steps. 1. Right click on the printer to remove the printer from system Printer page. 2. - Page 31 Jaguar IV User Manual 3. Select “Driver” page Installation 2-20...
-
Page 32: Data Transmitting
Jaguar IV User Manual Select the model and click on “Remove”. Click on “OK” Click on “Yes” The driver installed on PC is completely removed. 2.7.3 RS-232 Interface Connecting to the RS-232 (Serial) Port 1. For IBM PC, PS/2 users or compatibles, connect the RS-232C cable to the serial connector of the assigned serial port (COM1 or COM2) of your host computer. -
Page 33: Printer Sever Shared Setting
Jaguar IV User Manual Option 2: Most cutting software packages are able to emulate HP-GL or HP-GL/2 commands. As long as the file is HP-GL or HP-GL/2 format, the cutting plotter can output the data precisely. 2.7.5 Printer Sever Shared Setting In “A-PC”, set the printer driver as a shared printer, then use B-PC to connect A-PC’s printer driver via internet. - Page 34 Jaguar IV User Manual Step 2. Click “Advanced” tab, then choose “Print directly to the printer” option. Step 3. Send a job to the machine to check if A-PC is connected to the machine. Try to send a job to check if the port is working.
- Page 35 Jaguar IV User Manual Step 4. Activate A-PC’s Printer Driver from B-PC’s Network. Step 5. Right-click on printer icon, and select “Connect” to connect A-PC’s printer. Installation 2-24...
-
Page 36: The Control Panel
DATA CLEAR CUT TEST PAUSE / RESUME ENTER LINE < LCD Control Panel on Jaguar IV series > Function LCD Screen To display functions and error messages. Power LED To indicate the power status ( light up: power on; light off: power off ) 4 Arrow Keys To move position, select function, or change setting. -
Page 37: Menu In On-Line Mode
Jaguar IV User Manual Menu in On-line Mode Power On Jaguar IV in processing GCC Cutter LCM Version- - - Jaguar IV Firmware: Copyright: Place Media And Then Lower Down The Lever Roll Edge Single to select Sizing Media Width Lever Up To Abort Sizing Media Length Lever Up To Abort... -
Page 38: Menu In Off-Line Mode
Jaguar IV User Manual Menu in Off-line Mode Press [ON/OFF LINE] to switch to the offline mode Offline For System Setup Force:80 gf [ FORCE] 5~600 with an increment of 5(gram force) OK:ENTER [ OFFSET ] Offset: 0.275 mm 0.000~1.000 with an increment of 0.025(mm) OK:ENTER [ DATA CLEAR ] Clear Data Memory... - Page 39 Jaguar IV User Manual The Control Panel...
-
Page 40: Menu Items
Jaguar IV User Manual 3.4 Menu Items Below describes the functions of menu items Menu or Key Function Setting Default --- Media sizing --- Roll To measure media width. Maximum Media Length 150 meters Edge To measure media width and pull the media back till the front Maximum Media paper sensor open. - Page 41 Jaguar IV User Manual [ CUT TEST ] Square Cut To perform a cutting test at present blade position. For more information, please refer to “4.3 Adjusting the Cutting Force and Offset” to adjust blade force and cutting speed. To repeat AAS jobs automatically without having to operate Repeat AAS on the computer side.
- Page 42 Jaguar IV User Manual Over Cut To generate an overcut to facilitate weeding. 0.00mm-1.00mm 0.00mm 0.05mm/per step Set Tangential To enable the emulated tangential-cutting mode for thicker Enable Mode media types and small letter cuts. Note: while the Offset value setting at 0.000 mm, “Set Tangential Mode”...
- Page 43 Jaguar IV User Manual 9600, o, 8, 1, p 9600pbs, 8 Bits with ODD Parity 9600, e, 8, 1, p 9600pbs, 8 Bits with EVEN Parity 19200, n, 7, 1, p 19200pbs, 7 Bits with NO Parity 19200, o, 7, 1, p 19200pbs, 7 Bits with ODD Parity 19200, e, 7, 1, p 19200pbs, 7 Bits with EVEN Parity...
-
Page 44: Operation
Jaguar IV User Manual 4. Operation Media Loading 4.1.1 Loading the Sheet Media To load the media properly, please follow the procedures listed below: Step 1 Use the lever on the upper right side of the cutting plotter to raise or lower down pinch rollers. Pull the lever forward until it makes a clicking sound then the pinch rollers are raised ( Figure Lever... - Page 45 Jaguar IV User Manual Step 3 Then move the pinch rollers manually to the proper position. Be sure the pinch rollers must be positioned above the grid drum. The white marks on the top trail will remind you where the grid drums are (Figure 4-3).
-
Page 46: Loading The Roll Media
Jaguar IV User Manual Note: Please pull up the bottom of all pinch rollers (Figure 4-5) before the lever is pushed backwards to ensure accurate media width detection. Pull up bottom to release grip ENABLE Figure 4-5 4.1.2 Loading the Roll Media Step 1 Put the roll holder guide bushes on two roll holders (Figure 4-6). - Page 47 Jaguar IV User Manual Step 2 -- Option A (Use the media flanges) (Recommended) Insert a roll media flange at the end of each roll media and tighten the thumbscrew until the roll media is firmly gripped (see Figure 4-7). Then put the roll media on the roll holders.
- Page 48 Jaguar IV User Manual Step 3 Load the media on the platen. Please refer to “4.1.1 Loading the sheet media”. After loading the roll media, flatten the media on the platen and hold the front edge of the roll media firmly (Figure 4-10).
-
Page 49: Tracking Performance
Jaguar IV User Manual Tracking Performance In order to achieve the best tracking performance for a long plot, we recommend some significant media loading procedures described as follows: If the media length is less than 4 meters, leave the margin of 0.5mm—25mm in the left and right edges of the media (Figure 4-12). -
Page 50: Cutting Force And Offset Adjustment
Jaguar IV User Manual Cutting Force and Offset Adjustment Before sending your designs for cutting, you may perform a “cut test” to generate satisfactory cutting results. The “Cut Test” should be repeated until the appropriate cutting conditions for the media are discovered. After sizing the media, press [CUT TEST] button to select the “square cut”, and press [ENTER KEY] to confirm. -
Page 51: How To Cut 3Mm Letter
Jaguar IV User Manual How to Cut 3mm Letters To obtain good quality output, narrow media is recommended. However, if wide media is used, you should: Position two pinch rollers as close as possible to both edges of the cutting area. Make sure the loaded media is held flat with equal tension across the platen. -
Page 52: When Completing The Cutting Job
Jaguar IV User Manual Then turn the roll downward to make an equal tension across the media (See Figure 4-16) Make sure that the media tension is equally distributed from left to right. If the media is not tight enough against the platen, it will cause tracking problems. -
Page 53: Jaguar Iv Print Driver Setting
• SAVE: This function will save current print driver parameter settings to a file under the specified location on your computer. (Saved parameter setting files will be tagged with the Jaguar IV series extension) • LOAD: This function allows you to load previously saved print driver parameters. - Page 54 Jaguar IV User Manual Vinyl Figure 4-18 Cutting line Figure 4-19 Operation 4-11...
- Page 55 Jaguar IV User Manual To activate the Die Cut function, go to “Option”, tick “Die Cut”, and enter the amount you wish for the “Length” and “Force” of both Die Cut and Kiss Cut, then click “OK” (see figure 4-20). *Note: The length setting for the cutting line of Die Cut is in the range of 0-2000mm...
-
Page 56: Reference Parameter Setting For Different Materials
Jaguar IV User Manual 4.8 Reference Parameter setting for different materials The following reference parameter is used on GCC verified materials shown in the table. Material Wall stickers Magnets Protective tint Blade green green Blade tip length (mm) Force (g) Speed (cm/sec) Offset (mm) 0.275... -
Page 57: Automatic-Aligning System
08_A-3 CorelDraw Plug-In, 08_A-6 GreatCut, 08_A-7 Illustrator. Introduction The Jaguar IV series cutting plotters feature a standard Automatic-Aligning System (AAS II) to guarantee precise contour cutting quality by detecting the registration marks printed around the graphic. -
Page 58: Media Calibration
Jaguar IV User Manual AAS Calibrating the System The AAS system has one calibration procedures to ensure maximum accuracy of AAS operation. To operate the AAS you need to learn about the method of media feeding firstly. (Refer to 4.1 Media Loading.) 5.2.1 Media Calibration Media Calibration is to ensure the sensor being able to recognize the registration marks. -
Page 59: Aas Ii On Jaguar
Jaguar IV User Manual Margin: The distance between marks and images Range: 0mm~50mm Optimized Setting: 5mm The cutter can not detect the marks while: Cutter carriage is not located near the outside area of first mark before detecting (See the picture in page 5-7 for auto-detecting area of first mark.) Medium thickness is more than 0.8mm Transparent medium is used Non-monochrome drawing. -
Page 60: Aas Offset Test
Jaguar IV User Manual In-between distance on Y: 200-600mm, default 300mm 3. Multiple Copies The function is used to duplicate images to let you cut quantities of images at a time.The AAS II sensor will automatically scan registration marks for each individual image to ensure the contour cutting precision. - Page 61 Jaguar IV User Manual Load the graphic to Jaguar IV and sent the file to test the cutting job If there are any adjustments to be made, you can change the offset value by following the steps: ■ Measure the offset values from the printed line and the actual cutting line. ■...
-
Page 62: Registration Mark Offset Range
Jaguar IV User Manual Note: Before adjusting the AAS II settings, please proceed scaling for width and length. The blade offset value isn’t set for this test graphic, please set it according to the blade you use. If you have any question, please contact us or your local distributor for assistance. Registration Mark Offset Range Please correctly load your media (refer to the alignment ruler on the platen) to make sure the registration marks are successfully detected. - Page 63 Jaguar IV User Manual TIPS2: Create the contour in a separate layer and assign a different color for it. ■ Add registration marks around the graphic. Note: The Multiple Copies function is also available. It automatically copy the graphic and registration marks.
-
Page 64: Tips For Aas
Jaguar IV User Manual Step 3 Print the Graphics ■ Print the graphic and the marks with your printer (Scaling = 100%). ■ When printing on a roll media, make sure the orientation as following: Step 4 Load the printout onto cutter ■... -
Page 65: Maintenance
Jaguar IV User Manual 6. Maintenance This chapter explains the basic maintenance (i.e. cleaning the cutting plotter) required for the cutting plotter. Except for the procedures mentioned below, all other maintenance must be performed by a qualified service technician. Cleaning the Cutting Plotter Cleaning the machine properly and regularly will ensure optimal performance out of your machine. -
Page 66: Cleaning The Grid Drum
Jaguar IV User Manual Cleaning the Grid Drum 1. Turn off the cutting plotter, and move the tool carriage away from the area needed to be cleaned. 2. Raise the pinch rollers and move them away from the grid drum for cleaning. 3. -
Page 67: Trouble Shooting
Jaguar IV User Manual 7. Trouble Shooting This chapter is to help you correct some common problems you may come across. Prior to getting into the details of this chapter, please be sure that your application environment is compatible with the cutting plotter. Note: Before having your cutting plotter serviced, please make certain that the malfunction is in your cutting... -
Page 68: Operational Problems
Jaguar IV User Manual Operational Problems Some mechanical problems or failure during operation will cause some problems. The error messages shown on the LCM present the problem first, and followed by recommended actions. If the problem still exists after the recommended actions have been done, have your cutting plotter serviced. -
Page 69: Communication Problems
Jaguar IV User Manual Cutting Plotter/Computer Communication Problems The messages showed below present problems in relation to cutting plotter/computer communication. Is the connection cable Communication Error connected to the cutting plotter Setup: MISC. key and computer properly? Has the interface setting Refer to Chapter 2 - been done correctly? Connecting your cutting... -
Page 70: Software Problems
Jaguar IV User Manual Software Problems Check the following first: Does your software package indicate that it will work with your computer and cutting plotter? Does your software support HP-GL and HP-GL/2 drivers? (* check the configuration settings of your software.) Does the cutting plotter interface Most well known cutting softwares match the requirements of your... -
Page 71: Cutting Quality Problem
Jaguar IV User Manual Cutting Quality Problems Note: The daily maintenance of your cutting plotter is very important. Be sure to clean up the grid drum and pinch rollers regularly for better cutting accuracy and output quality. Is the blade installed correctly and the blade holder fastened securely? Refer to Chapter 2.4 Is the blade dull... -
Page 72: Jaguar Iv Specification
Jaguar IV User Manual Jaguar IV Specification Model Number J4-61 J4-101S J4-132S J4-183S Operational Method Roller-Type Max. Cutting Width 610mm (24in) 1016mm (40in) 1320mm (52in) 1830mm(72in) Max. Cutting Length 50m (164ft) Max. Media Loading Width 770mm (30.3in) 1270mm(50in) 1594mm(62.7in) 1900mm(74.8in) 50mm (1.97in) Min. - Page 73 Jaguar IV User Manual Jaguar IV_R Specification Model Number J4-61-R J4-101-R J4-132-R J4-183-R Operational Method Roller-Type Max. Cutting Width 610mm (24in) 1016mm (40in) 1320mm (52in) 1830mm(72in) Max. Cutting Length 50m (164ft) Max. Media Loading Width 770mm (30.3in) 1270mm(50in) 1594mm(62.7in) 1900mm(74.8in) 50mm (1.97in) Min.
- Page 74 Jaguar IV User Manual The above listed specification values are effective only when operated with media certified by GCC. Jaguar IV_W Specification Model Number J4-101-W J4-132-W J4-183-W Operational Method Roller-Type Max. Cutting Width 1016mm (40in) 1320mm (52in) 1830mm(72in) Max. Cutting Length 50m (164ft) Max.
- Page 75 Jaguar IV User Manual GCC reserves the right to change the specifications at any time without notice. The above listed specification values are effective only when operated with media certified by GCC. Jaguar IV Specification...
-
Page 76: Blade Specification
Jaguar IV User Manual Blade Specification For cutting thick fluorescent and reflective vinyl. Also for cutting detailed work in standard vinyl. 20200159G The blade is 45° with Red Cap(5-unit package), 0.25 mm offset For cutting reflective vinyl, cardboard, sandblast, flock, and stencil sharp edge. - Page 77 Jaguar IV User Manual About the Tool A generic term referring to the blade that cuts the sheet, the pen that does plotting, and the LED bombsight (option) used for pointing to the reference point. OFFSET is the distance that the blade tip is displaced from the centerline of the blade. Blade Central line Blade tip...
-
Page 78: Coreldraw Plug-In Instruction
Jaguar IV User Manual CorelDRAW Plug-In Instruction AASII VBA Installer is applicable for CorelDRAW Version 13, 14, 15, 16 Installation 1. Check the “AAS CorelDraw Installer” folder in Jaguar IV Installation CD, and double click the “AASIIVBAInstaller.exe” file to run the installation program. 2. -
Page 79: User Instructions
Jaguar IV User Manual User Instructions 1. Run CorelDRAW to edit your graphics and select all images at once when you wish to plot. 2. Select “Tools Visual Basic Play”. CorelDRAW Plug-In... - Page 80 Jaguar IV User Manual Visual Basic for Applications Marcos window will pop up. Select Global Macros(GCCAASII_Draw13.gms) under the “Macros in” manual, and press “Run”. 3. Click on “Apply” and select whether you would like to add the registration marks by page size or by object.
- Page 81 Jaguar IV User Manual Add Registration Mark by page size If you tick “Add Registration Mark by page size” as shown in the figure below and click “Apply”, your registration marks will be created automatically. Note: 1. The length setting will be in the range of 5-25mm according to your page size.
- Page 82 Jaguar IV User Manual Workable area It allows users to edit and cut graphics in the area outside the registration marks when adding registration marks by page. For A4 size media sheet, the workable area is 2.5mm extended from the registration mark on left and right sides and 4.5mm extended from the registration mark on top side.
- Page 83 Jaguar IV User Manual Add Registration Mark by Object If you tick “Add Registration Mark by Object”, you will be offered three options of registration marks as shown below. 4-Point Positioning Length: The length of marks Range: 5mm~50mm Optimized Setting: 25mm Thickness: The line thickness of marks Range: 1mm~2mm Optimized Setting: 1mm...
- Page 84 Jaguar IV User Manual 4-Point Positioning 4-Point Positioning Length: The length of marks Range: 5mm~50mm Optimized Setting: 25mm Thickness: The line thickness of marks Range: 1mm~2mm Optimized Setting: 1mm Margin: The distance between marks and images Range: 0mm~50mm Optimized Setting: 5mm The system will create the 4 marks as shown in the picture below.
- Page 85 Jaguar IV User Manual Note: To save your materials, in addition to amending object margins, you can also adjust the length of the registration marks (5mm minimum) when you apply 4-Point Positioning (see table 1 for suggestions based on different material sizes). The smaller the size is, the smaller the distance between the object and the registration marks is (see the figures below).
- Page 86 Jaguar IV User Manual Segmental Positioning For precise cutting quality, it is suggested to select “Segmental Positioning” when you are working on an extra long or large-sized image to increase cutting accuracy. Segmental Positioning X Step: The distance of intermediate position on the X axis Y Step: The distance of intermediate position on the Y axis Range: 200mm~600mm Optimized Setting: Less than 500mm...
- Page 87 Jaguar IV User Manual Multiple Copies It is suggested to select “Multiple Copies” when you would like to make several copies of one image on your material to increase cutting accuracy. Multiple Copies No. of X Copies: The numbers of copies on X axis No.
- Page 88 Jaguar IV User Manual Segmental Positioning will be applied to Multiple Copies when the object to be copied is of large size (with the length or width over 200mm) to increase the accuracy of registration mark detection. Segmental Positioning Please make sure you are happy with the settings for Segmental Positioning as these will be applied to the copies created.
- Page 89 Jaguar IV User Manual Contour cutting through CorelDraw Step 1: Position the paper with registration marks printed by your printer on the GCC cutter. Step 2: Select “Files Print”. Please note that if you use CorelDraw X5, you must follow the steps below. Click the “color”...
- Page 90 Jaguar IV User Manual Step 2: Go to the “Layout” page and select Bottom left corner at “Reposition images to”. Step 3: Click “Print”. CorelDRAW Plug-In...
- Page 91 Jaguar IV User Manual You can also add a Hot Icon for the AAS II Plug-in Step 1: Select “Tools Customization Commands Macros”. Step 2: Choose【GCC_CorelDraw_AASII.GCCModule.GCC_AASII】and drag it to the “commands” bar. Step 3: If you want to have a different icon, select “Tools Customization Commands Appearance”...
-
Page 92: Signpal 10.5 Instruction
Jaguar IV User Manual SignPal 10.5 Instruction The new SignPal 10.5 Software is Windows System compatible and all versions support the AAS II contour cutting function of RX, Jaguar IV, Puma III, Expert 24 LX, and Expert 52 LX cutting plotters. SignPal 10.5 Instruction Index: [1] Installing the SignPal 10.5 software [2] Set up your GCC Cutter on Production Manager... - Page 93 Jaguar IV User Manual 6. Read the Software License Agreement and select I accept the terms of the license agreement and click Next to accept. 7. If you did not have any previous versions of the software installed, skip to the next step. If you still have a previous version of the software installed, you will be prompted to overwrite the existing installation.
- Page 94 Jaguar IV User Manual A. To change the default destination folder, click Browse and choose a new destination folder. B. To check that the drive you are installing to has enough space for the installation: a. Click Disk Space. b. From the drop-down menu, select the drive you want to install to, and verify that it has enough space for the installation.
- Page 95 Jaguar IV User Manual 11. Once the installer is finished installing, the Install Manager opens. The Install Manager will automatically enable you to access the software and any optional features. 12. Click Done. SignPal 10.5 Instruction...
- Page 96 Jaguar IV User Manual 13. Check which icons and preferences you want to install: • Check Install to desktop to install a shortcut for the software on the desktop. • Check Install to startup items to install a shortcut for the software in the Startup folder of the Start menu.
- Page 97 Jaguar IV User Manual 14. Open SignPal 10.5v1 15. As you have not registered before, please check on the box at bottom to register a new account. 16. Input your personal information to complete the online registration. SignPal 10.5 Instruction...
- Page 98 Jaguar IV User Manual 17. If you have registered before, please enter your Registration code as below to open SignPal 10.5v1 software. SignPal 10.5 Instruction...
- Page 99 Jaguar IV User Manual SignPal 10.5 Instruction...
- Page 100 Jaguar IV User Manual Note: Steps 15-17 will only be compulsory for users who have never registered before. You will be prompted to the demo version registration process if the version of your dongle does not match that of the software. Do one of the following: •...
- Page 101 Jaguar IV User Manual [2] Set up your GCC Cutter on Production Manager 1. Open Production Manager 10.5v1 2. Choose and set up your GCC cutter. (Note that AAS II System only works on RX, Jaguar IV, Puma III, Expert 24 LX, and Expert 52 LX.) SignPal 10.5 Instruction...
- Page 102 Jaguar IV User Manual SignPal 10.5 Instruction...
- Page 103 Jaguar IV User Manual 3. Select File > Print Setup in SignPal Software. 4. Select the printer and paper size. SignPal 10.5 Instruction...
- Page 104 Jaguar IV User Manual -- SignPal AASII Quick Start 5. Use the Rectangle Tool to create a rectangle. SignPal 10.5 Instruction...
- Page 105 Jaguar IV User Manual 6. Select Effect > Contour Cut. Then click ‘Apply’ in DesignCentral window. SignPal 10.5 Instruction...
- Page 106 Jaguar IV User Manual 7. Apply the contour cut mark of GCC AASII by selecting Effect > Contour Cut Mark. 8. Select “GCC AASII” in SignPal DesignCentral window to create the AAS II registration marks (4-Point Positioning). Set the vales as 0.1cm or above and click ‘Apply’ in DesignCentral window.
- Page 107 Jaguar IV User Manual Segmentation” in DesignCentral window and then click ‘Apply’. 10. For ‘Multiple Copies’, this function is not available in SignPal. Currently the ‘Multiple Copies’ function is only available under CorelDraw plug-in. 11. Select File > Print to print out the image. SignPal 10.5 Instruction...
- Page 108 Jaguar IV User Manual 12. Set the Scale as 100cm =1m (100%) in Print page. 13. Load the printout vinyl on the plotter and select File > Cut Contour to send data. You can preview the job and change cutter’s parameter settings in ‘Properties’ tab of Cut Contour window.
- Page 109 Jaguar IV User Manual SignPal 10.5 Instruction...
- Page 110 Jaguar IV User Manual [3] SignPal 10.5 Feature Lists Master Expert Apprentice Text Text tool ● ● ● ● Arc Text ● ● ● Path Text ● ● ● Vertical Text ● ● ● ● Vertical Path Text ● ● ●...
- Page 111 Jaguar IV User Manual Shapes Rectangle ● ● ● ● Oval ● ● ● ● Polygon ● ● Starburst ● ● ● Arrow ● Border tool ● ● Registration mark tool ● ● ● ● Eyedropper ● Measure tool ● ●...
- Page 112 Jaguar IV User Manual Remove tiny objects ● ● ● Working with Files Job Info ● ● ● Scanning ● ● ● Send email as jpg ● ● send email as pdf ● ● send email as native ● ● ●...
- Page 113 Jaguar IV User Manual Color Trapping ● Smooth shadow ● ● ● Bitmap Marquee ● ● Move ● ● Eraser ● ● Pencil ● ● Fill ● ● Crop ● ● Autotrace ● ● Color Trace ● Change Color Mode ●...
-
Page 114: Easysign Instruction
Jaguar IV User Manual EasySIGN Instruction The user manual of EasySIGN software is available on the EasySIGN program CD, or you can refer to the getting started manual available on the EasySIGN webpage at http://www.easysign.com/mainwebv1/DownGT.aspx. GCC AASII Corpmark System This application note will show you how to use the GCC AASII corpmark system. It assumes that you have installed your GCC plotter correctly, and that you are able to cut simple jobs on it. - Page 115 Jaguar IV User Manual 3. Enable the cropmarks. Right-click on an empty part of the worksheet, and choose the command “Cropmark settings”. This will show a dialog. Please tick the box called “Show Print & cut cropmarks”. Next, you need to make a choice which system that you want to use, there are three different systems: This system uses four cropmarks, and one copy.
- Page 116 Jaguar IV User Manual 4. Position the cropmark Use the panelling tool from the left toolbox to drag the cropmarks around your job. Make sure that the cropmarks have some white space around them, there should not be any objects inside them, to make sure they can be scanned accurately.
- Page 117 Jaguar IV User Manual In the EasySIGN software, choose “File, Plotting”. A dialog will come up that allows you to change the plotter settings. Just make sure that the following settings are made: Alignment plotting (1) Switched on Normal line (2) Switched off Print and cut line (3) Switched on...
-
Page 118: Greatcut Instruction
Jaguar IV User Manual GreatCut Instruction The user manual of GreatCut 2 software is available on the GCC installation CD. GCC AASII System Below is a step-by-step instruction of using the AAS function of GreatCut 2 software through CorelDRAW and Adobe Illustrator. Edit your image in CorelDRAW 4-Point Positioning Step 1. - Page 119 Jaguar IV User Manual Step 2. Complete contour line settings (including contour offset value) and press Calculate to confirm. Contour offset is the distance between the object and the contour line. Contour lines will be added to the images. GreatCut Instruction...
- Page 120 Jaguar IV User Manual Step 3. Press the Settings icon on the GreatCut 2 toolbar. Step 4. Press the button on the right of Jog marks. GreatCut Instruction...
- Page 121 Jaguar IV User Manual Step 5. Adjust the size, object margin and line thickness of your registration marks in the Setup-Jog Marks window and click OK. 4-Point Positioning Size: The length of marks Range: 5mm~50mm Optimized Setting: 25mm Object margin: The distance between marks and images Range: 0mm~50mm...
- Page 122 Jaguar IV User Manual Step 7. Click the Set Jog Marks Icon in the GreatCut 2 toolbar. The system will create the 4 marks as shown in the picture below. GreatCut Instruction...
- Page 123 Jaguar IV User Manual Note: 1. To save your materials, in addition to amending object margins, you can also adjust the length of the registration marks (5mm minimum) when you apply the above function(see table 1 for suggestions based on different material sizes). The smaller the size is, the smaller the distance between the object and the registration marks is (see the figures below).
- Page 124 Jaguar IV User Manual Output Step 1. Select both the entire object (including registration marks and the contour line) and press the Cut icon in the GreatCut 2 toolbar. Step 2. The system will activate GreatCut2 automatically and import the registration marks and contour line to GreatCut 2.
- Page 125 Jaguar IV User Manual Step 3. Select Output under File. Step 4. Select Cut with AAS in Mode/Tool in the Output to device window. Complete the settings of AAS Offset, Pressure, Speed, Material width and so forth. GreatCut Instruction...
- Page 126 Jaguar IV User Manual Step 5. Click output and the object will be sent to GCC Cutting Plotter GreatCut Instruction...
-
Page 127: Advanced Settings
Jaguar IV User Manual Advanced Settings Segmental Positioning For precise cutting quality, it is suggested to apply “Segmental Positioning” by adjusting the x and y distance when you are working on an extra long or large-size image to increase cutting quality. Follow the same steps in the 4-Point Positioning section to complete the contour line setting and registration mark creation procedures. - Page 128 Jaguar IV User Manual Y axis X axis Segmental Positioning Follow the same steps in the Output section to output your image to GCC Cutting Plotter. GreatCut Instruction...
- Page 129 Jaguar IV User Manual Multiple Copies Follow the same steps in the 4-Point Positioning section to complete the contour line setting and registration mark creation procedures. When you apply the “Multiple Copies” function, the value that has been set in this section will still be applied.
- Page 130 Jaguar IV User Manual Click the Multi-copy Icon in the GreatCut 2 toolbar and complete the Number in X/Y (the number of copies desired on the X/Y axis) and Distance in X/Y (distance between each copy) settings then click Note: The spacing of vertical & horizontal (Offset X & Y) should be ≥ 20mm or = 0mm; Users are advised to set the Distance in X/Y as 0 mm to remove the space between each copy to avoid the waste of materials.
- Page 131 Jaguar IV User Manual The system will create several copies of the object with registration marks as shown in the picture below. Follow the same steps in the Output section to output your image to GCC Cutting Plotter. GreatCut Instruction...
- Page 132 Jaguar IV User Manual Edit your image in Adobe Illustrator 4-Point Positioning Step 1. Create a new file in Adobe Illustrator. Step 2. Select the image and go to Contour in GreatCu2 in File. GreatCut Instruction...
- Page 133 Jaguar IV User Manual Step 3. Complete contour line settings (including contour offset value) and press Calculate to confirm. Contour offset is the distance between the object and the contour line. Contour line is now added to the object. GreatCut Instruction...
- Page 134 Jaguar IV User Manual Step 4. Click Settings in GreatCut 2 under File. Step 5. Press the button on the right of Jog marks. GreatCut Instruction...
- Page 135 Jaguar IV User Manual Step 6. Adjust the size, object margin and line thickness of your registration marks and click OK. 4-Point Positioning Size: The length of marks Range: 5mm~50mm Optimized Setting: 25mm Object margin: The distance between marks and images Range: 0mm~50mm Optimized Setting: 5mm Line thickness:...
- Page 136 Jaguar IV User Manual Step 8. Click Set Jog Marks in GreatCut2 under File. The system will create the 4 marks as shown in the picture below. GreatCut Instruction...
- Page 137 Jaguar IV User Manual Output Step 1. Select both the entire object (including registration marks and the contour line) then click Cut in GreatCut2 under File. Step 2. The system will activate GreatCut2 automatically and import the registration marks and contour line to GreatCut 2.
- Page 138 Jaguar IV User Manual Step 3. Select Output under File. Step 4. Select Cut with AAS in Mode/Tool in the Output to device window. Contour offset is the distance between the object and the contour line. GreatCut Instruction...
- Page 139 Jaguar IV User Manual Step 5. Click output and the object will be sent to GCC Cutting Plotter GreatCut Instruction...
- Page 140 Jaguar IV User Manual Advanced Settings Segmental Positioning For precise cutting quality, it is suggested to apply “Segmental Positioning” by adjusting the x and y distance when you are working on an extra long or large-size image to increase cutting quality. Follow the same steps in the 4-Point Positioning section to complete the contour line setting and registration mark creation procedures.
- Page 141 Jaguar IV User Manual Click the Set Jog Marks Icon in the GreatCut 2 toolbar and 4 marks will be created as shown in the picture below. Follow the same steps in the Output section to output your image to GCC Cutting Plotter. GreatCut Instruction...
- Page 142 Jaguar IV User Manual Multiple Copies Follow the same steps in the 4-Point Positioning section to complete the contour line setting and registration mark creation procedures. When you apply the “Multiple Copies” function, the value that has been set in this section will still be applied.
- Page 143 Jaguar IV User Manual Click Multi-Copy in GreatCut2 under File. GreatCut Instruction...
- Page 144 Jaguar IV User Manual Complete the Number in X/Y (the number of copies desired on the X/Y axis) and Distance in X/Y (distance between each copy) settings then click OK. Note: The spacing of vertical & horizontal (Offset X & Y) should be ≥ 20mm or = 0mm; users are advised to set the Distance in X/Y as 0 mm to remove the space between each copy to avoid the waste of materials.
-
Page 145: Illustrator Instruction
Jaguar IV User Manual Illustrator Plug-In Instruction Illustrator Plug-In Instruction AASII VBA Installer is applicable for Illustrator Version CS4, CS5, CS6, CC. Installation 1. Check the “AAS Illustrator Installer” folder in Jaguar IV Installation CD, and double click the “AASIIInstaller.exe” file to run the installation program. 2. -
Page 146: Printer Setting
Jaguar IV User Manual Printer Setting Step1: Right click on the printer and select Properties to open the Printer Properties page Step2: Go to the Advanced page and make sure the Enable advanced printing features box is unchecked. Illustrator Plug-In... - Page 147 Jaguar IV User Manual User Instructions 1) Open Illustrator. 2) Edit your image and create a contour line (Note: you must have the line width set as 0.001mm). Contour line 3) Click on the image and apply the AAS function (File Scripts _AASII_Reg_Mark_Setting_01_03_02) Illustrator Plug-In...
- Page 148 Jaguar IV User Manual 4) Select the registration marks needed 5) Three types of registration marks are introduced here: 4-Point Positioning, Segmental Positioning and Multiple Copies. Note: The values entered in the “4-Point Positioning” section (length, thickness and margin) will still be applied when you tick “Segmental Positioning”...
- Page 149 Jaguar IV User Manual 6) Confirm the registration marks (the 4-Point Position mark is used as an illustration in the following steps). 7) Click on the blank area on the page and then click “Document Setup”. Illustrator Plug-In...
- Page 150 Jaguar IV User Manual 8) Hit “Edit Artboards”. 9) Click on “Presets → Fit Artboard to Artwork bounds”. Illustrator Plug-In...
- Page 151 Jaguar IV User Manual 10) Please move your mouse to the tool bar on the left when step 10) is finished and then click “Selection Tool”. 11) This will take you back to the edit mode. Illustrator Plug-In...
- Page 152 Jaguar IV User Manual 12) Print out the file with the contour line and the registration marks. 13) Place the printed file on the cutter, lower the pinch rollers and then position the carriage at the origin of the registration marks. 14) Send the file to the cutter.
- Page 153 Jaguar IV User Manual 15) Select the cutter model, position the object in the bottom left corner. 16) Your job is now completed. Illustrator Plug-In...
- Page 154 Jaguar IV User Manual Add Registration Mark by page size If you want to create registration mark by page size, go to “Scripts” under “File” and select “_AASII_Plug_In” Tick “Make by page size” and click “Apply” and the registration mark will be created on the 4 corners of the page automatically, sown as below.
- Page 155 Jaguar IV User Manual Workable area It allows users to edit and cut graphics in the area outside the registration marks when adding registration marks by page. For A4 size media sheet, the workable area is 2.5mm extended from the registration mark on left and right sides and 4.5mm extended from the registration mark on top side.
- Page 156 Jaguar IV User Manual Add Registration Mark by Object If you add registration mark by Object, you will be offered three options of registration marks. Firstly, select the graphic which you want to add registration mark on and go to “Scripts” under “File”...
- Page 157 Jaguar IV User Manual Three types of registration marks 4-Point Positioning 4-Point Positioning Length: The length of marks Range: 5mm~50mm Optimized Setting: 25mm Thickness: The line thickness of marks Range: 1mm~2mm Optimized Setting: 1mm Margin: The distance between marks and images Range: 0mm~50mm Optimized Setting: 5mm...
- Page 158 Jaguar IV User Manual Note: 1. To save your materials, in addition to amending object margins, you can also adjust the length of the registration marks (5mm minimum) when you apply 4-Point Positioning (see table 1 for suggestions based on different material sizes). The smaller the size is, the smaller the distance between the object and the registration marks is (see the figures below).
- Page 159 Jaguar IV User Manual Segmental Positioning For precise cutting quality, it is suggested to select “Segmental Positioning” when you are working on an extra long or large-sized image to increase cutting accuracy. Segmental Positioning X Step: The distance of intermediate position on the X axis Y Step: The distance of intermediate position on the Y axis...
- Page 160 Jaguar IV User Manual Multiple Copies It is suggested to select “Multiple Copies” when you would like to make several copies of one image on your material to increase cutting accuracy. Multiple Copies No. of X Copies: The numbers of copies on X axis No.
-
Page 161: Directcut
Jaguar IV User Manual DirectCut Instruction DirectCut Mac AI Plug-in is compatible with MAC OS X 10.4-10.7 (operated with Adobe Illustrator CS2-CS5). If you want to use Adobe Illustrator CS6 on your MAC, you may need Parallels Desktop software, Window OS and Windows based Adobe Illustrator CS6 to install Windows OS in your MAC computer and run Windows based software under MAC computer. - Page 162 Jaguar IV User Manual You will be presented with this dialog below: Step 2. Create/ import your image/ file. For texts 1) Enter your texts in Adobe Illustrator, select the letters and click [Text outline] to outline the letters. A contour line will be created for your image. Note: The line width must be set as 0.001 mm DriectCut...
- Page 163 Jaguar IV User Manual For Images 1) Open a new image on Illustrator and decide the size of your material. 2) Select the image and click [Make outline and offset] to create outlines of graphics. Outlines will be created for your image. DriectCut...
- Page 164 Jaguar IV User Manual 3) Click on the image and apply the AAS function by clicking the [Add registration marks] command and select the registration marks needed. The registration marks will be created as below. DriectCut...
- Page 165 Jaguar IV User Manual Step 3. Output 1) Click on [Plotter Setup] and select the correct model in [Plotter List]. 2) Tick Default Environment to create Pen No.1 in the Pen section. Double click Pen No.1 and complete your parameter settings. DriectCut...
- Page 166 Jaguar IV User Manual 3) Select the entire object and click [Plotter Output]. 4) Output the object by clicking [Export] and GCC Cutting Plotter will start cutting the image. DriectCut...
Need help?
Do you have a question about the Jaguar IV Series and is the answer not in the manual?
Questions and answers