Table of Contents
Advertisement
Owner's Instruction and Operation Manual
Model Number:
AP5000
Report #: F20-598
Certified to ASTM Std E1509-12 (2017)
and Certified to ULC-S627-00-REV1
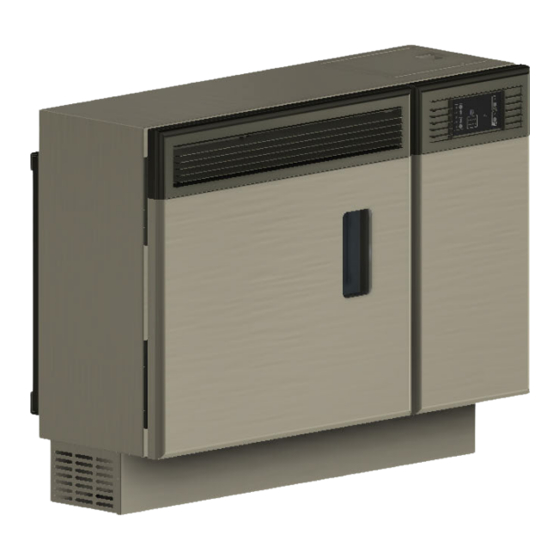
* All Pictures In This Manual Are For Illustrative Purposes Only. Actual Product May Vary.
Save These Instructions In A Safe Place For Future Reference.
SAFETY NOTICE: If this heater is not properly installed, a house fire may result.
For your safety, follow the installation instructions. Never use make-shift
compromises during the installation of this heater. Contact local building or
fire officials about permits, restrictions and installation requirements in your
area. NEVER OPERATE THIS PRODUCT WHILE UNATTENDED.
CAUTION! Please read this entire manual before you install or use your new room
heater. Failure to follow instructions may result in property damage, bodily injury,
or even death. Improper Installation Will Void Your Warranty!
U.S. Environmental Protection Agency
Certified to comply with 2020 particulate
emissions standards.
THIS MANUAL IS SUBJECT TO CHANGE WITHOUT NOTICE.
© 2021 United States Stove Company, 227 Industrial Park Rd., South Pittsburg, TN 37380
R
CALIFORNIA PROPOSITION 65 WARNING:
This product can expose you to chemicals including carbon
monoxide, which is known to the State of California to cause
cancer, birth defects, and/or other reproductive harm. For
more information, go to
853627C-2502J
www.P65warnings.ca.gov
Ph. 800-750-2723
Advertisement
Table of Contents

Subscribe to Our Youtube Channel
Related Manuals for Ashley AP5000


Summary of Contents for Ashley AP5000
- Page 1 Owner’s Instruction and Operation Manual Model Number: AP5000 Report #: F20-598 Certified to ASTM Std E1509-12 (2017) and Certified to ULC-S627-00-REV1 853627C-2502J * All Pictures In This Manual Are For Illustrative Purposes Only. Actual Product May Vary. Save These Instructions In A Safe Place For Future Reference.
- Page 2 INTRODUCTION This manual describes the installation and operation of the Ashley, AP5000 wood heater. This heater meets the 2020 U.S. Environmental protection agency’s crib wood emission limits for wood heaters sold after may 15, 2020. Under specific test conditions this heater has been shown to deliver heat at rates ranging from 8,141 to 12,161 btu/hr output.
-
Page 3: Installation Checklist
INSTALLATION CHECKLIST Your Wood Stove should be installed by a qualified installer only. An NFI qualified Installer can be found at www.nficertified.org/public/find-an-nfi-pro/ CUSTOMER SERVICE 1-800-750-2723 ext 5050 Text to 423-301-5624 Email to: Customerservice@usstove.com COMMISSIONING CHECKLIST This Checklist is to be completed in full by the qualified person who installs this unit. Keep this page for future reference. -
Page 4: Installation
ASSEMBLY INSTRUCTIONS Ensure the flame impingement baffle is installed properly. If the baffle is not installed properly, push the plate up in the void at an angle, rotate it to horizontal and place it on the metal stops. Flame Impingement Ba e INSTALLATION FOR CUSTOMER SERVICE CALL: 800-750-2723 EXT 5050 WARNING:... -
Page 5: Installation Options
INSTALLATION CAUTION: CAUTION: CONTACT YOUR LOCAL BUILDING OFFICIALS BEFORE INSTALLING YOUR HEATER, YOU TO OBTAIN A PERMIT AND INFORMATION MUST PERFORM AN INITIAL BURN IN AN ADDITIONAL INSTALLATION OUTSIDE ENVIRONMENT. FOLLOW RESTRICTIONS INSPECTION START-UP PROCEDURE IN THE OPERATION REQUIREMENTS IN YOUR AREA. SECTION OF THIS MANUAL. -
Page 6: Mobile Home Requirements
INSTALLATION CLEARANCES MOBILE HOME REQUIREMENTS Your pellet stove has been tested and listed for installation in residential, mobile home in WARNING! - accordance with the clearances given below. For DO NOT INSTALL IN A SLEEPING ROOM safety reasons, please adhere to the installation clearances and restrictions. -
Page 7: Wall Installation
INSTALLATION of the mounting holes and the exhaust/intake ATTENTION: through hole are marked. Make sure that the DO NOT VENT UNDER ANY PORCH, DECK, wall mounting plate is flush against the wall, AWNING, OR IN ANY SEMI ENCLOSED OR then level the mounting plate and verify that ROOFED AREA. -
Page 8: Vent Termination Clearances
INSTALLATION VENT TERMINATION CLEARANCES 4. Carefully cut intake/exhaust thru hole in exterior wall thru to the outside (see “Vent Clearances” section to ensure proper installation). 5. Insert 1/4” concrete wall anchors into the pilot holes and make sure that the anchors are seated flush with the concrete surface. - Page 9 INSTALLATION H. Minimum 1-foot [0.3m] clearance horizontally sections should be supported at least every 4 feet. from combustible wall. Wall Straps can be used for this purpose. NOTICE: This unit shall be installed in such a way • Seal all joints with high temperature silicone. that the exhaust gases are directed so they do not 2.
- Page 10 OPERATION INSTRUCTIONS NEVER OPERATE THIS PRODUCT WHILE UNATTENDED HOW YOUR HEATER WORKS • The exhaust blower will start. Note that this appliance pulses the exhaust blower in order to Your pellet heater operates on a timer based auger achieve the proper air to fuel ratio, and to also aid fuel feed system, that is controlled by a digital circuit in the cleaning of the burn pot.
-
Page 11: Unit Preparation
OPERATION INSTRUCTIONS 6. Materials containing asbestos; of smoke or fumes irradiating from the appliance during this process. Follow the Start-Up procedure Construction or demolition debris; below to begin your burn. 8. Railroad ties or pressure-treated wood; START-UP PROCEDURE 9. Manure or animal remains; 10. -
Page 12: Shutdown Procedure
OPERATION INSTRUCTIONS The heater will begin to feed fuel and the exhaust has gone out, you will have to press the “OFF” (draft) blower is running. Note that the exhaust button and then the “ON” button again to begin blower is pulsing. The auto-start ignitor will ignite a new start-up sequence. -
Page 13: Maintenance
MAINTENANCE NEVER OPERATE THIS PRODUCT WHILE UNATTENDED your heater, we suggest using a vacuum designed WARNING: for ash removal. Some regular vacuum cleaner (i.e. • DISCONNECT THE POWER CORD BEFORE shop vacs) may leak ash into the room. PERFORMING ANY MAINTENANCE! NOTE: TURNING THE ON/OFF SWITCH TO ”OFF”... -
Page 14: Blower Motors
MAINTENANCE SMOKE AND CO MONITORS GLASS Burning wood naturally produces smoke and Cleaning - We recommend using a high quality carbon monoxide(CO) emissions. CO is a poisonous glass cleaner. Should a buildup of creosote or gas when exposed to elevated concentrations carbon accumulate, you may wish to use 000 steel for extended periods of time. -
Page 15: Yearly Servicing
MAINTENANCE YEARLY SERVICING Monthly or Daily Weekly A yearly servicing and cleaning by your Authorized as needed pellet heater dealer is recommended. A fee may be Burn Pot Stirred Empty charged for this service. Combustion Brushed MAINTENANCE SCHEDULE Chamber Use the following as a guide under average use Ashes Check Empty... -
Page 16: Trouble Shooting Errors
TROUBLE SHOOTING ERRORS • Disconnect the power cord before performing any maintenance! NOTE: Switching the appliance to ”OFF” does not disconnect all power to the electrical components of the heater. • Never try to repair or replace any part of the heater unless instructions for doing so are given in this manual or supplied from the factory. - Page 17 TROUBLE SHOOTING ERRORS The firebox is not properly Make sure the door is closed and that the gasket is in good shape. sealed. Check to make sure vent pipe installation meets criteria in owner’s Vent pipe is incorrectly installed manual. pressure switch wire...
-
Page 18: Wiring Diagram
WIRING DIAGRAM Ensure the wires are connected to the bottom two prongs of the hopper switch as shown. CORRECT WRONG HOW TO ORDER REPAIR PARTS For Parts Assistance Call: 800-750-2723 Ext 5051 or Email: parts@usstove.com The information in this owner’s manual is specific to your unit. When ordering replacement parts the information in this manual will help to ensure the correct items are ordered. -
Page 19: Repair Parts
REPAIR PARTS © 2021 United States Stove Company... - Page 20 891748 Burnpot Weldment Email to: parts@usstove.com IN ORDER TO MAINTAIN WARRANTY, COMPONENTS MUST BE REPLACED USING ASHLEY PARTS PURCHASED THROUGH YOUR DEALER OR DIRECTLY FROM ASHLEY. USE OF THIRD PARTY COMPONENTS WILL VOID THE WARRANTY. © 2021 United States Stove Company...
- Page 21 To order parts: Call 1-800-750-2723 Ext 5051 or Email to: parts@usstove.com IN ORDER TO MAINTAIN WARRANTY, COMPONENTS MUST BE REPLACED USING ASHLEY PARTS PURCHASED THROUGH YOUR DEALER OR DIRECTLY FROM ASHLEY. USE OF THIRD PARTY COMPONENTS WILL VOID THE WARRANTY.
-
Page 22: Service Record
SERVICE RECORD It is recommended that your heating system is serviced regularly and that the appropriate Service Interval Record is completed. SERVICE PROVIDER Before completing the appropriate Service Record below, please ensure you have carried out the service as described in the manufacturer’s instructions. Always use the manufacturer's specified spare part when replacement is necessary. - Page 27 CÂBLE RUBAN ROUGE NOIR BLANC ROUGE BLEU ORANGE...
Need help?
Do you have a question about the AP5000 and is the answer not in the manual?
Questions and answers