
Subscribe to Our Youtube Channel
Related Manuals for Uovision UM565-SMS 12MP


Summary of Contents for Uovision UM565-SMS 12MP
- Page 1 UOVISION UM565-SMS 12MP Wireless SMS controlled Digital Scouting Camera User’s Manual...
-
Page 2: Quick Start
www.uovisioneurope.com Quick Start Load 12pcs alkaline batteries or connect 6 V external power supply. If external power used, the batteries can be inside the camera at the same time 2. Insert the SD card (32GB or smaller) and SIM card (Wireless cameras ONLY). - Page 3 www.uovisioneurope.com 8. To delete an image in SETUP mode, press the “ ” button to review the image and then press the “DEL” button to delete the image. Key Notes a. “MENU”: enter the program menu in preview mode; b. “▲”“▼”“◄”“►”: for parameter settings as described in the user’s manual.
-
Page 4: General Description
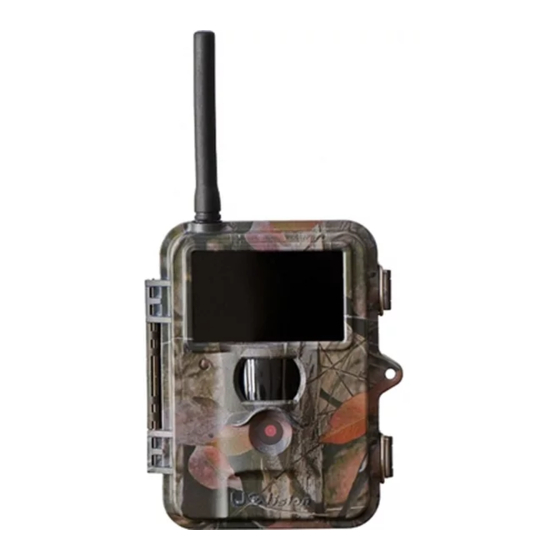
1 Instruction Instruction 1.1 General Description This camera, is wireless digital surveillance camera, triggered by any movement of humans or animals monitored by a high sensitive Passive Infrared (PIR) motion sensor, and then automatically captures high quality pictures, up to 12MP, varied by different models or records video clips (QVGA and VGA) according to default settings or preset customer settings. - Page 5 1 Instruction Antenna SIM card Slot IR Flash Lock Indication LED Lens Figure 1: Front View Battery Depot Display Screen Operation Panel Lock Hole Power Switch Figure 2: Operation Interface Page 2...
- Page 6 1 Instruction DC In DC Hole and Stopper SD-card Slot Bottom Screw Figure 3: Bottom view 1.2.1 Key Notes a. “MENU”: enter the program menu in preview mode; b. “▲”“▼”“◄”“►”: for parameter settings as described in the user’s manual. “▲”is the shortcut to choose “Video”, while “▼”for the “Photo”. c.
-
Page 7: Mms Function
1 Instruction 1.3 MMS function(For Wireless type ONLY) Wireless version camera can send pictures instantly to your mobile device via GSM/GPRS network. You’ll be alerted just when a picture or video has been taken. The camera sends MMS message through GPRS network, so before using this function, you need to open GPRS service from your service provider. -
Page 8: Power Supply
3 Quick Introductions 2. Quick Start Guide Power Supply To supply power for the camera 12 size AA batteries are needed. Confirm that the power switch is in the OFF position; load the fully charged batteries into the pack according the polarities signs shown below. -
Page 9: Power On And Enter Into The On Mode
3 Quick Introductions Power on and Enter into the ON Mode Before switching on, please pay attention to the following: 1. Avoid temperature and motion disturbances in front of the camera such as a big leaf, curtain, air-conditioner, air outlet of the chimney and other heat sources to prevent from false triggering. -
Page 10: Power Off
3 Quick Introductions Power Off Slide the power switch to the OFF position to power off the camera. Please note that even in the OFF mode, the camera still consumes a small amount of battery power. Therefore, please remove the batteries if the camera is not in use for some time. -
Page 11: Advanced Operations
4 Advanced Operations 3 Advanced Operations Settings Menu and Default Settings To view the camera settings menu, switch the camera to SETUP mode and press MENU, the main menu and the default settings are under below charts: Main menu Setting Items Description Choose Photo or Video Camera Mode... -
Page 12: Viewing Photo Or Video
4 Advanced Operations stamp on the picture or not. 50% = 20 ft./6m, 100% = 40 ft./12m Flash Power The default password is 0000. Choose Password OFF to stop this function. English(Preset),we provide the choice for Language customer to choose the language, pls contact your distributor for assistance. -
Page 13: File Numbering
4 Advanced Operations 4.3. File Numbering Images and videos are saved in the pre-named folder. File numbering continues by adding one to the last number for each new image or video. Saving names are IMAG0001.JPG or IMAG0001.AVI. Through the suffix you can distinguish whether the file is an image (with suffix .jpg) or a video (with suffix .avi). -
Page 14: Appendixⅰ : Technical Specifications
AppendixⅠ: Technical Specifications AppendixⅠ : Technical Specifications Picture Resolution 12MP, 8MP, 5MP, 3MP Lens F/NO=3.0 FOV(Field of View)=52° IR-Flash 50% = 6m, 100% = 12m Display Screen 2.0” LCD Memory Card From 8 MB to 32GB Video Resolution VGA, QVGA PIR Sensor Multi Zone PIR Sensitivity... -
Page 15: Appendixⅱ : Parts List
Appendix Ⅱ: Parts List AppendixⅡ : Parts List Part Name Quantity Digital Camera USB Cable Not Available Belt User Manual Antenna The camera manufacturer provides 12 months of warranty service for this product against manufacturing defects or malfunctions. If your camera fails to function under normal use within 1 year, the camera manufacturer will repair or replace the camera at no charge. - Page 16 Appendix Ⅲ: Wireless Settings -- for Wireless Cameras 1. Insert a SD card and a SIM card into the camera. 2. Switch the camera to SETUP position, and press “MENU”. 3. Go to the MENU → GSM →Download Tool. 4. Press OK to download the “GSMSETUP.ZIP” into Page 13...
- Page 17 Appendix Ⅲ: Wireless Settings the SD card. 5. Use a computer to unzip the ZIP file, and then edit the “GSMSETUP.exe” file. See the below chart for reference I. Send Mode Manually send: Page 14...
- Page 18 Appendix Ⅲ: Wireless Settings Press“ ”playback button to review the desired image, then press“MENU”button. Choose “Send” and press “OK”. The camera starts to send the image from step 1 to step 10, After the LCD screen reminds “Send successfully”, the image has been sent to the preset phone numbers and E-mail addresses.
- Page 19 Appendix Ⅲ: Wireless Settings Daily Report: The camera sends a SMS to inform how many pictures/videos get captured during the past 24 hours at the pre-set time. If the time were 21:30PM as in the attached picture, the user will get the report at 21:30PM.
- Page 20 Appendix Ⅲ: Wireless Settings II. Set Send Via The camera provides two solutions to send the pictures to the desired phone number and email address via MMS and GPRS. a. MMS If MMS selected, pictures would be sent to the preset phone numbers, (Maximum 4 numbers allowed) email...
- Page 21 Appendix Ⅲ: Wireless Settings If choose the GPRS, there is a reminder to ask the user to set the Email; Click the Email Set button, there would be another Dialog BOX as shown below: Complete the above information and Click “OK” to save.
- Page 22 Appendix Ⅲ: Wireless Settings III. Send to Send means destinations where MMS/GPRS goes to. a. Phone: pictures to phone numbers (MAX 4 numbers.) b. Email: pictures to email addresses (MAX 4 emails.) c. Both: pictures to both phone number and email address.
- Page 23 Appendix Ⅲ: Wireless Settings according to the preset phone number or email address. The selected country is Germany, and the operator is T-mobile, the camera will work and send MMS information according to the preset phone number or email address. b.
- Page 24 Appendix Ⅲ: Wireless Settings Click the “Custom”, there would be a Dialog box appears as below. Page 21...
- Page 25 Appendix Ⅲ: Wireless Settings Pls complete the above columns and click OK to save the settings. This allows 3 operators’ information. Take Germany T-MOBILE for example. V. Recipients Recipients mean where the pictures goes to, Phone number or email address. The recipients allow 4 phone numbers and 4 email address, use semicolon “;”...
- Page 26 Appendix Ⅲ: Wireless Settings VI. Rename and Max Size Rename: the user can edit the camera within 8 letters. The renamed contents will appear in the Pictures taken by after Renamed cameras. Max size: the user can change the digits between 35KB~120KB.
- Page 27 Appendix Ⅲ: Wireless Settings VII. Generate File Save the edited “GSM SETUP.exe”, and the file “PROFILE.BIN” is generated in the designated place. Copy the file “PROFILE. BIN” to a SD card and insert the SD card to a wireless camera. VIII.
- Page 28 Appendix Ⅲ: Wireless Settings Note: 1. MMS is sent via a GPRS network, be sure to open the GPRS service by your SIM card. Our device supports four bands: 850MHz, 900MHz, 1800MHz and 1900MHz. 2. Be sure to open the GPRS service for both the camera and your cellular receiving phone.
- Page 29 Appendix Ⅲ: Wireless Settings In order to use the SMS control function, the user need to set the SMS switch to “On” position firstly. 2. The master phone number is the “Phone number 1”. The master phone number has the right to delete/add the subordinates (Phone number 2/3/4, and all Email addresses).
- Page 30 Appendix Ⅲ: Wireless Settings 3. Preparation. If want to use the SMS control function, be sure to turn on the switch to SETUP and wait until the camera finish searching network before entering into the “ON” mode every time after changing batteries. Page 27...
- Page 31 Appendix Ⅲ: Wireless Settings SMS Command Order List ACTION SMS Command Order Acquire Pictures #500# Get Location #510# #200#ON# Wireless On (active) #200#OFF# Wireless Off (sleeping) Turn Off the PIR sensor #320#OFF# Turn On the PIR sensor #320#ON# Set Photo Mode #310#P# Set Video Mode #310#V#...
- Page 32 Appendix Ⅲ: Wireless Settings Controlling your camera using Android APP You can control many of the basic functions of your camera from your cell phone by sending it codes via android APP or text message. You can control the following functions on your camera via SMS.
- Page 33 Appendix Ⅲ: Wireless Settings There are 3 main panels as below. Slide the phone screen to switch between the panels. Page 30...
- Page 34 Appendix Ⅲ: Wireless Settings Note: If you set Wireless Status to OFF, you will not receive photos or Daily reports to your phone or e‐mail. You also can’t get any response of other SMS commands. Just Wireless ON command can be responded when the Wireless Status is Off.
- Page 35 Appendix Ⅲ: Wireless Settings Page 32...
Need help?
Do you have a question about the UM565-SMS 12MP and is the answer not in the manual?
Questions and answers