Beyerdynamic Quinta Operating Instructions Manual
Hide thumbs
Also See for Quinta:
- Quick start manual (28 pages) ,
- Operating instructions manual (27 pages) ,
- Update instructions (25 pages)
Table of Contents
Advertisement
Quick Links
Advertisement
Table of Contents

Related Manuals for Beyerdynamic Quinta


Summary of Contents for Beyerdynamic Quinta
- Page 1 Quinta DIGITAL WIRELESS CONFERENCE SYSTEM Operating Instructions...
-
Page 2: Table Of Contents
8.1.3 Quinta and Bluetooth ..........Page 8.1.4 Example for Quinta, Media Control System and WLAN......Page... - Page 3 Quinta – Contents Components..............Page Accessories .
-
Page 4: Safety Instructions
For this reason do not install it in the immediate vicinity of • Use only the CD2 charger or Quinta SC power supply unit to swimming pools, showers, damp basement rooms or other areas charge the rechargeable batteries integrated in the microphone with unusually high atmospheric humidity. -
Page 5: Quinta Mu Microphone Unit
Volume batteries. For removing the batteries, please refer to chapter • If the participants of a meeting use a headphone with the Quinta “How to insert the batteries“. microphone stations, please make sure that the volume is not set •... - Page 6 Quinta – Safety Instructions • This symbol on the product, in the instructions or on the packaging means that your electrical and electronic equipment should be disposed at the end of its life separately from your household waste. There are separate collection systems for recycling in the EU.
-
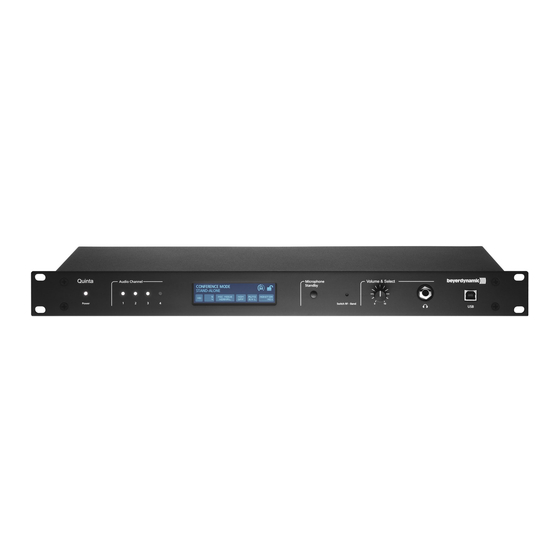
Page 7: Quinta Cu Control Unit
Quinta CU Control Unit Furthermore, please note The Quinta CU control unit is the heart of the system. It controls the • the ambient temperature of the installation site must not exceed delegate and chairman microphone units. With one control unit a 35 °C [95 °F]. -
Page 8: Where To Place The Control Unit
In such specific • If you do not use remote antennae, place the Quinta CU control installations the use of remote antennae can possibly achieve unit in the room where the meeting takes place. If you use an improvement of the RF situation. -
Page 9: Audio Connection
If required, connect the Audio Mix , XLR or Cinch master output of the Quinta CU control unit to the input of a mixing console or amplifier. • If you want to feed the audio signals into a network, connect the AVB connection * µ... -
Page 10: How To Switch The Control Unit On/Off
Quinta – Control Unit How to Switch the Control Unit On/Off • Turn on the Quinta CU control unit with the On/Off switch The Power on LED will illuminate. • The channel LED 1 to 4 will illuminate white to indicate the availability. -
Page 11: Main Menu
Quinta – Control Unit Main Menu Press the volume control approx. 3 seconds until the Quinta CU control unit displays “Main Menu”. By turning and pressing you can display and set different parameters in the main menu. 2.9.1 Master Volume •... -
Page 12: Room Combining
2.9.2 Room Combining The “Room Combining” function is used when you want to operate or combine several Quinta systems in different rooms (A, B, C, D). All microphone units and control units have been set to “A” at the factory. Refer to picture “Factory setting of control units and micro- phone units”. - Page 13 flash red. • In order to configure the control unit to “B” press the volume control approx. 3 seconds until the Quinta CU control unit displays the main menu. • Turn the volume control to the right or left until “Room...
- Page 14 – The configuration for room A, B, C or D is stored in the appropriate microphone units. – When you have only one Quinta system which you want to use in one room only, you can keep the factory setting of “A”.
-
Page 15: Ethernet Info
• The default screen also displays “RF off”. 2.9.3 Ethernet Info • Press the volume control approx. 3 seconds until the Quinta CU control unit displays “Main Menu”. • Turn the volume control to the right or left until “Ethernet Info” is displayed. -
Page 16: Avb Info
• The “RF Anlayzer” displays how much the frequency range is already used by other devices that use the same frequencies (e.g. other Quinta systems, WiFi, etc.) With “RF-Analyzer” you can find out which frequency band is most suitable. • To interpret the displayed values correctly, a detailed knowledge about other wireless technologies is required. -
Page 17: Quinta Mu Microphone Units
The Quinta MU 31/33 microphone units are provided with the • Quinta MU 23 chairman microphone unit with three buttons Revoluto technology for maximum freedom of movement and 3-colour... - Page 18 Connection for gooseneck microphone Loudspeaker “Clear” button to clear all delegate microphone units / Attention: Only with Quinta MU 23 V this button acts also as “yes” voting button Microphone button / Attention: Only with Quinta MU 23 V / MU 21 V this button acts also as “no”...
- Page 19 Quinta – Microphone Units Quinta MU 33 Chairman Microphone Unit Quinta MU 31 Delegate Microphone Unit Bottom of Microphone Unit Quinta MU 33/31 Lateral View Loudspeaker “Clear” button to clear all delegate microphone units Microphone button Programmable function button Reset button to restart the integrated microcontroller (refer also the item “Microphone unit cannot be switched off”...
-
Page 20: How To Connect The Gooseneck Microphone
• To activate the microphone or to allocate the microphone unit to a free channel of the Quinta CU control unit, press the microphone button once again. Depending on the operating Quinta MU 23 V... -
Page 21: Powering / Operating Time
• The charging state of the microphone units can be displayed with the Quinta Conference software on a PC connected to the Quinta CU control unit or via the integrated web server. Furthermore, it can be displayed on an external media control system connected to the Quinta CU control unit. -
Page 22: Operating Modes
Quinta MU 21 The different operating modes such as “Normal”, “Push-To-Talk” or “Voice Activation” are adjusted with the Quinta Conference soft- ware for all microphone units. The standard operating mode is “Normal”. Please refer also to the appropriate “Quinta Conference Software”... -
Page 23: Maintenance Of The Microphone Units
Quinta MU microphone units and the are only available, when they have been programmed with the Quinta CU control unit within one system. This will increase the Quinta Conference software before. Please refer to the “Quinta safety against unauthorised listening. - Page 24 First push mutes the port, the next one enables it, third one mutes again etc. If the chairman presses the function button of his/her micro- phone unit, the audio output of the Quinta CU control unit will be muted. The function button illuminates red.
-
Page 25: Request-To-Talk Mode
Quinta – Microphone Units Request-to-Talk Mode Quinta MU 22 Double Delegate Microphone Unit • This operating mode is only possible in conjunction with a PC using the Quinta Conference software or a media control system (AMX ® , Crestron ®... -
Page 26: Quinta Cd 2 Charger In The Quinta Cc 2 | Cc 2 / 600 Case
For microphone units using the Classis GM 316 Q microphone the microphone cannot be piled up because of the microphone length. version Quinta CC 2 / 600 with a higher top cover (Quinta CT 2 / 600) • For the Quinta CC 2 or CC 2 / 600 or CC 3 charging and transport will be available. -
Page 27: Battery Charging With External Mains Power Adapter
Battery Charging with External Mains Power Adapter Quinta MU 23/22/21 Rear View • The Quinta MU microphone units can also be charged with the external CA 2459 mains power adapter, which is connected to the DC socket • The operating control LED... -
Page 28: Quinta Th Handheld Transmitter
By using the Quinta Conference Software the Quinta TH handheld transmitter can be configured as sub chairman or dele- gate. The Quinta TH is compatible to the 2.4, 5.2 and 5.8 GHz frequencies. Important: Please note that for an optimal operation without... -
Page 29: How To Attach The Microphone Head
Quinta – Handheld Transmitter How to Attach the Microphone Head For the Quinta TH handheld transmitter there are different con- denser and dynamic microphone capsules available. The micro- phone head used is also displayed in the participant list of the Quinta Conference Software. -
Page 30: How To Insert The Batteries
• In order to activate the microphone or to allocate the microphone to a free channel of the Quinta CU control unit, press the micro- phone button briefly once again. Depending on the operating... -
Page 31: Operating Modes
The microphone button will illuminate green. The micro- phone is ready to speak into it. • Using the Quinta CU control unit, up to 4 participants (e.g. 3 delegates and 1 chairman) can speak simultaneously depending on the setting. -
Page 32: Maintenance
Quinta – Handheld Transmitter Maintenance • Protect the handheld transmitter from humidity, knocks and shock. Avoid dropping the transmitter at all times. • For cleaning metal surfaces, use a soft cloth moistened with methylated spirits or alcohol. • As soon as your microphone sounds dull, you should clean the integrated pop shield. -
Page 33: Charging
• If required, connect the Ethernet port to a media control system. • Put the Quinta TH handheld transmitter or the NiMH batteries into the charging compartments as indicated in the drawing. If the transmitter is turned on, it will be turned off automatically. -
Page 34: Trouble Shooting
Quinta – Trouble Shooting Trouble Shooting If problems occur that you do not find listed below, reset the Quinta system to the standard configuration with the Quinta Conference soft- ware. Please refer alsoto the appropriate manual. Problem Possible Cause Solution Microphone button flashes red rapidly •... - Page 35 • Headphone or recorder is not connected • Connect the headphone or recorder properly properly • Check the volume setting with the Quinta • Increase the volume with the Quinta Conference Software or Quinta Web Server Conference Software or Quinta Web Server Feedback •...
-
Page 36: Simultaneous Operation Of The Quinta Conference System And Other 2.4 Ghz Devices
For this reason the WLAN channels 1, 6 and 11 were selected for the can never be operated on the same frequency. It is only possible to RF channels Low, Mid and High used for the Quinta conference operate a certain number of compatible radio devices within a system. -
Page 37: Quinta And Bluetooth
3. Configure the WLAN access point to WLAN channel 11 making use of the frequency range 2451 to 2473 MHz. This frequency range must be reserved for the use by WLAN exclusively. 4. As an alternative you can operate Quinta in the 5.2 or 5.8 GHz band. -
Page 38: Components
Charger for 10 Quinta MU 23/22/21 microphone units ....... . . -
Page 39: Technical Specifications
Format of the audio data ......AM824 Stream ID Quinta CU ......Bit 63 – 16 / MAC address Bit 15 –... - Page 40 Quinta – Technical Specifications Operating time depending on the type of the microphone unit ......approx. 20 hours in discussion mode; operating time depends on the volume Temperature range (at <...
- Page 41 Quinta – Technical Specifications Quinta CD 2 / CD 3 Charger Power supply ........100 - 240 V AC , 50 / 60 Hz ˜...
-
Page 42: Ec-Declaration Of Conformity
Theresienstraße 8, 74072 Heilbronn, Germany Type of Equipment: Wireless Conference System Quinta Model Numbers: Quinta CU I, the undersigned, as an employee of beyerdynamic, hereby declare that the equipment specified conforms to the above Directive and Standards. Manufacturer’s Signature: Date: June, 2012 Full Name:... - Page 43 Model Numbers: Quinta MU 21, Quinta MU 22, Quinta MU 23 Quinta MU 31, Quinta MU 33 I, the undersigned, as an employee of beyerdynamic, hereby declare that the equipment specified conforms to the above Directive and Standards. Manufacturer’s Signature:...
- Page 44 Theresienstraße 8, 74072 Heilbronn, Germany Type of Equipment: Wireless Conference System Model Numbers: Quinta TH I, the undersigned, as an employee of beyerdynamic, hereby declare that the equipment specified conforms to the above Directive and Standards. Manufacturer’s Signature: Date: May, 2015...
-
Page 45: Fcc Regulation
Part 15.21 Statement NOTICE: Changes or modifications made to this equipment not expressly approved by beyerdynamic GmbH & Co. KG may void the FCC authorization to operate this equipment. Part 15.105 Statement NOTE: This equipment has been tested and found to comply with the limits for a Class B digital device, pursuant to Part 15 of the FCC Rules. - Page 46 GmbH & Co. KG Theresienstr. 8 | 74072 Heilbronn – Germany Tel. +49 (0) 7131 / 617 - 0 | Fax +49 (0) 7131 / 617 - 204 info@beyerdynamic.de | www.beyerdynamic.com For further distributors worldwide, please go to www.beyerdynamic.com...
Need help?
Do you have a question about the Quinta and is the answer not in the manual?
Questions and answers