Table of Contents
Advertisement
Quick Links
Advertisement
Table of Contents

Related Manuals for Wincor Nixdorf BA92


Summary of Contents for Wincor Nixdorf BA92
- Page 1 BA92/BA93/BA93W LCD TFT Panel Display User Manual...
- Page 2 Please send us a copy of this page if you have any constructive criticism. We would like to thank you in advance for your comments. With kind regards. Your Opinion: Wincor Nixdorf Pte Ltd Research and Development 151 Lorong Chuan New Tech Park #05-01A/B...
- Page 3 BA92/BA93/BA93W LCD TFT Flat Panel Display User Manual Edition September 2015...
-
Page 4: Table Of Contents
Introduction ................... 5 From Point-of-Sale to Point-of-Service ..........5 Features at a glance ................6 About this manual ................6 Display overview ................7 BA92 ....................7 BA93 ....................7 BA93W ....................8 Touch screen per model..............8 User interfaces ................9 Front panel (OSD) ................ - Page 5 How to operate ............... 21 Cleaning instruction ..............22 Waiter Lock ..................22 How to operate ............... 22 Cleaning instruction ..............22 RFID/NFC Reader ................23 How to operate ............... 23 Cleaning instruction ..............23 Fingerprint Reader ................24 How to operate ............... 24 Cleaning instruction ..............
-
Page 7: Manufacturer's Declaration And Approval
This device complies with part 15 of the FCC Rules. Operation is subject to the following two conditions: (1) This device may not cause harmful inter- ference, and (2) this device must accept any interference, including inter- ference that may cause undesired operation. BA92/BA93/BA93W User Manual... -
Page 8: Tested Safety
Tested safety The BA92/BA93/BA93W have been awarded the cUL- and UL- symbol. Energy Star The BA92/BA93/BA93W have been awarded the ENERGY STAR symbol. User information Repair work on the devices should only be carried out by authorized and specially trained personnel. - Page 9 BEETLE or PC should be removed, and the Wincor Nixdorf customer service should be contacted. If the LCD display element is broken and the liquid crystal solution leaks out of the display and onto your hands, clothing etc., wash your hands or clothing immediately with soap or...
-
Page 10: Instructions For Maintenance
Also switch your display off when you take a longer break or finish your work. There are still some parts that are not reusable. Wincor Nixdorf guarantees the environmentally safe disposal of these parts in a Recycling Center, which is certified pursuant to ISO 9001 and ISO 14001. -
Page 11: Introduction
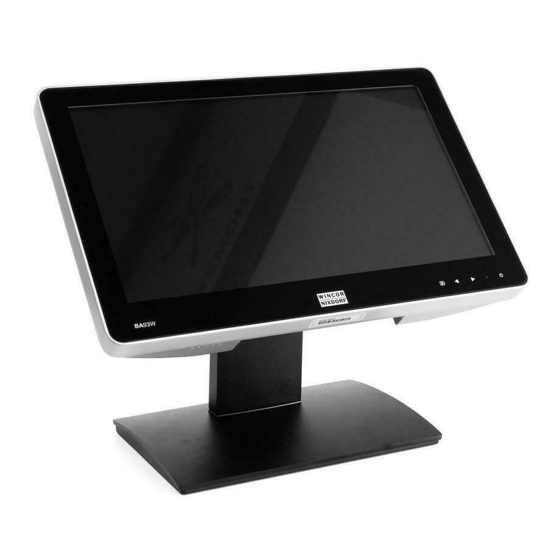
Equipped with a sleek modern bezel free design and robust aluminum housing, the BA9x features projected capacitive (BA92, BA93 and BA93W) or resistive (BA92 and BA93) touch technology. There is also a non-touch version available for the BA92 and BA93. -
Page 12: Features At A Glance
BA9x. Same parts of this book require familiarity and experience in working with operating systems and installation and configuration procedures. Notes in the manual are marked by this symbol. This symbol is used for warnings. BA92/BA93/BA93W User Manual... -
Page 13: Display Overview
Application programs should use this resolu- tion. BA93 The TFT LCD flat panel display is a 15-inch flat panel display which is absolutely flicker-free. lt is designed for a resolution of max. 1024 x 768 pixels. Application programs should use this resolution. BA92/BA93/BA93W User Manual... -
Page 14: Ba93W
BA93 15” No Touch, Protective Glass BA93/r-touch 15” Resistive Touch BA93/pc-touch 15” Projected Capacitive Touch BA93W/pc-touch 15.6” Projected Capacitive Touch * This model is not a standard option and will be offered on a project basis only. BA92/BA93/BA93W User Manual... -
Page 15: User Interfaces
OSD to time-out (saves changes and exit). The adjustments will be saved in each way. There are a number of parameters that can be set via the OSD menu. Please refer to the table “Parameters set via the OSD menu” for details. BA92/BA93/BA93W User Manual... -
Page 16: Connector Panel
If the display is manually switched off, it will not wake up auto- matically when the system boots. When the BA92/BA93/BA93W is connected via PLINK2™ interface to a BEETLE system, the button also switches the system on or off, provided that the system supports the feature. -
Page 17: Integrated Loudspeaker
Only UL Listed LPS (Limited Power Source) power supplies can be used. Integrated loudspeaker The integrated loudspeaker is located at the bottom side of the screen. BA92/BA93/BA93W User Manual... -
Page 18: Display Settings
Auto color adjustment at VGA mode only sRGB Settings Standard RGB settings Color Temperature Choose the color temperature listed in the sub menus Exit Sub-Menu Back to OSD-Menu Image Setting Auto Adjustment This function will adjust the image if neces- sary BA92/BA93/BA93W User Manual... - Page 19 Ambient Light Sensor The ALS can be enabled/disabled with this option Presence Sensor The Presence Sensor can be ena- bled/disabled with this option Wincor Logo Lighting The logo backlight can be enabled/disabled with this option BA92/BA93/BA93W User Manual...
-
Page 20: Osd Lock/Unlock
BEETLE system using a PLINK2™ interface cable. The mode of operation depends on the settings of the BEETLE BIOS as well as on the display settings. For details please consult the table below. BA92/BA93/BA93W User Manual... - Page 21 RMT disabled System no reaction; Display remains off. RMT disabled System no reaction; Display switches off. For FW 2.10 onwards. For information about the power button behavior of previous FW versions, please contact a Wincor Nixdorf sales representative. BA92/BA93/BA93W User Manual...
-
Page 22: Power Button - Lock/Unlock
Please set the set- ting to ON if the display is required to wake up from sleep by pressing the touch screen. For FW2.10 onwards, USB Hub is always ON during standby and the OSD selection no longer available. BA92/BA93/BA93W User Manual... -
Page 23: Ddc Compliant Interface
DDC-CI compliant software interface. The DDCcontrol tool software is available for specific operating systems and OSD functions only. Please consult the technical information of DDCcontrol tool for more information. Settings made via DDCcontrol tool have priority over manual settings! BA92/BA93/BA93W User Manual... -
Page 24: Touch Technologies
With a circular motion of the fingers the element on the dis- play can be rotated. This function must be supported by either the operating system or by the application. BA92/BA93/BA93W User Manual... -
Page 25: Cleaning Instructions
Because the controller derives both the “X” and “Y” touch coordi- nates from the stable glass layer, the accuracy and operation of the touch screen is unaffected by damage to the top sheet caused by extended use or neglect. BA92/BA93/BA93W User Manual... -
Page 26: Construction Of The Resistive Touch Screen
Use a soft, fine-meshed cloth to clean the surface. Dampen the cloth slightly and then clean the screen. A wrong maintenance may cause damages to the screen, which are not covered by guarantee or warranty. BA92/BA93/BA93W User Manual... -
Page 27: Modular Options
Swipe cards should not be allowed to come into close contact with a magnetic field. Swipe cards should only be inserted in the top of the specially designed slit of the reading device. If the card is inserted in another place, this could damage the reading head. BA92/BA93/BA93W User Manual... -
Page 28: Cleaning Instruction
In order to guarantee good reading results, the swipe card reader should be cleaned from time to time. This is carried out by using a special cleaning card that can be purchased from Wincor Nixdorf. For details on software application programming, please refer to BA9x MSR/Waiter Lock Programming Manual. -
Page 29: Rfid/Nfc Reader
In order to guarantee good reading results, the sensor should be cleaned from time to time with a soft cloth to remove dust. For details on software application programming, please refer to BA9x RFID/NFC Reader Programming Manual. BA92/BA93/BA93W User Manual... -
Page 30: Fingerprint Reader
Use normal cellophane to pick the dust particles by lightly pasting it on the window and then peeling it off slowly. Throw it away and use a new piece each subsequent time until the window is cleared of all noticeable particles. BA92/BA93/BA93W User Manual... -
Page 31: Mounting Peripherals
(seen from the front). Magnetic Waiter Lock RFID/NFC Fingerprint Swipe Card with holder, Reader with Reader with Reader with cable and holder, cable holder, cable holder, cable and two and two two screws and two screws screws screws BA92/BA93/BA93W User Manual... -
Page 32: Mounting On The Right Side (Seen From The Front)
Remove right side cover at the back of the display, exposing one end of a connecting cable. Release the catch on one side of the peripheral’s holder. Remove the back cover of the holder. BA92/BA93/BA93W User Manual... - Page 33 Use the two screws sup- plied to secure the holder to the display. Place in the back cover of the peripheral. The mounting is complete. BA92/BA93/BA93W User Manual...
-
Page 34: Mounting On The Left Side (Seen From The Front)
Lay the display face down on the protection sheet. Remove left side cover at the back of the display. Route in the supplied ca- ble as shown. Release the two catches on the side of the periph- eral’s holder. BA92/BA93/BA93W User Manual... - Page 35 Remove the back cover of the holder. Locate the holder to the side of the display uncov- ered in step 3. Route the connecting cable mentioned in step 3, into the holder and con- nect to the connector on the holder BA92/BA93/BA93W User Manual...
- Page 36 Use the two screws sup- plied to secure the holder to the display. 10. Place in the back cover of the peripheral. The mounting is complete. BA92/BA93/BA93W User Manual...
-
Page 37: Initial Setup
Lf damage has occurred during shipping or if the package contents do not match the delivery note, immediately in- form your Wincor Nixdorf sales outlet. Transport the device only in its original packaging (to protect it against impact and shock). - Page 38 *To avoid damage to the back cover of the stand, be careful of how you would remove it. ✔ ✘ ✘ BA92/BA93/BA93W User Manual...
-
Page 39: Preparing The Display
Remove the cable cover at the bottom of the display. Plug in cable. Place back the cable cover at the bottom of the display. Pull the cable through the opening of the cable cover. BA92/BA93/BA93W User Manual... -
Page 40: Installing The Stand
Installing the stand 1. Bring the display into a posi- tion above the stand. 2. Locate the screws (that were previously tightened halfway through) to the four holes on the frame of the stand. BA92/BA93/BA93W User Manual... - Page 41 3. Tighten the four Torx screws to secure the display to the stand. 4. Place in the VESA cover. BA92/BA93/BA93W User Manual...
- Page 42 5. Place in the back cover, routing the cable through the bottom. 6. Place in the base cover. The installation is complete. When uninstalling the stand always make sure that all cables are disconnected. BA92/BA93/BA93W User Manual...
-
Page 43: Connecting The Display
Before connecting cables switch off the system and disconnect it from the main supply. For display mounted on a stand 1. Push down the cable cover to release it and slide it out of the guide (see arrows). The connector panel is now accessible. BA92/BA93/BA93W User Manual... - Page 44 Make sure that cables that are not secured by a lock are loosely inserted into the strain relief. 3. Replace the cable cover. 4. Remove the small cover on the cable cover. 5. Pull out the cable through the opening. BA92/BA93/BA93W User Manual...
-
Page 45: For Display Mounted On A On Pole
For display mounted on a on pole Pole Mount “bottom mounted” 1. Push down the cable cover to release it and slide it out of the guide (see arrows). The connector panel is now accessible. BA92/BA93/BA93W User Manual... - Page 46 USB-B) and connect the plug. Make sure that cables that are not secured by a lock are loosely inserted into the strain relief. 3. Insert the lower hooks into the designated position (see arrows). BA92/BA93/BA93W User Manual...
- Page 47 4. Fix the holder with two screws. Pole Mount with VESA Pole Mount 1. Push the cable cover to release it and slide it out of the guide (see arrows). The connector panel is now accessible. strain relief BA92/BA93/BA93W User Manual...
- Page 48 USB-B) and connect the plug. Make sure that cables are not secured by a lock, are loosely inserted into the strain relief. 3. Slide in the cable cover. Ensure that it catches at the sides (see arrows). BA92/BA93/BA93W User Manual...
- Page 49 4. Fix the VESA 100 holder with four screws. The installation of the VESA 100 pole mount is complete. BA92/BA93/BA93W User Manual...
-
Page 50: Ergonomic Terminal Workplace
Position the screen within a 0° preferred and permit ted 40° range of vision, so that you can look vertically onto the 30° screen. 30° preferred range of vision BA92/BA93/BA93W User Manual... -
Page 51: Technical Data
260 cd/ m Non-Touch 400 cd/ m 310 cd/ m Projected Capacitive 800:1 800:1 500:1 Contrast Resistive 800:1 700:1 Non-Touch 800:1 800:1 Backlight Power Typical 9.85 W 11.95 W 14.60 W consumption Maximum 10.50 W 12.80 W 15.50 W BA92/BA93/BA93W User Manual... -
Page 52: Dimensions (Mm)
Dimensions (mm) BA92 BA92/BA93/BA93W User Manual... - Page 53 BA93 BA92/BA93/BA93W User Manual...
- Page 54 BA93W BA92/BA93/BA93W User Manual...
-
Page 55: Projected Capacitive Touch Screen
USB 2.0 Protocol HID 1.1 (Human Interface Device) Device supported Olitronic GmbH magnetic key, 99-L- 01 (DS1990A) Physical Interface 1-Wire, serial Height x Width(Screen mounted )x Depth 125 x 36 x 34 mm Weight approx. 107 g BA92/BA93/BA93W User Manual... -
Page 56: Rfid/Nfc Module
20% to 80% non-condensing Supported Operating System Windows 7 Pro POSReady 7 Windows 8.1 Pro Windows 8.1 Industry POSReady 2009 WNLPOS2 WNLPOS3 Height x Width(Screen mounted) x Depth 125 x 36 x 34 mm Weight 115 g BA92/BA93/BA93W User Manual... -
Page 57: Supported Resolution
47.7 kHz Positive 60.0 Hz Positive WXGA+ 1440 x 900 60Hz 55.9 kHz Negative 59.9 Hz Positive 1600 x 900 60Hz 56.0 kHz Negative 59.9 Hz Positive WSXGA+ 1680 x 1050 60Hz 65.3 kHz Negative 60.0 Hz Positive BA92/BA93/BA93W User Manual... -
Page 58: Abbreviation Index
On Screen Display Point Of Sales SVGA Super Video Graphics Array Thin Film Transistor Technology (LCD Technology) Universal Serial Bus Verband Deutscher Elektrotechniker (German Electricians Association) VESA Video Electronics Standard Association Video Graphics Array Extended Graphics Array BA92/BA93/BA93W User Manual... - Page 59 Wincor Nixdorf Pte Ltd 151 Lorong Chuan New Tech Park #05-01A/B Singapore 556741 Order No.: 01750256092F...
Need help?
Do you have a question about the BA92 and is the answer not in the manual?
Questions and answers