Table of Contents
Advertisement
Quick Links
Advertisement
Table of Contents

Related Manuals for Wincor Nixdorf BA73A-2


Summary of Contents for Wincor Nixdorf BA73A-2
- Page 1 BA73A-2 Flat Panel Display User Manual Edition February 2008...
- Page 2 Li nux™ is a re gis te red tra de mark of Li nus Tor valds Pen ti um™ is a re gis te red tra de mark of the In tel Cor po ra ti on MS-DOS™, Wind ows 95™, Wind ows 98™, Wind ows NT™ and Wind ows CE™...
-
Page 3: Table Of Contents
Tech ni cal Data ..... . 20 BA73A-2 ....... . . 20... - Page 4 BA73A-2 re sis ti ve Touch, short time Ope ra ti on ... . . 21 BA73A-2 In fra red Touch ......21 TFT/LCD Screen.
-
Page 5: Introduction
The low-ener gy, fli cker free and low ra di ati on co lour mo ni tor of the BA73A-2 is a LCD in TFT-tech no lo gy (Thin Film Tran sis tor). -
Page 6: About This Manual
(soft wa re and hard wa re), the ope ra ti on and the main ten an ce of your BA73A-2. Some parts of this book re qui re fa mi lia ri ty and ex per ien ce in wor king with ope ra ting sys tems and in stal la ti on and con fi gu ra ti on procedures. -
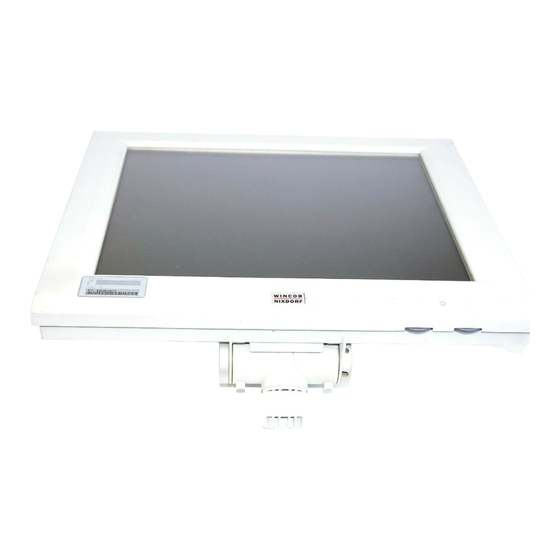
Page 7: The Flat Panel Display Ba73A-2
ON/OFF LED The screen mo du le re pre sents the main unit of the BA73A-2. It com pri ses of a TFT-LCD co lour screen, the TFT-in ter fa ce and an in ver ter that ge ner ates the vol ta ge for bac klighting the screen. -
Page 8: Bright Ness And Loud Ness
GENERAL Bright ness and Loud ness You can ad just the bright ness and the loud ness with the thumb wheels lo ca ted down to the right of the front of the screen. dark power off green power on yellow power save... -
Page 9: Capacitive Touch Screen (Option)
Con duc ti ve Coa ting Pro tec ti ve Noi se Shield When you connect your new BA73A-2 to your BEETLE for the first time you have to calibrate the Touch Screen. Details depend on the operating system that you are using. -
Page 10: Clea Ning In Struc Tions
CAPACITIVE TOUCH SCREEN (OPTION) You can ad just the bright ness and the loud ness with the thumb wheels lo ca ted down to the right of the front of the screen. Clea ning In struc tions Al ways turn off the sys tem be fo re clea ning. The glass sur fa ce of your Touch Screen should be clea ned with a mild, abrasive free, com mer ci al ly avai la ble glass clea ning pro duct. -
Page 11: Resistive Touch Screen (Option)
Hard-coa ted po ly es ter Adhesive Glass sub stra te with spa cer When you connect your new BA73A-2 to your BEETLE for the first time you have to calibrate the Touch Screen. Details depend on the operating system that you are using. -
Page 12: Clea Ning In Struc Tions
RESISTIVE TOUCH SCREEN (OPTION) sphe ri cal ra di us of 0.8 mm and con tain no sharp ed ges or burrs that may cause damage to the topsheet. Clea ning In struc tions Al ways turn off the sys tem be fo re clea ning. The sur fa ce of your Touch Screen should be clea ned with a wa ter-ba sed sol vent or a non-ab ra si ve clea ner. -
Page 13: Infrared Touch Screen (Option)
INFRARED TOUCH SCREEN (OPTION) Infrared Touch Screen (Option) Ge ne ral The infrared (IR) technology is based on the interruption of a grid of IR light beams before the surface of a screen. The touch frame contains a row of infrared light emitting diodes (LEDs) and photo transistors, each mounted on two opposite sides to create a grid of invisible infrared light. -
Page 14: Clea Ning In Struc Tions
INFRARED TOUCH SCREEN (OPTION) sensors detect the absence of light and transmit a signal, that identifies the x and y coordinates. Breaking through the grid has the same ef fect as cli cking the left mou se but ton. To avoid malfunctions: Do not fix labels or stickers on the frame and do not put pencils or the like on the inner frame. -
Page 15: Installing And Securing
Wincor Nixdorf sales outlet. Trans port the de vi ce only in its ori gi nal pa cka ging (to pro tect it against im pact and shock). -
Page 16: Securing The Screen Into Tube Version
SECURING THE SCREEN INTO TUBE VERSION Now fas ten the screw on the foo ted stand into pla ce again using the cross tip screwdri ver. En su re that the screw is in the cor rect po si ti on. Securing the screen into Tube Version The sys tem has been de sig ned for se cu ring into pla ce on a tu bu lar stand, with a tube with 35.2 ±... -
Page 17: Adjustable Screen Angle
ADJUSTABLE SCREEN ANGLE Adjustable Screen Angle The display is fit ted with a joint on the rear. You can op ti mi ze the an gle of the screen de pen ding on the vie wing and lighting con di tions. Use a screwdri ver to set the twi sting for ce of the tight... -
Page 18: Ergonomic Terminal Workplace
ERGONOMIC TERMINAL WORKPLACE Ergonomic Terminal Workplace Plea se ob ser ve the fol lo wing when set ting up your ter mi nal work pla ce: Avoid di rect gla ring and re flec ti ve gla ring. Use the screen only in a con trol led lu mi nan ce su roun ding. -
Page 19: Installing An Adapter
LCD-ADAPTER Installing an Adapter The flat panel display is either connected to the BEETLE system via a LCD adapter (submodule of the CPU) or via a graphic PCI controller. Further informations on the controller see in the user manual "Graphic PCI Controller". -
Page 20: In Stal Ling A Lcd-Adap Ter
LCD-ADAPTER In stal ling a LCD-Adap ter First en su re that the con trol ler is swit ched off and the mains supp ly plug has been pul led out. Open the BEET LE sys tem. Plug in the TFT adap ter on the CPU mo du le as shown in the il lu stra ti on. -
Page 21: Inserting The Cable
PULL PULL rail. In sert the 40-pin BA73A-2 ca ble of the key bo ard. The ca ble will be car ried in a cur ve from the small co ver of the screen mo du le to the ca ble co ver. -
Page 22: Releasing The Cable Connection
RELEASING THE CABLE CONNECTION Press the cover of the cable connection (see arrow). Open the cover and connect the cable to the screen. Releasing the Cable Connection Ne ver re mo ve a ca ble from a con nec tor so cket by sim ply pul ling on the ca ble. - Page 23 RELEASING THE CABLE CONNECTION Press the plastic lat ches of the MDR con nec tor to get her and then re mo ve the con nec tor from the socket.
-
Page 24: Technical Data
Footed stand 7.6 kg Weight Footed stand 2.4 kg The following operating conditions are valid for a BA73A-2 that is fitted with all the available modules. BA73A-2 w/o Touch/ capacitive Touch IEC 721 3/3 Class 3K3 Climate class +5°C - +40° C... -
Page 25: Ba73A-2 Resistive Touch, Long Time Operation
BA73A-2 RESISTIVE TOUCH, LONG TIME OPERATION BA73A-2 resistive Touch, long time Operation Climate class IEC 721 3/3 Class 3K3 Operating temperature +5°C - +40° C Humidity 20% - 50% rel. humidity, non condensed BA73A-2 resistive Touch, short time Operation Climate class... -
Page 26: Tft/Lcd Screen
PLUG & PLAY FEATURE TFT/LCD Screen Horizontal (KHz) 48,3 Frequencies Vertical (Hz) Horizontal 1024 pixel Vertical 768 pixel Solutions LCD adapter/graphic PCI controller: RGB 16, 256, 64k, Colour depth LCD adapter: up to 16 mio. colour approx. 0,30 mm x 0,30 mm Pixel Format LVDS Interface... -
Page 27: Touch Screen (Optional)
“2” or “3” means a touch of ELO. When the digits "X.X" are missing on the type label and the display has a touch screen, it is a matter of 3M technology. Wincor Nixdorf BA7XA2/ rTouch 5V/ 12V 017500 000000 0.7A/ 0.7A... -
Page 28: Elo Ir Touch Screen, Elo R- Touch (Optional)
Iden ti fi ca ti on of ELO re sis ti ve and in fra red touch The pictures show samples of BA7x type labels. The last digit in the marked field indicates the touch technology. A “2” means a resistive and a “3” an infrared screen. Wincor Nixdorf BA7XA2/ rTouch 5V/ 12V 017500 000000 0.7A/ 0.7A... -
Page 29: Screen Driver Installation
SCREEN DRIVER INSTALLATION Screen Driver Installation When installing drivers for the touch pay attention to the following: The re are sub stan ti al dif fer en ces bet ween dri vers for 3M and ELO. 3M dri vers are avai la ble for the fol lo wing ope ra ting sys tems: Wind ows: Wind ows XP, WE POS Li nux: WNLPOS. -
Page 30: Current Consumption Of The Screen Module
POWER SAVE MODE 40-pin connector TFT cable 2.5 W Power Consumption 480 mA Current Consumption 50 mA/ 30 mA Current Consumption of the Screen Module Consisting of an LCD display, Touch Screen incl. controller, inverter, interface. + 12V (Normal Mode) 0 mA + 12V (Standby Mode) + 5V (Normal Mode) -
Page 31: Plug & Play Feature
PLUG & PLAY FEATURE Plug & Play Feature The flat panel display is featured with the Plug and Play property. This prpperty is a subset of the EDID specification. Plug and Play feature is only possible if all components are equipped with this property: BA73-2, TFT sig nal ca ble A (This ca ble with this add-on of Plug and Play is de li ver ed for a fair ly long time),... -
Page 32: Programming The Msr
FI LES Programming the MSR Two kinds of magnetic card readers (MSR) are possible. In the first version the MSR is programmable and in the last edition it is non-programmable. By pro gram ming the mag ne tic card rea der you have the pos si bi li ty to fle xi bly ad just the MSR to your spe ci al needs. -
Page 33: Main Functions
MAIN FUNCTIONS “DOS Mode” This sta te is used by the Re tail De vi ce In ter fa ce (RDI), it is en te red by rsp. com mands from Wind ows Mode “Pro gram med” In this sta te a tab le has been sent to the MSR and is sto red in Flash me mo ry;... -
Page 34: Key Bo Ard Con Nec Ti On
KEY BO ARD CON NEC TI ON is part of the di alo gue uti li ty KBU TI.EXE. The se 4 pro grams the re fo re are in ten ded to be used in con juncti on with .BAT fi les. They re turn va lu es that can be che cked using ER ROR LE VEL. - Page 35 CREA TING TAB LES in a DOS wind ow of Wind ows 9x and in a DOS wind ow of Wind ows NT, Wind ows 2000 and Wind ows XP. Sen ding and Re cei ving tab les, ho we ver, is only pos si ble un der MS DOS or Wind ows 9x.
-
Page 36: Sen Ding And Re Cei Ving Tab Les
SEN DING AND RE CEI VING TAB LES dri ver for the rsp. coun try. The tar get con fi gu ra ti on is im por tant, not the con fi gu ra ti on at the time when the tab le is crea ted. For the codes of the data of the various tracks of the swipe card reader and insertion rsp. - Page 37 USE FUL HINTS RCVKBT.EXE KB2DEF.EXE KBCHKDEF.EXE are pro vi ded espe ci al ly for this si tua ti on to al low sup port of the tech ni ci ans. Ho we ver, the pro grams alo ne are not hel pful for a tech ni ci an! Ins te ad they should be avai la ble de pen dent on the so lu ti on on disks to get her with rsp.
-
Page 38: Manufacturer's Declaration And Approval
The BA73A-2 has been awar ded the GS sym bol for “Ge prüf te Si cher heit” (tes ted sa fe ty). BA73A-2 ful fills the re qui re ments for er go no my ac cor ding to ISO 13406-2. -
Page 39: User Information
USER INFORMATION Ad di tio nal ly, the BA73A-2 has been awar ded the cUL- and UL- sym bol. Accessory LCD monitor BA73A-2 for use with UL-listed computers. User Information Win cor Nix dorf In ter na tio nal GmbH does not ac cept re spon si bi li ty for ra dio and TV in ter fe ren ce and faults that are cau sed by un aut ho ri zed chan ges that have been made to the de vi ces. -
Page 40: Instructions For Maintenance
Instructions for Maintenance Cle an your BA73A-2 re gu lar ly with an ap pro pria te sur fa ce clea ning pro duct. Make sure that the de vi ce is swit ched off, con nec tor ca bles are un plug ged and that no moi stu re is al lo wed to get into the in si de of the de vi ce. -
Page 41: Recycling
The BA73A-2 is ma nu fac tur ed wit hout the use of CFCs und CCHS and is pro du ced main ly from reu sa ble com po nents and ma te ri als. The pro ces sed plas tics can, for the most part, be re cy cled. -
Page 42: Abbreviation Index
ABBREVIATION INDEX Abbreviations AS CII Ame ri can Stan dard Code for In for ma ti on In ter chan ge Ad van ced Tech no lo gy BIOS Ba sic In put Out put Sys tem Cold cat ho de Fluo res cent Lamp Com mu ni ca ti on Port Cen tral Pro ces sing Unit Cat ho de Ray Tube...
Need help?
Do you have a question about the BA73A-2 and is the answer not in the manual?
Questions and answers