
Related Manuals for MobileDemand T1400


Summary of Contents for MobileDemand T1400
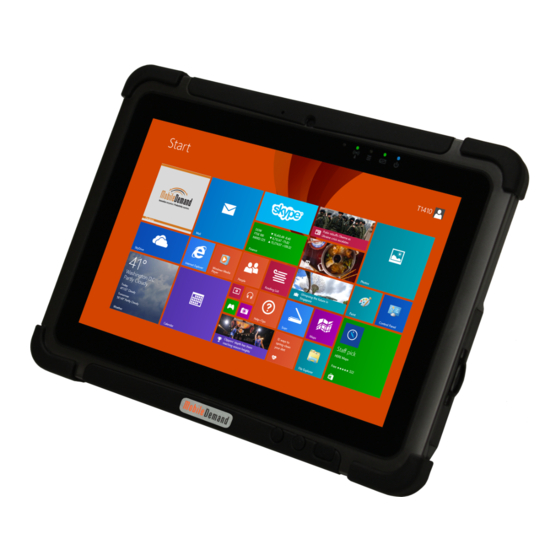
- Page 1 MobileDemand xTablet T1400 User’s Guide Please read these instructions carefully before using this product, and save this manual for future use.
- Page 2 Products that are referred to in this document may be either trademarks and/or registered trademarks of the respective owners. The publisher and the author make no claim to these trademarks. MobileDemand is a registered trademark of MobileDemand, LC. MobileDemand logos are registered trademarks of MobileDemand, LC.
-
Page 3: Table Of Contents
Setting up the RFID Reader 38 How to use the LTE Skylight Connection Mgr Software How to install LTE SIM Mechanical Drawings Accessories Chapter 3: Troubleshooting Troubleshooting (Basic) Chapter 4: Safety Informaiton Precaution on Battery Pack xTablet T1400 User Guide... - Page 4 General Product Safety Handling and Maintenance General Guideline Cleaning Guideline Touchscreen Guideline Regulatory Safety Statements Copyright Contact information Please read these instructions carefully before using this product, and save this manual for future use.
-
Page 5: Chapter 1: Getting Started
T1400 Users Guide Chapter 1: Getting Started Congratulations on purchasing the xTablet T1400. The rugged design allows you to use it in harsh outdoor environments. This chapter tells you step by step how to get the computer up and running. You will find instructions for the following procedures: ... -
Page 6: Description Of Parts
T1400 Users Guide Description of Parts Front: Right: Item Description Item Description I/O Cover Protects I/O ports 1 Front Camera 2 Megapixel Webcam Micro HDMI HDMI output to 2 LED Indicators: Show the current status external HDMI display of the xTablet T1400... - Page 7 T1400 Users Guide Front LED Indicators: Front Buttons: Docking Contacts: Rear Buttons Battery Lock: Expansion Port:...
- Page 8 T1400 Users Guide Item Description Item Description Kensington Kensington Lock access. Docking Docking contacts for Lock detail Contacts office and vehicle docks to provide Optional Barcode Imager for power and external Barcode reading 1D/2D barcodes. GPS antenna Optional RFID RFID reader for reading of 13.56MHz RFID tags.
-
Page 9: First-Time Operation
To insert the included standard battery pack into the xTablet T1400: 1. Disconnect any cords connected to the xTablet T1400. 2. Turn the xTablet T1400 over, back facing up. 3. Rotate the D-Rings so they are out of the way for the battery to be removed. -
Page 10: Hot Swapping Batteries
Note: If you have used the xTablet T1400 for several hours and then put it to sleep for several days, the main battery will be slowly depleted and may lose power all together. -
Page 11: Connecting To Power Supply
The xTablet T1400 operates either on external AC power or internal battery power. It is recommended to use AC power (for at least 6 hours) when you start up the xTablet T1400 for the first time in order to fully charge the battery. -
Page 12: Turning On / Off
T1400 Users Guide Turning On / Off Turning On Press and hold the power switch for 5 seconds until the blue LED power indicator lights up. Note: Do not press the power switch repeatedly. Do not perform the following operations until the hard drive indicator turns off... - Page 13 The computer will forcibly be turned off if the power switch is pressed and held for six seconds or longer. Leaving the tablet in sleep for several days on low batteries could cause the T1400 to drain all power in the main pack and backup battery which will turn off the tablet, losing unsaved...
-
Page 14: Chapter 2: Useful Information
Chapter 3: Useful Information CTRL-ALT-DELETE Operation To produce a Ctrl-Alt-Delete press and hold both Volume Keys down at the same time. Boot Menu To boot from a USB stick for example, you have two options. 1. When powering on the tablet Press F7 using a regular keyboard. 2. -
Page 15: Battery Status Led's
T1400 Users Guide Battery Status LED’s Based on your battery level and if your tablet is in normal operation, sleeping or powered off and charging, your LED lights will show like this. Battery 100% Battery 11-99% Battery 0-10% Tablet Plugged In, turned... - Page 16 Hot Tab Utility Interface Shortcuts The HotTab menu option allows users to configure short cuts to quickly access programs with a few taps. The Shortcuts menu offers 8 empty slots. Shortcuts can be mapped to any executable files (.exe) installed on the tablet. Short Cut Menu: To store a new shortcut: 1.
-
Page 17: Camera
T1400 Users Guide Camera To activate the Camera App, the default is the front Fn1 Button. To change, use the setting menu. This Hot- Tab menu option allows users take a picture or record a video. Before use, make sure... - Page 18 Description of Camera User Interface Buttons: You can get to these settings by selecting this icon from the HotTab menu. No Item Description Camera Switch Switch between front and rear cameras. Settings Available Settings: Picture Save: modify/inspect saved location for pictures. ...
-
Page 19: Hottab Devices
T1400 Users Guide Device This Hot-Tab menu option enables/disables xTablet T1400’s hardware functions: Item Status Color Description Orange Wi-Fi is enabled. White Wi-Fi is disabled. Orange WWAN (3G/4G) is enabled. White WWAN (3G/4G) is disabled. Orange GPS is enabled. -
Page 20: Hottab Setting Menu
White Expansion Port 5V Power is disabled. Orange External GPS antenna is used for GPS. White Built-in GPS antenna is used for GPS. Setting This Hot-Tab menu option provides users information such as PC Information, Battery status, and also device settings such as power management, and function key mappings. PC and Battery This section provides user PC and battery Information. - Page 21 T1400 Users Guide Function Key Mapping The function key mapping menu option allows user to change the physical function buttons, Fn1 and Fn2. Users can change what application will be launched with short press or long press of keys.
-
Page 22: Auto Screen Rotate- Windows 10 Enable - Disable
Auto Screen Rotation or Lock Screen Rotation for Windows 10 Windows 10 has the ability to rotate the screen when you physically rotate the tablet. However the UI aspect resolution is not always desirable switching from Portrait to Landscape position on your screen. -
Page 23: Auto Screen Rotate- Windows 8.1 Enable - Disable
T1400 Users Guide Auto Screen Rotation or Lock Screen Rotation for Windows 8.1 Windows 8.1 has the ability to rotate the screen when you physically rotate the tablet. However the UI aspect resolution is not always desirable switching from Portrait to Landscape position on your screen. -
Page 24: Auto Screen Rotate- Windows 7 Enable - Disable
Technical Tip: Windows 7 Enable and Disable Screen Rotation When using Windows 7, follow these steps to enable and disable the auto screen rotation. Note: This does not apply to Windows 8.1 To Enable the Screen Rotation: 1. Click on Start – Then click Control Panel 2. - Page 25 T1400 Users Guide 4. Select the box to enable the screen rotation and click Apply. 5. You will be prompted to restart. 6. Restart 7. Once restarted the screen rotation will work. 8. If screen rotation doesn’t work after this, then the HotTab application will need to be configured to allow auto screen rotation.
- Page 26 3. The Screen rotation is the bottom choice. 4. To enable the Auto Rotation, press the Auto Rotation menu item, and it will turn Orange. This means it is enabled. 4. If you want to lock in a particular orientation, then do not enable Auto Rotation, but rather, press the orientation you desire to use.
- Page 27 T1400 Users Guide 5. Once you select Auto Rotation, the screen will rotate to match the position of the tablet. To Disable Auto Rotation 1. As shown above, disable the Auto Rotation setting in Hot Tab. 2. Another alternative, is to disable the sensor in the Control Panel as shown in the above...
-
Page 28: Tech Tip - Windows 8.1 Password Required On Wake
Tech Tip: I don’t want Windows 8.1 to ask for my password when I wake my tablet from sleep We have noticed that even when we set the password to not prompt when the system awakes from sleep, it still asks for a password. This causes users extra time to put in a password. In Desktop Mode press and hold your finger on the Windows Start Logo in the bottom left corner of the tablet Select the Control Panel... -
Page 29: Tech Tip - Windows 10 Password Required On Wake
T1400 Users Guide Tech Tip: I don’t want Windows 10 to ask for my password when I wake my tablet from sleep Press and hold your finger on the Windows Start Logo in the bottom left corner of the tablet. A menu will come up, choose Control Panel. -
Page 30: High Resolution Screen Scaling And Setting
Click on the “Don’t require a password”, and then Save changes. High Resolution Screen Scaling and Setting The xTablet T1400’s 1920 x 1200 high resolution display is perfect for viewing image, video, or other applications, however, Windows user interface (icons, buttons, and other user interface elements) may be too small to read and operate at the default Windows settings. - Page 31 T1400 Users Guide Changing display scaling setting in Windows 10 Perform the following to change display scaling setting: 1. Tap and hold anywhere on the desktop for 3 seconds and release to bring up the context menu, and select “Screen resolution” option as shown below: 2.
-
Page 32: High Resolution Screen Scaling Win 8.1 & Win7
Changing display scaling setting in Windows 8.1 & Windows 7 Perform the following to change display scaling setting: 7. Tap and hold anywhere on the desktop for 3 seconds and release to bring up the context menu, and select “Screen resolution” option as shown below: 8. - Page 33 T1400 Users Guide 10. A prompt may show up to ask if you want to sign out to apply the scaling change. Hit “Sign out Now” to apply changes, as shown below: 11. The user may now login again to Windows to see the changed display scaling already being applied.
- Page 34 2. The Customize your display settings will come up. To change the resolution you would click on the Advanced display settings...
- Page 35 T1400 Users Guide 3. The Advanced display settings menu comes up. 4. You can see here that the resolution is not an option to change. Changing screen resolution setting in Windows 8.1 & Windows 7 Alternatively, instead of changing the display scaling setting, user may choose to change the overall resolution setting to make screen elements bigger.
- Page 36 2. Click on the dropdown option next to “Resolution” and select the desire resolution by tapping on the scale: 3. Hit “Apply”. A prompt “Display Settings” prompt will show up to ask the user if the applied resolution is usable. 4.
-
Page 37: Setting Up The Barcode Scanner
T1400 Users Guide Setting up the Barcode Scanner This configuration should be completed prior to shipment. If for some reason scanning is not functioning correctly please go through the following steps starting with opening Windows ... - Page 38 Then select Function 2 Then Select Short Press ...
- Page 39 T1400 Users Guide Change the Select for F2 Short Press to Barcode Go to driver’s folder C:\Drivers Folder\Barcode\MDScanner and run the MDScanWizard.exe This wizard will launch. Verify “Intermec” is the Scanner Type. Verify the COM port is 15. Verify “Use ISCP Packet Mode” is selected Verify Start with Windows (All Users) is selected. Click on Next. 35 ...
- Page 40 Make sure these items are selected. Click on Finish. Note: IF you are an AB customer and use the registry to pull scan data, click the lower right hand selection then click on Finish. Make sure you see this on the toolbar. You will have to wait for the MDScanWizard application to start and go down to the toolbar. There are two barcodes that need to be scanned to place the scanner in PULSE mode, and to put in a 5 second timeout. Print out the barcodes and scan them in. The two codes to scan are in an XPS document included in the directory. Test the scanner. ...
- Page 41 T1400 Users Guide Setting up the RFID Reader To enable the built-in HF RFID Reader, perform the following scenarios: 1. Open HotTab utility by pressing (Menu) Button located on the front panel, OR Launching HotTab Utility application. 2. Tap on Device button.
-
Page 42: Setting Up The Rfid Reader
5. Open the application where RFID reader will input, have a HF RFID tag close to the RFID antenna, and the data will be read and shown on the indexed field. How to setup RFID Reader To setup the built-in HF RFID Reader, perform the following scenarios: Open HotTab utility by pressing (Menu) Button located on the front panel, OR Launching HotTab Utility application. - Page 43 T1400 Users Guide Trigger Setting Auto Scan The default setting for RFID trigger is AUTO SCAN. Under this setting, the RFID Reader will always be ready to scan tags. When the RFID tag is detected from RFID antenna, the data will be read automatically.
- Page 44 T1400 Users Guide Single Scan User can also define the RFID Reader scanning as SINGLE SCAN. Under this setting, the RFID Reader will be triggered only when the user clicks on “Send”. Note: The RFID scanner Antenna is located here on the back side of the tablet.
- Page 45 T1400 Users Guide Prefix / Suffix Prefix User can type in this field to define the characters BEFORE the data scanned. After the characters are typed, click on “Set” to save the settings. Suffix User can type in this field to define the characters AFTER the data scanned. After the characters are typed, click on “Set”...
- Page 46 T1400 Users Guide Settings Sound The SOUND check box defines whether a beep sound will come with the data scanning. Data Output Display data on UI This option is to copy the scanned data to another UI in this PC.
- Page 47 T1400 Users Guide RFID Output Setting The default setting for built-in HF RFID Reader is to READ UID only. For some applications, user might need to read or write further block data; the drop-down menu under this section can do this change.
-
Page 48: How To Use The Lte Skylight Connection Mgr Software
Step 4: Inserting your SIMM card Step 5: Connecting to the carrier Step 6: Set up xTablet GPS. You do not need a mobile broadband account to use the MobileDemand xTablet's GPS feature. Step One: Verify that WWAN Mode is enabled Start up the xTablet T1400 Press the Home Key to bring up the HotTab application. - Page 49 T1400 Users Guide Step Two: Start the Skylight application You start the Skylight application from the icon on the Desktop of Windows. To start the Skylight application 1. Tap Start > Desktop – Skylight The Skylight application window opens and the...
- Page 50 T1400 Users Guide Click on “Network Operator, and you will be presented with a drop down list of carriers. Select your carrier from the list of carriers. You should choose Generic for T-Mobile in the USA xTablet T1400 User Guide...
- Page 51 This is letting you know it is ok to connect. Make sure you read below about instructions on how to add your 3FF Micro SIM from your carrier to the xTablet T1400. xTablet T1400 User Guide...
-
Page 52: How To Install Lte Sim
T1400 Users Guide The next thing you must do is register your radio module information with a carrier and get a SIM card. Here are the steps to follow for that. Turn off the tablet to install the 3FF Micro SIM card. Follow the instructions below on inserting the 3FF Micro SIM card. - Page 53 T1400 Users Guide 6. Insert the Micro SIM Card as shown. 7. Gently press the Micro SIM into the slot with your finger. xTablet T1400 User Guide...
- Page 54 T1400 Users Guide 8. Once the Micro SIM is fully seated you will feel it click and lock into place. 9. Remove Antenna cable from retaining socket and retaining screw from threaded insert xTablet T1400 User Guide...
- Page 55 T1400 Users Guide 10. Install LTE Module the slot 11. Secure in place with retaining screw xTablet T1400 User Guide...
- Page 56 T1400 Users Guide 12. Connect Antenna cable to antenna port labeled ‘Main’. Take care to route cable so that it will not be pinched in the seals for the access hatch. 13. Replace LTE Module cover xTablet T1400 User Guide...
- Page 57 1. Now that your 3FF Micro SIM is installed and it is associated with your carrier, you can connect with your carrier . 2. Power on the xTablet T1400. 3. Click “Connect” to connect to the carrier. If this is the first time you have connected, there will be an automatic activation in the back ground.
-
Page 58: Mechanical Drawings
T1400 Users Guide Mechanical Drawings Front view of the xTablet T1400 xTablet T1400 User Guide... - Page 59 T1400 Users Guide Side view of the xTablet T1400 xTablet T1400 User Guide...
-
Page 60: Accessories
T1400 Users Guide Accessories The xTablet T1400 offers the following optional accessories for purchase: Gigabit Ethernet Adapter RS232 Ethernet Adapter 30-pin extension port 30-pin extension port Length; 10 cm Length:10 cm Connector: RJ45, female Connector: DB9 Serial RS232 Cable, female ... -
Page 61: Chapter 3: Troubleshooting
Verify in HotTab The xTablet T1400 may be in sleep mode Nothing appears on the screen. (indicated by blinking green indicator light). Press the power button to wake up the display. - Page 62 Make sure that GPS receiver and the location sensor are enabled in Control Panel. The xTablet T1400 may be out of coverage area. Move your xTablet T1400 outdoors or closer to a window. Check if your surroundings have interference, such as microwave ovens, cordless phones.
- Page 63 T1400 Users Guide Problem Solution With Vehicle Dock connected while Right click the start button having a monitor connected, the Touch •Choose control panel from the popup is responding on the 2 monitor. menu Open the ‘Tablet PC Settings’ control panel (grouped under ‘Hardware and...
-
Page 64: Chapter 4: Safety Informaiton
T1400 Users Guide Chapter 4: Safety Information Follow and adhere to all warnings and instructions in this manual. For your safety, please read all safety and operating instructions before using the product. Keep this manual for future reference. Precaution on Battery Pack Do Not Expose the Battery Pack to Excessive Heat, or Extreme Heat (Near a Fire, in Direct Sunlight for example). -
Page 65: General Product Safety
T1400 Users Guide General Product Safety This product should not be used near water such as bathtubs, sinks, swimming pools, wet basement, etc. Do not block any ventilation openings. Do not place the product against a wall or in an enclosed space as doing so might impede the flow of cooling air. -
Page 66: Handling And Maintenance
TV, refrigerator, motor, or a large audio speaker. Do not place heavy objects on top of the xTablet T1400 as this may damage the display. The screen surface can be scratched. Do not use paper towels to clean the display. It is best to use a touch screen cleaning cloth. -
Page 67: Regulatory Safety Statements
Regulatory Safety Statements FCC Digital Emissions Compliance This equipment has been tested and found to comply with the limits for a Class B digital device, pursuant to Part 15 of the FCC Rules. These limits are designed to provide reasonable protection against harmful interference in a residential installation. -
Page 68: Copyright
Copyright Copyright 2014. All rights reserved. © No part of this user manual may be transmitted, stored in a retrieval system, or translated into any language or computer language, in any form or by any means, without the prior written permission of the manufacturer.
Need help?
Do you have a question about the T1400 and is the answer not in the manual?
Questions and answers