Table of Contents
Advertisement
Advertisement
Table of Contents

Related Manuals for MobileDemand xTablet T1200


Summary of Contents for MobileDemand xTablet T1200
- Page 1 T1200 Rugged Tablet PC User's Guide...
- Page 2 Products that are referred to in this document may be either trademarks and/or registered trademarks of the respective owners. The publisher and the author make no claim to these trademarks. MobileDemand is a registered trademark of MobileDemand, LC. MobileDemand logos are registered trademarks of MobileDemand, LC.
-
Page 3: Table Of Contents
Table of Contents ....................5 OPYRIGHT ................. 5 EGULATORY TATEMENT Federal Communications Commission Statement ......................5 Declaration of Conformity ............................... 5 RF exposure warning................................ 6 Canada, Industry Canada (IC) Notices ........................... 6 Battery Disposal ................................7 CLASS 1 LASER PRODUCT ............................7 BEFORE YOU START .............. - Page 4 MAKING CONNECTIONS ............25 USB D ................25 ONNECTING EVICES ..............26 ONNECTING ERIPHERAL EVICES (LAN)..........27 ONNECTING TO A OCAL ETWORK ................28 ONNECTING EADPHONES POWER MANAGEMENT ............29 ................29 SING THE OWER ..............30 SING THE OWER AVING USING THE BIOS SETUP UTILITY ..........
-
Page 5: Copyright
Preface Copyright © Copyright 2012. All rights reserved. No part of this user manual may be transmitted, stored in a retrieval system, or translated into any language or computer language, in any form or by any means, without the prior written permission of the manufacturer. Information is subject to change without prior notice. -
Page 6: Rf Exposure Warning
Preface RF exposure warning This equipment must be installed and operated in accordance with provided instructions and must not be co-located or operating in conjunction with any other antenna or transmitter. End-users and installers must be provided with antenna installation instructions and transmitter operating conditions for satisfying RF exposure compliance. -
Page 7: Battery Disposal
Preface Ce périphérique a été évalué et démontré conforme aux limites SAR (Specific Absorption Rate – Taux d'absorption spécifique) d'IC lorsqu'il est installé dans des produits hôtes particuliers qui fonctionnent dans des conditions d'exposition à des appareils portables. Battery Disposal THIS PRODUCT CONTAINS A LITHIUM-ION OR NICKEL-METAL HYDRIDE BATTERY. - Page 8 Preface CAUTION FOR ADAPTER THIS TABLET PC IS FOR USE WITH DEDICATED AC ADAPTER. BATTERY SAFETY DANGER OF EXPLOSION IF BATTERY IS INCORRECTLY REPLACED. REPLACE ONLY WITH THE SAME OR EQUIVALENT TYPE RECOMMENDED BY THE MANUFACTURER. DISPOSE OF USED BATTERIES ACCORDING TO THE MANUFACTURER'S INSTRUCTIONS.
-
Page 9: Before You Start
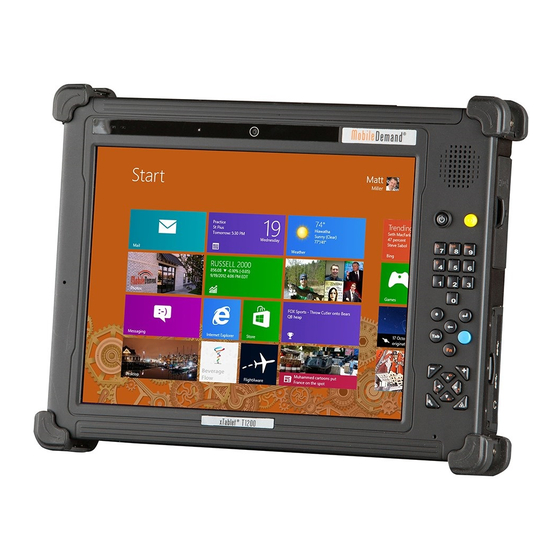
Before You Start Before You Start Congratulations on your purchase of this tablet PC. This rugged tablet PC is portable and provides users with maximum mobile computing experience in a wide range of working environments. Before you begin using your tablet PC, read this chapter to familiarize yourself with the main components installed in the system. -
Page 10: Features
Before You Start Features • Intel ”Ivy Bridge” 3rd Generation i-Core Series CPU • Rugged feature: 5 feet drop and dust/waterproof IP 65 • 10.4” XGA LCD with Multi-touch function • Two battery packs support 9~10 hrs battery life and hot swapping •... -
Page 11: Components
Before You Start Components Front View Item Description Status Indicators Indicate the corresponding function status. (Power, Battery, See “Status Indicators” on page 15. HDD, Wireless) Camera Use to take pictures. Speaker Emit sound. Power button Press to power on and off the tablet PC. Scanner button Press to trigger the Barcode scan function if the barcode scanner is on. - Page 12 Before You Start Item Description Camera button Shutter button for camera utility Function button Use with other key combinations to perform special functions. • < > + < >: Increase audio volume. • < > + < >: Decrease audio volume. •...
-
Page 13: Bottom View
Before You Start Back View Item Description Camera LED flash Provide additional lighting when taking pictures under low light environment. Camera Use to take pictures. Battery latch Lock the battery in place. Battery compartment Contain the battery. Battery LED indicator Press the button to display the remaining battery power level. -
Page 14: Left View
Before You Start Left View Item Description Kensington lock slot Connect to a Kensington-compatible tablet PC security lock. Mini USB port Connect USB peripheral devices. Serial port (RS-232) Connect a peripheral device, such as a printer or other device with serial port. LAN (RJ-45) port Connect to a local area network (LAN) using an Ethernet cable. -
Page 15: Status Indicators
Before You Start Status Indicators The status indicators in the upper left corner of the tablet PC light up when a particular function of the tablet PC is active. Each indicator is marked with a symbol. Icon Item Description The LED always lights on (blue) when the system is Power running. -
Page 16: Getting Started
Getting Started Getting Started This chapter will guide you on how to use your tablet PC. Powering Up Your Tablet PC Your tablet PC can be powered up using the AC adapter or the Lithium-ion battery. Connecting the AC Adapter The AC adapter powers up your tablet PC and charges the battery. -
Page 17: Installing The Batteries
Getting Started Installing the Batteries To install the batteries, follow the steps below: 1. Align and insert the first battery to the battery compartment. 2. Push completely until the battery locks into place. 3. Slide the battery latch to the lock position to secure the battery. -
Page 18: Charging Time
Getting Started Charging Time Number of Charging duration battery pack (at 25ºC) 3 hours 6 hours NOTE • The charging time may be longer if you are using your tablet PC while charging the battery. CAUTION • DO NOT charge the battery if the temperature is below 0ºC or higher than 60ºC. -
Page 19: Removing The Batteries
Getting Started Removing the Batteries To remove the batteries, follow the steps below: 1. Press and hold the battery latch release button to slide the second battery latch to the unlock position. 2. Remove the second battery out of the battery compartment. -
Page 20: Starting Your Tablet Pc
Getting Started Starting Your Tablet PC Turning On Your Tablet PC Press the button until the Power LED lights up. Changing the Display Orientation You can rotate the display orientation to suit your preference. Shutting Down Your Tablet PC It is important to properly shut down your tablet PC to avoid the loss of unsaved data. -
Page 21: Using The Stylus
Getting Started Using the Stylus This tablet PC comes with an integrated stylus for accurate control input to the LCD touch panel and digitizer. You can use the stylus to point, select, or drag items or objects on the screen. Calibrate the Screen To ensure touch accuracy, calibrate the screen. -
Page 22: Using The Memory Cards
Getting Started Using the Memory Cards Your tablet PC supports different types of memory cards to provide faster data transfer. Supported types are as follows: • SD card • SDHC card • Mini-SD card (with adapter) Inserting a Memory Card With the label side down, push the memory card into the memory card slot until it clicks into place. -
Page 23: Using The Smart Card
Getting Started Using the Smart Card Your tablet PC is equipped with a built-in smart card reader that allows you to make secure purchases, store security information, and provide identification and information using a smart card. Inserting a Smart Card Insert a smart card into the smart card slot. -
Page 24: Using The Pc Cards
Getting Started Using the PC Cards Your tablet PC supports Type II PC Card, which can perform a variety of functions. NOTE • Refer to the PC Card manual for specific instructions on the card installation. Inserting a PC Card Insert a PC card firmly into the PC card slot until it clicks into the connector. -
Page 25: Making Connections
Making Connections Making Connections This chapter will guide you on installing peripheral devices to maximize the use of your tablet PC. Connecting USB Devices You can connect your tablet PC to other USB devices, such as a mouse, keyboard, digital camera, printer, or an external hard disk drive. 1. -
Page 26: Connecting Peripheral Devices
Making Connections Connecting Peripheral Devices You can connect your tablet PC to other peripheral devices, such as a printer or other device with serial port. 1. Connect one end of an RS-232 cable to the RS-232 port of your tablet PC. 2. -
Page 27: Connecting To A Local Area Network (Lan)
Making Connections Connecting to a Local Area Network (LAN) You can connect your notebook to a local area network (LAN) using the RJ-45 LAN port. 1. Connect one end of an RJ-45 cable to the LAN port of your tablet PC. 2. -
Page 28: Connecting Headphones
Making Connections Connecting Headphones You can connect your tablet PC to a headphone or external speakers. Plug the audio jack of the headphone or speakers to the Headphone jack of your tablet PC. -
Page 29: Power Management
Power Management Power Management This chapter will guide you on how to manage the system power. Using the Power Plan To improve energy efficiency, you can use the power plan to reduce the amount of power your tablet PC uses, maximize the performance, or balance the two. 1. -
Page 30: Using The Power Saving Mode
Power Management Using the Power Saving Mode When you are not using the tablet PC, turn off the tablet PC or set the tablet PC to enter sleep mode. To set the tablet PC to enter sleep mode, follow the steps below: 1. -
Page 31: Using The Bios Setup Utility
Using the BIOS Setup Utility Using the BIOS Setup Utility Your tablet PC has a BIOS setup utility which allows you to configure important system settings, including settings for various optional functions of the tablet PC. This chapter explains how to use the BIOS setup utility. BIOS Setup Menu The BIOS Setup Utility allows you to configure your tablet PC basic settings. -
Page 32: Navigating And Entering Information In Bios
Using the BIOS Setup Utility Navigating and Entering Information in BIOS Use the following keys to move between fields and to enter information: Tablet External Description Keypad Keyboard Selects screen. Moves up/down to select items. Confirms the selection and enters the selected menu Enter screen. -
Page 33: Main Menu
Using the BIOS Setup Utility Main Menu The Main menu displays the system overview information about BIOS version, CPU features, and total memory size. You can also set the system date and time. Advanced Menu The Advanced menu allows you to select SATA mode, set the keypad backlight timer, BIOS hotkey press, calibrate fan and battery, and configure devices, power management, Intel Rapid Start Technology, and Trusted Computing settings. -
Page 34: Boot Menu
Using the BIOS Setup Utility Boot Menu The Boot menu allows you to configure the boot type and boot sequence. Security Menu The Security menu allows you to set or change the Administrator and User passwords, and configure Secure Boot settings. -
Page 35: Save & Exit Menu
Using the BIOS Setup Utility Save & Exit Menu The Save & Exit menu allows you to save or discard the changes, or restore the default values for all setup options before leaving the BIOS Setup Menu. -
Page 36: Specifications
Specifications Specifications Features Specifications Processor Type 3rd Generation Intel i-Core Series QM77 Chipset Two 204-pin SODIMM sockets each for Type DDRIII1600 2GB, 4GB, 8GB System Memory Maximum 16GB Memory Standard : : : : Display 10.4” XGA (1024x768) LCD with resistive multi- touch panel Sunlight readable: 10.4”... - Page 37 Specifications Features Specifications Audio out (For headphone)x1 Optional RF connectors for external WWAN, WLAN, or GPS antennas AC/DC Adapter AC power input:100V-240V,50Hz-60Hz, 65W ;output:19V Compliant with Energy Star 5.2 Battery Life One 6 cells battery pack (5200mAh, 57.72 W) is 4~5 hr. Second Battery Support optional second Battery 2nd battery is available if main-storage is...
Need help?
Do you have a question about the xTablet T1200 and is the answer not in the manual?
Questions and answers