Table of Contents
Advertisement
Quick Links
Advertisement
Table of Contents

Related Manuals for Ayra ITA3D 710


Summary of Contents for Ayra ITA3D 710
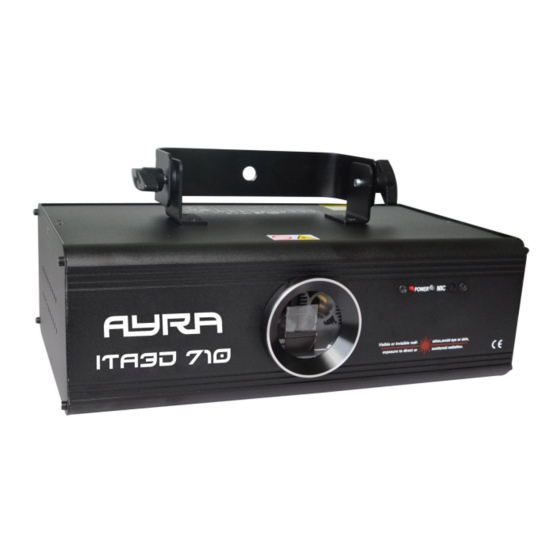
- Page 1 ITA3D 710 RGB DMX laser with 3D effect User manual...
-
Page 2: Safety Precautions
WARNING: Do not look directly into the beam coming out of the lens, from short distance or when a solid beam is projected. This may cause serious injury to eyesight. Ayra is not responsible for any injuries caused by incorrect use of this device. - Page 3 - Avoid heavy shocks and collision during transport and use, as this might cause damage to the laser diodes, electronic circuit, optics and housing. - Keep the device away from moisture, rain, water or any liquids as this may cause a short circuit and/or electric shocks.
-
Page 4: Box Contents
Box contents Box contents 1x ITA3D 710 laser device 1x user manual 1x IEC to Schuko power cable 1x XLR – XLR DMX signal cable Unit and accessory inspection - Always use the supplied power cable to connect the unit to a power supply. If the cable appears broken or has visible damage, do not use it. -
Page 5: Device Overview
Device overview 1. Beam output 2. Power status LED-indicator (red) 3. Microphone sensitivity LED indicator (blue) 4. Built-in microphone (used for sound-active mode) 5. DMX input 6. DMX output 7. DMX dipswitch setting (also used for activation of auto/sound active mode 8. -
Page 6: Setting Up The Device
Setting up the device Setting up the device - When the power supply is connected, the unit will first calibrate the stepping motors of the unit. It is normal that this may cause any noise. When the calibration is done, the unit is ready to be used (in the selected DMX, automatic or music controlled mode) - It is possible that the unit may shut off the beam projection when no music or sound is detected. - Page 7 Slave mode: It is possible to link several ITA3D 710 fixtures for a synchronized lasershow, without the use of a DMX controller. Connect your devices with standard XLR-XLR cables. The first device in the chain needs to be set to a basic function, such as sound-active or one of the auto shows.
- Page 8 DMX operating mode While in the DMX mode, it is possible to select the working mode of the laser. That way, you can either choose to use your own programmed presets of your DMX controller, or to activate the music activated/automatic working mode of the laser to have a fully-automatic lasershow.
-
Page 9: Technical Specifications
Technical specifications TYPE: ITA3D 710 Laser diodes Type ITA3D 710: - 60mW green laser (wavelength: 532nm) - 150mW red laser (wavelength: 650nm) - 500mW blue laser (wavelength: 450nm) Tech specs: - scanset: 15 kpps high-speed optical scanner with big angle capacities...
Need help?
Do you have a question about the ITA3D 710 and is the answer not in the manual?
Questions and answers