FLIR Scout Operator's Manual
Night vision
Hide thumbs
Also See for Scout:
- Operator's manual (38 pages) ,
- Quick start manual (2 pages) ,
- Operator's manual (38 pages)

Related Manuals for FLIR Scout


Summary of Contents for FLIR Scout
- Page 1 Scout Thermal Night Vision Camera Operator’s Manual Document Number: 431-TS00-00-10 Revision: 110 June 2011 .800.561.8187 information@itm.com www. .com...
- Page 2 FLIR for proper disposal. This document is controlled to FLIR Technology Level EAR 1. The information contained in this document is proprietary and/or restricted and pertains to a dual use product controlled for export by the Export Administration Regulations (EAR).
-
Page 3: Table Of Contents
Scout Camera Features ........2... - Page 4 — Scout Operator’s Manual June 2011 .800.561.8187 information@itm.com www. .com...
-
Page 5: Introduction
People, animals, and objects all make their own heat and their own contrast, and are clearly seen by the Scout in even the most adverse conditions. -
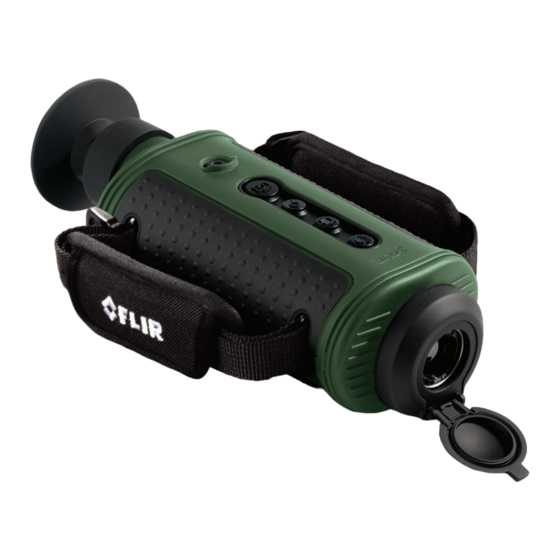
Page 6: Scout Camera Features
1—Introduction Scout Operator’s Manual 1–1 Scout Camera Features • Rugged design—Built to withstand the demands of outdoor use. It is fully submersible (IP67). • 240×180 or 320×240 microbolometer sensor for excellent image quality and clarity • Hot Shoe—Provides convenient power input and video output. -
Page 7: Detection Range
1–2 Detection Range The illustration below shows the comparative range performance of the Scout camera with different lens configurations. The data is based on detecting a man 1.8 meters tall (and one-half meter wide). 19 mm 500 yd. (450 m) -
Page 8: Cautions
Only use the auxiliary power adapters provided with your Scout camera. Connecting the camera to an improper power source may damage the camera and void your warranty. Be careful not to leave fingerprints on the camera’s infrared optics. -
Page 9: Getting Started
2 Getting Started The Scout cameras shown below are available with the features, options, and accessories described in this manual. 19 mm Lens Configuration Focus Ring TS32r with 65 mm Lens 431-TS00-00-10, Revision 110 .800.561.8187 information@itm.com www. .com... -
Page 10: Shipping Kits
2—Getting Started Scout Operator’s Manual 2–1 Shipping Kits Refer to the packing list enclosed with your camera shipment to determine the actual contents of your camera package. • TS24, TS32, and TS32r Cameras In addition to the camera, Quick Start card, and Documentation/ Training CD or DVD;... - Page 11 Scout Operator’s Manual 2—Getting Started • TS24 Pro, TS32 Pro, and TS32r Pro Cameras In addition to the camera, Quick Start card, and Documentation/ Training CD or DVD; the following items are included in the camera package: Neck Lanyard Carrying Pouch...
-
Page 12: Options And Accessories
2—Getting Started Scout Operator’s Manual 2–2 Options and Accessories 2× Optical Extender for 19 mm lens configurations: Note The 2× Optical Extender is not waterproof and should not be used in wet environments. The attachable 2× Optical Extender lens doubles the range of... -
Page 13: Operating Your Scout Camera
3 Operating Your Scout Camera 3–1 Camera Features and Controls White hot/ × Display zoom Power Capture Black hot/ Brightness Instalert Eyepiece Lens cap Adjustable diopter ±2 SD Card door Hot Shoe power contacts Hot Shoe/ Tripod mount Battery cover 431-TS00-00-10, Revision 110 .800.561.8187... -
Page 14: Installing The Batteries And Sd Card
3—Operating Your Scout Camera Scout Operator’s Manual 3–2 Installing the Batteries and SD Card The batteries must be installed and charged before using your camera. Also install your SD card at this time. 1. To aid in removal of the... -
Page 15: Charging The Camera
Scout Operator’s Manual 3—Operating Your Scout Camera 3–3 Charging the Camera The batteries in the camera must be fully charged prior to use. If not fully charged or if the recommended batteries are not installed, the battery status indicator may not accurately reflect the remaining battery life. -
Page 16: Scout Power Management
The Scout camera is designed to operate much like your cell phone: • It is rarely turned off unless you do not plan to use it for a few days or more. - Page 17 Scout Operator’s Manual 3—Operating Your Scout Camera Power States • Three power states: Off, On, and Standby • The initial power-on Bootup process between the Off state and the On state takes about 90 seconds (fast flashing red state LED). During the Bootup process, pressing the Power button again will turn the camera off.
-
Page 18: Buttons And Controls
3—Operating Your Scout Camera Scout Operator’s Manual 3–5 Buttons and Controls Power Button Changing between the Off, On, and Standby power states is controlled by the Power button. The table below describes how the camera moves between states. From Method... - Page 19 Use this button to capture snapshots (in JPEG format) or video clips (in AVI format). The files are stored on the integrated SD card. AVI files are viewable via the FLIR Viewer Utility included on the H-Series resource CD. •...
- Page 20 3—Operating Your Scout Camera Scout Operator’s Manual Still Frame Capture and Store—To capture and store a single still image of what is currently being shown in the display, momentarily press the Capture button. The thermal image will momentarily freeze and...
- Page 21 Scout Operator’s Manual 3—Operating Your Scout Camera White Hot/Black Hot/Instalert™ Button Use this button to toggle between the two video and the four Instalert modes. In the default White Hot mode, hotter objects appear as white or light grey. In the Black Hot mode, hotter objects appear as black or dark grey.
- Page 22 3—Operating Your Scout Camera Scout Operator’s Manual Display Brightness Button Use this button to cycle through the five levels of display brightness. Each press of the button advances to the next level of brightness. When the highest brightness level is reached, subsequent button presses advance to the next lower brightness levels.
-
Page 23: Batteries
3—Operating Your Scout Camera 3–6 Batteries Your Scout camera is equipped with a sophisticated power system that accommodates a wide variety of AA battery types. This includes rechargeable and non-rechargeable batteries. The camera is optimized for operation with the 2700 mAh rechargeable NiMh batteries that were supplied with your camera. -
Page 24: Sd Card Door
3—Operating Your Scout Camera Scout Operator’s Manual 3–7 SD Card Door The SD Card door is located on the bottom of the camera in front of the battery compartment. The SD card, the USB connector, and the Auto- Standby Enable switch are located under the door. - Page 25 Scout Operator’s Manual 3—Operating Your Scout Camera SD Card Capacity and Type The TS24 Pro and TS32 Pro model cameras support storing images and video on standard 1-Gb and 2-Gb SD cards or up to 32-Gb on SDHC cards. If an SD card is inserted into a non-Pro model, the SD card will be ignored unless the camera software detects a valid upgrade file.
-
Page 26: Auto-Standby Operation
Scout Operator’s Manual 3–8 Auto-Standby Operation Auto-Standby is a feature of the Scout cameras that helps to guard against draining the batteries prematurely by inadvertently leaving the camera on. Auto-Standby puts the camera into the Standby state if the following three conditions are met: •... -
Page 27: The Hot Shoe
Scout Operator’s Manual 3—Operating Your Scout Camera 3–9 The Hot Shoe Note The Hot Shoe is not waterproof and should not be used in wet environments. The Hot Shoe provides the connections to power the camera for continuous operation or charging the Power batteries;... -
Page 28: Installing The Shuttered Eyepiece
3—Operating Your Scout Camera Scout Operator’s Manual 3–10 Installing the Shuttered Eyepiece The shuttered eyepiece keeps light from coming out of the viewfinder display. Pressing your eye up against the eyepiece opens the shutter. The shutter closes automatically. The eyepiece fits into a groove around the display housing. -
Page 29: Bayonet Lens Mounting System
Scout Operator’s Manual 3—Operating Your Scout Camera 3–11 Bayonet Lens Mounting System All TS24 and TS32 camera models are equipped with a robust bayonet mounting system to allow for field-interchangeable optics options. As shipped, the camera comes with a lens-cover assembly mounted on the bayonet mount. -
Page 30: Extender (19 Mm Only)
The 2× Optical Extender is not waterproof and should not be used in wet environments. The 2× Optical Extender is compatible with all Scout camera models and provides the user the ability to see farther and/or enhance the resolution of objects in the field of view. The 2× Optical Extender is mounted on the bayonet mount in front of the existing lens on the camera. -
Page 31: Installing Software Upgrades
3—Operating Your Scout Camera 3–13 Installing Software Upgrades Software upgrades may become available during the life of your Scout camera. The upgrade process requires an SD card loaded with the upgrade file. After receiving the upgrade file from FLIR, load it onto your SD card. -
Page 32: Checking Software Version
3—Operating Your Scout Camera Scout Operator’s Manual 3–14 Checking Software Version To check the current installed version of software, place the camera in standby, then turn on the camera while looking in the upper right corner of the display for the software version number. -
Page 33: Technical Data
4–1 Scout Camera Model Features The Scout cameras are available with either NTSC or PAL video output format and two resolutions. The TS24 and TS24 Pro both have video resolution of 240 × 180 pixels, while the,TS32, TS32r, TS32 Pro, and TS32r Pro both have video resolution of 320 ×... -
Page 34: Power
4—Technical Data Scout Operator’s Manual 4–2 Power Battery Types 4 AA Batteries; NiMH or Alkaline Battery Life Operating Approximately 5 Hours on NiMH batteries at 25°C, (Stand-By) (120 hours on NiMH batteries) 4–3 Environmental TS24 and TS32 and TS32r and... -
Page 35: Lens Choice
Scout Operator’s Manual 4—Technical Data 4–5 Lens Choice TS24, TS24 Pro, TS32, and TS32 Pro × 24° 18° × × FOV (w/Optional 2 Extender) 12° 9° TS32r, TS32r Pro 7° × 5° 4–6 Storage File Formats TS32 Pro and TS24 Pro... -
Page 36: Range Detection
4—Technical Data Scout Operator’s Manual 4–7 Range Detection TS24, TS24 Pro × 350 yd. (320 m) Detect Man (1.8 m 0.5 m) × 980 yd. (900 m) Detect Vehicle (2.3 m 2.3 m) TS32, and TS32 Pro/with 2× Optical Extender ×... - Page 37 .800.561.8187 information@itm.com www. .com...
- Page 38 Santa Barbara Portland FLIR Commercial Systems, Inc. FLIR Corporate Headquarters World Headquarters FLIR Systems, Inc. FLIR Systems, Inc. 27700A SW Parkway Ave. 70 Castilian Dr. Wilsonville, OR 97070 Goleta, CA 93117 PH: +1.888.747.FLIR (+1.888.747.3547) Europe FLIR Commercial Systems B.V. Charles Petitweg 21...
Need help?
Do you have a question about the Scout and is the answer not in the manual?
Questions and answers