
Related Manuals for C.T.M. HS-915


Summary of Contents for C.T.M. HS-915
- Page 1 C.T.M. MOBILITY SCOOTER C.T.M. MOBILITY SCOOTER C.T.M. MOBILITY SCOOTER 9-Series Instruction Booklet HS-915 HS-928...
-
Page 2: Table Of Contents
9-Series Instruction Booklet TABLE OF CONTENTS INTRODUCTION --------------------------------------------------------1 IMPORTANT PRECAUTIONS ----------------------------------------2 ELECTROMAGNETIC INTERFERENCE AND WARNINGS ----3 IDENTIFICATION OF PARTS ----------------------------------------5 CHARGING THE BATTERIES --------------------------------------11 DISASSEMBLING YOUR SCOOTER ------------------------------13 LCD DISPLAY PANEL ------------------------------------------------15 CAUTION ---------------------------------------------------------------26 TECHNICAL SPECIFICATIONS ------------------------------------27... -
Page 3: Introduction
9-Series Instruction Booklet INTRODUCTION Thank you and congratulations on purchasing your new C.T.M. Mobility Scooter. It is designed to provide you with transportation ability indoors and outdoors. We pride ourselves on providing safe and comfortable products. Our goal is to ensure your complete satisfaction. -
Page 4: Important Precautions
IMPORTANT PRECAUTIONS •Only one person at a time could ride a C.T.M. Mobility Scooter. •Maximum load : HS-915 is 190 kgs / 419 ; HS-928 is 226 kgs / 498 pounds. •Turn key off before getting on or off. •Always drive carefully and be aware of others using the same area. -
Page 5: Electromagnetic Interference And Warnings
9-Series Instruction Booklet ELECTROMAGNETIC INTERFERENCE AND WARNINGS CAUTION: It is very important that you read this information regarding the possible effects of Electromagnetic Interference on your motorized scooter. Powered wheelchairs and motorized scooters may be susceptible to electromagnetic interference (EMI), which is interfering electromagnetic energy (EM) emitted from sources such a radio stations, TV stations, amateur radio (HAM) transmitters, two-way radios, and cellular phones. - Page 6 9-Series Instruction Booklet Motorized Scooter Electromagnetic Interference: Because EM energy rapidly becomes more intense as one moves closer to the transmitting antenna (source), the EM fields from hand-held radio wave sources (transceivers) are of special concern. It is possible to unintentionally bring high levels of EM energy very close to the motorized scooter control system while using these devices.
-
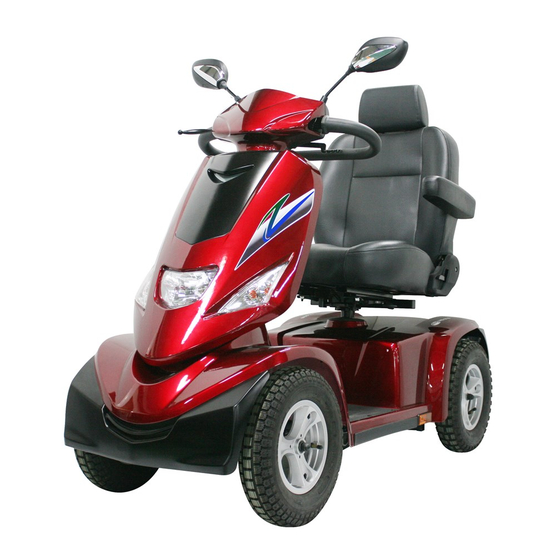
Page 7: Identification Of Parts
9-Series Instruction Booklet IDENTIFICATION OF PARTS Before you take your first trip, you should familiarize yourself well with the operation of the scooter and with all operating elements. Take your time to test all functions and driving modes. Wigwag 22" Captain Seat Hand Brake Angle Armrest Tiller Angle... - Page 8 9-Series Instruction Booklet FUNCTION OF PARTS: Main Key Switch (A) 1.Turn the key to the right - Turn the scooter on 2.Turn the key to the left - Turn the scooter off Always ensure that the scooter is switched off before getting on or off the scooter and before removing any items of the scooter Turning the scooter OFF whilst driving will bring the scooter to an abrupt stop and...
- Page 9 9-Series Instruction Booklet Tiller Storage Compartment (K) Provide you a spacious room to put things. Hand Brake (L). Hold brake (L), when immediate stop is required. If you have to brake in an emergency, simply release the thumb lever and hold hand brake, which will bring you to a halt! Figure 6 Figure 6...
- Page 10 9-Series Instruction Booklet Seat Fore-Aft Adjustment (P) Pull the Seat fore-aft Adj Lever (Q) to disengage the seat (P). Slide the seat forwards or backwards into the required position. Let go of the lever (Q) again to lock the seat into its required position.
- Page 11 9-Series Instruction Booklet Seat (P) Height Adjustment 1.Refer to page 13 for disassembly, then remove seat (P) and rear shroud (Z). (Figs 18 & 19) 2.Remove screw, nut and washer from seat post (V). (Fig 13) 3.Adjust seat post (V) to desired height, and attached tightly with screw, nut and washers. (Fig 13) 4.Then assemble the rear shroud (Z), seat (P) back to its original position.
- Page 12 9-Series Instruction Booklet Proportional Speed Reduction : 1.The scooter is equipped with proportional speed reduction. It will automatically reduce speed when encountering a corner, reducing speed corresponding to the angle of turn. 2.For safety reasons, when pushing the scooter by hand, if a pre-determined speed is exceeded, the controller automatically switches on and brakes the scooter.
-
Page 13: Charging The Batteries
9-Series Instruction Booklet CHARGING THE BATTERIES Batteries must be charged before using the scooter for the first time and should be recharged after each day use. You will need the scooter and the battery charger. Each country may supply different charger. The charging procedure may be different from below. - Page 14 9-Series Instruction Booklet The time needed to recharge will vary depending on the depletion of the batteries. (Approx. 8 hours). Do no continuous charging for over 15 hours. Troubles Shooting 1.LED(POWER) light is off Make sure the battery charger output connector is connected properly, and make sure the battery voltage is higher than the lowest charge voltage range 2.LED(CHARGE)light is off Check if the connectors are correctly connected.
-
Page 15: Disassembling Your Scooter
9-Series Instruction Booklet DISASSEMBLING YOUR SCOOTER Seat (P) disassembling : Pull the lever (T) upwards to disengage the seat (P), hold the seat (P) firmly by the backrest and front edge and remove it upwards. If found the seat (P) uneasy to remove, hold seat swivel lever (R), and then rotate the seat to reduce resistance then pull up. - Page 16 9-Series Instruction Booklet Resetting the Circuit Breaker : Resetting the circuit breaker may be needed if scooter does not turn on and when a scooter's circuit over loaded, the circuit breaker will trip. 1.To reset, press the circuit breaker button (D1) upwards. 2.Reassemble the rear shroud (Z).
-
Page 17: Lcd Display Panel
9-Series Instruction Booklet LCD DISPLAY PANEL Figure 25 Figure 25 Function Buttons & Indicators ITEM SPECIFICATION Hazard Light, Horn, Right Turn Light, Headlight, Left Turn Control Buttons Light, Turtle(decelerate), H/L Speed, Rabbit(accelerate) Status Indicator (Green) Headlight Indicator (Green) LED Indicators Left / Right Indicators (Green) High/Low Speed Indicator (Green) 20PIN... - Page 18 9-Series Instruction Booklet 1.Full Lighting Control Headlight, Taillight ITEM SPECIFICATION Operation Take exterior headlight switch as determinant signal. Feature Press button to turn on headlight & turn signal and headlight indicator. Control Mode Press button again to turn off headlight & turn signal and headlight indicator.
- Page 19 9-Series Instruction Booklet The direction lights and indicators will be turned off Automatic Turn Off automatically while flashing for 30 seconds. Press hazard indicator button once, the right/left lights and hazard indicator start to flash, warning tone acts as Hazard Lights well;...
- Page 20 9-Series Instruction Booklet Setup Mode Press together for 3 secs to enter setup mode. (Time adjustment) While「HH」zis flashing, Press to increase digits and to decrease digits. Press「Mode」to enter¡yMM¡zsetup mode when finished. While「MM」is flashing, Press to increase digits and to decrease digits. Press「Mode」to return「HH」setup mode when finished.
- Page 21 9-Series Instruction Booklet 2-3 Speedometer ITEM DESCRIPTIONS Use optical coupler to detect the signal and transfer to Operation related speed. Feature Speed displays 60km/h while it's on 1500 rpm. Display Errors +15~20% Display Range 0.0 ~ 30.0, display resolution: 0.5 Operational Press「Mode」button and switch to speedometer mode of...
- Page 22 9-Series Instruction Booklet The user could quit the setup mode with the following conditions. (1)Leave buttons alone for 15secs. Setup Mode (Unit change) (2)Press any button of Parking light, Horn, Turn light or Headlight, the definitive settings will be stored and return to normal speedometer mode.
- Page 23 9-Series Instruction Booklet Quit Setup Mode The user could quit the setup mode with the following conditions. (1) Leave「Mode」button alone for 15secs. (2) Press any button of Parking light, Horn, Turn signal or Headlight, the definitive settings will be stored and return to normal TRIP mode.
- Page 24 9-Series Instruction Booklet Note 1 : Setup mode The mileage counts down to 0km TRIP Flashing The mileage does not count down to 0km. Display II for Routine TRIP Maintenance Flashing Note 2 Press button to adjust to the mileage for next maintenance.
- Page 25 9-Series Instruction Booklet 4.Digital High / Low Speed Control ITEM DESCRIPTIONS Press「H/L Speed」 button to switch High/Low speed Operation Feature Press to fine tune in 5 speeds Press「H/L Speed」 button once, the High/Low Speed Indicator ( ) will light on. Press again, the indicator will Control Mode light off.
- Page 26 9-Series Instruction Booklet When the battery capacity is lower than 30%, the warning Low Voltage tone will be beeped once with "BiBi - BiBi -- BiBi" Warning Tone 3 short double beeps. Flicker Frequency Once per two seconds While (1) controller shut down (2) in charging-mode, Usage Condition the function will be disabled.
-
Page 27: Malfunction Messages
9-Series Instruction Booklet 6.Malfunction Messages ITEM DESCRIPTIONS Operation Take the connector pin (KEY) of controller as determinant Feature signal, then converts it into digital codes. When the controller sends out an error message, (LED) Usage starts flashing to wait for confirming and display the "Error Condition message code"... -
Page 28: Caution
9-Series Instruction Booklet CAUTION 1.Obstacle Climbing : Your scooter can climb obstacles and kerbs of up to 6cm in height. Never attempt to overcome an obstacle when on an uphill or downhill gradient! Always approach obstacles straight on! Ensure that the front wheels and rear wheels move over the obstacle in one stroke, do not stop halfway! 2.The maximum gap the scooter can drive over is 22cm, •When driving scooter on ramp, adjust body center of gravity to keep scooter more safety. -
Page 29: Technical Specifications
9-Series Instruction Booklet TECHNICAL SPECIFICATIONS SPECIFICATIONS HS-915 HS-928 Overall Length 1580 mm / 62.2" 1600 mm / 63" Overall Width 720 mm / 28.3" 720 mm / 28.3" Overall Height 1300 mm / 51.2" 1280 mm / 50" Wheels : Front 380 mm / 15"...
Need help?
Do you have a question about the HS-915 and is the answer not in the manual?
Questions and answers