Advertisement
Advertisement

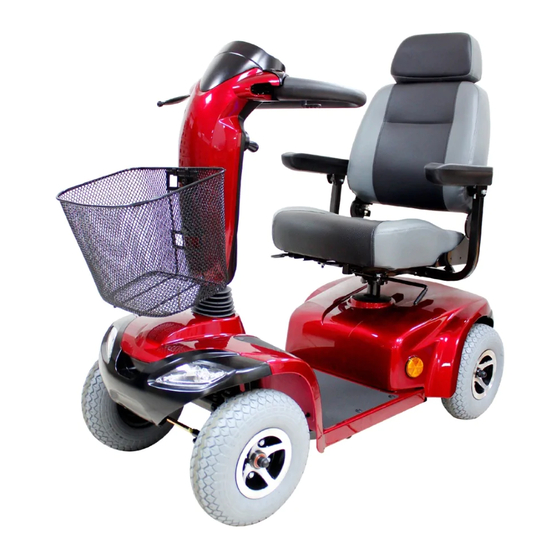
Related Manuals for C.T.M. HS-559


Summary of Contents for C.T.M. HS-559
- Page 1 ...
-
Page 2: Table Of Contents
Service Manual‐ CTM HS‐559 Content General Information ............................ 3 Check List for maintenance .......................... 4 Trouble Shooting .............................. 5 Disassembly................................ 7 Maintenance .............................. 1 2 2 ... -
Page 3: General Information
Service Manual‐ CTM HS‐559 General Information 1‐1 Introduction, This service manual only contains basic technical information about the common disassembly and replacement to enable dealers to provide good after service. Your scooter feature and related parts might different from this service manual, which is based on different demand in various markets. If you need more product information or technical support, please contact with CTM, we will provide more detailed information. 1‐2 The Manufacturer, The scooter is designed and manufactured by Chien Ti Enterprise Co., Ltd. No. 13, Lane 227, Fu Ying Rd., Hsin Chuang District, New Taipei City, Taiwan Tel : +886‐2‐29032987 Email: sales@chienti.com.tw Web. www.chienti.com.tw 1‐3 Information of European Representative Emergo Europe Prinsessegracht 20 2514 AP The Hague The Netherlands ... -
Page 4: Check List For Maintenance
Service Manual‐ CTM HS‐559 Check List for maintenance Check Point Inspection Remark N‐D lever Check for the correct function Horn Check for correct function Throttles Pull the wigwag to test the scooter movement Electro‐mechanical Pull the wigwag a little bit and release it to test if brake brake and emergency works. If your scooter comes with emergency handbrake, hand brake please check it as well. Battery Gauge Check if the battery gauge is displayed and whether it is at low power. Rear mirror(s) Check if the parts are clean and firmly tighten to the scooter ... -
Page 5: Trouble Shooting
Service Manual‐ CTM HS‐559 Trouble Shooting 3‐1 Scooter won’t move when key in turned on, Check Point Solution Check if the power is off Turn the power on. Check if the N‐D lever is in Neutral position Switch to D (drive) position. Turn off the power and turn on again. Check if the battery power is enough. (Battery Recharge the battery and then retest. gauge is under 25%) Check if the charger power cord is still plugged in Unplug the charger power cord. scooter 3‐2 Error Code Flash Description Initial Check Points 1 Battery low The batteries are running low. ‐ Recharge the batteries ... - Page 6 Service Manual‐ CTM HS‐559 ‐ The throttle may require re‐calibration. 7 Speed pot The throttle speed limit pot SRW or their associated wiring may be faulty. ‐ Check the throttle and speed pot and associated connections and wiring. 8 Motor voltage The motor or its associated wiring is faulty. ‐ Check the motor and associated connections and wiring. 9 Other error The controller may have an internal fault. ‐ Check all connection and wiring. 3‐3 Other problem Tire: The tires should be inspected frequently for damage, the presence of foreign bodies, unusual wear and sufficient tread depth. If replacement tires are needed, please contact the nearest dealer. The following areas require periodic inspection: ‐ Tire pressure between 35‐40 psi ‐...
-
Page 7: Disassembly
Service Manual‐ CTM HS‐559 Disassembly 4‐1 Steering ‐ Starter assembly / Variable Resistor Tool requirement, ‐ Philip Screwdriver ‐ 12mm offset wrench Instruction for disassembly A. Take out the bar of angle adjustable lever. B. Remove the rear mirror by hand or 12mm offset wrench. C. Remove the steering cover by Philip screwdriver D. Remove the steering rear cover by Philip screwdriver. E. Remove the starter assembly / variable resistor comp. (30KΩ) Inspection points When assembling, please use the torque wrench to make sure the tightening torque as the drawing. ... - Page 8 Service Manual‐ CTM HS‐559 4‐2 Front frame – Bar Assembly Tool requirement, 29mm offset wrench Instruction for disassembly ‐ When changing the parts in this area, pay more attention about this sequence. Should take note the sequence when disassemble. ‐ Below list is from above 12 526680‐52800 PADLOCK 1 11 536228‐56010 NUT , STEERING STEM LOCK 1 10 536212‐56000 WASHER 1 9 536211‐56000 WASHER TOOTH 1 8 536213‐56000 RACE , STEERING OUTER UPPER ...
- Page 9 Service Manual‐ CTM HS‐559 4‐3 Front wheel Tool requirement, 12mm hex‐key wrench 13mm socket wrench 12mm offset wrench / 17mm offset wrench / 32mm offset wrench Instruction for disassembly A. Please turn off the scooter and remove the key. Make sure the ND lever is in D position before this job. B. Leak some air from wheel before you disassemble the wheel. (refer to 4‐4) C. Use a ratchet and socket to remove the front wheel screw from the center hub of the wheel. D. Separate the tire from the rim. E. Replace the parts (inner tube or outer tube) as the demand. F. Install the front wheel nut into the center hub, tighten it as the torque as the above drawing. Inspection points When assembling, please use the torque wrench to make sure the tightening torque as the drawing. Range of tire pressure is around 35~40 psi. ...
- Page 10 Service Manual‐ CTM HS‐559 4‐4 Air tire Tool requirement, 5mm hex‐key wrench Instruction for disassembly ‐ Before removing the front and rear wheels, please do remove some pressure from wheels to prevent any accident. ‐ Use 12mm hex‐key wrench to rotate the cap as drawing, ‐ Then remove some pressure from tire. 10 ...
- Page 11 Service Manual‐ CTM HS‐559 4‐5 Rear Wheel, Motor, Transaxle. Tool requirement, 5mm hex‐key wrench 17mm socket wrench 12mm offset wrench Instruction for disassembly G. Please turn off the scooter and remove the key. Make sure the ND lever is in D position before this job. H. Leak some air from wheel before you disassemble the wheel. (refer to 4‐4) I. Use a ratchet and socket to remove the front wheel screw from the center hub of the wheel. J. Separate the tire from the rim. K. Replace the parts (inner tube or outer tube) as the demand. L. Install the drive wheel nut into the center hub and verify the key is lined up with axle and wheel, and then tighten to secure it in place. The torque 300±30kgf‐cm. Inspection points When assembling, please use the torque wrench to make sure the tightening torque as the drawing. Range of tire pressure is around 35~40 psi. ...
-
Page 12: Maintenance
Service Manual‐ CTM HS‐559 Maintenance 5‐1 Motor Carbon brushes, Change of new carbon brush could effectively improve abnormal noise. Carbon brush is consumables, which wears out after use, hence, in order to sustain motor quality, CTM would recommend following: ‐ When one carbon brush is worn to 1/2 of its original length, it is necessary to replace 4 carbon brushes by new ones. ‐ When one carbon is worn out by 2/3 of its original length, 4 carbon brushes must be replaced by new ones. ‐ Suggested change for brush = one time only 5‐2 Batteries (50ah) Information for battery voltage, ‐ Normal situation: 12.95V~13.1V ‐ Low battery: Below 12.9v ‐ Dead battery: Below 12v ‐... - Page 13 Service Manual‐ CTM HS‐559 ‐ To constant charge after use (reference to user manual) ‐ To check on battery terminals for oxidization or loose screw. ‐ To check on battery wire for fray ‐ To check on voltage using voltammeter 13 ...
- Page 14 Service Manual‐ CTM HS‐559 Chien Ti Enterprise Co., Ltd. No. 13, Lane 227, Fu Ying Rd., Hsin Chuang District, New Taipei City, Taiwan Tel: +886‐2‐29032987 Fax: +886‐2‐29038807 Email: sales@chienti.com.tw Website: www.chienti.com.tw 14 ...
Need help?
Do you have a question about the HS-559 and is the answer not in the manual?
Questions and answers
Wie erkenne ich bei der Ladeanzeige wenn mein Akku leer ist